Corner to Corner Single Crochet Entrelac Square — Free Pattern + Tutorial
📝 Updated June 7, 2026: Full framework refresh… new standalone intro (CAL references removed), “What Is Single Crochet Entrelac?” education section added, materials updated (Chic Sheep by Marly Bird discontinued … current substitutes with affiliate links added), tips section for managing ends and blocking, internal entrelac cluster navigation, and expanded conversational FAQ.
Free Corner to Corner Single Crochet Entrelac Square Pattern (12″)
Entrelac has that gorgeous woven, lattice-like look that seems complicated but is actually built entirely from small rectangles layered on top of each other. This version uses single crochet… not Tunisian, which means you don't need a special long hook. Just the regular hook you already own. The finished square is 12 inches square, making it perfect for blankets, standalone art pieces, or a skill-builder project that looks way more impressive than it actually is. You'll definitely get compliments on this one.
Originally designed for the Wedding Blanket CAL, but this pattern stands completely on its own. Whether you're working through the full blanket or just want one gorgeous square for your collection… this one is for you.
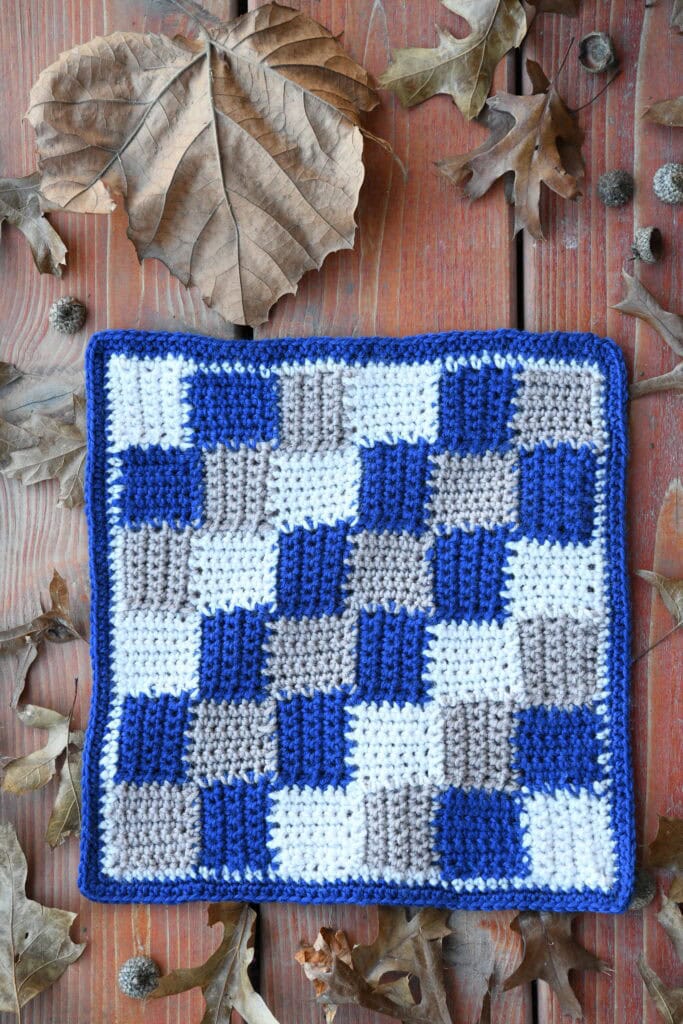
What Is Single Crochet Entrelac?
Entrelac = building fabric from small squares and rectangles arranged diagonally, creating that woven or lattice look.
C2C (corner to corner) = building from one corner outward and then decreasing back, which gives you straight edges all around.
Single crochet vs. Tunisian entrelac: Most online tutorials use Tunisian, which requires a special long hook. Marly's version uses regular single crochet… the yarn, hook, and skills you already have. SC entrelac is softer and flatter than Tunisian, but equally beautiful. The main challenge is managing all the color changes and weaving in those ends, not the stitch itself.
✅ Is This For You?
- You know how to single crochet
- You're comfortable changing colors
- You don't mind weaving in ends (there are several)
- You want a square that looks way more impressive than it actually is
Materials
- Yarn: This pattern was originally written for Chic Sheep by Marly Bird (Merino Wool, DK weight). That yarn is discontinued. You can substitute with any DK weight yarn with good stitch definition… the pattern calls for 3 colors (A, B, C) in small amounts, so this is a great project for mini skeins or scraps. Suggested substitutes: Excellent substitutes that give you the same beautiful stitch definition:
- Malabrigo Rios — tidd.ly/49VZcW1
- Berroco Ultra Wool — tidd.ly/4pSjENv
- Swish Worsted (Knit Picks) — tidd.ly/4qL6Zxt
- Cascade 220 Superwash — tidd.ly/4afBG7B
- Madelinetosh Tosh Vintage — tidd.ly/4rgPp3P
When substituting, look for: worsted weight (#4), strong stitch definition, merino wool or a soft wool blend. This is also a wonderful scraps and mini-skein project — use small amounts of any smooth worsted that coordinates!
- Hook: Size I/9 (5.5 mm)
- Gauge: 4 squares = 4″ × 4″ [10 × 10 cm]. You can use any size hook to obtain the gauge. Just work a small swatch first.
- Notions: Stitch markers (important… mark stitches between tiers as you go), scissors, tapestry needle
- Finished size: 12″ × 12″ after blocking
- 1 ball color A (Chic Sheep by Marly Bird™ in Linen)
- 1 ball color B (Chic Sheep by Marly Bird™ in VIP)
- 1 ball color C (Chic Sheep by Marly Bird™ in Suede)
- Scissors
- Finishing needle
- Blanket: Use as many squares as you need. 5×5 = a generous lap blanket
- Pillow cover: Two squares, seamed three sides
- Wall hanging: One or two squares in bold colors
- Wedding Blanket CAL: Part of the full blanket pattern
- Boysenberry Bramble Cowl … a cozy neck wrap that uses the same entrelac technique with a fun color play
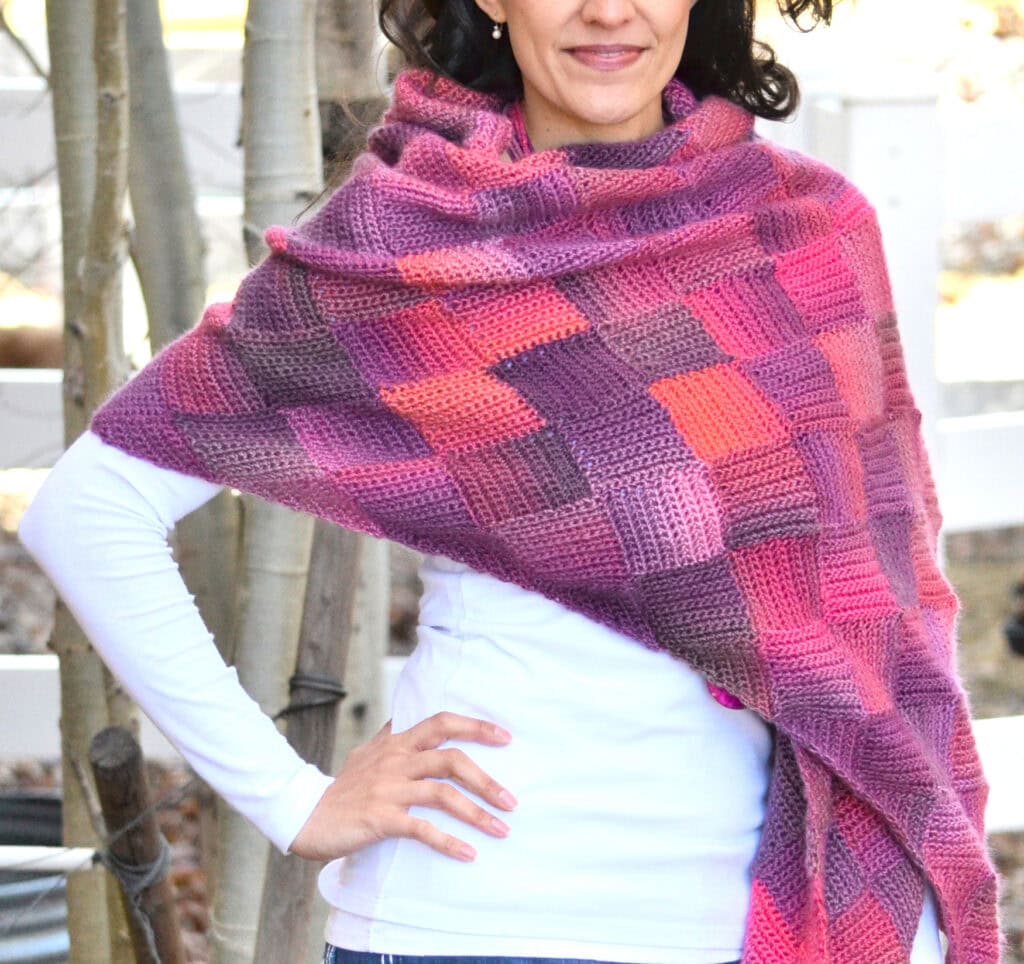
- Pieces of You Entrelac Wrap … a larger wrap project that really shows off the woven texture
- 51 Free C2C Crochet Patterns … our huge collection of corner-to-corner patterns
- Wedding Blanket CAL … the full blanket project this square is part of
Corner to Corner Single Crochet Entrelac Square Pattern
Materials:
Tier 1
With Color A
Row 1 (RS): Chain 8, sc in 2nd chain from hook and in each chain across, turn … 7 sc.
Row 2 (WS): Ch 1, sc in each sc across, turn.
Row 3: Ch 1, sc in each sc across, turn.
Row 4: Ch 1, sc in each sc across, turn.
Row 5: Ch 1, sc in each sc across, turn.
Row 6: Ch 1, sc in each sc across, turn.
Row 7: Ch 1, sc in each sc across, change to color B in last sc of row and place marker in that stitch, turn.
Go ahead and cut color A leaving a 6″ tail to weave in later.
Tier 2
Square 1
With color B
Row 1 (WS): Chain 8, sc in 2nd chain from hook and in each of the next 5 ch, sc2tog (the last chain and the marked stitch on square from previous tier), slip stitch in next stitch on square from previous tier [note: the slipped stitch takes the place of the ch 1 we usually do after the turn], turn … 6 sc, 1 sc2tog.
Row 2 (RS): Sc in sc2tog, and in next 6 sc across, turn … 7 sc.
Row 3: Ch 1, sc in each of the next 6 sc, sc2tog (the last sc and the next stitch on square from previous tier), slip stitch in next stitch on square from previous tier, turn … 6 sc, 1 sc2tog.
Row 4: Sc in sc2tog, and in next 6 sc across, turn … 7 sc.
Row 5: Ch 1, sc in each of the next 6 sc, sc2tog (the last sc and the next stitch on square from previous tier), slip stitch in next stitch on square from previous tier, turn … 6 sc, 1 sc2tog.
Row 6: Sc in sc2tog, and in next 6 sc across, turn … 7 sc.
Row 7: Ch 1, sc in each of the next 6 sc, sc2tog (the last sc and the next stitch on square from previous tier) place a marker in that stitch, do not turn … 6 sc, 1 sc2tog.
Square 2
Working along the edge of the same square of previous tier
Row 1 (WS): Ch 1, 7 sc evenly along the edge, turn … 7 sc.
Row 2 (RS): Ch 1, sc in each sc across, turn … 7 sc.
Row 3: Ch 1, sc in each sc across, turn … 7 sc.
Row 4: Ch 1, sc in each sc across, turn … 7 sc.
Row 5: Ch 1, sc in each sc across, turn … 7 sc.
Row 6: Ch 1, sc in each sc across, turn … 7 sc.
Row 7: Ch 1, sc in each sc across, change to color C in last sc of row and place marker in that stitch, turn.
Go ahead and cut color B leaving a 6″ tail to weave in later.
Tier 3
Square 1
With color C
Row 1 (RS): Chain 8, sc in 2nd chain from hook and in each of the next 5 ch, sc2tog (the last chain and the marked stitch on square from previous tier), slip stitch in next stitch on square from previous tier [note: the slipped stitch takes the place of the ch 1 we usually do after the turn], turn … 6 sc, 1 sc2tog.
Row 2 (WS): Sc in sc2tog, and in next 6 sc across, turn … 7 sc.
Row 3: Ch 1, sc in each of the next 6 sc, sc2tog (the last sc and the next stitch on square from previous tier), slip stitch in next stitch on square from previous tier, turn … 6 sc, 1 sc2tog.
Row 4: Sc in sc2tog, and in next 6 sc across, turn … 7 sc.
Row 5: Ch 1, sc in each of the next 6 sc, sc2tog (the last sc and the next stitch on square from previous tier), slip stitch in next stitch on square from previous tier, turn … 6 sc, 1 sc2tog.
Row 6: Sc in sc2tog, and in next 6 sc across, turn … 7 sc.
Row 7: Ch 1, sc in each of the next 6 sc, sc2tog (the last sc and the next stitch on square from previous tier) place a marker in that stitch, do not turn … 6 sc, 1 sc2tog.
Square 2
Working along the edge of the same square of previous tier
Row 1 (RS): Ch 1, 6 sc evenly along the edge, sc2tog (the last sc and the marked stitch on square from previous tier), slip stitch in next stitch on square from previous tier, turn … 6 sc, 1 sc2tog.
Row 2 (WS): Sc in sc2tog, and in next 6 sc across, turn … 7 sc.
Row 3: Ch 1, sc in each of the next 6 sc, sc2tog (the last sc and the next stitch on square from previous tier), slip stitch in next stitch on square from previous tier, turn … 6 sc, 1 sc2tog.
Row 4: Sc in sc2tog, and in next 6 sc across, turn … 7 sc.
Row 5: Ch 1, sc in each of the next 6 sc, sc2tog (the last sc and the next stitch on square from previous tier), slip stitch in next stitch on square from previous tier, turn … 6 sc, 1 sc2tog.
Row 6: Sc in sc2tog, and in next 6 sc across, turn … 7 sc.
Row 7: Ch 1, sc in each of the next 6 sc, sc2tog (the last sc and the next stitch on square from previous tier) place a marker in that stitch, do not turn … 6 sc, 1 sc2tog.
Square 3
Working along the edge of the same square of previous tier
Row 1 (RS): Ch 1, 7 sc evenly along the edge, turn … 7 sc.
Row 2 (WS): Ch 1, sc in each sc across, turn … 7 sc.
Row 3: Ch 1, sc in each sc across, turn … 7 sc.
Row 4: Ch 1, sc in each sc across, turn … 7 sc.
Row 5: Ch 1, sc in each sc across, turn … 7 sc.
Row 6: Ch 1, sc in each sc across, turn … 7 sc.
Row 7: Ch 1, sc in each sc across, change to color A in last sc of row and place marker in that stitch, turn.
Go ahead and cut color C leaving a 6″ tail to weave in later.
Tier 4
Square 1
With color A
Row 1 (WS): Chain 8, sc in 2nd chain from hook and in each of the next 5 ch, sc2tog (the last chain and the marked stitch on square from previous tier), slip stitch in next stitch on square from previous tier [note: the slipped stitch takes the place of the ch 1 we usually do after the turn], turn … 6 sc, 1 sc2tog.
Row 2 (RS): Sc in sc2tog, and in next 6 sc across, turn … 7 sc.
Row 3: Ch 1, sc in each of the next 6 sc, sc2tog (the last sc and the next stitch on square from previous tier), slip stitch in next stitch on square from previous tier, turn … 6 sc, 1 sc2tog.
Row 4: Sc in sc2tog, and in next 6 sc across, turn … 7 sc.
Row 5: Ch 1, sc in each of the next 6 sc, sc2tog (the last sc and the next stitch on square from previous tier), slip stitch in next stitch on square from previous tier, turn … 6 sc, 1 sc2tog.
Row 6: Sc in sc2tog, and in next 6 sc across, turn … 7 sc.
Row 7: Ch 1, sc in each of the next 6 sc, sc2tog (the last sc and the next stitch on square from previous tier) place a marker in that stitch, do not turn … 6 sc, 1 sc2tog.
Squares 2 and 3
Working along the edge of the same square of previous tier
Row 1 (WS): Ch 1, 6 sc evenly along the edge, sc2tog (the last sc and the marked stitch on square from previous tier), slip stitch in next stitch on square from previous tier, turn … 6 sc, 1 sc2tog.
Row 2 (RS): Sc in sc2tog, and in next 6 sc across, turn … 7 sc.
Row 3: Ch 1, sc in each of the next 6 sc, sc2tog (the last sc and the next stitch on square from previous tier), slip stitch in next stitch on square from previous tier, turn … 6 sc, 1 sc2tog.
Row 4: Sc in sc2tog, and in next 6 sc across, turn … 7 sc.
Row 5: Ch 1, sc in each of the next 6 sc, sc2tog (the last sc and the next stitch on square from previous tier), slip stitch in next stitch on square from previous tier, turn … 6 sc, 1 sc2tog.
Row 6: Sc in sc2tog, and in next 6 sc across, turn … 7 sc.
Row 7: Ch 1, sc in each of the next 6 sc, sc2tog (the last sc and the next stitch on square from previous tier) place a marker in that stitch, do not turn … 6 sc, 1 sc2tog.
Square 4
Working along the edge of the same square of previous tier
Row 1 (WS): Ch 1, 7 sc evenly along the edge, turn … 7 sc.
Row 2 (RS): Ch 1, sc in each sc across, turn … 7 sc.
Row 3: Ch 1, sc in each sc across, turn … 7 sc.
Row 4: Ch 1, sc in each sc across, turn … 7 sc.
Row 5: Ch 1, sc in each sc across, turn … 7 sc.
Row 6: Ch 1, sc in each sc across, turn … 7 sc.
Row 7: Ch 1, sc in each sc across, change to color B in last sc of row and place marker in that stitch, turn.
Go ahead and cut color A leaving a 6″ tail to weave in later.
Tier 5
Square 1
With color B
Row 1 (RS): Chain 8, sc in 2nd chain from hook and in each of the next 5 ch, sc2tog (the last chain and the marked stitch on square from previous tier), slip stitch in next stitch on square from previous tier [note: the slipped stitch takes the place of the ch 1 we usually do after the turn], turn … 6 sc, 1 sc2tog.
Row 2 (WS): Sc in sc2tog, and in next 6 sc across, turn … 7 sc.
Row 3: Ch 1, sc in each of the next 6 sc, sc2tog (the last sc and the next stitch on square from previous tier), slip stitch in next stitch on square from previous tier, turn … 6 sc, 1 sc2tog.
Row 4: Sc in sc2tog, and in next 6 sc across, turn … 7 sc.
Row 5: Ch 1, sc in each of the next 6 sc, sc2tog (the last sc and the next stitch on square from previous tier), slip stitch in next stitch on square from previous tier, turn … 6 sc, 1 sc2tog.
Row 6: Sc in sc2tog, and in next 6 sc across, turn … 7 sc.
Row 7: Ch 1, sc in each of the next 6 sc, sc2tog (the last sc and the next stitch on square from previous tier) place a marker in that stitch, do not turn … 6 sc, 1 sc2tog.
Squares 2, 3, 4
Working along the edge of the same square of previous tier
Row 1 (RS): Ch 1, 6 sc evenly along the edge, sc2tog (the last sc and the marked stitch on square from previous tier), slip stitch in next stitch on square from previous tier, turn … 6 sc, 1 sc2tog.
Row 2 (WS): Sc in sc2tog, and in next 6 sc across, turn … 7 sc.
Row 3: Ch 1, sc in each of the next 6 sc, sc2tog (the last sc and the next stitch on square from previous tier), slip stitch in next stitch on square from previous tier, turn … 6 sc, 1 sc2tog.
Row 4: Sc in sc2tog, and in next 6 sc across, turn … 7 sc.
Row 5: Ch 1, sc in each of the next 6 sc, sc2tog (the last sc and the next stitch on square from previous tier), slip stitch in next stitch on square from previous tier, turn … 6 sc, 1 sc2tog.
Row 6: Sc in sc2tog, and in next 6 sc across, turn … 7 sc.
Row 7: Ch 1, sc in each of the next 6 sc, sc2tog (the last sc and the next stitch on square from previous tier) place a marker in that stitch, do not turn … 6 sc, 1 sc2tog.
Square 5
Working along the edge of the same square of previous tier
Row 1 (RS): Ch 1, 7 sc evenly along the edge, turn … 7 sc.
Row 2 (WS): Ch 1, sc in each sc across, turn … 7 sc.
Row 3: Ch 1, sc in each sc across, turn … 7 sc.
Row 4: Ch 1, sc in each sc across, turn … 7 sc.
Row 5: Ch 1, sc in each sc across, turn … 7 sc.
Row 6: Ch 1, sc in each sc across, turn … 7 sc.
Row 7: Ch 1, sc in each sc across, change to color C in last sc of row and place marker in that stitch, turn.
Go ahead and cut color B leaving a 6″ tail to weave in later.
Tier 6
Square 1
With color C
Row 1 (WS): Chain 8, sc in 2nd chain from hook and in each of the next 5 ch, sc2tog (the last chain and the marked stitch on square from previous tier), slip stitch in next stitch on square from previous tier [note: the slipped stitch takes the place of the ch 1 we usually do after the turn], turn … 6 sc, 1 sc2tog.
Row 2 (RS): Sc in sc2tog, and in next 6 sc across, turn … 7 sc.
Row 3: Ch 1, sc in each of the next 6 sc, sc2tog (the last sc and the next stitch on square from previous tier), slip stitch in next stitch on square from previous tier, turn … 6 sc, 1 sc2tog.
Row 4: Sc in sc2tog, and in next 6 sc across, turn … 7 sc.
Row 5: Ch 1, sc in each of the next 6 sc, sc2tog (the last sc and the next stitch on square from previous tier), slip stitch in next stitch on square from previous tier, turn … 6 sc, 1 sc2tog.
Row 6: Sc in sc2tog, and in next 6 sc across, turn … 7 sc.
Row 7: Ch 1, sc in each of the next 6 sc, sc2tog (the last sc and the next stitch on square from previous tier) place a marker in that stitch, do not turn … 6 sc, 1 sc2tog.
Squares 2, 3, 4, 5
Working along the edge of the same square of previous tier
Row 1 (WS): Ch 1, 6 sc evenly along the edge, sc2tog (the last sc and the marked stitch on square from previous tier), slip stitch in next stitch on square from previous tier, turn … 6 sc, 1 sc2tog.
Row 2 (RS): Sc in sc2tog, and in next 6 sc across, turn … 7 sc.
Row 3: Ch 1, sc in each of the next 6 sc, sc2tog (the last sc and the next stitch on square from previous tier), slip stitch in next stitch on square from previous tier, turn … 6 sc, 1 sc2tog.
Row 4: Sc in sc2tog, and in next 6 sc across, turn … 7 sc.
Row 5: Ch 1, sc in each of the next 6 sc, sc2tog (the last sc and the next stitch on square from previous tier), slip stitch in next stitch on square from previous tier, turn … 6 sc, 1 sc2tog.
Row 6: Sc in sc2tog, and in next 6 sc across, turn … 7 sc.
Row 7: Ch 1, sc in each of the next 6 sc, sc2tog (the last sc and the next stitch on square from previous tier) place a marker in that stitch, do not turn … 6 sc, 1 sc2tog.
Square 6
Working along the edge of the same square of previous tier
Row 1 (WS): Ch 1, 7 sc evenly along the edge, turn … 7 sc.
Row 2 (RS): Ch 1, sc in each sc across, turn … 7 sc.
Row 3: Ch 1, sc in each sc across, turn … 7 sc.
Row 4: Ch 1, sc in each sc across, turn … 7 sc.
Row 5: Ch 1, sc in each sc across, turn … 7 sc.
Row 6: Ch 1, sc in each sc across, turn … 7 sc.
Row 7: Ch 1, sc in each sc across
Fasten off color C leaving a 6″ tail to weave in later, turn … 7 sc.
The square is now as wide on the diagonal as it will get. Time to decrease one square per tier until we get to only 1 again.
Tier 7
Squares 1, 2, 3, 4
With color B
For square 1, join with a slip stitch in 8th stitch to begin row. This is the top of square 5 from the previous row. Starting here will decrease this row to 4 squares.
For squares 2, 3, 4, Working along the edge of the same square of previous tier
Row 1 (RS): Ch 1, 6 sc evenly along the edge, sc2tog (the last sc and the marked stitch on square from previous tier), slip stitch in next stitch on square from previous tier, turn … 6 sc, 1 sc2tog.
Row 2 (WS): Sc in sc2tog, and in next 6 sc across, turn … 7 sc.
Row 3: Ch 1, sc in each of the next 6 sc, sc2tog (the last sc and the next stitch on square from previous tier), slip stitch in next stitch on square from previous tier, turn … 6 sc, 1 sc2tog.
Row 4: Sc in sc2tog, and in next 6 sc across, turn … 7 sc.
Row 5: Ch 1, sc in each of the next 6 sc, sc2tog (the last sc and the next stitch on square from previous tier), slip stitch in next stitch on square from previous tier, turn … 6 sc, 1 sc2tog.
Row 6: Sc in sc2tog, and in next 6 sc across, turn … 7 sc.
Row 7: Ch 1, sc in each of the next 6 sc, sc2tog (the last sc and the next stitch on square from previous tier) place a marker in that stitch, do not turn … 6 sc, 1 sc2tog.
Square 5
Working along the edge of the same square of previous tier
Row 1 (RS): Ch 1, 7 sc evenly along the edge, turn … 7 sc.
Row 2 (WS): Ch 1, sc in each sc across, turn … 7 sc.
Row 3: Ch 1, sc in each sc across, turn … 7 sc.
Row 4: Ch 1, sc in each sc across, turn … 7 sc.
Row 5: Ch 1, sc in each sc across, turn … 7 sc.
Row 6: Ch 1, sc in each sc across, turn … 7 sc.
Row 7: Ch 1, sc in each sc across
Fasten off color B leaving a 6″ tail to weave in later, turn … 7 sc.
Tier 8
Squares 1, 2, 3
For square 1, join with a slip stitch in 8th stitch to begin row. This is the top of square 5 from the previous row. Starting here will decrease this row to 4 squares.
For squares 2, 3, 4, Working along the edge of the same square of previous tier
With color A
Row 1 (WS): Ch 1, 6 sc evenly along the edge, sc2tog (the last sc and the marked stitch on square from previous tier), slip stitch in next stitch on square from previous tier, turn … 6 sc, 1 sc2tog.
Row 2 (RS): Sc in sc2tog, and in next 6 sc across, turn … 7 sc.
Row 3: Ch 1, sc in each of the next 6 sc, sc2tog (the last sc and the next stitch on square from previous tier), slip stitch in next stitch on square from previous tier, turn … 6 sc, 1 sc2tog.
Row 4: Sc in sc2tog, and in next 6 sc across, turn … 7 sc.
Row 5: Ch 1, sc in each of the next 6 sc, sc2tog (the last sc and the next stitch on square from previous tier), slip stitch in next stitch on square from previous tier, turn … 6 sc, 1 sc2tog.
Row 6: Sc in sc2tog, and in next 6 sc across, turn … 7 sc.
Row 7: Ch 1, sc in each of the next 6 sc, sc2tog (the last sc and the next stitch on square from previous tier) place a marker in that stitch, do not turn … 6 sc, 1 sc2tog.
Square 4
Working along the edge of the same square of previous tier
Row 1 (WS): Ch 1, 7 sc evenly along the edge, turn … 7 sc.
Row 2 (RS): Ch 1, sc in each sc across, turn … 7 sc.
Row 3: Ch 1, sc in each sc across, turn … 7 sc.
Row 4: Ch 1, sc in each sc across, turn … 7 sc.
Row 5: Ch 1, sc in each sc across, turn … 7 sc.
Row 6: Ch 1, sc in each sc across, turn … 7 sc.
Row 7: Ch 1, sc in each sc across
Fasten off color A leaving a 6″ tail to weave in later, turn … 7 sc.
Tier 9
Squares 1, 2
With color C
For square 1, join with a slip stitch in 8th stitch to begin row. This is the top of square 5 from the previous row. Starting here will decrease this row to 4 squares.
For squares 2, 3, 4, Working along the edge of the same square of previous tier
Row 1 (RS): Ch 1, 6 sc evenly along the edge, sc2tog (the last sc and the marked stitch on square from previous tier), slip stitch in next stitch on square from previous tier, turn … 6 sc, 1 sc2tog.
Row 2 (WS): Sc in sc2tog, and in next 6 sc across, turn … 7 sc.
Row 3: Ch 1, sc in each of the next 6 sc, sc2tog (the last sc and the next stitch on square from previous tier), slip stitch in next stitch on square from previous tier, turn … 6 sc, 1 sc2tog.
Row 4: Sc in sc2tog, and in next 6 sc across, turn … 7 sc.
Row 5: Ch 1, sc in each of the next 6 sc, sc2tog (the last sc and the next stitch on square from previous tier), slip stitch in next stitch on square from previous tier, turn … 6 sc, 1 sc2tog.
Row 6: Sc in sc2tog, and in next 6 sc across, turn … 7 sc.
Row 7: Ch 1, sc in each of the next 6 sc, sc2tog (the last sc and the next stitch on square from previous tier) place a marker in that stitch, do not turn … 6 sc, 1 sc2tog.
Square 3
Working along the edge of the same square of previous tier
Row 1 (RS): Ch 1, 7 sc evenly along the edge, turn … 7 sc.
Row 2 (WS): Ch 1, sc in each sc across, turn … 7 sc.
Row 3: Ch 1, sc in each sc across, turn … 7 sc.
Row 4: Ch 1, sc in each sc across, turn … 7 sc.
Row 5: Ch 1, sc in each sc across, turn … 7 sc.
Row 6: Ch 1, sc in each sc across, turn … 7 sc.
Row 7: Ch 1, sc in each sc across
Fasten off color C leaving a 6″ tail to weave in later, turn … 7 sc.
Tier 10
Square 1
For square 1, join with a slip stitch in 8th stitch to begin row. This is the top of square 5 from the previous row. Starting here will decrease this row to 4 squares.
For squares 2, 3, 4, Working along the edge of the same square of previous tier
With color B
Row 1 (WS): Ch 1, 6 sc evenly along the edge, sc2tog (the last sc and the marked stitch on square from previous tier), slip stitch in next stitch on square from previous tier, turn … 6 sc, 1 sc2tog.
Row 2 (RS): Sc in sc2tog, and in next 6 sc across, turn … 7 sc.
Row 3: Ch 1, sc in each of the next 6 sc, sc2tog (the last sc and the next stitch on square from previous tier), slip stitch in next stitch on square from previous tier, turn … 6 sc, 1 sc2tog.
Row 4: Sc in sc2tog, and in next 6 sc across, turn … 7 sc.
Row 5: Ch 1, sc in each of the next 6 sc, sc2tog (the last sc and the next stitch on square from previous tier), slip stitch in next stitch on square from previous tier, turn … 6 sc, 1 sc2tog.
Row 6: Sc in sc2tog, and in next 6 sc across, turn … 7 sc.
Row 7: Ch 1, sc in each of the next 6 sc, sc2tog (the last sc and the next stitch on square from previous tier) place a marker in that stitch, do not turn … 6 sc, 1 sc2tog.
Square 2
Working along the edge of the same square of previous tier
Row 1 (WS): Ch 1, 7 sc evenly along the edge, turn … 7 sc.
Row 2 (RS): Ch 1, sc in each sc across, turn … 7 sc.
Row 3: Ch 1, sc in each sc across, turn … 7 sc.
Row 4: Ch 1, sc in each sc across, turn … 7 sc.
Row 5: Ch 1, sc in each sc across, turn … 7 sc.
Row 6: Ch 1, sc in each sc across, turn … 7 sc.
Row 7: Ch 1, sc in each sc across
Fasten off color B leaving a 6″ tail to weave in later, turn … 7 sc.
Tier 11
Square 1
For square 1, join with a slip stitch in 8th stitch to begin row. This is the top of square 5 from the previous row. Starting here will decrease this row to 4 squares.
With color A
Row 1 (WS): Ch 1, 6 sc evenly along the edge, sc2tog (the last sc and the marked stitch on square from previous tier), slip stitch in next stitch on square from previous tier, turn … 6 sc, 1 sc2tog.
Row 2 (RS): Sc in sc2tog, and in next 6 sc across, turn … 7 sc.
Row 3: Ch 1, sc in each of the next 6 sc, sc2tog (the last sc and the next stitch on square from previous tier), slip stitch in next stitch on square from previous tier, turn … 6 sc, 1 sc2tog.
Row 4: Sc in sc2tog, and in next 6 sc across, turn … 7 sc.
Row 5: Ch 1, sc in each of the next 6 sc, sc2tog (the last sc and the next stitch on square from previous tier), slip stitch in next stitch on square from previous tier, turn … 6 sc, 1 sc2tog.
Row 6: Sc in sc2tog, and in next 6 sc across, turn … 7 sc.
Row 7: Ch 1, sc in each of the next 6 sc, sc2tog (the last sc and the next stitch on square from previous tier) place a marker in that stitch, do not turn … 6 sc, 1 sc2tog.
Fasten off color A and your block is finished. Weave in your ends and block your square to 12″ x 12″. Attach your block to your blanket in the position you like best.
Tips for Making Your Entrelac Square
Managing Your Color Changes and Ends
Lots of color changes mean lots of ends. Weave in as you go, not at the end. Leave 6-8″ tails at each color change. Use your tapestry needle and weave into the back of nearby squares in different directions so you don't have a bulky spot.
Using Your Stitch Markers
Place markers in the last stitch of each tier as indicated in the pattern. Move markers as you go… don't try to remember where you are. The diagonal construction gets disorienting fast. Markers save you.
Blocking Makes a Big Difference
Single crochet entrelac can pull slightly. Wet blocking opens it up and evens out the diagonal joins. For a 12″ finished square, block to size. Unblocked it may measure slightly smaller and the texture won't be as even.
Color Combinations to Try
The 3-color rotating repeat (A… B… C… A) is built into the pattern, but you can use more colors if you want. More colors means more ends, so start with 3 for your first attempt. Gradient and ombre sets look stunning. And this is a great use for leftover sock or DK yarn.
What Can I Make With This Square?
More Single Crochet Entrelac Projects to Try Next



Frequently Asked Questions
What is the difference between C2C and entrelac crochet?
So here's the thing… C2C (corner to corner) and entrelac can look similar, but they build completely differently. C2C usually builds from one corner toward the center with diagonal increases, then decreases back. Entrelac builds in tiers, where each new tier of squares sits on top of the previous one, creating that woven effect. Both are beautiful. Both give straight edges. This pattern is C2C entrelac, which means we're using both techniques together.
Is single crochet entrelac hard?
Honestly… not as hard as it looks. The stitch itself (single crochet) is simple. The pattern is a lot of instructions, but once you work through the first tier, you see the repeat. The challenge isn't the stitch… it's managing color changes, keeping track of where you are on the diagonal, and weaving in ends. If you're comfortable with single crochet and color changes, you can do this.
What's the difference between Tunisian entrelac and this pattern?
Great question. Tunisian entrelac uses Tunisian stitches (yarn overs that stay on the hook) and requires a special long Tunisian hook. This pattern uses regular single crochet and regular hooks. The result is a slightly softer, flatter fabric. Both are stunning. Tunisian entrelac tends to be stiffer and more structured. Single crochet entrelac drapes a bit more.
Can I make this square bigger or smaller?
Yes, but you'll need to adjust the pattern. The finished size depends on your gauge and how many tiers you work. If you want a 16″ square instead of 12″, you'd add more tiers. If you want a smaller square, work fewer tiers. Just keep in mind that each tier adds width both ways, so the math gets a bit tricky. Start with this 12″ version first to get the hang of it, then try sizing.
How many ends will I have to weave in?
A lot. With 3 colors rotating through 11 tiers, you're cutting yarn and changing colors frequently. Our best advice… weave in ends as you go. Don't wait until the end. It's faster, easier, and you won't have a mountain of tails to deal with later.
What yarn works best for this pattern?
Any DK weight yarn with good stitch definition will work. The original was designed for Chic Sheep by Marly Bird (discontinued), but you can use Cascade Heritage, Berroco Vintage, KnitPicks Wool of the Andes, or any worsted to DK merino blend. Avoid very splitty yarns or very fluffy eyelash yarns… stitch definition is your friend for this pattern so the texture actually shows.
Final Thoughts on the Corner to Corner Single Crochet Entrelac Square
The C2C single crochet entrelac technique is one of those things that looks impossibly complex until you actually do it — and then it clicks, and you realize the whole thing is just a series of small squares worked diagonally. That's genuinely the whole trick. Once your hands understand the rhythm of working into the side edges of each square, you'll be flying through this and wondering why it ever seemed intimidating.
The textured woven look you get from this technique is unlike anything else in crochet. It photographs beautifully, it feels substantial in the hand, and it works in almost any weight yarn you love. Whether you make one square as a standalone project or start dreaming about blankets and scarves made entirely of these — that's a completely valid rabbit hole to fall into.
Give yourself grace on the first square. It's a learning square. By the second one, you'll wonder what all the fuss was about. Happy stitching! 🧶
❤️ Your BiCrafty Bestie,
Marly Bird

Categories: Crochet, Our Free Patterns