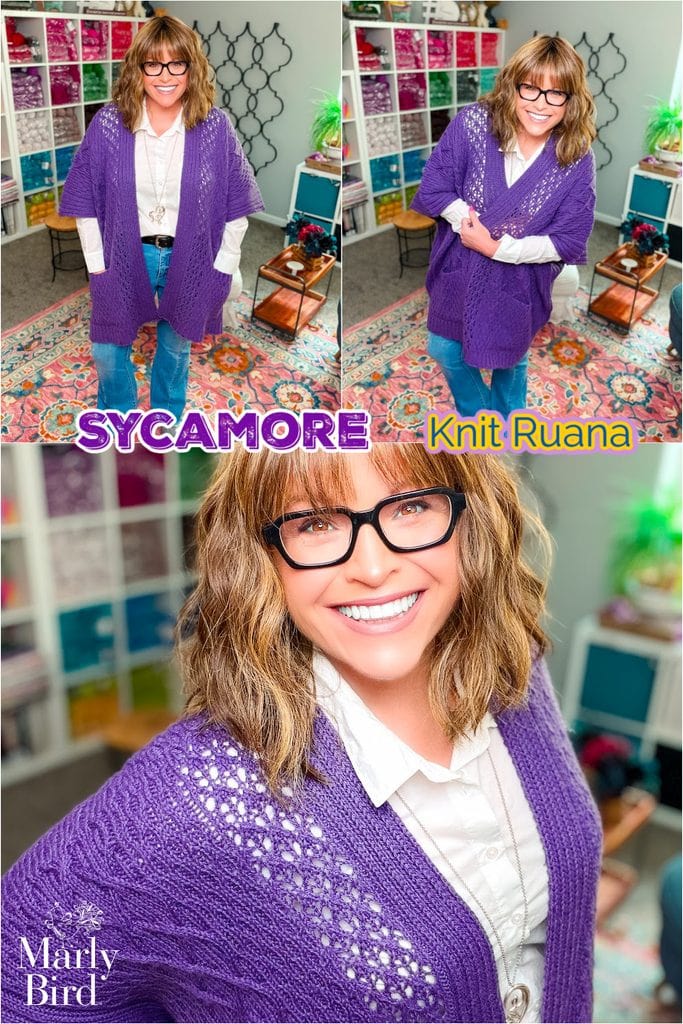
Sycamore Ruana: Free Knit Ruana Pattern With Lace & Cables
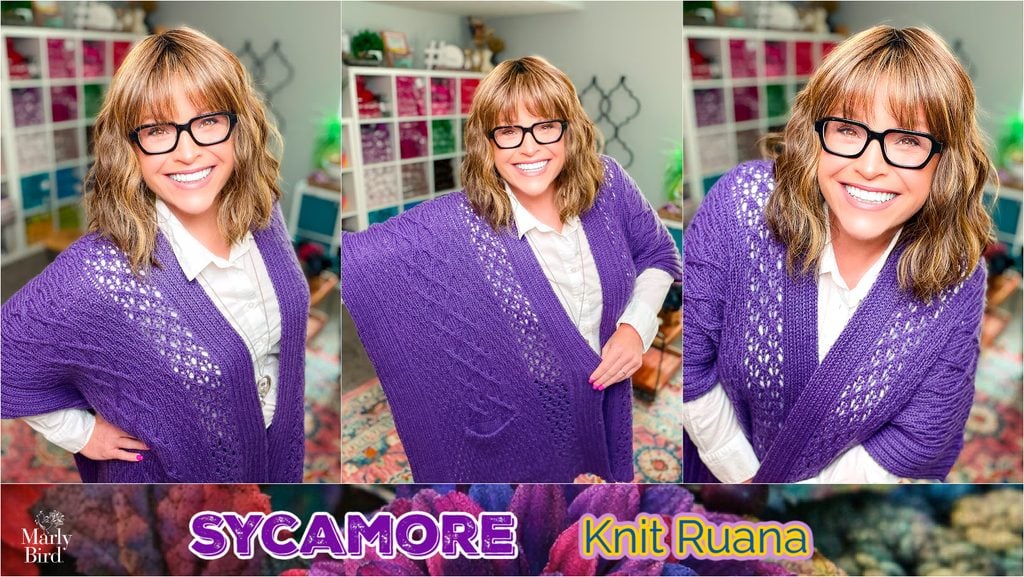
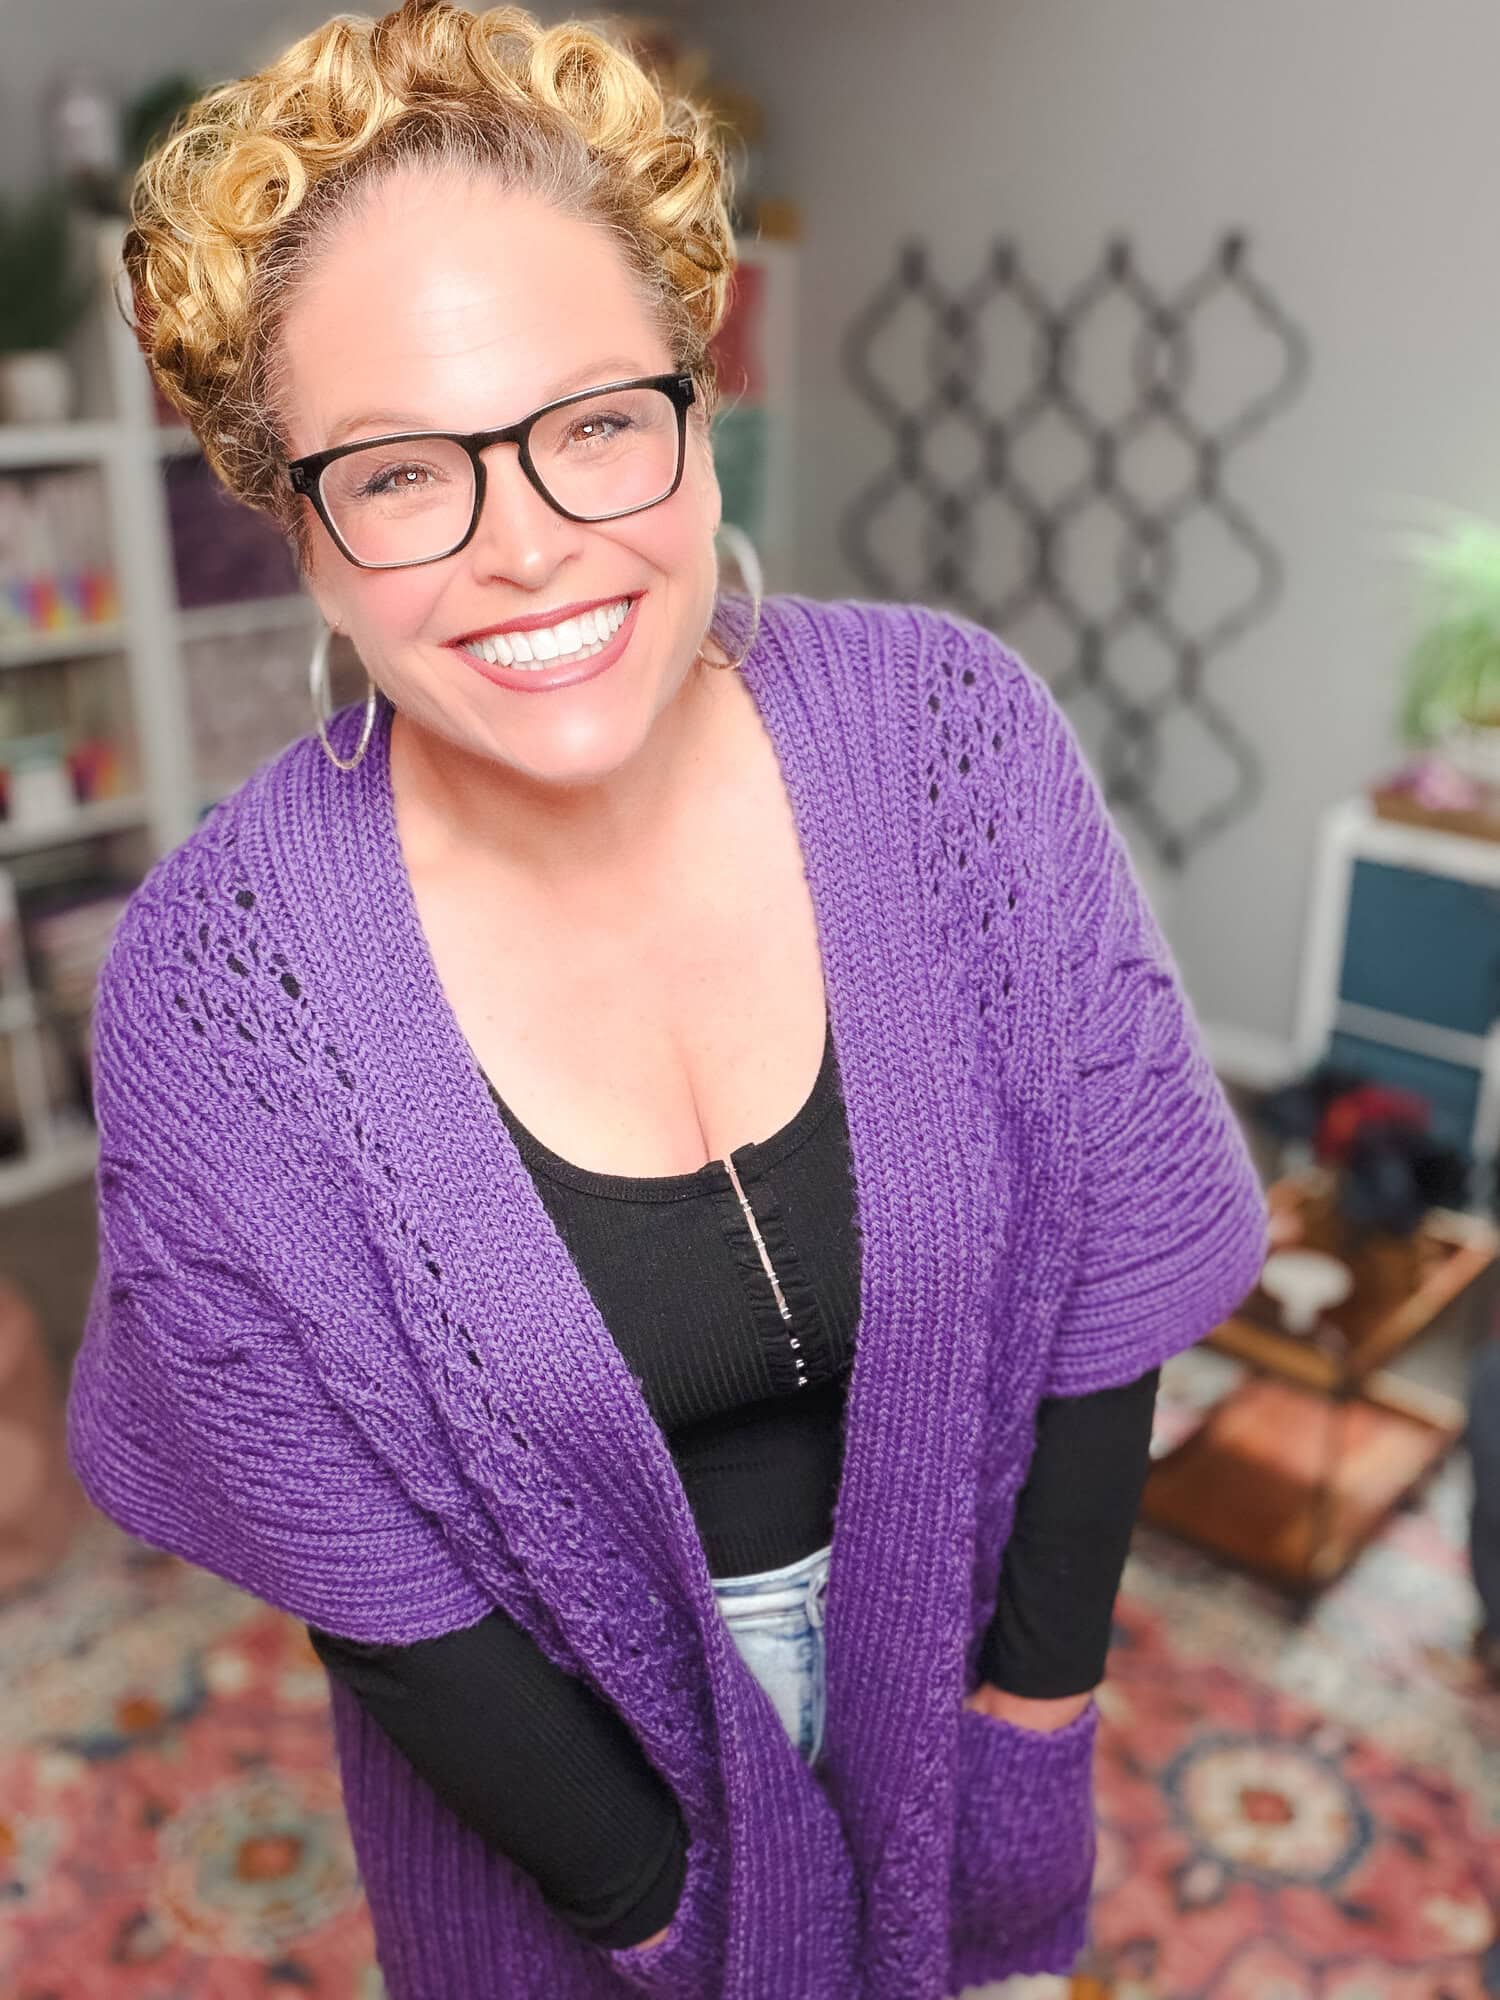
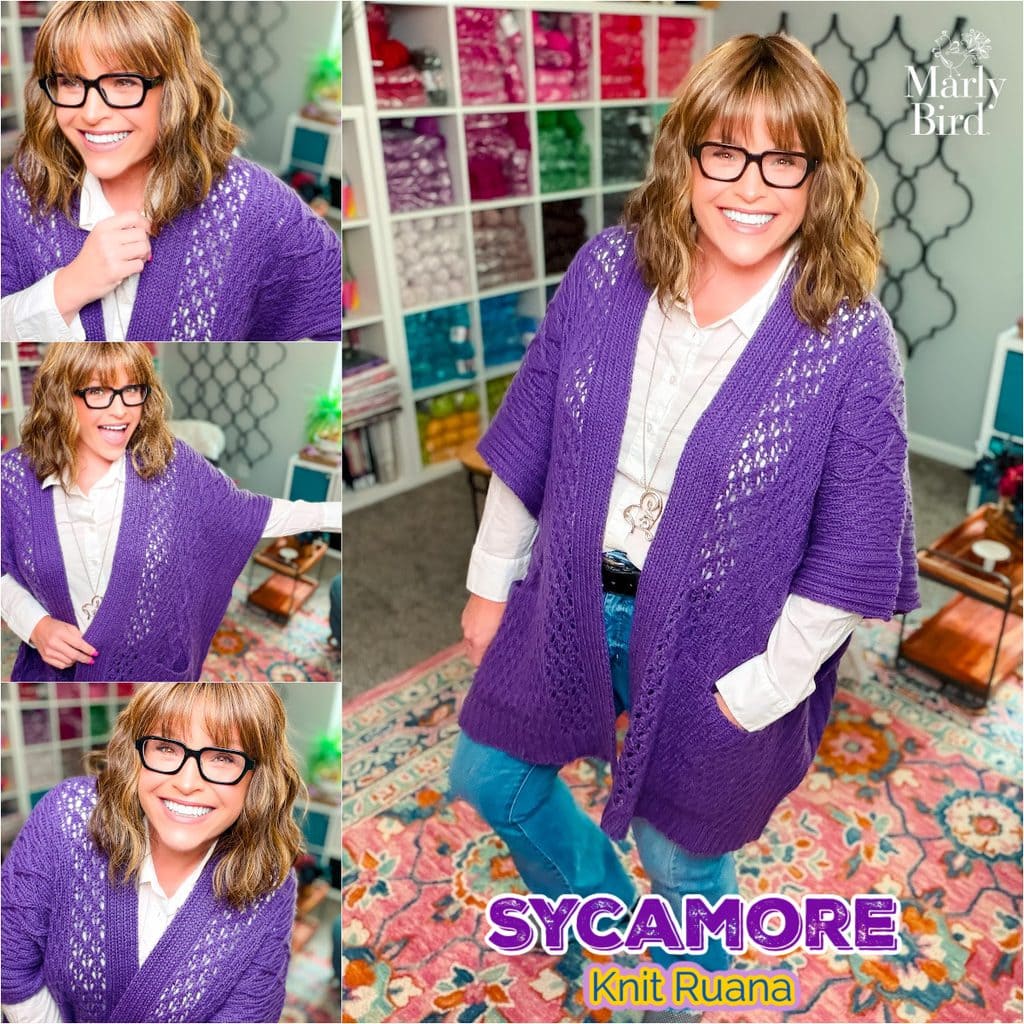
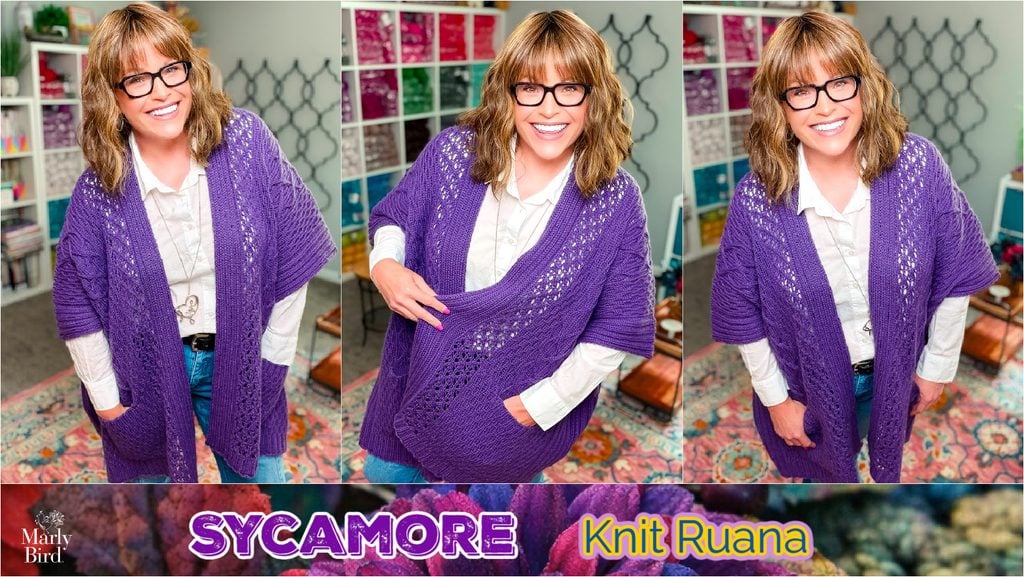
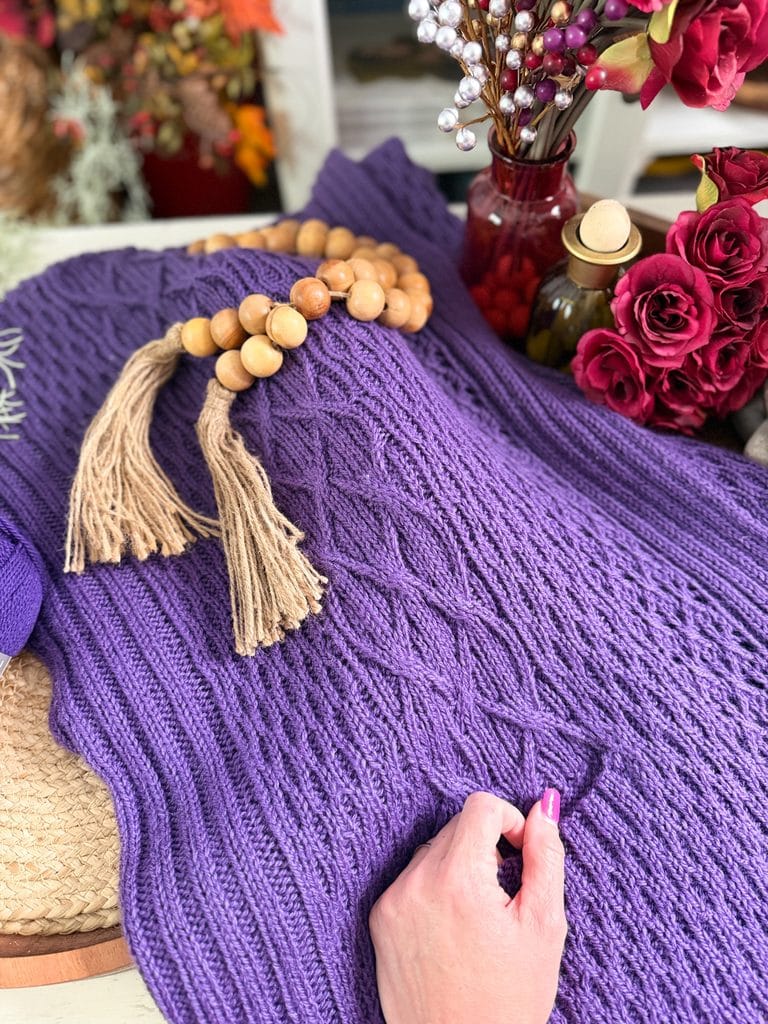
The Sycamore Ruana is a free knit ruana pattern designed by Marly Bird, originally from the Turkey Trot 2020 Mystery Make-Along held during Thanksgiving 2020.
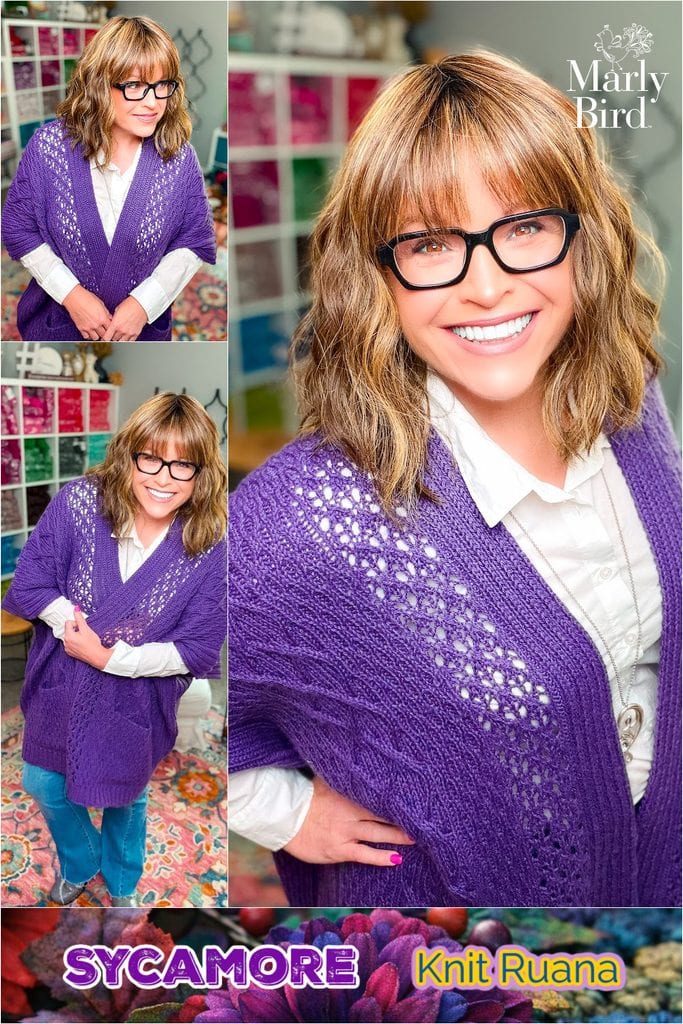
This intermediate ruana features lace panels, small and big cables, built-in pockets, and is available in two sizes (S-XL and 2XL-5XL). Complete pattern instructions, abbreviations, special stitches, and video tutorials are included below.
⚡ Quick Answer:
The Sycamore Ruana is a free knit pattern designed by Marly Bird for intermediate knitters. It features lace and cable details, built-in pockets, and comes in sizes S-XL (64″ finished chest) and 2XL-5XL (76″ finished chest). You'll need Patons Classic Wool Worsted in worsted weight, US 9 circular needles, and a gauge of 20 sts × 26 rows = 4″ in Stockinette.
Hey, BiCrafty Bestie! 💛 If you've been looking for a knit ruana pattern with personality — one that combines lace work, cabling, AND functional pockets… you're in for a treat. The Sycamore Ruana is a personal favorite of mine because it's structured and wearable, but the stitch patterns keep your hands engaged from setup through finishing. The folded construction means the shaping is baked right in, and the built-in pockets? Game-changer for those of us who want our makes to be as practical as they are pretty.
Why You'll Love This Pattern 💖
✨ Lace & Cabling Combined: The Sycamore Ruana pairs elegant lace panels with structured cables, giving you a pattern that's as rewarding to work as it is beautiful to wear.
🎯 Built-In Pockets: The pocket linings serve double duty — they're integrated into the construction AND they function as your gauge swatches, so nothing gets wasted.
📏 Flexible Sizing: Available in two size groups (S-XL and 2XL-5XL), plus tips for customizing the fit if you fall between sizes or need length adjustments.
This is your pattern if you're ready to tackle lace and cables in the same project, love structured garments with room to move, and appreciate the thoughtful problem-solving that goes into a well-designed pattern. You'll come away knowing how to work lace panels, execute cable crosses cleanly, and finish a complex garment with confidence.
Quick Pattern Overview
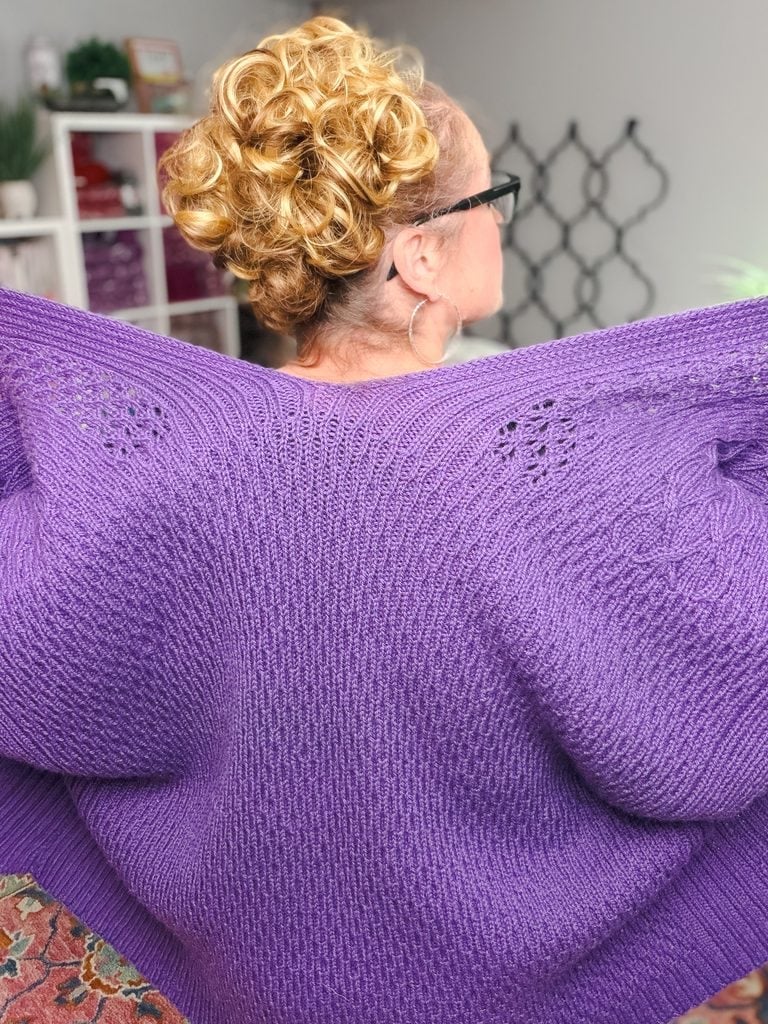
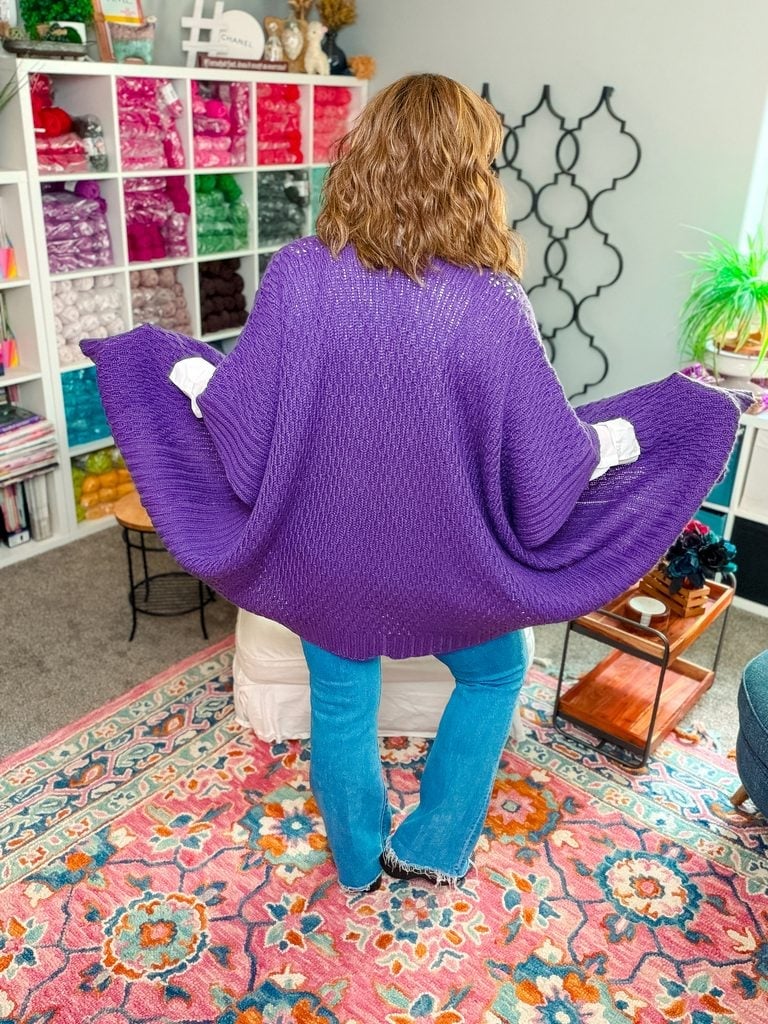
The Sycamore Ruana is worked from the bottom fronts upward, with both front panels meeting at the back neck. From there, the back is worked downward to complete the piece. Once finished, the ruana is folded in half and the sides are seamed to create armholes… it's a smart construction that means you don't need separate armhole shaping. The result is a garment that drapes beautifully and moves with your body.
Love the Pattern but Want an Ad-Free PDF? ⭐
Get the complete pattern with no ads, plus extra resources like a printable stitch-count tracker and blocking checklist. Grab your copy on Etsy, Shopify, or Ravelry — or sign up for the email list to get the PDF delivered straight to your inbox.
Want an ad-free PDF with no interruptions? Grab the Sycamore Ruana pattern on Etsy, Shopify, or Ravelry!
Join our Newsletter
Get Free Crochet & Knitting
Pattern Links & Coupons!


Which Size Should You Make?
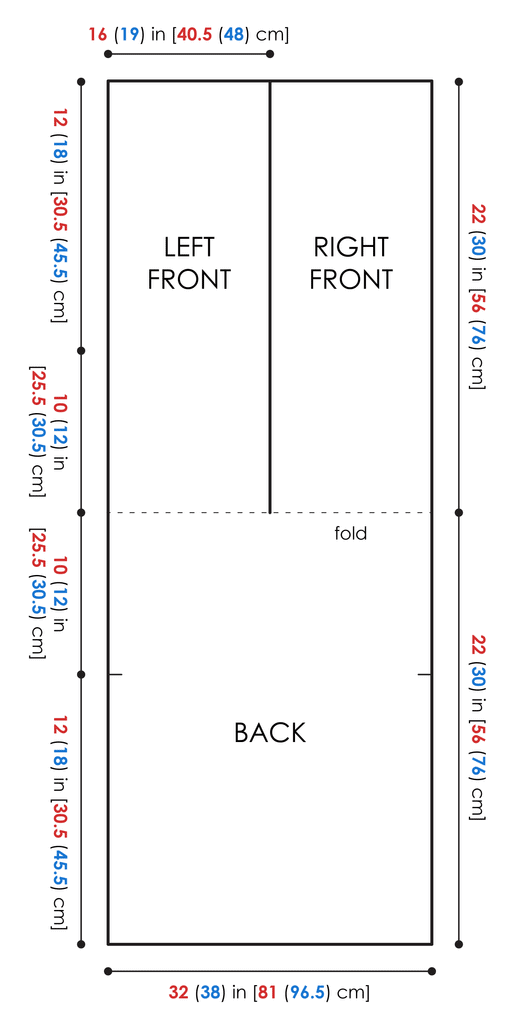
Finished Measurements (after blocking): The smaller size (S-XL) measures 64″ around the chest and 22″ in length when folded. The larger size (2XL-5XL) measures 76″ around the chest and 30″ in length when folded. Both sizes are meant to be worn as a ruana — a relaxed, drapey layer that sits on the shoulders.
Customizing Between Sizes: If you fall between sizes, you have flexibility. For a petite frame in a larger size, use the stitch count for the larger size but the row count for the smaller size — this gives you the width without the extra length. For a taller build in the smaller size, reverse it: stitch count from the smaller size, row count from the larger. Measure a finished ruana or cardigan you love to help guide your decision.
About Gauge: Gauge isn't essential for this pattern — the ruana is forgiving because of its construction. That said, checking gauge will help you know how much yardage you'll need and ensure your finished measurements match the pattern's. A swatch is never wasted; you'll weave the ends in and call it done.
Yarn & Materials
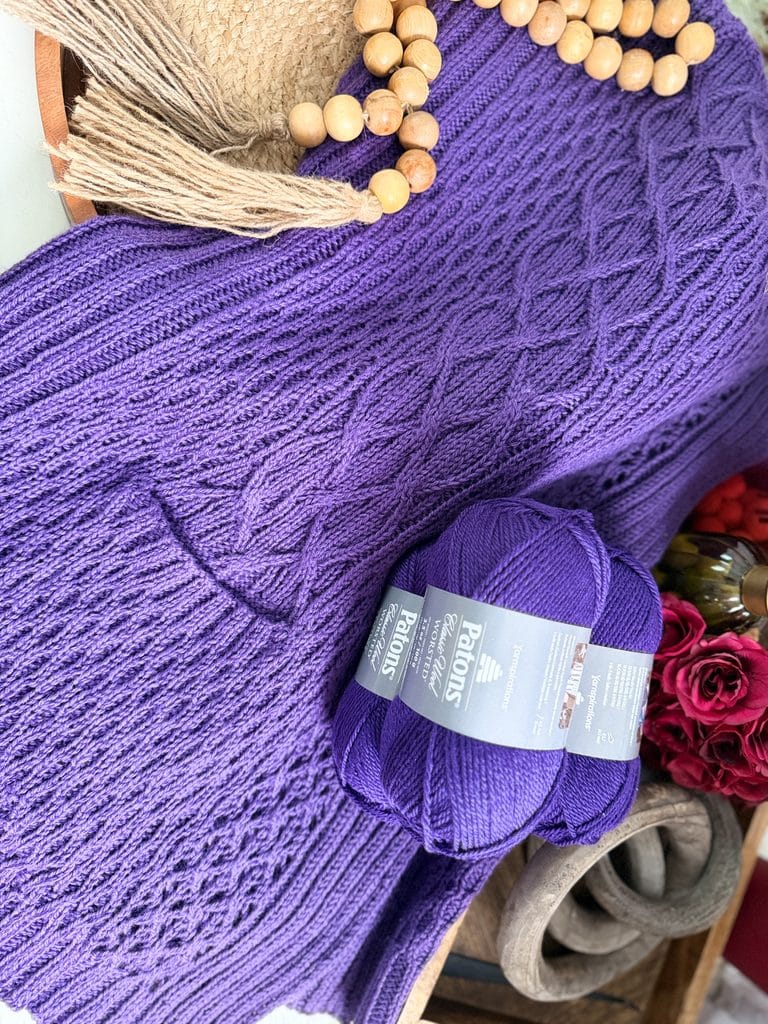
Yarn: The pattern is written for Patons Classic Wool Worsted (100% pure new wool, 194 yards / 177 meters per 3.5 oz / 100g skein, CYCA #4 worsted weight). You'll need 8 skeins for the S-XL size or 10 skeins for the 2XL-5XL size. The original was stitched in Gray Plum — a beautiful sophisticated tone that lets the stitch patterns shine.
Yarn Alternatives
Looking for a substitute? The Sycamore Ruana needs a worsted-weight wool with good stitch definition — the cables and lace look best in a yarn that blocks well and holds its shape. Here are some great options:
🧶 KnitPicks Wool of the Andes Worsted — 100% Peruvian Highland wool, excellent stitch definition, budget-friendly.
🧶 KnitPicks Wool of the Andes Tweed — same great wool base with flecks of color that add subtle visual interest without competing with the stitch pattern.
🧶 Cascade 220 Superwash — machine washable 100% superwash wool, beautiful drape for a garment, and available in a gorgeous color range.
🧶 Malabrigo Rios — a hand-dyed superwash merino worsted that takes blocking beautifully and adds a subtle color depth that really makes cables pop.
🧶 Berroco Vintage Worsted — a wool/acrylic/nylon blend that's machine washable and forgiving… great if you're newer to knitting with wool.
Always check your gauge swatch with your chosen yarn before committing all your yardage!
Notions & Tools
- Two US 9 [5.5mm] 40″ [101.5cm] circular needles (worked flat; circulars used for width)
- Stitch markers
- Tapestry needle
- Scissors
- Tape measure
- Cable needle
- Blocking squares
- Blocking pins
- Blocking wires
- Eucalan Wool Wash (or your preferred wool soaking solution)
- Stitch saver cord or holders (for holding stitches)
Video Tutorials
If you're a visual learner, these video tutorials cover the techniques you'll use in the Sycamore Ruana. Watch them before you cast on, or keep them handy as you work through the pattern.
- Knit Stitch (Continental)
- Purl Stitch (Continental)
- How to Knit Lace
- How to Cable 2/2 LC
- How to Cable 2/2 RC
- How to Cable with No Cable Needle
- How to Fix Miscrossed Cables
- Tink Cables
- Yarn Over Increase
- How to Add a Lifeline
- How to Tink
- How to Bury Ends
- Wet Blocking Tips
Sycamore Ruana || Pattern Details
Skill Level
Intermediate. You should be comfortable with knit and purl stitches, increases and decreases, and basic cable work. Lace is a bonus skill that you'll build through this pattern.
Finished Measurements
Chest (after blocking): 64″ [162 cm] for S-XL | 76″ [193 cm] for 2XL-5XL
Length (folded, after blocking): 22″ [56 cm] for S-XL | 30″ [76 cm] for 2XL-5XL
Gauge
20 sts × 26 rows = 4″ [10 cm] in Stockinette stitch on US 9 [5.5mm] needles. This is a Blocked Gauge!
Gauge is helpful for knowing yardage needs and final measurements, but the construction is forgiving if you're slightly off.
Materials
Yarn: Patons Classic Wool Worsted (100% pure new wool, 194 yds / 177 m, 3½ oz / 100 g, CYCA #4 worsted). 8 skeins in Gray Plum for S-XL | 10 skeins for 2XL-5XL.
Needles: Two US 9 [5.5mm] 40″ [101.5cm] circular needles, worked flat (the length accommodates the width of the ruana).
Notions: Stitch markers
Abbreviations
K — knit | K2tog — knit 2 together | P — purl | Pm — place marker | RS — right side | Sk2p — slip 1, knit 2 together, pass slipped stitch over | Slm — slip marker | Ssk — slip, slip, knit | St(s) — stitch(es) | Tbl — through back loop | WS — wrong side | Yo — yarn over

Special Stitches
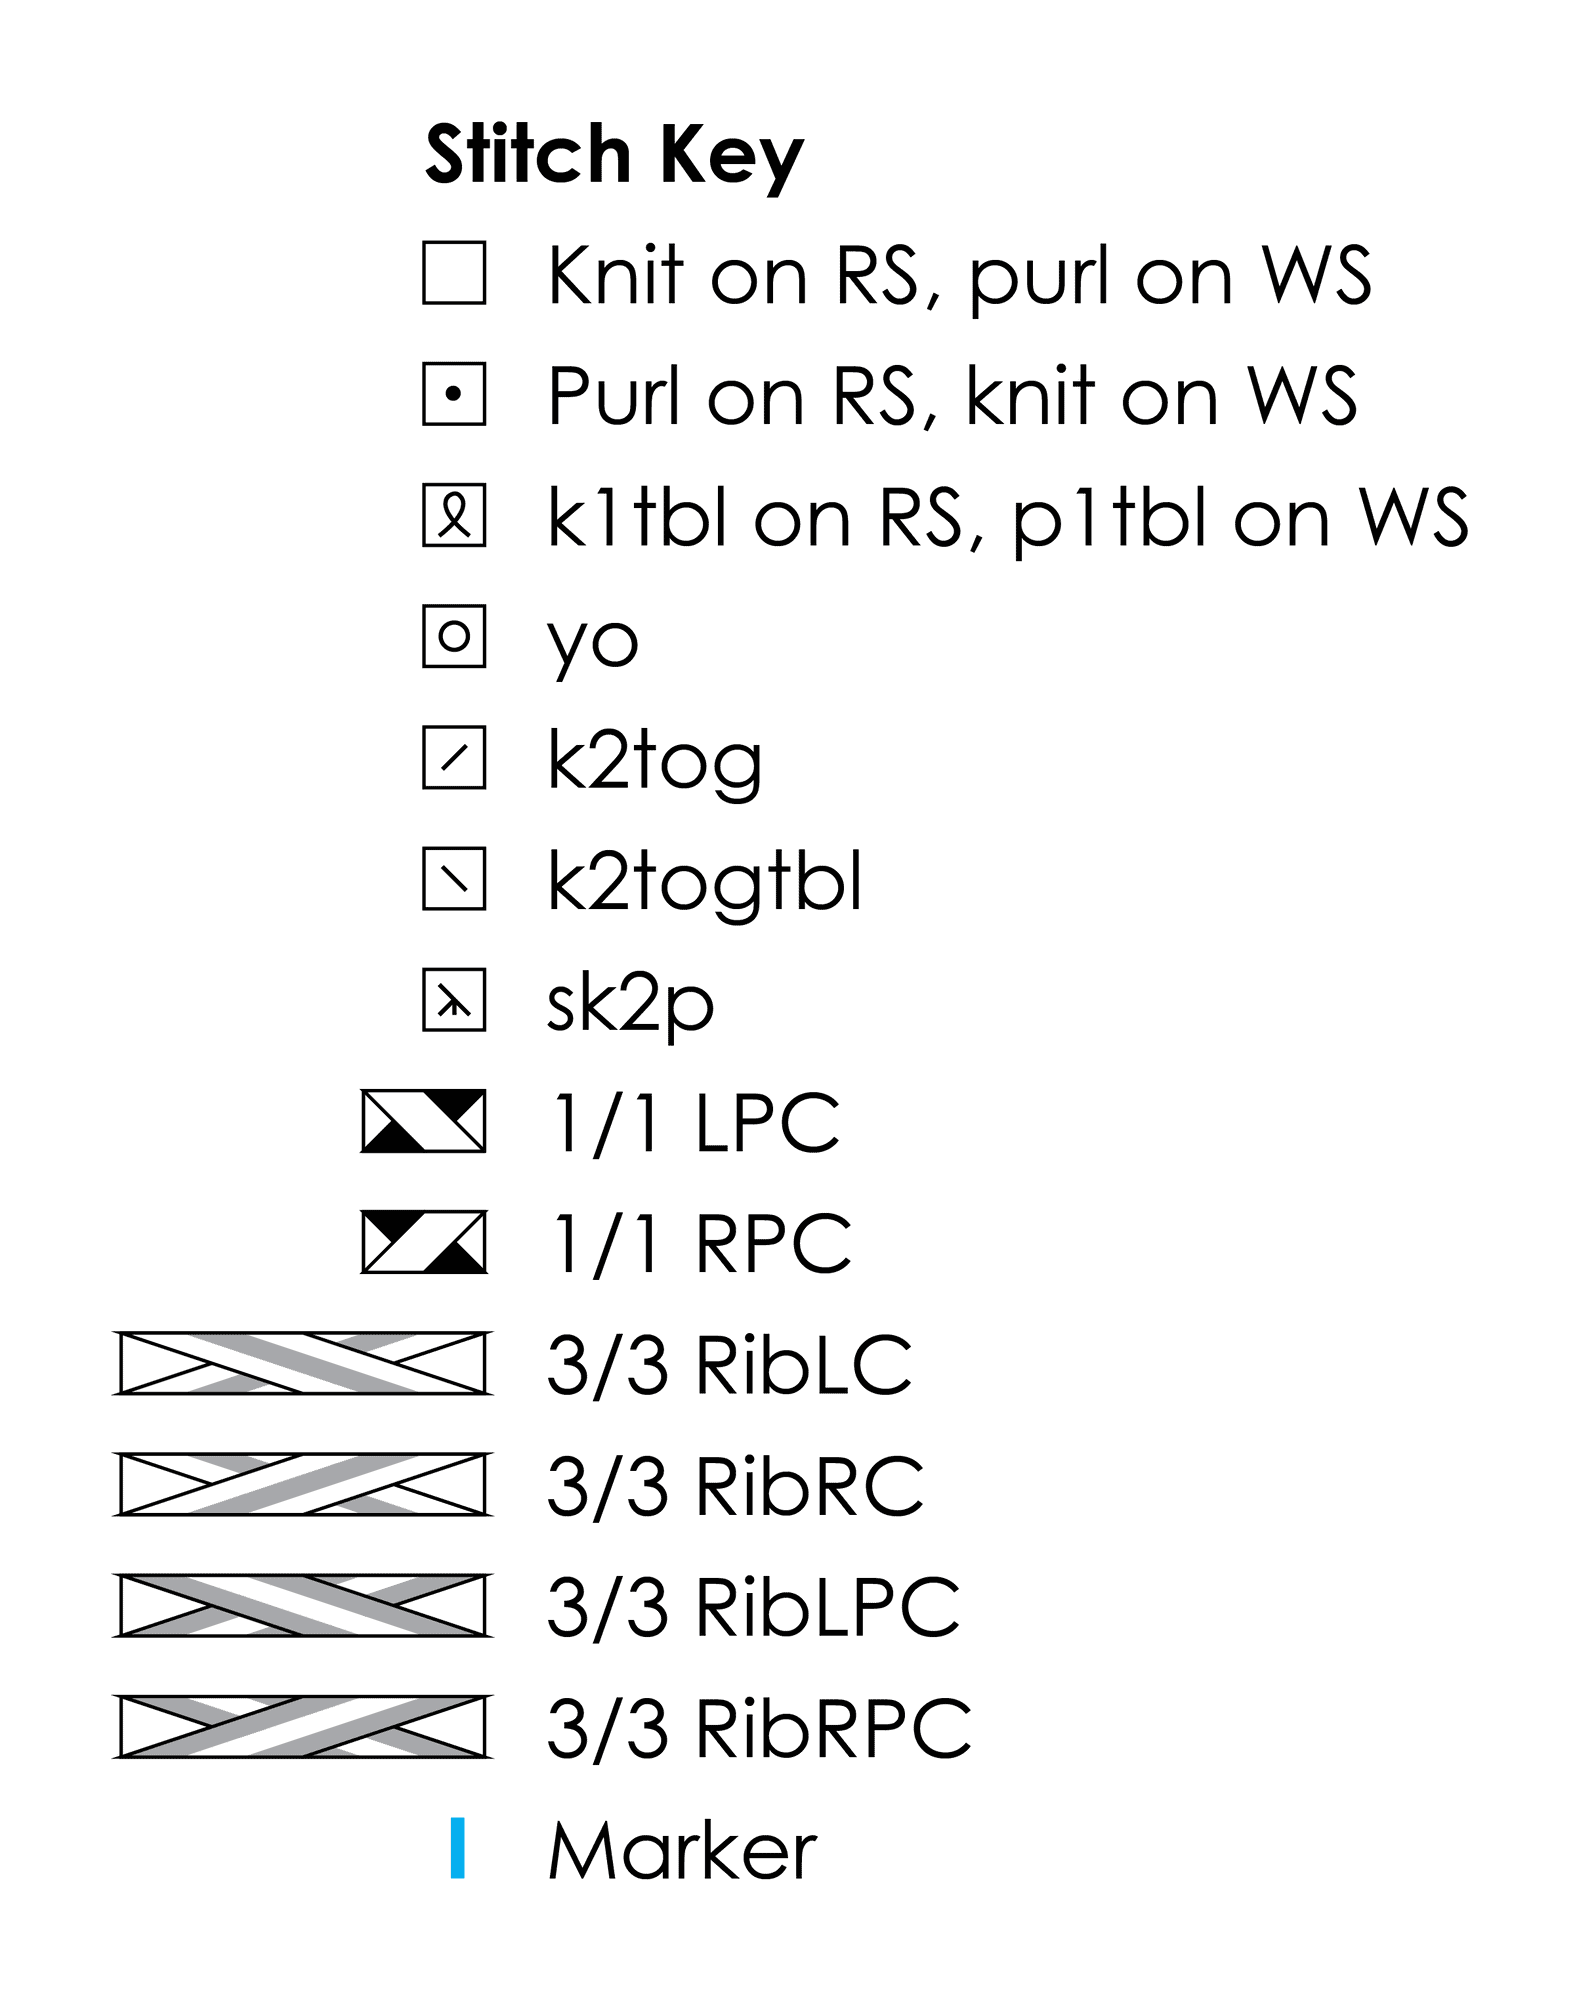
Sk2p: Slip next st knitwise, k2tog, pass slipped st over — 2 sts decreased.
Ssk: Slip 2 sts knitwise one at a time, knit together from front — 1 st decreased. For a flatter decrease that blends better with lace, you can also slip the needle into the front leg of the next st (don't knit), insert into the back leg of the second st, yarn over, and knit both together.
1/1 LPC: Slip 1 st to cable needle, hold to front; p1 from left needle; k1 from cable needle.
1/1 RPC: Slip 1 st to cable needle, hold to back; k1 from left needle; p1 from cable needle.
3/3 RibLC: Slip 3 sts to cable needle, hold to front; [k1, p1, k1] from left needle; [k1, p1, k1] from cable needle.
3/3 RibRC: Slip 3 sts to cable needle, hold to back; [k1, p1, k1] from left needle; [k1, p1, k1] from cable needle.
3/3 RibLPC: Slip 3 sts to cable needle, hold to front; [p1, k1, p1] from left needle; [p1, k1, p1] from cable needle.
Charts


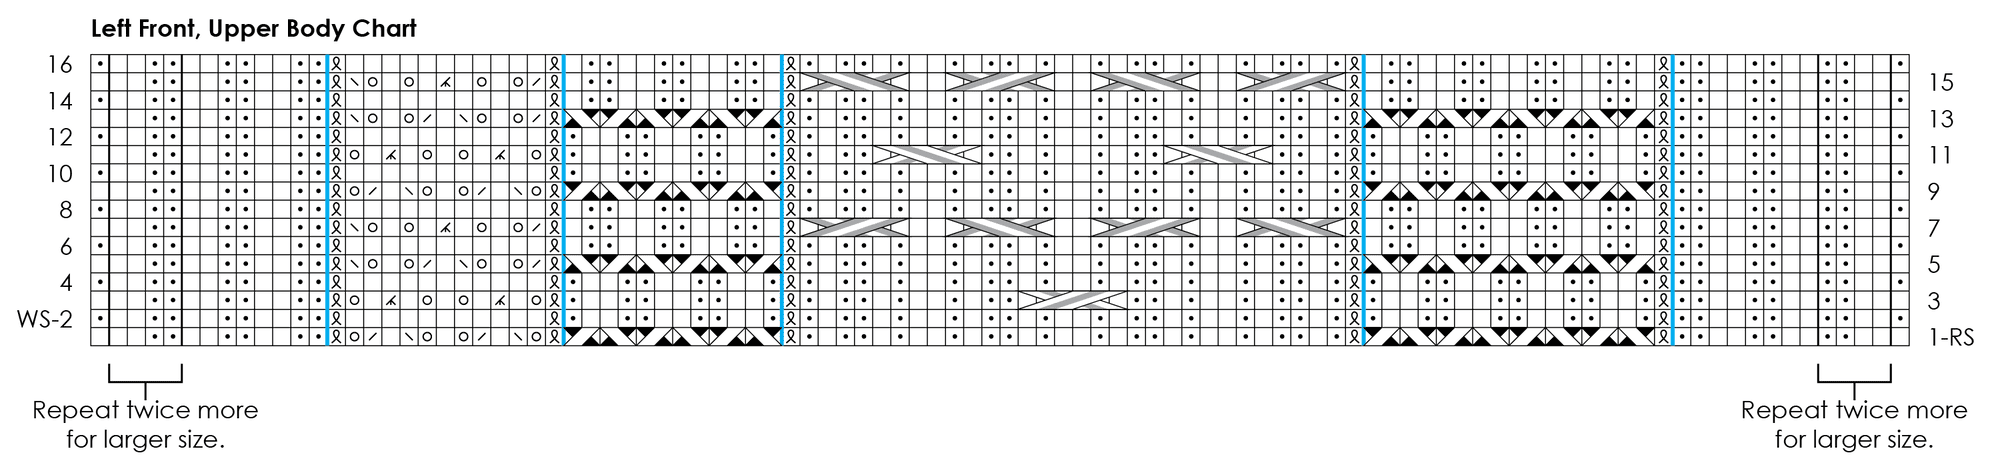
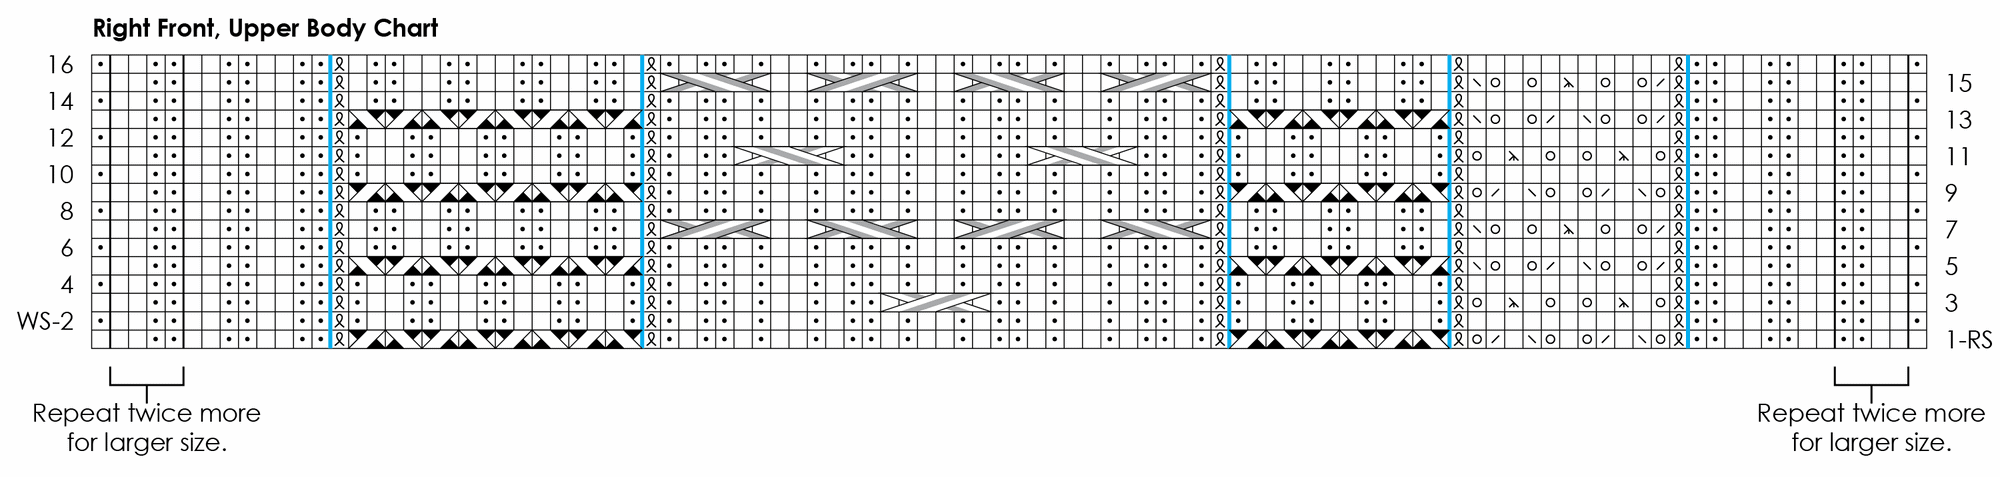
Want an ad-free PDF with no interruptions? Grab the Sycamore Ruana pattern on Etsy, Shopify, or Ravelry!
Schematic
Notes
- Directions are for the smaller size; changes for the larger size are in parentheses. When only one number is given then that number applies to both sizes.
- Ruana is worked beginning at bottom fronts, joining together at back neck, and continuing in one piece to bottom back. It is then folded in half and seamed at the sides to create armholes.
- Ruana is worked back and forth in rows. Circular needles are used to accommodate the full width of the sts.
- For a petite larger size follow the stitch count for the larger size and row count for the smaller size.
- For taller size small follow the stitch count for the smaller size and the row count for the larger size.
- Ruana features easy-to-join pockets. The pocket linings can double as your gauge swatch.
- 1 st at each edge is worked in Garter st (knit every row) throughout.
- 2 x 2 Rib stitches are highlighted in YELLOW throughout.
- Lace Panel stitches are highlighted in PINK throughout.
- Small Cable Pattern stitches are highlighted in BLUE throughout.
- Big Cable Panel stitches are highlighted in GREEN throughout.

GROW
To Unlock Exclusive Subscriber Content click the Box below and join for free by simply adding your email and creating a password! If you are having troubles, clear your cache or reset your password or login to the Grow Publisher Portal.
>> Learn More About Grow Here <<
I'm thrilled to share this amazing pattern with you, many patterns on my blog are absolutely free! I kindly request that you don't copy and paste or distribute this pattern. Prefer an ad-free experience? Buy a digital PDF pattern for a small fee from one of my online stores for a seamless crafting journey.
I appreciate your support and readership. You are the reason I can keep doing what I love and sharing it with others. So, thank you from the bottom of my yarn-loving heart! Disclosure: This post contains affiliate links, meaning I get a commission if you decide to make a purchase through my links at no cost to you.
Sycamore Ruana || Pattern Instructions
POCKET LININGS
Note: These can serve as your gauge swatches as well!
Make both the same as follows:
Cast on 32 sts.
Rows 1-4 (begin RS): Knit.
Row 5 (WS): Purl.
Row 6 (RS): Knit.
Repeat Rows 5 and 6 only 18 times more, then Row 5 only once more.
Place sts on a holder and cut the yarn leaving a long tail that you can later use for seaming.
RIGHT FRONT RIBBING
JOIN FRONTS TO MAKE A BACK
Continue using yarn attached to Left Front to join Fronts as follows:
Row 1 (RS): Work across Left Front sts as follows: k1, [k2, p2] 3 (5) times, slm, k1 tbl, [1/1 LPC, 1/1 RPC] 4 times, remove marker, [1/1 LPC, 1/1 RPC] 8 times, remove marker, [1/1 LPC, 1/1 RPC] 3 times, remove marker, [1/1 LPC, 1/1 RPC] 3 times, k1 tbl, slm, [p2, k2] 3 (5) times, p1; use same needle and yarn to work across Right Front sts as follows: p1, [k2, p2] 3 (5) times, slm, k1 tbl, [1/1 LPC, 1/1 RPC] 3 times, remove marker, [1/1 LPC, 1/1 RPC] 3 times, remove marker, [1/1 LPC, 1/1 RPC] 8 times, remove marker, [1/1 LPC, 1/1 RPC] 4 times, k1 tbl, slm, [p2, k2] 3 (5) times, k1.
Count: 200 (232) sts.
BACK NECK RIBBING
Row 2 (WS): K1, [p2, k2] 3 (5) times, slm, p1 tbl, [k1, p2, k1] 18 times, p1 tbl, slm, [k2, p2] 6 (10) times, k2, slm, p1 tbl, [k1, p2, k1] 18 times, p1 tbl, slm, [k2, p2] 3 (5) times, k1.
Row 3 (RS): K1, [k2, p2] 3 (5) times, slm, k1 tbl, [p1, k2, p1] 18 times, k1 tbl, slm, [p2, k2] 6 (10) times, p2, slm, k1 tbl, [p1, k2, p1] 18 times, k1 tbl, slm, [p2, k2] 3 (5) times, k1.
Row 4 (WS): K1, [p2, k2] 3 (5) times, slm, p1 tbl, [k1, p2, k1] 18 times, p1 tbl, slm, [k2, p2] 6 (10) times, k2, slm, p1 tbl, [k1, p2, k1] 18 times, p1 tbl, slm, [k2, p2] 3 (5) times, k1.
Row 5 (RS): K1, [k2, p2] 3 (5) times, slm, k1 tbl, [1/1 RPC, 1/1 LPC] 18 times, k1 tbl, slm, [p2, k2] 6 (10) times, p2, slm, k1 tbl, [1/1 RPC, 1/1 LPC] 18 times, k1 tbl, slm, [p2, k2] 3 (5) times, k1.
Row 6 (WS): K1, [p2, k2] 3 (5) times, slm, p1 tbl, [p1, k2, p1] 18 times, p1 tbl, slm, [k2, p2] 6 (10) times, k2, slm, p1 tbl, [p1, k2, p1] 18 times, p1 tbl, slm, [k2, p2] 3 (5) times, k1.
Row 7 (RS): K1, [k2, p2] 3 (5) times, slm, k1 tbl, [k1, p2, k1] 18 times, k1 tbl, slm, [p2, k2] 6 (10) times, p2, slm, k1 tbl, [k1, p2, k1] 18 times, k1 tbl, slm, [p2, k2] 3 (5) times, k1.
Row 8 (WS): K1, [p2, k2] 3 (5) times, slm, p1 tbl, [p1, k2, p1] 18 times, p1 tbl, slm, [k2, p2] 6 (10) times, k2, slm, p1 tbl, [p1, k2, p1] 18 times, p1 tbl, slm, [k2, p2] 3 (5) times, k1.
BACK AFTER NECK RIBBING
Row 1 (RS): K1, [k2, p2] 3 (5) times, slm, k1 tbl, [1/1 LPC, 1/1 RPC] 18 times, 1/1 LPC removing marker, [1/1 RPC, 1/1 LPC] 6 (10) times, 1/1 RPC removing marker, [1/1 LPC, 1/1 RPC] 18 times, k1 tbl, slm, [p2, k2] 3 (5) times, k1.
Row 2 (WS): K1, [p2, k2] 3 (5) times, slm, p1 tbl, [k1, p2, k1] 43 (47) times, p1 tbl, slm, [k2, p2] 3 (5) times, k1.
Row 3 (RS): K1, [k2, p2] 3 (5) times, slm, k1 tbl, [p1, k2, p1] 43 (47) times, k1 tbl, slm, [p2, k2] 3 (5) times, k1.
Row 4 (WS): K1, [p2, k2] 3 (5) times, slm, p1 tbl, [k1, p2, k1] 43 (47) times, p1 tbl, slm, [k2, p2] 3 (5) times, k1.
Row 5 (RS): K1, [k2, p2] 3 (5) times, slm, k1 tbl, [1/1 RPC, 1/1 LPC] 43 (47) times, k1 tbl, slm, [p2, k2] 3 (5) times, k1.
Row 6 (WS): K1, [p2, k2] 3 (5) times, slm, p1 tbl, [p1, k2, p1] 43 (47) times, p1 tbl, slm, [k2, p2] 3 (5) times, k1.
Row 7 (RS): K1, [k2, p2] 3 (5) times, slm, k1 tbl, [k1, p2, k1] 43 (47) times, k1 tbl, slm, [p2, k2] 3 (5) times, k1.
Row 8 (WS): K1, [p2, k2] 3 (5) times, slm, p1 tbl, [p1, k2, p1] 43 (47) times, p1 tbl, slm, [k2, p2] 3 (5) times, k1.
Repeat Rows 1–8 13 (19) more times.
Note: Make adjustments to length same as for Fronts, if necessary. The Back should now match the length of the Fronts to the Ribbing.
Place a removable marker into the end of the row to use for measuring the ribbing.
BOTTOM BACK RIBBING
Row 1 (RS): K1, * k2, p2; repeat from * to last 3 sts, k3.
Row 2 (WS): K1, * p2, k2; repeat from * to last 3 sts, p2, k1
Repeat Rows 1 and 2 until Back Ribbing measures 2” [5 cm] from the marked row.
Bind off all sts loosely in rib pattern.
Finishing
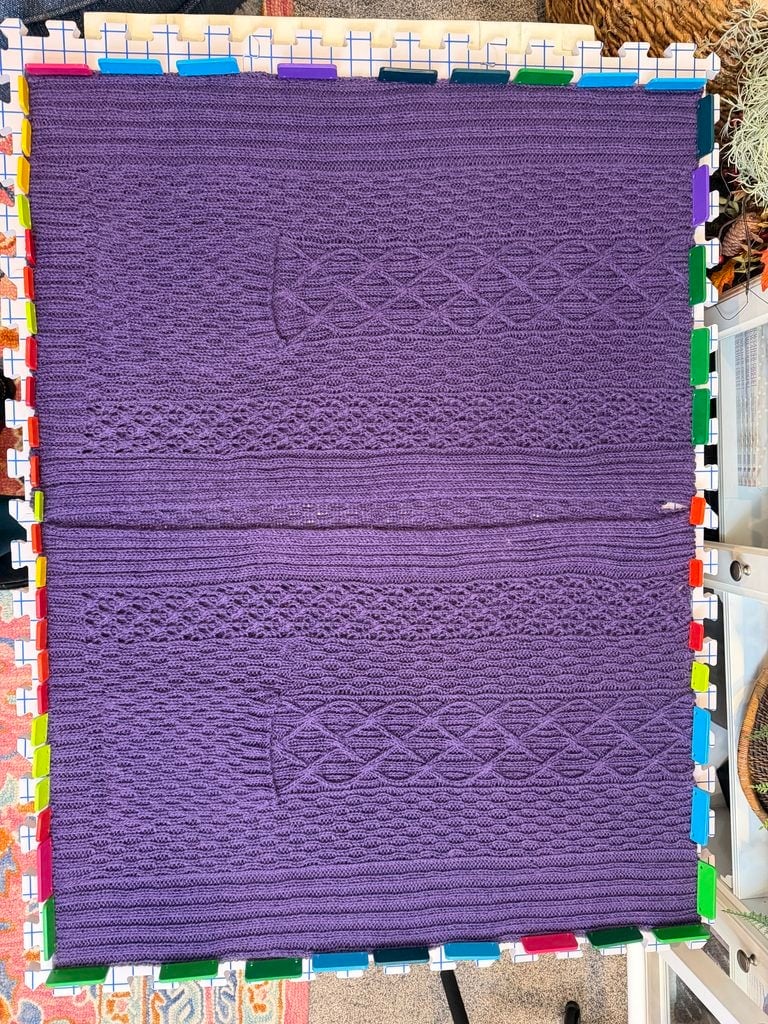
Weave in all ends carefully, securing them as you go. Wet block the finished ruana, paying special attention to opening up the lace panels and evening out the cables. Use blocking wires to hold the edges straight and blocking squares to support the piece as it dries. Allow 24—48 hours for complete drying.
Blocking the Sycamore Ruana 🌊
Blocking isn't optional for this pattern… it's where the magic happens. The lace panels won't reach their full, open beauty until they've been wet blocked. The cables will even out and settle into their pattern. And the drape — the gorgeous, wearable drape of a well-blocked wool ruana — simply cannot happen if you skip this step. Budget time for it at the end, and the result will take your breath away.
What You'll Need for Blocking
Eucalan Wool Wash (or another no-rinse wool wash) — soak the finished piece in cool water with a capful for 15-20 minutes. No wringing, no agitation.
Blocking mats or squares — you'll need enough surface area to lay the ruana flat. On a bed covered with a clean towel works too.
Rust-proof T-pins — pin the edges to your measurements. Rusting pins will leave permanent marks on your wool.
Blocking wires — thread these through the edges of the lace panels before pinning. They create a smooth, straight edge that individual pins alone can't achieve.
Step-by-Step Wet Blocking
Step 1 — Soak. Fill a basin or clean sink with cool water and add a capful of wool wash. Submerge the finished ruana and let it soak for 15-20 minutes. Don't swish or agitate — just let it absorb the water fully.
Step 2 — Remove excess water. Gently squeeze the ruana (don't wring or twist). Lay it on a dry towel and roll the towel up around it, pressing firmly to absorb more water. Unroll and lift the piece.
Step 3 — Shape to measurements. Lay the ruana flat on your blocking mats and shape it to the finished measurements listed in the pattern. For the lace panels: thread blocking wires through the edge stitches before pinning the wires out straight. Pin every 1-2 inches along the edges to hold the shape.
Step 4 — Let it dry completely. Allow 24-48 hours depending on your climate and air circulation. The ruana must be fully dry before you unpin it — picking it up while still damp will let the fibers relax back into an unblocked state. A fan nearby speeds things up nicely.
About Superwash Wool Substitutes
If you're substituting a superwash wool (like Cascade 220 Superwash or Malabrigo Rios), note that superwash fibers block differently than standard wool. Superwash can relax and grow significantly when wet — especially in a large, heavy garment like this. Your finished measurements may be slightly larger than the pattern states. Swatch, wash your swatch, and measure again before you cast on the full project.
More Free Knit Patterns You'll Love 🧶

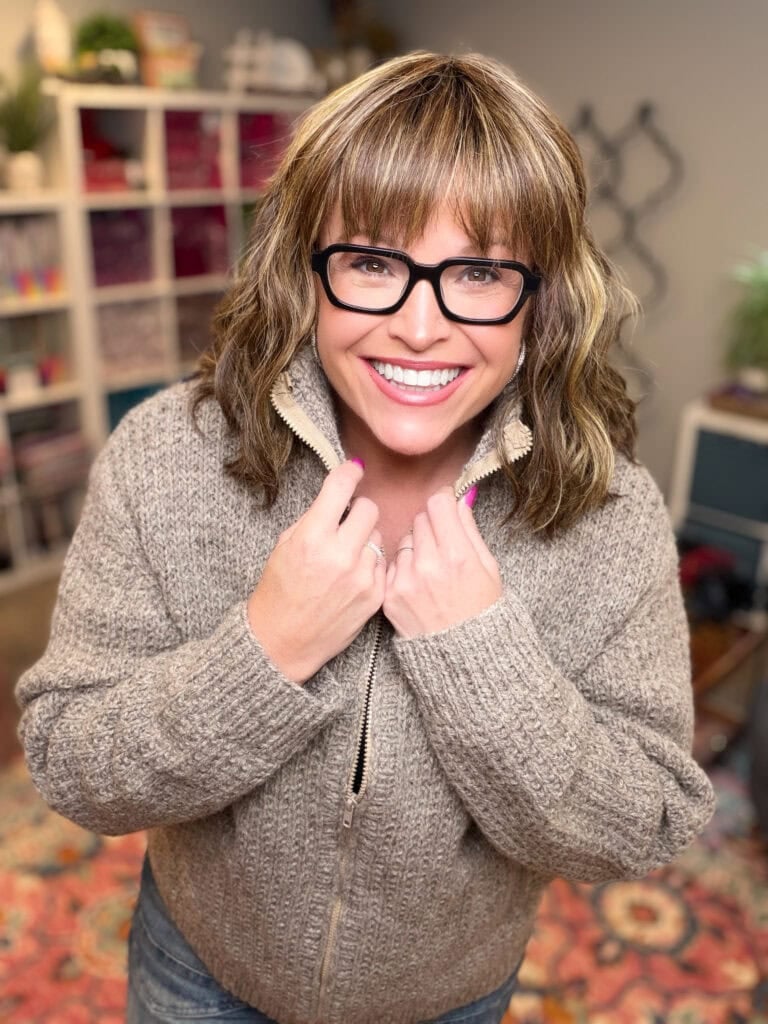
Know Your Worth Knit Cocoon Cardigan — a free knit cocoon cardigan pattern that's all about cozy, oversized comfort. Perfect if the Sycamore Ruana has you in the mood for more wearable knits.
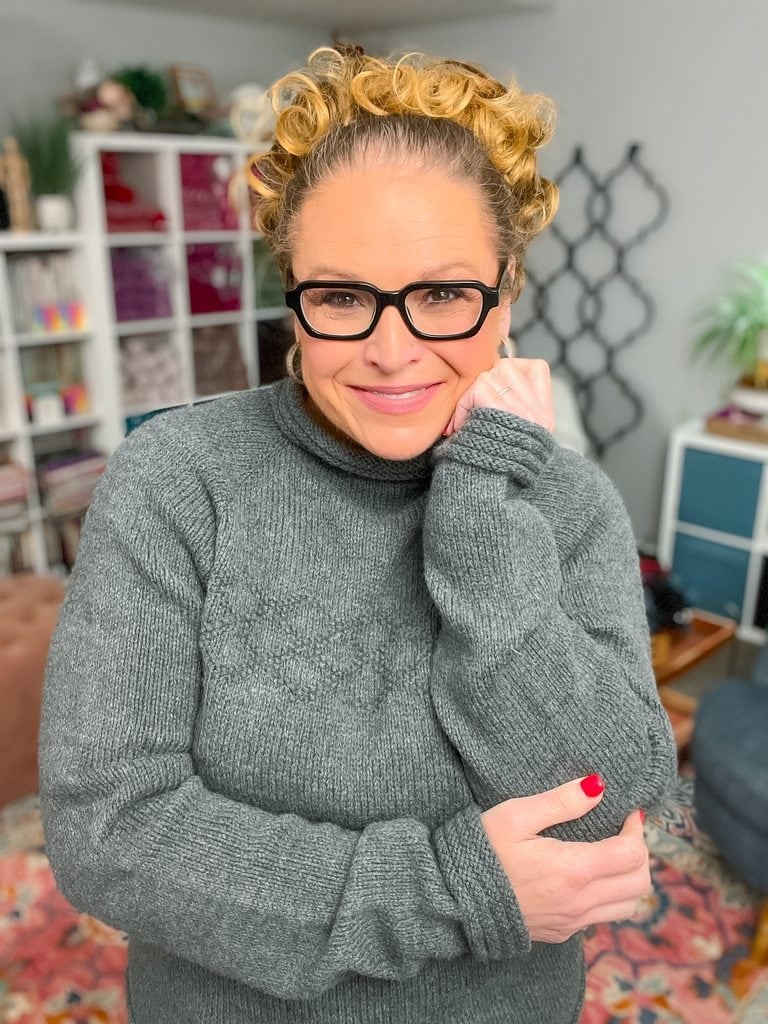
Smokey Graphite Men's Knit Pullover — a simple-texture crewneck with a generous oversized fit. Find it on Ravelry.
Adam's Ribbed Zipper Knit Cardigan — classic ribbed cardigan with zipper front. Available in the pattern shop.
Harbor Ridge Knit Vest & Sweater — a two-in-one pattern: wear it as a classic vest or add sleeves for a full sweater. Great next project once you've mastered the Sycamore.
Fairhope Cable Knit Cowl — practice your cable work in a shorter project. This free cable cowl is a great warm-up for the cables in the Sycamore Ruana.
Creekside Crochet Ruana — love the ruana shape but prefer to crochet? The Creekside is your BiCrafty answer… free pattern, built-in pockets, and just as cozy.

Frequently Asked Questions
Can I substitute a different yarn?
Absolutely! Any worsted-weight wool or wool blend with similar yardage (around 194 yards per 100 grams) will work. Just check your gauge with your chosen yarn before committing all of your yarn, since different yarns have different stretch and drape characteristics.
What if I've never done lace or cables before?
This pattern is labeled “Intermediate” because it combines lace and cable work in the same project. Watch the video tutorials before you start, and don't hesitate to use a lifeline as you work through the lace sections. The cable sections are straightforward once you get the rhythm.
How long does the Sycamore Ruana take to make?
That depends on your speed and experience, but most makers report 40—60 hours of knitting time. If you're comfortable with the techniques, you can expect closer to the lower end of that range.
Do I need to block this pattern?
Blocking is highly recommended, especially for the lace and cable detail. Wet blocking will open up the lace panels and even out the cables, making the finished piece look polished and professional.
Can I customize the length or width?
Yes, and the pattern notes include guidance for customizing between sizes. For width, you can adjust stitch counts; for length, adjust row counts. Test your changes on a swatch or paper before committing to the full pattern.
Final Thoughts
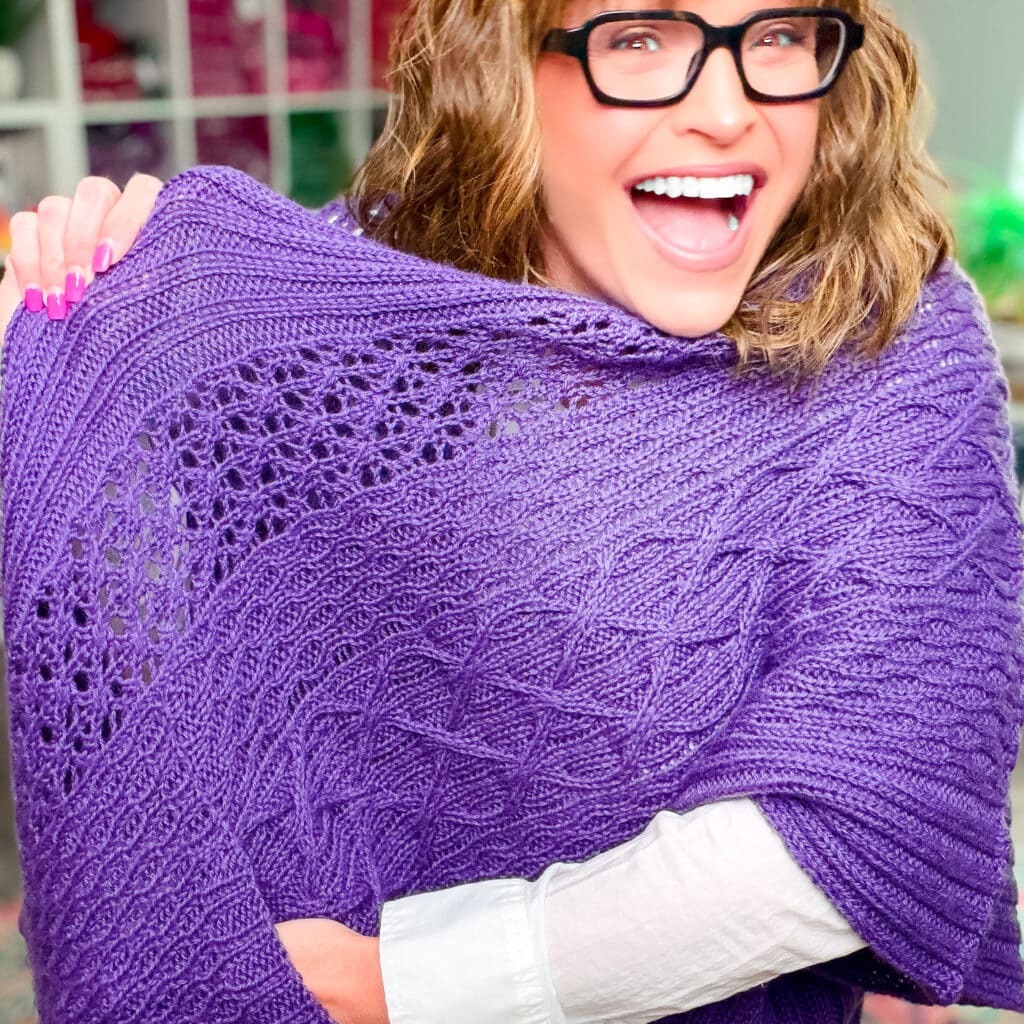
The Sycamore Ruana is a pattern that rewards careful, thoughtful knitting — the kind of project that teaches you something new with every row and results in a wearable you'll treasure for years. The lace and cables balance visual interest with the practical ease of a ruana shape, and those built-in pockets? Pure genius.
If you cast it on, please please please share your progress with me! Tag me @marlybird on Instagram or Facebook and use #MMMDI (Marly Made Me Do It), #MarlyBird, or #SycamoreRuana so I can see your beautiful makes. 💛
❤️ Your BiCrafty Bestie,
Marly Bird

Categories: Free Patterns, Knitting, Marly Bird Premium Patterns, Our Free Patterns, Pattern