
Big Bear || Free Crochet Stuffed Animal Pattern
MarlyBird.com’s free crochet stuffed animal pattern is perfect for adventurous beginners! So, look no further if you want that special, squishable stuffed animal for your next crochet project! Using chunky blanket yarn, a big crochet hook, easy-to-follow instructions, and cuteness to a level 10 make this project a wonderful first amigurumi pattern.
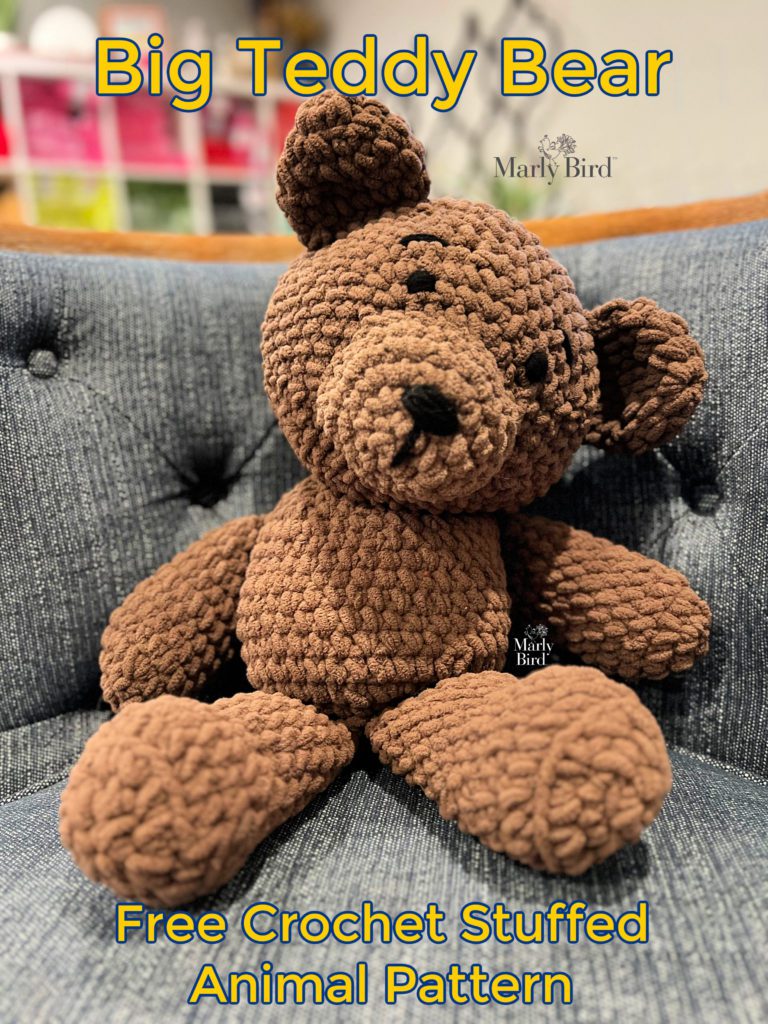
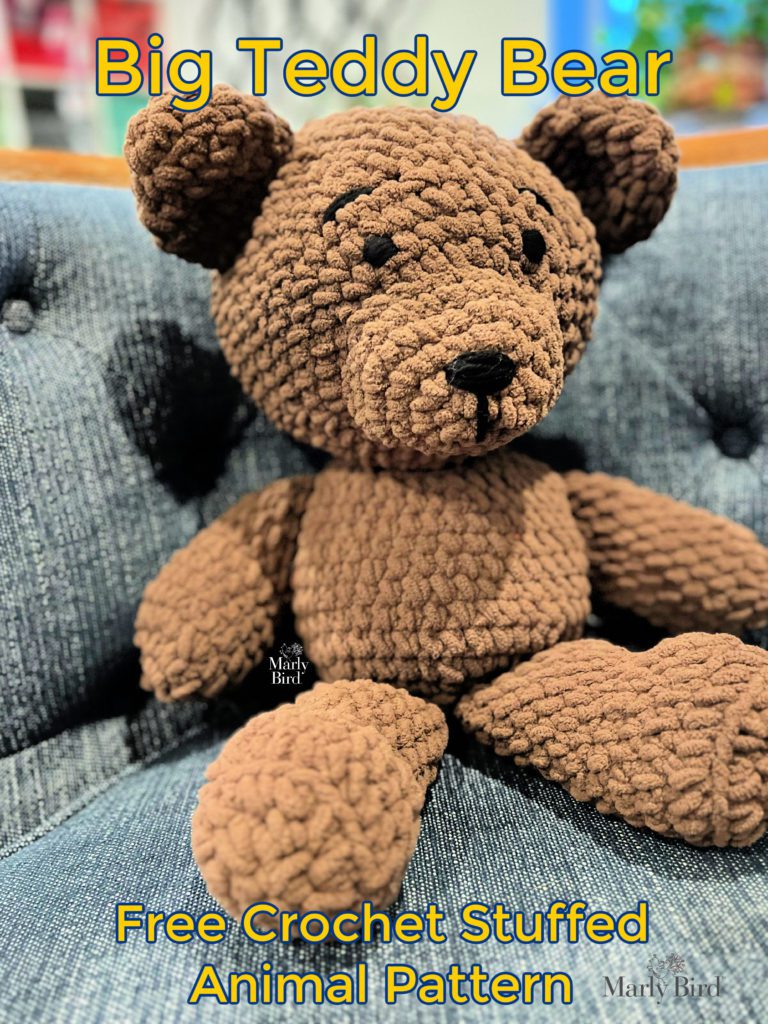
This classic crochet teddy bear pattern is about 19 inches tall (bottom of paws to top of head), the perfect size for pretty much any age if you are looking to gift this sweet big guy. I love how perfectly cuddly he is! Although it’s a great pattern for adventurous beginners, even a determined beginner can make this work.
Read more: Big Bear || Free Crochet Stuffed Animal Pattern*THIS POST CONTAINS AFFILIATE LINKS. BY CLICKING ONE OF THESE LINKS AND MAKING A PURCHASE A SMALL PORTION COMES BACK TO THE BLOG. THE PRICE YOU PAY WILL NOT CHANGE. THANK YOU FOR YOUR SUPPORT OF THE BLOG.*
Make him in your favorite blanket yarn (we used Bernat Blanket). Yes, our crochet teddy bear is brown, but you can make yours ANY COLOR!
This project should whip up pretty quickly if you’d like to make him as a gift.

Big Teddy Bear || Free Crochet Stuffed Animal Pattern
Designed by Michele Wilcox for MarlyBird.com
SKILL LEVEL
Adventurous Beginner
MEASUREMENTS
Finished Measurements
Teddy Bear is 10” [25.5 cm] wide by 19” [48.5 cm] tall from bottom of foot to top of head.
Gauge
8 sc by 8 rounds = 4” [10 cm] x 4”[10 cm]; use any size hook to obtain the gauge.
MATERIALS
Yarn
Bernat, Blanket (100% Polyester, 220 yds / 201 m, 10.5 oz/ 300 g, CYCA# 6 super bulky) — get it from Michaels!
Color A: Taupe, 2 skeins
Red Heart Super Saver (100% acrylic, 364 yds / 333 m, 7 oz/ 198 g, CYCA# 4 worsted)
Color B: Black, 5 yds for embroidery
Hook
Size L/11 (8.0 mm)
Notions
- Large Steel Tapestry Needle
- Polyester Fiberfill
- Straight Pins (to hold pieces while sewing to body)
- Stitch markers
ABBREVIATIONS
Ch – Chain(s)
RS – Right Side
Sc – Single Crochet
Sc2tog – Single Crochet Two Together
Sl st – Slip Stitch
Sp(s) – Space(s)
St(s) – Stitch(es)
Tch – Turning Chain
WS – Wrong Side
Yo – yarn over
SPECIAL STITCHES
Single Crochet 2 Together (sc2tog): *Insert hook into indicated stitch, yarn over and pull up a loop; repeat from * in next stitch indicated, yarn over and draw through all 3 loops on hook. (1 decrease)
NOTES
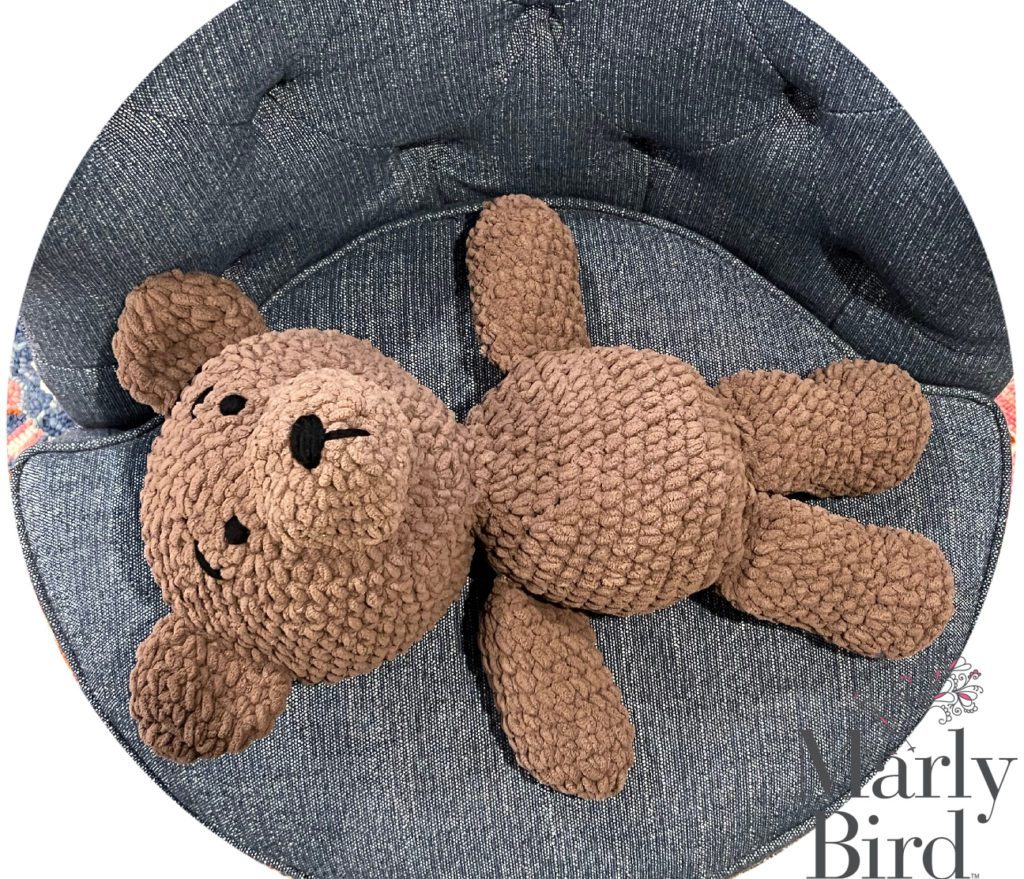
- Teddy bear is worked in pieces and seamed together. Details are added last.
- Body parts are worked in continuous spiral rounds that are not joined at the end of the round.
- Use a stitch marker to mark the first stitch of each new round throughout project.
- Try using the yarn under instead of yarn over when working the stitches for a tighter stitch and a slightly different look.
BIG TEDDY BEAR || FREE CROCHET STUFFED ANIMAL PATTERN
HEAD
Note: The head is worked from the nose at the increasing rounds and through the back of the head while decreasing.
With A, ch 2.
Round 1: 6 sc in 2nd ch from hook, do not turn–6sc.
Round 2: 2 sc in each sc around, do not turn– 12 sc.
Round 3: 2 sc in each sc around, do not turn– 24 sc.
Round 4: *2 sc in next sc, sc in next 3 sc; repeat from * around, do not turn– 30 sc
Round 5: Sc in next 2 sc, *2 sc in next sc, sc in next 4 sc; repeat from * around to last 2 sc, sc in last 2 sc, do not turn– 36 sc
Round 6: *2 sc in next sc, sc in next 5 sc; repeat from * around, do not turn– 42 sc
Round 7: Sc in next 3 sc, *2 sc in next sc, sc in next 6 sc; repeat from * around to last 3 sc, sc in last 3 sc, do not turn– 48 sc
Round 8: Sc in each sc around, do not turn.
Round 9: *2 sc in next sc, sc in next 7 sc; repeat from * around, do not turn– 54 sc
Rounds 10-15: Sc in each sc around, do not turn.
Round 16: *Sc2tog over next 2 sc, sc in next 7 sc; repeat from * around, do not turn– 48 sc.
Round 17: Sc in next 3 sc, *sc2tog over next 2 sc, sc in next 6 sc; repeat from * around to last 3 sc, sc in last 3 sc, do not turn– 42 sc.
Round 18: *Sc2tog over next 2 sc, sc in next 5 sc; repeat from * around, do not turn– 36 sc.
Round 19: Sc in next 2 sc, *sc2tog over next 2 sc, sc in next 4 sc; repeat from * around to last 2 sc, sc in last 2 sc, do not turn– 30 sc.
Round 20: *Sc2tog over next 2 sc, sc in next 3 sc; repeat from * around, do not turn– 24 sc.
Round 21: Sc in next sc, *sc2tog over next 2 sc, sc in next 2 sc; repeat from * around to last sc, sc in last sc, do not turn– 18 sc.
Stuff the teddy bear’s head with fiberfill.
Round 22: *Sc2tog over next 2 sc, sc in next sc; repeat from * around, do not turn– 12 sc.
Round 23: *Sc2tog over next 2 sc; repeat from * around, do not turn, fasten off leaving long tail– 6 sc.
Weave tail through the stitch on the last round, pull tight to close hole. Weave in ends.
MUZZLE
With A, ch 4.
Round 1: 2 sc in 2nd ch from hook, sc in next ch, 3 sc in last ch, (beg work in free loops of foundation chain), sc in next 2 ch, do not turn–8 sc.
Round 2: [2 sc in next sc] twice, sc in next sc, [2 sc in next sc] 3 times, sc in next sc, 2 sc in next sc, do not turn – 14 sc.
Round 3: *[2 sc in next sc] twice, [sc in next sc, 2 sc in next sc] twice, sc in next sc; repeat from * once more, do not turn – 22 sc.
Round 4: *2 sc in next sc, sc in next 2 sc, 2 sc in next sc, sc in next sc, 2 sc in next sc, sc in next 3 sc, 2 sc in next sc, sc in next sc; repeat from * around, do not turn – 30 sc.
Round 5: Sc in each sc around, fasten off.
Lightly stuff and sew to head over beginning rounds.
With color B, satin stitch embroider nose onto muzzle. Satin stitch embroider eyes onto head using photo as guide. Straight stitch embroider both mouth and eyebrows.
BODY
Note: Body is worked from the bottom at the increasing rounds through the top while decreasing.
With A, ch 2.
Round 1: 6 sc in 2nd ch from hook, do not turn–6sc.
Round 2: 2 sc in each sc around, do not turn– 12 sc.
Round 3: 2 sc in each sc around, do not turn– 24 sc.
Round 4: *2 sc in next sc, sc in next 3 sc; repeat from * around, do not turn– 30 sc
Round 5: Sc in next 2 sc, *2 sc in next sc, sc in next 4 sc; repeat from * around to last 2 sc, sc in last 2 sc, do not turn– 36 sc
Round 6: *2 sc in next sc, sc in next 5 sc; repeat from * around, do not turn– 42 sc
Rounds 7-14: Sc in each sc around, do not turn.
Round 15: *Sc2tog over next 2 sc, sc in next 5 sc; repeat from * around, do not turn– 36 sc.
Round 16: Sc in next 2 sc, *sc2tog over next 2 sc, sc in next 4 sc; repeat from * around to last 2 sc, sc in last 2 sc, do not turn– 30 sc.
Round 17: *Sc2tog over next 2 sc, sc in next 3 sc; repeat from * around, do not turn– 24 sc.
Round 18: Sc in next sc, *sc2tog over next 2 sc, sc in next 2 sc; repeat from * around to last sc, sc in last sc, do not turn– 18 sc.
Stuff teddy bear’s body with fiberfill.
Round 19: *Sc2tog over next 2 sc, sc in next sc; repeat from * around, do not turn– 12 sc.
Round 20: *Sc2tog over next 2 sc; repeat from * around, do not turn, fasten off leaving long tail– 6 sc.
Weave tail through the stitch on the last round, pull tight to close hole. Weave in ends.
Sew body to head firmly by whipstitching around head twice. Make head floppy or firm as desired.
EARS
Make 2
With A, ch 2.
Round 1: 6 sc in 2nd ch from hook, do not turn–6sc.
Round 2: 2 sc in each sc around, do not turn– 12 sc.
Round 3: *2 sc in next sc, sc in next sc; repeat from * around, do not turn– 18 sc.
Rounds 4 – 5: Sc in each sc around, do not turn.
Round 6: *Sc2tog over next 2 sc, sc in next sc; repeat from * around, fasten off– 12 sc.
Do not stuff; flatten ear. Sew ear bottom closed. Using photo as a guide, sew ears to head.
ARMS
Make 2
With A, ch 2.
Round 1: 6 sc in 2nd ch from hook, do not turn–6sc.
Round 2: 2 sc in each sc around, do not turn– 12 sc.
Round 3: *2 sc in next sc, sc in next sc; repeat from * around, do not turn– 18 sc.
Rounds 4 – 11: Sc in each sc around, do not turn.
Stuff arm. Pinch opening closed and whipstitch. Using photo as a guide, sew arms to body.
LEGS
With A, ch 2.
Round 1: 6 sc in 2nd ch from hook, do not turn–6sc.
Round 2: 2 sc in each sc around, do not turn– 12 sc.
Round 3: 2 sc in each sc around, do not turn– 24 sc.
Round 4: Sc in back loop of each sc around, do not turn.
Rounds 5-6: Sc in each sc around, do not turn.
Round 7: [Sc2tog over next 2 sc] 6 times, sc in each sc around, do not turn– 18 sc.
Rounds 8-14: Sc in each sc around, do not turn.
FINISHING
Fasten off. Stuff leg. Pinch leg closed and whip stitch. Using photo as guide, sew legs to body.
Frequently Asked Questions
How big is the finished Big Bear?
This is a BIG guy… that’s the whole point! The finished bear is large enough to be a serious cuddle buddy for kids (and let’s be honest… adults too). The exact size depends on your yarn and gauge, but using the recommended yarn and hook size, you’ll end up with a substantial stuffed animal that makes an unforgettable gift. Check the pattern for specific measurements, but expect something you can really hug.
What yarn do I need for this crochet teddy bear?
You’ll want a worsted or bulky weight yarn that’s smooth and easy to work with. Since this is a big project, choose something affordable that you can buy in large quantities. Acrylic is a great choice… it’s machine washable (important for anything a kid is going to love on), widely available, and comes in classic teddy bear colors. Bernat Blanket or similar soft, plush yarns give the bear an extra cuddly feel if you want to go that route.
Is this pattern good for someone new to amigurumi?
It’s actually a really good intro to amigurumi because the pieces are large! Bigger pieces are easier to work with than tiny detailed ones… you can see your stitches clearly, counting is simpler, and the assembly is less fiddly. If you can single crochet in the round and do basic shaping (increases and decreases), you can make this bear. The size makes it more forgiving than small, detailed amigurumi where every stitch shows.
What stuffing should I use for a big crochet bear?
Polyester fiberfill is the standard… it’s lightweight, hypoallergenic, washable, and it holds its shape. For a bear this size, you’ll need more stuffing than you think! Buy a big bag. Stuff firmly but not so tight that the filling shows through your stitches. Some people add weighted pellets in the bottom to help the bear sit upright… just make sure they’re in a sealed inner pouch, especially if the bear is for a child.
How long does it take to crochet a big teddy bear?
Plan for a solid week or two of stitching… this isn’t a one-evening project because of the sheer size. The body and head are the biggest time investment. The arms, legs, and ears go faster since they’re smaller. Assembly and finishing (attaching all the parts, adding the face, weaving in ends) takes some patience too. But when you’re done… you’ll have something truly special that could become a kid’s best friend for years. Totally worth the time.
Categories: Crochet, Free Patterns, Marly Bird Premium Patterns, Our Free Patterns, Pattern


I’ve search for 2 days for the button that says “download pdf here” but came up empty both days. What did I do wrong?
It was only a free pdf for a limited time. Now it is only a free pattern on the website.
Going to give this a try . Thank you so much
Thank you for the teddy bear pattern. I’m an adventurous beginner in making stuffed animals. Can’t wait to try it.