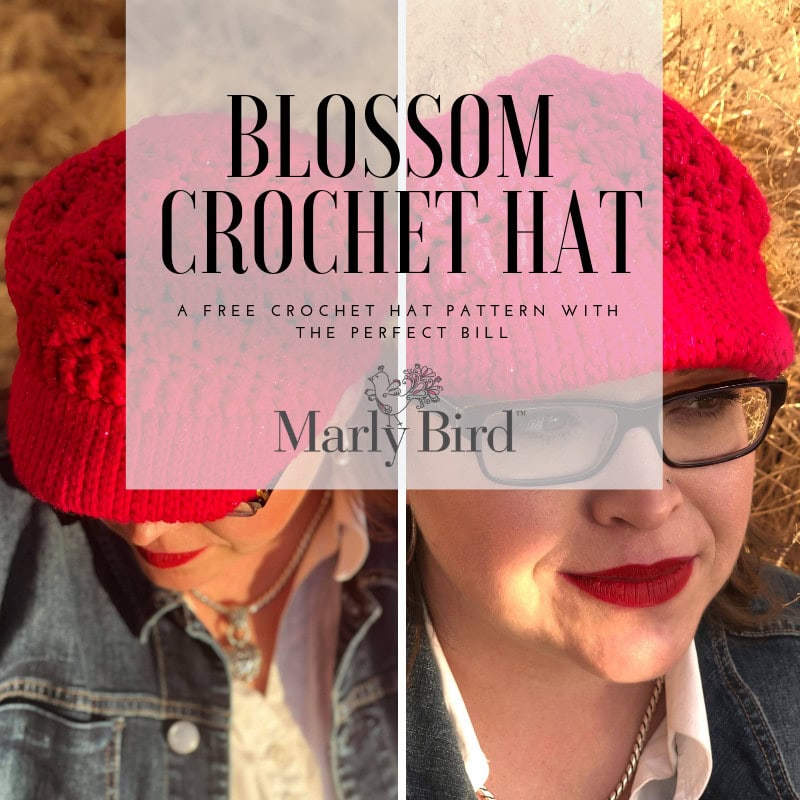
Blossom Crochet Hat-Crochet Hat with Bill
Get a Free Crochet Hat Pattern with the perfect bill! The Blossom Crochet Hat pattern is a fun project to crochet. It does take a bit more time than a simple double crochet messy bun hat but it is worth it! Expand your crochet skills and learn how to make this hat pattern in a full crown or as a messy bun hat.
WE love making crochet hats with a bill here on the Marly Bird website. Here are a few free ones here: Ribbed for Him and Her Crochet Hat with a bill or maybe you like the All About It newsboy hat. We know you will love these hats!
First question everybody has is, “what did you add to the bill to make it an actual stand out?” The answer to that is NOTHING! The unique construction of the bill allows it to extend from the forehead as one is intended to do.
Learn how to make this wonderful hat that only uses 1 ball of Red Heart, With Love Metallic yarn. Because it uses only 1 ball of yarn, this project is not only cute but cheap to make! And it’s a great gift for your loved one, a great addition to your craft fair wares, and a great addition to your own wardrobe.
Add to favorites and Queue the Blossom Crochet Hat Pattern on Ravelry
**this post includes affiliate links**
Pattern Details for Blossom Crochet Hat
Finished Circumference: 18.5, 20.25, 22, 23.75” around at base of hat.
Sizes: Baby, Child, Adult Small, Adult Large
Gauge
17 sts = 5″ [10 cm] in fpdc, bpdc pattern.
6 slip sts = 1” [2.54 cm] and 17 rows = 2” [5 cm] in slip stitch pattern
Materials for Blossom Crochet Hat
Yarn
[4 Medium] RED HEART® With Love™ Metallic, Art. E400BM available in solid 4.5 oz (127 g), 200 yd (183 m) and prints 4 oz (113 g), 152 yd (139 m) balls.
● Color used in sample: Fuschia 1 ball — 8922 Fuchsia
Crochet Hook
Susan Bates® Crochet Hook: 3.75 mm [US F/5]
Notions
Removable Stitch Markers (learn to how to make your own stitch markers)
Bent Tip Tapestry Needle
Notes
● Make all slip stitches on bill through back loop only (TBLO).
● When going to the body of the hat work through both loops.
Stitches Used (and YouTube Video links to help you learn)
● Chain Stitch (ch)
● Slip Stitch (Sl St)
● Through Back Loop Only (TBLO)
● Through Front Loop Only (TFLO)
● Front Post Double Crochet (FPDC)
● Back Post Double Crochet (BPDC)
● Front Post Double Crochet Two Together (FPDC2Tog)
Special Stitches
Foundation Half Double Crochet (as worked in this pattern): yarn over (yo) hook, insert hook stitch/space indicated, yo and pull up a loop, yo draw through one (this is the chain of the foundation chain), three loops remain on hook, yo, draw through 3. One Foundation Half Double Crochet completed.
Standing Double Crochet: Place slip knot on your hook, yarn over, insert hook into indicated stitch, yarn over and pull up a loop on to your hook. (3 loops on your hook) [Yarn over and draw through 2 loops on your hook] twice.
V-st: (Dc, ch 2, dc) in stitch or space indicated.
Stacked Double Crochet (Stacked Dc): (Do not ch 1 prior to making the first sc) Sc in first stitch/space, insert hook in between two legs of the base, yarn over and pull up a loop, yarn over and draw through 2 loops on hook.
Beginning Stacked Dc2tog: In ch-1 space, (Do not ch 1 prior to making the first sc) sc, insert hook in between two legs of the base, yarn over and pull up a loop (2 loops on hook), yarn over hook, insert hook in next ch-1 space, yo pull up a loop (4 loops on hook), yo draw through 2 loops on hook (3 loops on hook), yo draw through 3 loops on hook.
Pattern for Blossom Crochet Hat
Bill of hat
Chain 6, slip stitch (sl st) in the 2nd chain from hook through back loop only (TBLO) and in each chain TBLO to end, ch 1, turn –5 slip stitches.
Place a marker in the middle stitch.
Row 2 (increase row): Slip stitch in each stitch TBLO to 1 stitch BEFORE the marker, sl st TBLO TWICE in next stitch (this is the stitch before marker), sl st TBLO in marked stitch, move marker to newly made middle stitch, sl st TBLO TWICE in next stitch, sl st TBLO to end of row, ch 1, turn–7 slip stitches (2 stitches increased).
Row 3: Slip stitch in each stitch TBLO to marked stitch, sl st in marked stitch, move marker to newly made middle stitch, sl st in each stitch TBLO to end of row, ch 1, turn.
Repeat rows 2 and 3 5 (6, 7, 8) times– 17 (19, 21, 23) stitches. Continue to move middle stitch marker up each row.
Repeat Row 3 approximately 35 (37, 39, 41) times. (48, 52, 56, 60 rows total), or until the piece measures 4.25 (4.5, 5, 5.25)” from the 2nd marker, then remove the 2nd marker. Continue to move stitch marker up on each row.
Row 1 (decrease): Slip stitch in each stitch TBLO to 1 stitch before center marked stitch, skip next stitch, sl st in center marked stitch, move marker to newly made middle stitch, skip next stitch, sl st in each stitch TBLO to end of row, ch 1, turn– 15 (17, 19, 21) stitches (2 stitches decreased).
Row 2: Slip stitch in each stitch TBLO to marked stitch, sl st in marked stitch, move marker to newly made middle stitch, sl st in each stitch TBLO to end of row, ch 1, turn.
Repeat rows 1 and 2 5 (6, 7, 8) times — 5 stitches remain. Do NOT fasten off.
1st Finishing
Fold piece in half, working only into edge of every other row, sl st to close piece.- 30 (33, 36, 39) stitches.
UnCuff of Hat
Note: You need to know the number of stitches you have after the join because you will subtract that number from the total number of stitches you need for the hat. This will result in the number of stitches you need to work for the foundation hdc for the body of the hat. I needed a total of 78 sts for the sample hat shown which is an Adult Medium size. I had a total of 36 sts after finishing my bill, so 78-36= 42 sts I need to make for the body of my hat.
Rnd 1: Continue working from the slip stitches used to fold brim, work 36 (39, 42, 45) foundation half double crochet, then, working into the first slip stitch of the brim, join to work in the round by doing a half double crochet through front loop only (TFLO) of the sl sts that closed the brim to the end, join with a slip stitch into the first foundation half double crochet.
Do Not Turn—66 (72, 78, 84) hdc.
Rnd 2: Ch 2 (does not count as a stitch), front post double crochet (FPDC) around the first stitch (this is the stitch you just joined to with a slip stitch), back post double crochet (BPDC) around next stitch, * FPDC around next stitch, BPDC around next stitch; repeat from * to end of the rnd, join with a slip stitch into the first FPDC. Do Not Turn.
Repeat rnd 2 once more. Fasten off.
Mark the 18th (19th, 21st, 22nd) stitch from the joining point of the cuff. This should be approximately the center back of the cuff.

GROW
To Unlock Exclusive Subscriber Content click the Box below and join for free by simply adding your email and creating a password! If you are having troubles, clear your cache or reset your password or login to the Grow Publisher Portal.
>> Learn More About Grow Here <<
I’m thrilled to share this amazing pattern with you, many patterns on my blog are absolutely free! I kindly request that you don’t copy and paste or distribute this pattern. Prefer an ad-free experience? Buy a digital PDF pattern for a small fee from one of my online stores for a seamless crafting journey.
I appreciate your support and readership. You are the reason I can keep doing what I love and sharing it with others. So, thank you from the bottom of my yarn-loving heart! Disclosure: This post contains affiliate links, meaning I get a commission if you decide to make a purchase through my links at no cost to you.


