
Crochet Spa Headband Pattern — Free, Quick, and Perfect for Gift-Giving
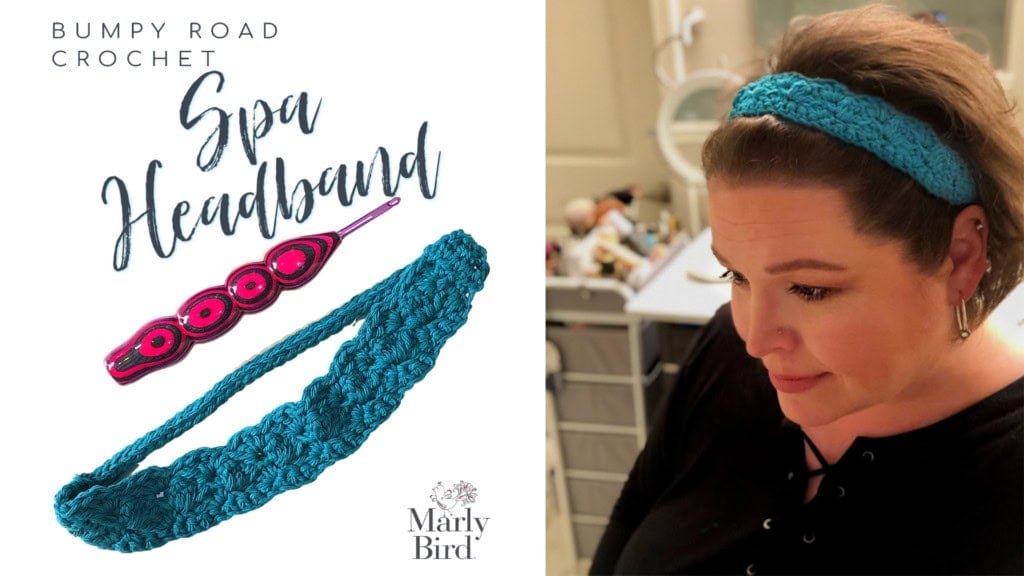
The Crochet Spa Headband is a free quick crochet pattern designed by Marly Bird in worsted-weight cotton yarn. Finished size is 21.5″ circumference and 1.25″ wide, perfect for holding your hair back during facials, makeup application, and skincare routines. This is a beginner-friendly pattern that takes about 1 hour to complete, making it ideal for quick gifts or as a self-care project for your own beauty routine.
✏️ Last updated: June 2026 — full framework rebuild with new pattern sections, care instructions, and expanded FAQ.
Honestly, this might be the most practical quick crochet project you'll make all year. You'll be making these in every cotton color in your stash… and then reaching out to yarn-loving friends asking for more colors to stock up on. They're that useful.
Hey, Bestie 💛
*This post contains affiliate links. By clicking on one of these links and making a purchase, a portion will go to the blog. The price you pay will not change, and the small commission I receive helps me keep bringing you free content and giveaways on the blog. Thank you for your continued support.*
⚡ Quick Answer:
The Crochet Spa Headband is a free pattern that takes about 1 hour in worsted cotton with a size G hook. It's beginner-friendly, finished at 21.5″ around and 1.25″ wide, and uses a bumpy stitch texture that looks beautiful and feels great against your skin.
What You Will Love About This Pattern 💖
💚 Quick and practical: Makes in just about an hour… perfect for that last-minute gift or a weekend afternoon project.
💚 Beginner-friendly stitch work: Uses single crochet and double crochet in a simple repeating pattern… no tricky techniques here.
💚 Uses yarn you probably already have: Any worsted-weight cotton yarn will work beautifully. This is the perfect stash-buster project.
💚 Perfect for gifting: Pairs beautifully with face cloths and a nice bar of soap for a thoughtful, handmade spa-day gift. Bridal showers, baby showers, Mother's Day, teacher gifts… it fits them all.
💚 The bumpy texture is addictively tactile: Your friends won't stop running their fingers over that bumpy road stitch pattern. It's that good.
Quick Pattern Overview
The spa headband has two main parts… the body (made first) and the i-cord band that wraps around and holds everything in place. The body is worked in rows using the bumpy road stitch… a simple single crochet and double crochet repeat that creates gorgeous texture and drape. The i-cord is made using either the knitting needle method or the pinch method… both give identical results, and the video tutorial walks you through both if you've never tried this technique before.
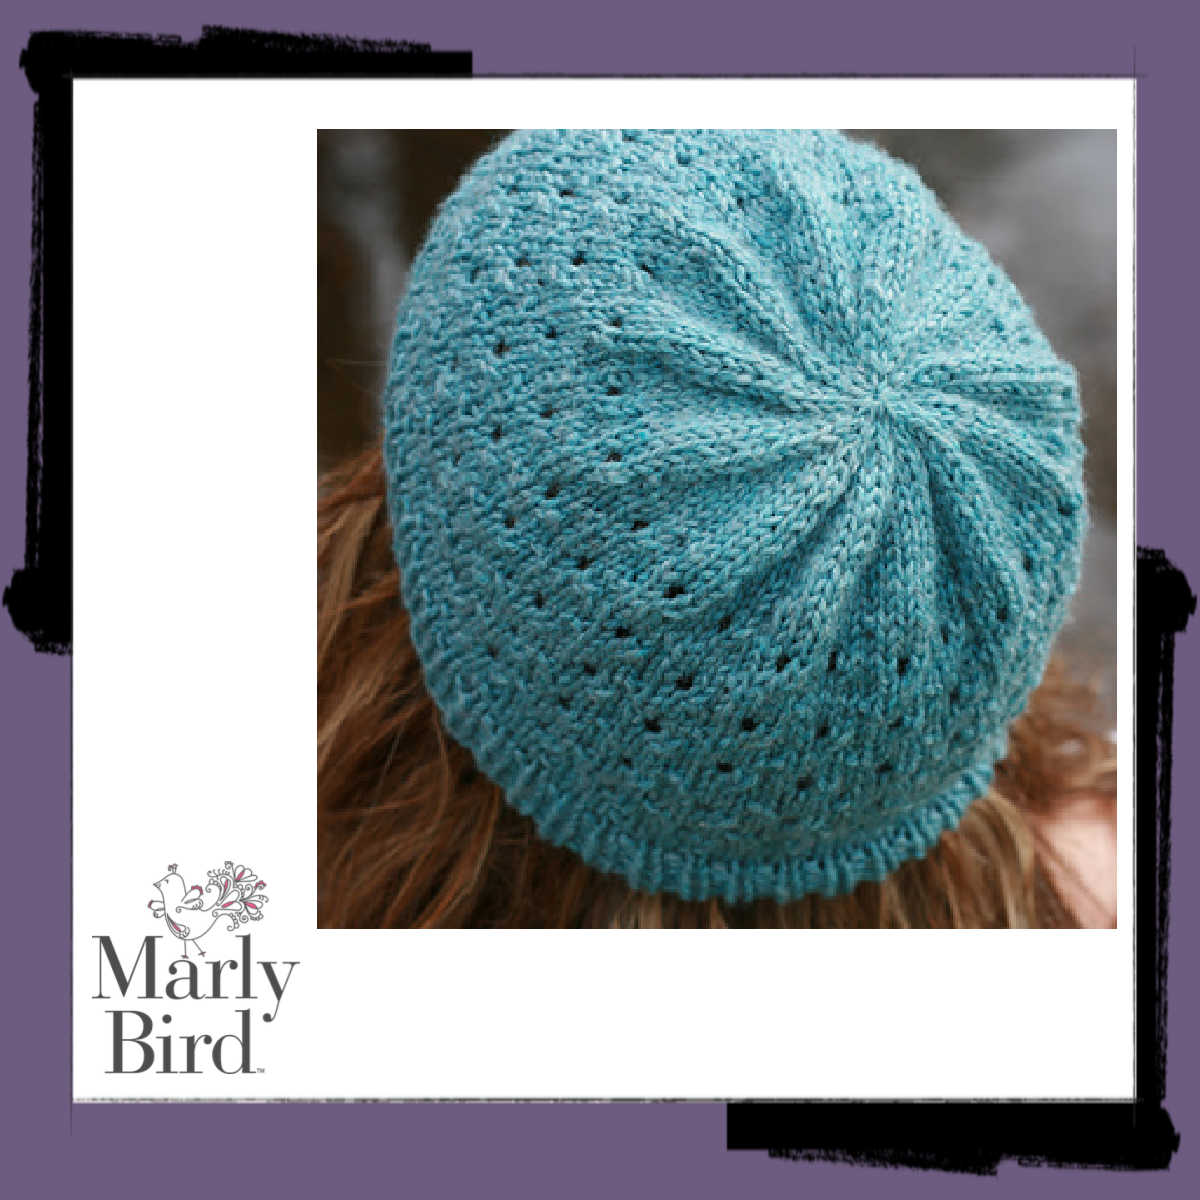
The finished size is perfectly snug… 21.5″ around with just a little gentle stretch, and the 1.25″ width sits comfortably on your forehead without being bulky. Marly made hers in a single teal color, but the bumpy pattern is textured enough that you could easily stripe colors to add even more visual interest.
Love the Pattern but Want an Ad-Free PDF? ⭐
Get the ad-free, printable PDF version… plus email access to every free pattern on marlybird.com.
Is This Crochet Spa Headband Right for You?
Skill level: Beginner. This pattern uses only chain stitch, single crochet, and double crochet. If you can chain, single crochet, and double crochet, you can make this headband. The i-cord might be new to you, but the video tutorial makes it clear and easy to follow.
Yarn preference: Worsted-weight cotton yarn is ideal here. Cotton breathes beautifully against skin and holds up wonderfully to frequent washing. Silk blends work too if you want extra luxury, but cotton is the classic choice for spa accessories.
Your speed: Love quick projects? This headband is your new best friend. One hour from yarn tail to finished gift… that's the energy we're bringing here.
Perfect if: You're shopping for spa-themed gifts, building your stash-busting project list, exploring i-cord techniques for the first time, or just want something practical for your own skincare routine that happens to look gorgeous.
Why Cotton Yarn is Perfect for Spa Accessories
So here's the thing about cotton yarn… it's the workhorse of functional accessories. Cotton breathes, doesn't hold onto moisture the way some animal fibers do, and gets softer and more beautiful every single time you wash it. That makes it absolutely ideal for something that's going directly against skin during facials or makeup routines.
For the spa headband specifically, the light weight and smooth texture of worsted cotton mean you get a headband that sits comfortably without slipping, won't irritate sensitive facial skin, and actually improves with wear and washing. This is a make-once-use-forever kind of project… the better quality yarn you choose, the longer it'll be a favorite.
Yarn & Materials
Yarn Weight: Worsted Weight / 4-Ply (CYCA #4)
Yardage Required: 100-110 yards
Recommended Yarn: Lily Sugar and Cream 100% Cotton (what Marly used in the sample photo). 2oz/56.7g per ball, 102 yards per ball. One ball is plenty.
Alternative Cotton Yarns:
| Yarn | Weight | Yardage | Best For |
| Red Heart Hempathy | Worsted | 186 yards per 100g | Hemp blend, ultra soft and breathable |
| Lily Sugar and Cream Original | Worsted | 120 yards per 2.5oz | Budget-friendly classic cotton |
| Lion Brand Cotton Ease | Worsted | 207 yards per 100g | Cotton-acrylic blend, very durable |
Hook: Size G/6 (4mm)
Optional For I-Cord: Size 7 (4.5mm) knitting needle (if you prefer the knitting needle method for the i-cord)
Notions: Yarn needle (for seaming), removable stitch marker (to hold stitches)
Crochet Spa Headband… Pattern Details
Finished Measurements
21.5″ (51.61cm) circumference / 1.25″ (3.175cm) wide
Gauge
9 stitch repeats = 10″ (25.4cm); 3 row repeats = 1″ (2.54cm) in Bumpy Road pattern. Gauge is not essential for this project since the finished size is flexible.
Special Abbreviations
CH — chain / DC — double crochet / Rep — repeat / RS — right side / SC — single crochet / SC2tog — single crochet two together / St(s) — stitch(es) / WS — wrong side
Pattern Notes
The stitch multiple is 4 (+2 for chain). Work row 1 in back bump of the chain stitch to create a nice edge. The body is made first, then the headband band is made along the side edge of the body. Make the i-cord a little bit smaller than head circumference to account for the stretch when wet.
Crochet Spa Headband… Pattern Instructions
Body
Chain 38
Row 1 (WS): Sc in 2nd ch from hook in the back bump of the ch and in each ch to end. Ch 1, turn — 37 sc.
Row 2 (RS): (Sc, 3 dc) in first st, *skip next 3 sc, (sc, 3 dc) in next sc; rep from * to last 4 sts, skip 3 sc, sc in last sc. Ch 1, turn — 9 (sc, 3 dc) sets, 1 sc.
Row 3 (WS): (Sc, 3 dc) in first st, *skip next 3 dc, (sc, 3 dc) in next sc; rep from * to last 4 sts, skip 3 dc, sc in last sc. Ch 1, turn.
Row 4 (RS): (Sc, 3 dc) in first st, *skip next 3 dc, (sc, 3 dc) in next sc; rep from * to last 4 sts, skip 3 dc, sc in last sc. Ch 1, do NOT turn.
Headband
Rotate body 90 degrees, continue working along the side edge of the body.
Row 1 (RS): 4 sc evenly along edge, slip stitch into 1st chain of foundation chain (counts as a stitch). Ch 1, turn — 5 sts.
Row 2 (WS): Sc2tog, sc in next sc, sc2tog. Turn — 3 sc.
Crochet I-Cord
Row 1 (RS): *Insert hook into sc, yo, pull up a loop; repeat from * in next two sc — 4 loops on hook.
Watch the video tutorial below if you've never done a crochet i-cord before. You have two method options… the knitting needle method or the pinch method. Both give identical results, so pick whichever feels more natural to you!
Knitting Needle Method
Row 2: Transfer all the loops to the knitting needle, place a removable stitch marker in first loop (we will come back to this later), transfer 1 loop back to your hook, ch 1, transfer next loop to your hook, yarn over and pull up loop onto hook, transfer last loop onto your hook, yarn over and pull up loop onto hook — 3 loops on hook.
Row 3: Transfer 2 loops onto the knitting needle, with last loop on hook, ch 1, transfer 1 loop back onto the hook, yarn over and pull up a loop onto the hook, transfer last loop back onto the hook, yarn over and pull up a loop onto the hook — 3 loops on hook.
Repeat Row 3 until i-cord measures 11″ (27.94cm) or until the headband just about fits around the head slightly pulled; adjust as necessary.
Place last row of loops onto a stitch marker to hold while finishing.
Pinch Method
Row 2: Remove hook (yes, it is super odd feeling, but go with it! The loops will flop all over the place), place stitch marker in first loop and set aside (we will come back to this later), insert hook into second loop, yarn over (it is more like scooping then a true yarn over) and pull up loop onto hook, insert hook into next loop, yarn over and pull up loop onto hook, insert hook into last loop, yarn over and pull up loop onto hook — 3 loops on hook.
Row 3: Pinch bottom of loops, remove hook (yes, we do this again), insert hook into first loop, yarn over (it is more like scooping then a true yarn over) and pull up loop onto hook, insert hook into next loop, yarn over and pull up loop onto hook, insert hook into last loop, yarn over and pull up loop onto hook — 3 loops on hook.
Repeat Row 3 until i-cord measures 11″ (27.94cm) or until the headband just about fits around the head slightly pulled; adjust as necessary.
Place last row of loops onto stitch marker to hold while finishing.
Finishing
Place loop with stitch marker through it (the one we put on hold) onto hook. Looking at the back side of the i-cord where it appears to have long strands (from the last stitch of the i-cord to the first stitch) or ladders, insert hook under first long strand and draw through loop on hook, *hook next long strand (there is a long and short for each row, grab the long one), pull through loop on hook; repeat from * to the end of the i-cord. Place last loop on same stitch holder as last row of loops — 4 loops on holder.
Place the 4 loops on hook with working yarn at hook edge, do not turn.
Row 1 (RS): Ch 1, *yarn over hook, draw through 2 loops on hook; repeat from * twice more. Ch 1, do not turn — 1 loop on hook.
Row 2 (RS): 2 sc in first bump, sc in next bump, 2 sc in last bump — 5 sc.
Fasten off leaving a 10″ (25.4cm) tail.
Thread the tail onto a tapestry needle and with the RS of the body and headband facing towards you, meet the side edge of the body not yet worked into to the final row of the headband. Seam together.
Video Tutorial
Watch the complete Bumpy Road Crochet Spa Headband video tutorial for a visual walkthrough of every step. The video is especially helpful if you've never tried the i-cord technique before… seeing it in action makes all the difference.
Care Instructions
Cotton yarn is wonderfully easy to care for. Machine wash your spa headband in warm water on a gentle cycle with like colors, then lay flat to dry or tumble dry on low heat (heat helps cotton soften even more over time). The bumpy texture won't snag or pill… it'll just get softer and more beautiful with every wash.
More Free Crochet Patterns You'll Love
Looking for more quick crochet gifts that pack a punch of practicality? Check out these fan-favorite patterns…
- Free Crochet Dishcloths & Washcloths — pair them with the spa headband for the ultimate self-care gift set
- Free Crochet Patterns Library — browse all of Marly's free patterns by difficulty and category
- Quick & Easy Crochet Projects — more one-hour wonders for your project list
Frequently Asked Questions
Can I make this headband for gifts?
Oh goodness yes! This crochet spa headband is such a thoughtful gift. You can make them in every color of cotton yarn you have in your stash. They make wonderful bridal shower gifts, baby shower gifts for mom, Mother's Day gifts, or just a special “just because” gift for a friend. Pair a few headbands with some cute face cloths and a nice bar of soap to make an absolutely gorgeous spa-themed gift set.
How long does this headband take to make?
Honestly… this entire crochet spa headband took Marly a little more than 1 hour to make. So yes, it's a super quick crochet gift that you can whip up in no time! If you're still learning the i-cord technique, you might want to budget about 90 minutes for your first one… but once you get the hang of it, you'll be flying through them.
What kind of yarn should I use for this headband?
So here's the thing… cotton yarn is absolutely the star here. Cotton breathes beautifully against skin, holds up wonderfully to frequent washing (it actually gets softer), and is perfect for anything touching your face. The sample was made in Lily Sugar and Cream, but any worsted-weight cotton yarn will work perfectly. You can also try cotton-blend yarns or even linen blends if you want to experiment.
What if I've never done an i-cord before?
Great question! The video tutorial walks you through both the knitting needle method and the pinch method step-by-step. You've got options, so pick whichever sounds more appealing to you. Both create the same beautiful elastic band that holds the headband snugly in place. The i-cord technique opens up SO many pattern possibilities once you've learned it… it's totally worth exploring.
Can I make this headband in a different size?
Yes! The size is super flexible because the i-cord band stretches. If you're making for someone with a smaller head, you can shorten the i-cord to about 10″ instead of 11″. For a larger head, extend it to 12″. Just test the fit as you go… you want the headband to sit snugly when gently stretched. Marly recommends making the i-cord a little bit smaller than actual head circumference to account for the stretch when wet.
Can I make this in a striped color pattern?
Absolutely! The bumpy road stitch pattern is textured enough that color changes really pop. You could stripe every 2-3 rows, or switch colors with each section (body, headband band, i-cord). Just cut and rejoin yarn as you switch colors, and weave in those ends as you go. The texture will keep the whole thing looking cohesive even with multiple colors.
What makes the bumpy road stitch pattern so special?
Honestly, it's the single crochet and double crochet combination. The single crochets create little anchor points, and the triple double crochets give texture and height. Together they create that beautiful bumpy surface that's both gorgeous to look at AND incredibly tactile to touch. This stitch pattern would work beautifully in other projects too… washcloths, amigurumi bases, garment panels… once you try it, you'll want to use it everywhere.
Final Thoughts
The Crochet Spa Headband is proof that sometimes the best gifts are the ones that are actually useful. This little pattern delivers beauty, practicality, and satisfaction… all in under an hour. Make a few in different colors, tuck them into spa gift sets, or keep one for yourself and rotate through them during your skincare routine. They're that good.
❤️ Your BiCrafty Bestie,
Marly Bird

Categories: Crochet, Our Free Patterns, Pattern, YouTube Video Tutorial



I was just thinking I wanted to make some small headbands with a small strap on the bottom so it doesn’t overwhelm my short hair style. THIS IS PERFECT!!