
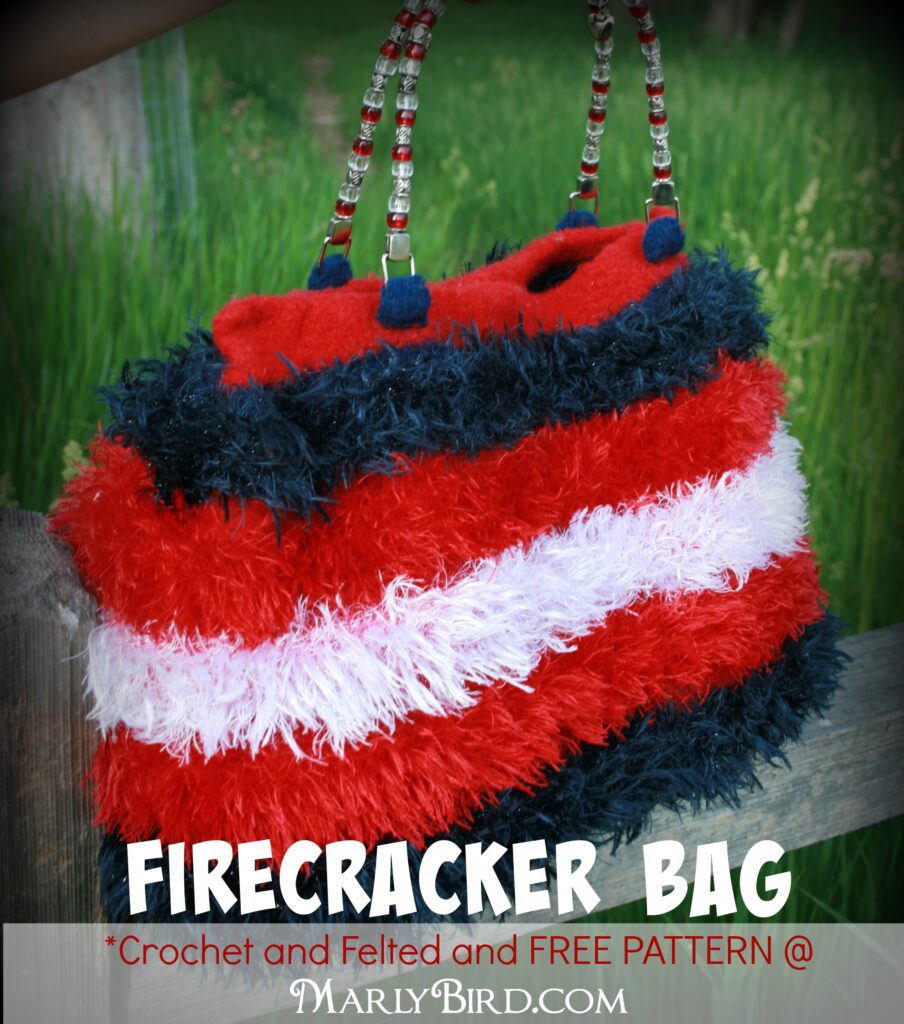
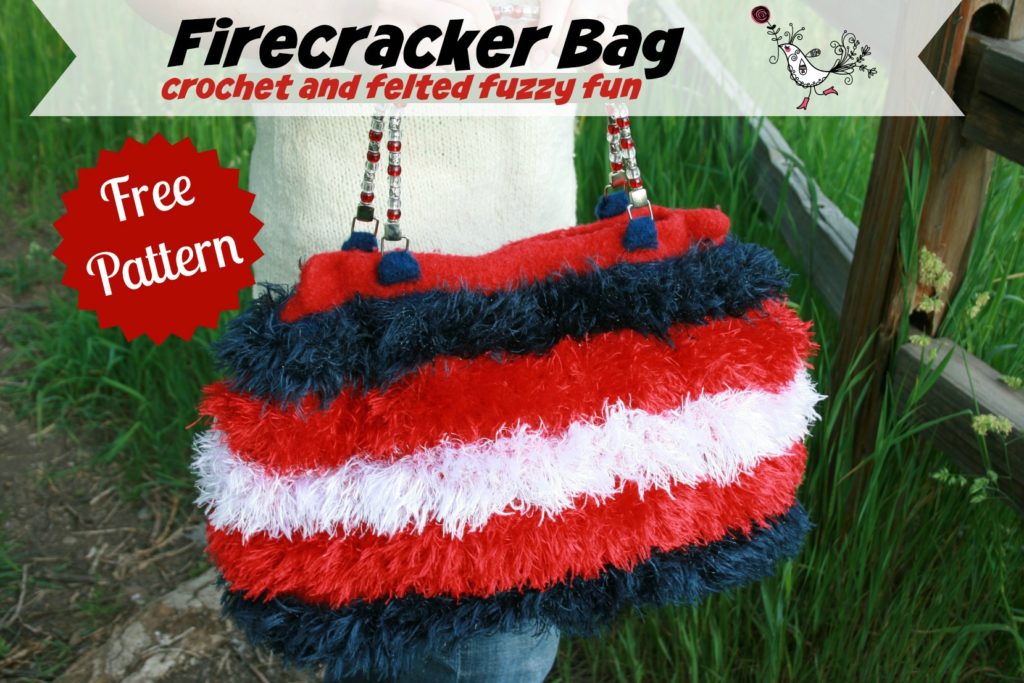
Firecracker Felted Crochet Bag – Patriotic Crochet Project for Beginners
Ignite Your Crochet Passion with the Firecracker Bag! Are you ready for a crochet project that’s as fun to make as it is to show off? I’m excited to share the pattern for the Firecracker Crochet Felted Bag – a fabulous accessory that’s perfect for patriotic holidays or any day you want a pop of color (or red, white, and blue). Crochet felting combines the beauty of crochet with the unique texture of felting, and this bag is sure to turn heads!
Disclaimer, Affiliate Links Used in this post so I can make some money and give you a pattern for FREE
The Firecracker Crochet Felted Bag: A Burst of Color and Texture
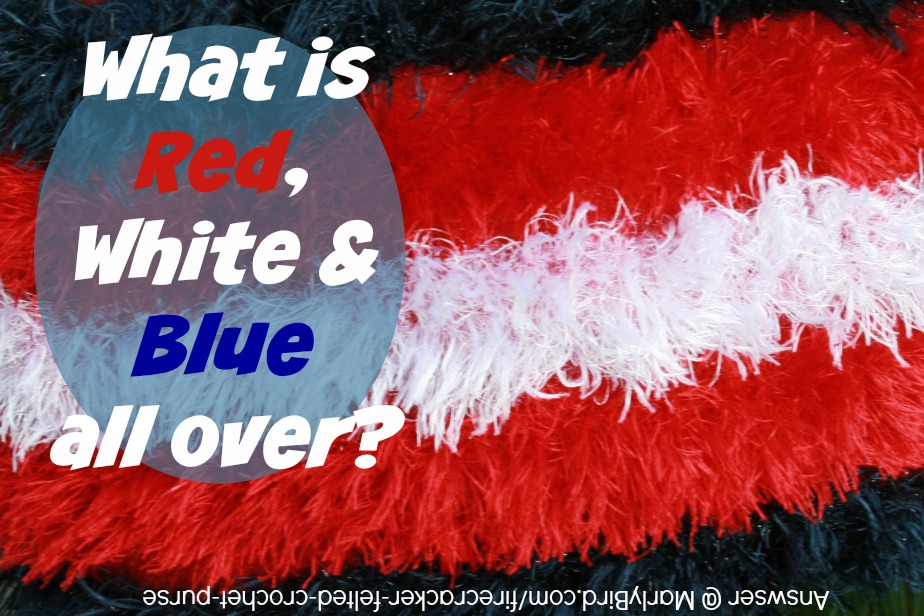
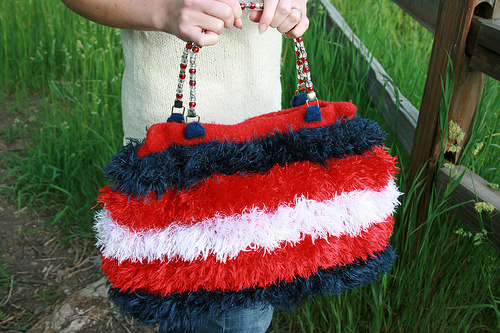
This isn’t just any crochet bag; it’s a statement piece that celebrates bold colors and textures. With its vibrant red, white, and blue colors, and the unique felted texture combined with the eyelash yarn, the Firecracker Bag is a conversation starter. Perfect for beginners and seasoned crocheters alike, this pattern will guide you through each step to create a bag that’s both practical and patriotic.
You will most certainly get noticed with this crochet handbag by your side on the 4th of July. The bomb-burst in the sky will not be the only fireworks at the picnic!
What You’ll Need to Get Started to Felt This Bag
Before we jump into the pattern, let’s talk about what materials you’ll need:
- Bulky yarn in red, white, and blue – must be 100% feltable wool (we love this yarn from Cascade); also eyelash yarn.
- A crochet hook suitable for bulky yarn (I recommend size J or 6 mm)
- A pair of scissors
- A magnetic button or fastener for closure
- Purse Handle – have fun and embellish it with beads if you want
Your Step-by-Step Pattern Guide
Now, let’s get to the exciting part – the pattern! The Firecracker Bag is worked in rows for the base, then continuous rounds on the body, alternating colors to create the patriotic stripes. You’ll start with the base of the bag, work up the sides, and finish with the fun, fringy top. The tabs for the purse handles are worked in a join as you go method so you have no seaming!
Once your crochet work is done, you’ll felt the bag to give it that unique, puffy texture. Full detailed instructions will be provided in the pattern below.
Felting Your Crochet Bag
Felting your crochet is a magical process. It transforms the stitches into a sturdy, dense fabric that’s perfect for a durable bag. You can felt your bag by running it through a hot wash cycle in your washing machine, then shaping it as it dries. Don’t be afraid to really get in there and mold it – felting is all about embracing the process!
During the First Fall of 2022 Marly taught us how to felt a bag for the weekender bag she made for the event. This is a great tutorial plus video to help you with that process.
Show Off Your Crochet Creation
After you’ve completed your Firecracker Crochet Felted Bag, it’s time to show it off! Use it for your holiday gatherings, summer barbecues, or when you’re out and about and want a splash of color. Don’t forget to post pictures of your finished bag online and tag them with #MarlyBirdFirecrackerBag or #MMMDI or simple #MarlyBird so we can all admire your beautiful work.
Get more Patriotic Crochet Patterns
Because we know how much you love to support the red, white and blue, here are some more awesome patterns that you can crochet to show you’re patriotic.
Time to Crochet Your First Felted Crochet Bag
Get ready to celebrate with your hooks and yarn, and let’s create something that’ll make every day feel like the Fourth of July. Stay tuned for the complete written pattern to start your Firecracker Crochet Felted Bag!
Because I want many of you to know how wonderful this bag is I am offering it to you as a FREE Crochet Bag PATTERN! Please share this pattern page URL but remember the pattern is copyrighted so you may not print the pattern off for distribution.
Firecracker Crochet Felted Bag Pattern Details
Finished Size
Post-felt: 16” wide and 12” tall; base 13” wide
Materials
- Yarn: Cascade Yarns, “220” (100% Peruvian Wool; 220 yds [200 m]/100 g): #9568 Twilight Blue (MC), 3 hanks; #8414 Bright Red (CA), 3 hanks. **NOTE: any 100% wool will work for this project**
- Yarn Bee Yarn, “Gilt Eyelash” (65% Polyester, 35% Lurex Glitter; 125 yds [3 ounces]): #60 Tinsel Sky (CB), 1 ball; #30 Twinkle (CC), 1 ball; #50 Star Ruby (CD), 1 ball.
Crochet Hook: Size J/10 (6 mm)
Notions: Stitch markers(m), tapestry needle, sewing needle and matching thread, purse handles
Crochet Gauge: 12 sts and 9 rows = 4″ (10 cm) in Half Double Crochet double stranded.
Pattern Notes
- You don’t want the stitches to be too tight or the fabric will not felt as well as it should.
- Bag is worked hold two strands of wool together throughout pattern, when the eyelash yarn is used hold is along with the two strands of 100% wool.
- The bag is made inside out therefore, the inside of the bag will look like it has more eyelash but once it is flipped right side out it will look GREAT!
- Work over the ends of all the yarn used (even the eyelash) as you work along. Doing this is fine for a felted bag, as the ends cannot work loose once the finished bag is felted.
Special Stitches
flp (front loop only): in stitch indicated, insert hook into front loop only and work stitch as indicated.
hdc (half double crochet): Yarn over hook, insert hook into indicated stitch, yarn over and pull up a loop; yarn over and draw through all three loops on hook.
hdc2tog (half double crochet 2 stitches together): [Yarn over, insert hook in next st, yarn over and draw up a loop] twice, yarn over and draw through all 5 loops on hook.
Abbreviations
Approx – Approximately
BLO – Back Loop Only
Ch – Chain(s)
Cont – Continue(ity)
FLO – Front Loop Only
Hdc – Half Double Crochet
PM – Place Marker
RS – Right Side
Sc – Single Crochet
Sc2tog – Single Crochet two together
Sl st – Slip Stitch
Sp(s) – Space(s)
St(s) – Stitch(es)
Tch – Turning Chain
WS – Wrong Side
Yo – yarn over
Color Sequence
MC 4 rnds
MC and CB 3 rnds
CA 2 rnds
CA and CD 3 rnds
CA 2 rnds
CA and CC 3 rnds
CA 2 rnds
CA and CD 3 rnds
CA 2 rnds
MC and CB 3 rnds
MC 2 rnds
CA 2 rnds
Felted Crochet Bag Instructions
Base
With MC, CH 52. hdc in 3rd ch from hook and in each ch across, ch 2, turn—50 hdc’s.
Row 1: Hdc in first hdc and in each hdc across, ch 2, turn—50 hdc’s. Repeat row 14 more times, do not finish off—16 rows.
Prepare for round
Row 1: *3 hdc in first st, hdc to last st, 3 hdc in last st. Turn work 90 degrees to work along the side of the base. Hdc 21 sts evenly along the side. Turn work 90 degrees* to work along the chain edge; rep from * to *. Join with a sl st to first hdc, ch 2. Do Not Turn—150 sts around.
Place a marker in the middle of each 3 hdc corners and move the marker up as you make the bag.
Body of Bag—in the round
Follow the color sequence
Rnd 1: Hdc in first hdc and in each around, join with a sl st to first hdc, ch 2. Do Not Turn.
Repeat rnd 1to the last rnd of the color sequence. Last Rnd: Hdc through the front loop only this rnd, finish off.
Top of Bag
Work each side separately on each row
Row 1: With the short edge facing, estimate the center and place a stitch marker. Now, fold the sides to the center marker so that all the markers match up at the center of the bag (forms a letter W or M).
With CB, join with a sl st to the outside edge and sctog two layers together to the marker, then sc the long side to the markers on other side and sctog two layers together to end, finish off.
Join yarn to opposite side of bag and repeat from * to end, Do Not Finish Off.
Row 2: Ch 2, sctog two layers together at the sides (these are what you just created) to the marker, then sc the long side to the marker on other side and sctog two layers together, finish off.
Join yarn at markers edge and sc around opposite long side edge to opposite marker, finish off.
Turn the bag Right Side Out
Handle tabs: laying your bag out flat and place the purse handle you plan on using at the top of the bag so that you can see where the tabs need to be placed. Use removable stitch markers to mark specifically where you want your tab to begin and end so that the purse handle is centered.
Between your markers is where the tab will be made. Make sure the tab is long enough that when it is felted and folded it will still be good for the handles you plan on using.
At one marker, join MC with a sl st to the exposed loop of the row you did the front loop only hdc. Work a row of sc wide enough for your handles, turn. Working only on the stitches just created *Ch 1 and sc across, turn; repeat from * until tab is desired length, finish off.
Finishing
Weave in all loose ends.
Felting
Place the bag in a pillowcase or pillow cover and either zipper it shut or close it with a heavy duty elastic – this will help to prevent clogging your machine with fibers coming off in the washing process. Place the pillowcase in the washer and add a very small amount of detergent. Set the washer on hot water/cold rinse cycle, minimum size load, and wash garment. Check the felting process every 1-2 minutes depending on your machine, detergent, and local water conditions. If using spin cycle to remove excess water, set on lowest setting – folds caused by the spin cycle are hard to remove. After the piece has finished washing, shape to desired form. Then, let dry overnight.
Using sewing thread and needle sew the handles on to bag.
Really make your bag shine! Choosing the right handles can really take your bag from a craft item to a WOW, YOU MADE THAT?!? I like the handcrafted handles made of leather. You can find some really great handles here.
Don’t forget to support this design on Ravelry by favoriting and queueing it up!

Categories: Crochet, Our Free Patterns, Pattern, Uncategorized


Marly! What a fun bag. I have never felted a crocheted piece before but this looks fun and like a great way to combine fun fur with wool. Thank you for the idea and pattern.