
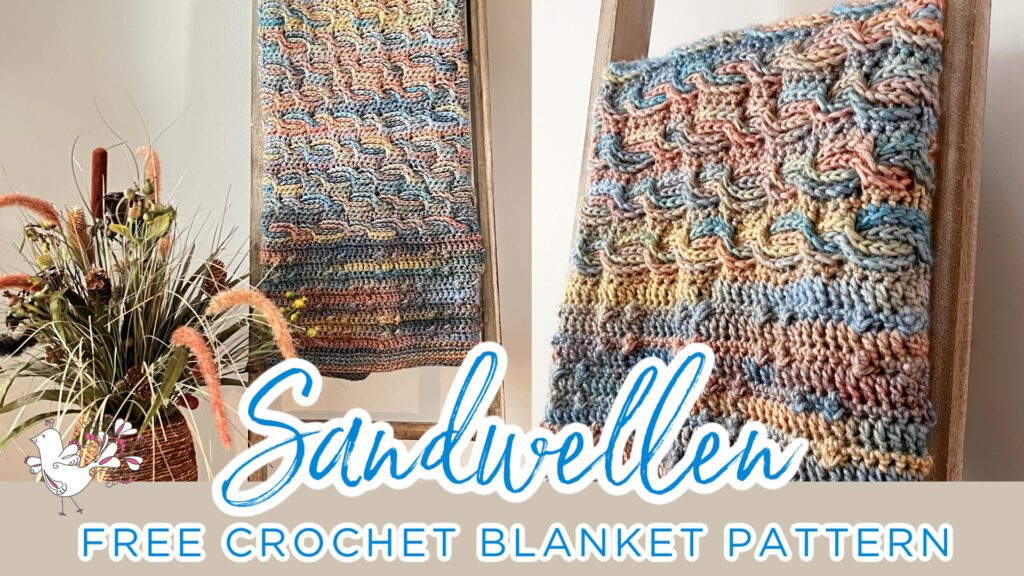
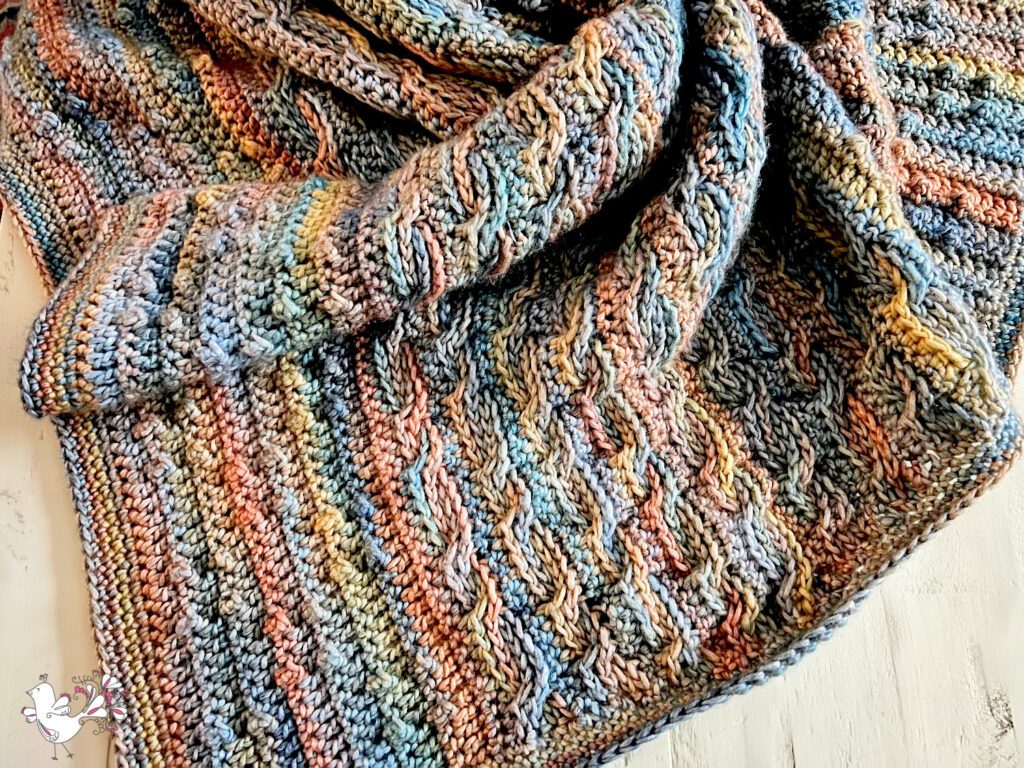
Sandwellen Free Textured Crochet Blanket Pattern with Caron Blossom Cakes 🧶✨
If you’re searching for a textured crochet blanket pattern that feels fresh, looks impressive, and doesn’t rely on complicated color changes — this one’s for you. 💕
Affiliate Disclosure: This post contains affiliate links. To learn more please visit my privacy policy here💖
This free crochet blanket pattern combines rich texture, clear stitch definition, and the subtle color shifts of Caron Blossom Cakes yarn to create a blanket that looks intricate without being overwhelming to make.
It’s the kind of project that keeps your hands interested while still letting you relax — and the finished blanket has that “how did you do that?” energy we all secretly love. 😄

What You Will Love About This Textured Crochet Blanket 💖
This textured crochet blanket pattern is designed for makers who love stitch definition, cozy fabric, and projects that feel engaging without being overwhelming.
You’ll love this pattern if you’re looking for:
- A unique crochet blanket stitch pattern with beautiful texture
- A blanket that looks intricate but follows a repeatable stitch pattern
- A design that works well with solid or softly variegated yarns
- An easy way to customize your blanket size
- A relaxing crochet project you can pick up and put down
✨ Designer Tip: Texture-forward blanket patterns shine when the stitches do the talking. You don’t need complicated color changes to make a blanket feel special.
Unique Crochet Blanket Stitch & Technique ✨
What makes this blanket stand out is the texture technique. Instead of relying on colorwork or striping, the interest comes from stitch placement and raised elements that create depth and dimension across the fabric.
This style of textured crochet blanket is perfect if you:
- Love stitch-focused patterns
- Want something that looks complex but works up logically
- Enjoy learning new techniques without frustration
The stitch pattern repeats consistently, making it ideal for longer projects like blankets where rhythm really matters.
Crochet Blanket Gauge: Why It Matters for Texture 📏🧶
Gauge plays a big role in textured crochet blankets. It affects not only the final size of your blanket, but also how clearly the stitch pattern shows up.
For this pattern, consistent gauge helps ensure:
- The texture looks defined, not squished
- The blanket drapes nicely instead of feeling stiff
- Your finished size matches your expectations
If your stitches feel tight or the texture looks compressed, adjusting your hook size slightly can make a big difference.
Need help tracking gauge and planning blanket size?
If gauge math or stitch repeats make your brain freeze, I’ve got you covered. Grab my free Crochet Gauge & Blanket Size Worksheet, designed to help you track gauge, choose blanket sizes, and calculate starting chains with confidence.
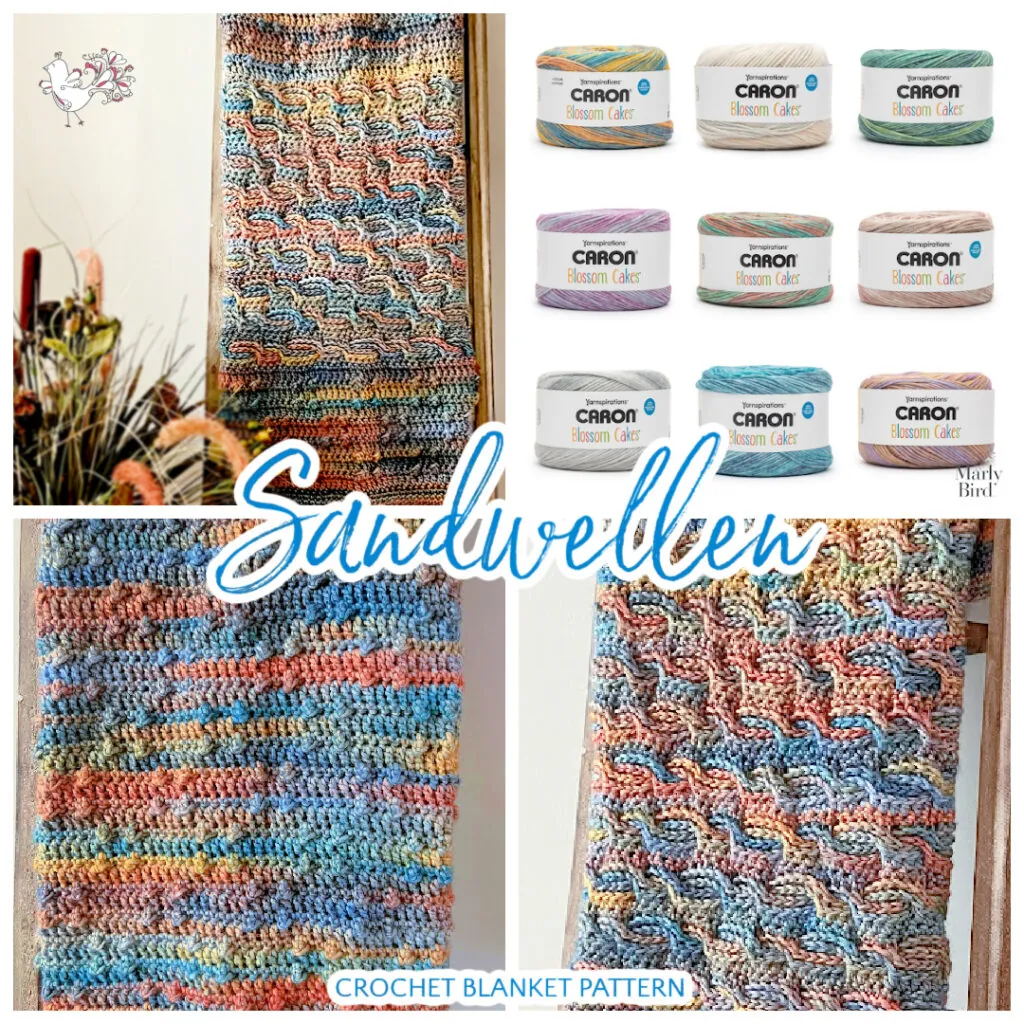
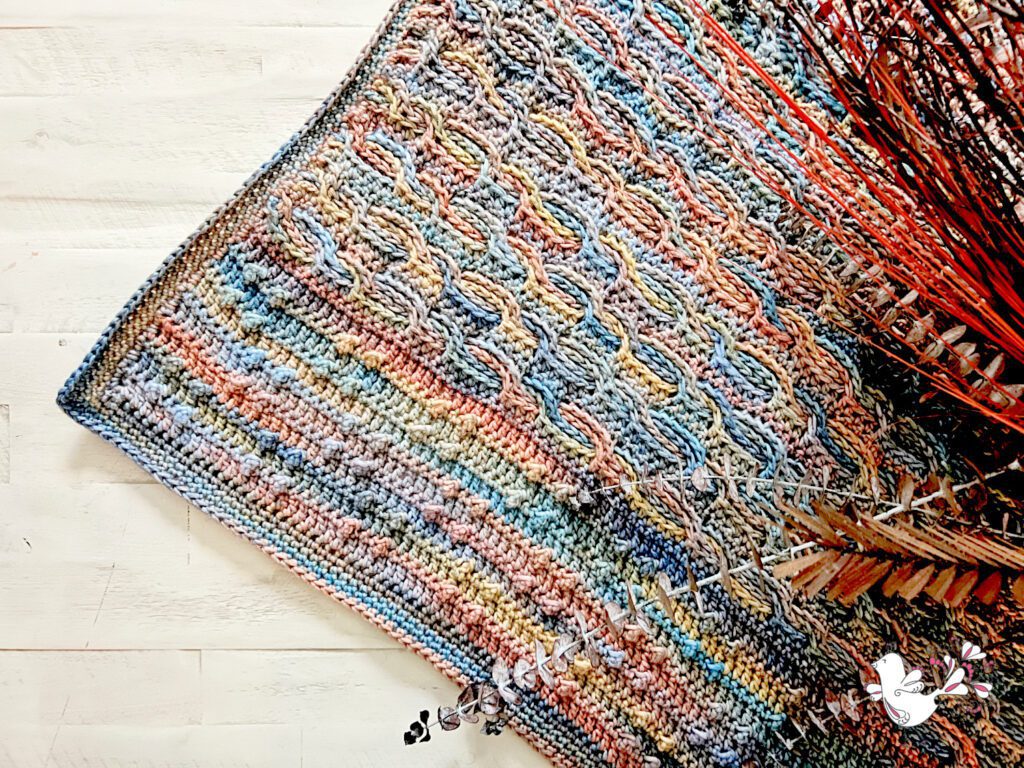
Yarn Choice: Why Caron Blossom Cakes Works So Well 🧶
At the heart of the Sandwellen Crochet Blanket lies the luxurious Caron Blossom Cakes Yarn. It’s a dreamy, soft yarn that will delight your crochet experience. Its gentle, blooming shades and smooth texture effortlessly blend creating a harmony of colors that will capture your heart. With Caron Blossom Cakes, you’ll feel the yarn glide through your fingers, making each stitch an absolute pleasure.
Caron Blossom Cakes is a fantastic choice for textured crochet blankets because it offers:
- Smooth stitch definition
- Gentle color transitions that don’t distract from texture
- A soft feel that works well for blankets used every day
In the Sandwellen project, we opted to use a single shade of yarn. But you have the creative freedom to experiment with different colorways. Create your truly unique crochet afghan.
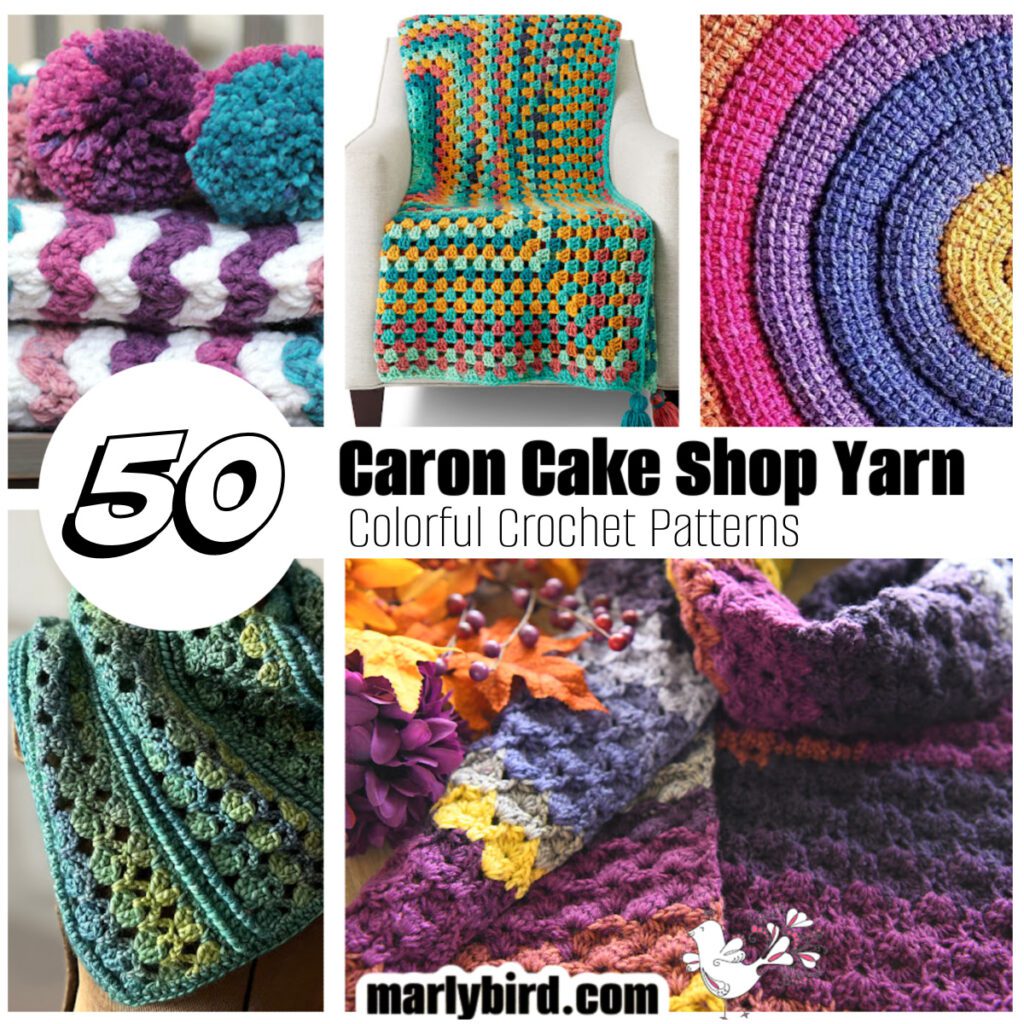
Our love for this yarn is no secret, as the Caron Cake Shop yarns boast exceptional beauty. In fact, we have a blog post featuring more than 50 crochet patterns showing the versatility of this yarn. Be sure to check it out here or click on the image below!
Yarn Substitution Guidelines
If you want to use a different yarn, look for:
- Worsted-weight yarn
- Smooth plies (avoid overly fuzzy textures)
- Fiber blends that balance softness and durability
Matching gauge is far more important than matching fiber content exactly.
Here are some yarns we love and think would be great with this pattern!
- Everyday Worsted Gradient – Love the idea of a long color change gradient
- RHSS Bitty Stripes – This has a lot of color but might look really cool
- Caron Cakes – Long color changes and soft yarn
- Bernat Lattice – This is a bit of a novelty yarn but I really do like it
- Mandala Gradient Yarn – This yarn is a little thin but with adjustments you could make it work
- RHSS Granny Square – Although this is designed to make easy granny squares, it would be a fun color blocking yarn
- Herrschners Worsted Stripes – This could be super cool with the striping
- Everyday Worsted Gradient Glitter – Who doesn’t like a little sparkle AND a gradient?
- Herrschners Worsted Sparkle – This yarn is so popular at Herrschners, for a good reason
Crochet Blanket Sizing & How to Make It Larger 📐
The beauty of the Sandwellen Crochet Blanket lies in its versatility. The pattern includes instructions for multiple sizes, allowing you to create a blanket that perfectly fits your needs. ✨ That means you don’t have to do any extra math!
You can make a cozy throw for your favorite reading nook or an exquisite bedspread to adorn your bedroom. The Sandwellen Blanket is a versatile project that promises to be cherished.
This makes the pattern incredibly flexible and stash-friendly.
Why This Crochet Blanket Makes a Great Gift 🎁
Textured crochet blankets are some of the most searched-for handmade gifts, and this pattern works beautifully for many occasions, including:
- Baby shower or new baby gift
- Wedding or housewarming present
- Graduation or college send-off
- Holiday or Christmas crochet gift
- Comfort or sympathy gift
- Anniversary or milestone birthday
Because the texture is timeless and the design is neutral-friendly, you can tailor the yarn color to suit the occasion without changing the stitch pattern.
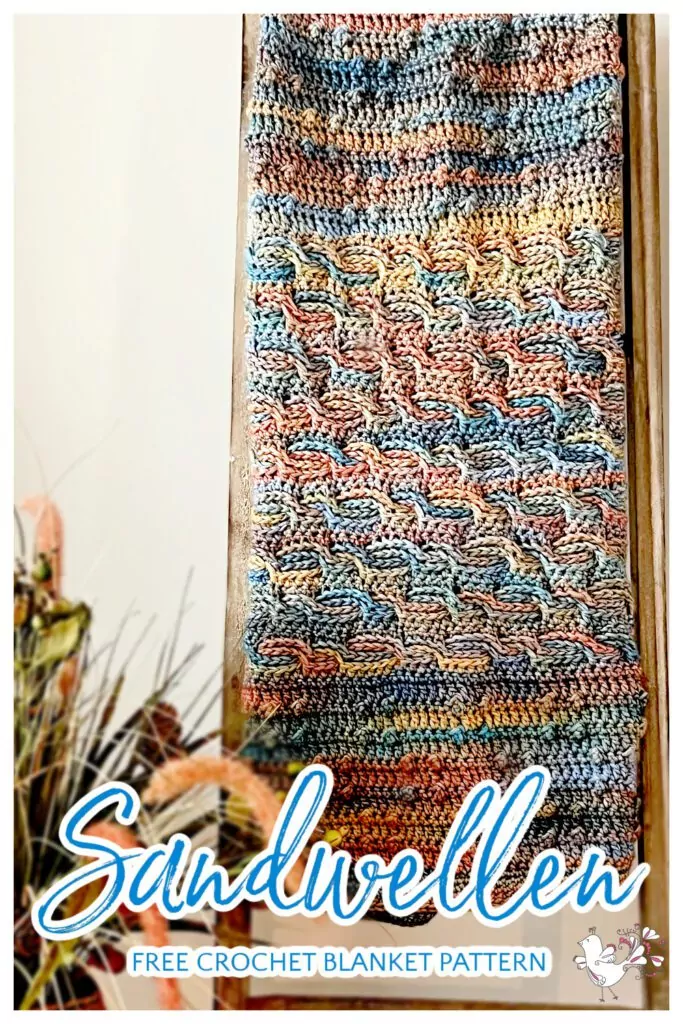
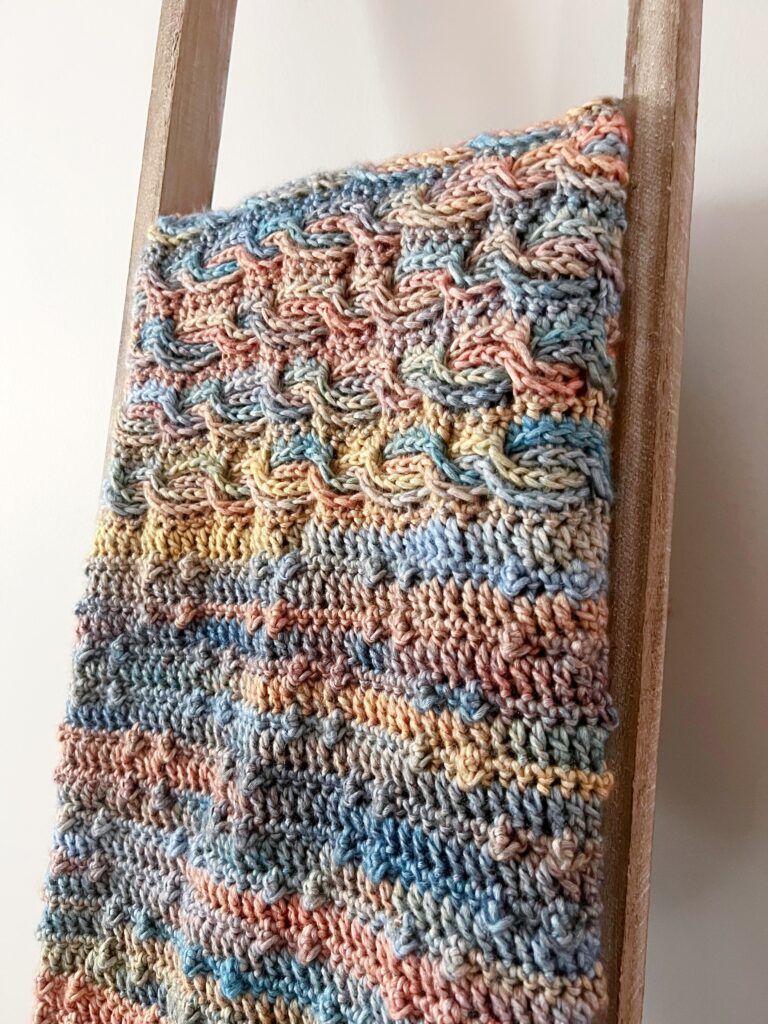
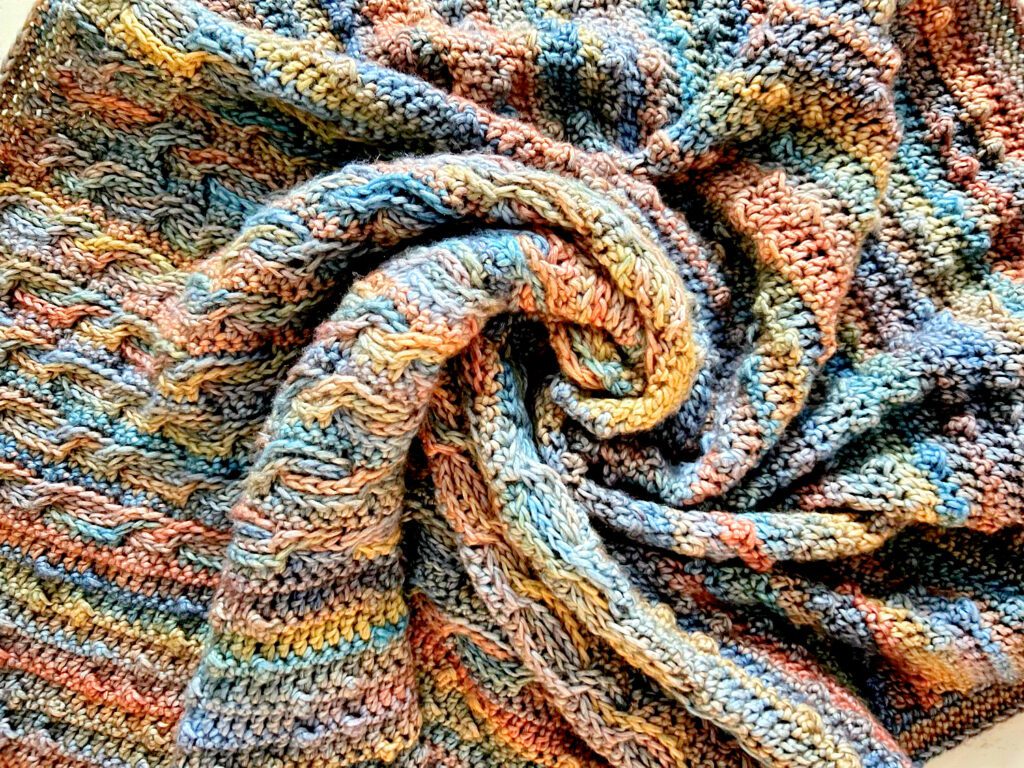
Texture Magic: Crochet Bobbles and Horizontal Cables
One of the defining features of the Sandwellen Blanket is the mesmerizing texture it boasts. Crochet bobbles add a playful dimension to the fabric, creating delightful pops of depth and interest.
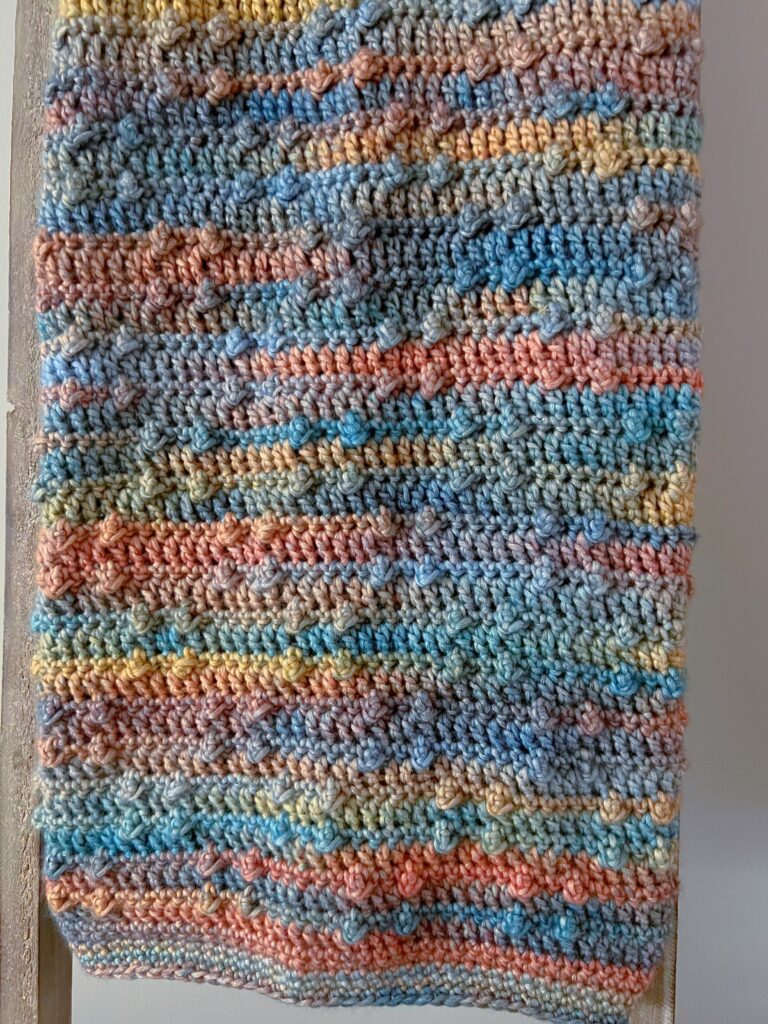
But that’s not all – the showstopper is the horizontal cables (also known as segmented cables). These unique stitches create a captivating pattern! It seems to dance across the blanket, leaving you in awe of your own crochet skills.
Mastering the Art of Horizontal Cables
Worried about tackling the horizontal cables? Fear not! The Sandwellen Crochet Blanket pattern includes a detailed stitch diagram. We also made a helpful video tutorial to guide you through the process step-by-step. With practice, and yarn management tips from expert Robyn Chachula, you’ll soon become a pro at this captivating technique.

Ready to Start?
Indulge in the magic of crochet and embrace the allure of this textured crochet blanket pattern. With Caron Blossom Cakes Yarn, crochet bobbles, and captivating horizontal cables, this masterpiece will become a cherished heirloom. Elevate your crochet skills and immerse yourself in the joy of creation. Let the Sandwellen crochet afghan warm your heart for years to come.
Are you ready to get started? Get your hands on the Sandwellen Crochet Blanket pattern for free below.
Textured Crochet Blanket Pattern with Caron Blossom Cakes Details
⭐️Add this pattern to your Ravelry Queue and Favorites🔥
SKILL LEVEL
Intermediate
MEASUREMENTS
Finished Measurements
Blanket is 36” (42, 52, 61)” [91.5, 106.5, 132, 155 cm] wide by 36 (54, 64, 90)” [91.5, 137, 162.5, 228.5 cm] long.
Gauge
13 sts x 12 rows in stitch pattern of first section= 4” [10 cm] x 4.5” [11.5 cm]; use any size hook to obtain the gauge.
MATERIALS
Yarn
Caron, Blossom Cakes (61% Cotton/ 39% Acrylic, 481 yds / 440 m, 8 oz/ 227 g, CYCA# 4 worsted): Island Time, 4 (7, 9, 16) cakes
Hook
Size I/9 [5.5 mm]
Notions
Tapestry needle, Stitch Markers
ABBREVIATIONS
(Get details about each stitch in our Crochet Definition Library)
Ch – Chain(s)
Dc – Double Crochet
Fsc – Foundation Single Crochet (see special stitches)
Hdc – Half Double Crochet
PM – Place Marker
RS – Right Side
Sc – Single Crochet
Sl st – Slip Stitch
Sp(s) – Space(s)
St(s) – Stitch(es)
Stacked Dc – Stacked Double Crochet
Tch – Turning Chain
Tr – Treble Crochet
WS – Wrong Side
SPECIAL STITCHES
⭐️ Stacked Double Crochet (Stacked Dc): (Do not ch 1 prior to making the first sc) Sc in first stitch, insert hook in between two legs of the base, yarn over and pull up a loop, yarn over and draw through 2 loops on hook.
⭐️ Foundation Single Crochet (fsc):
First fsc: Ch 2, insert hook into 2nd ch from hook, yarn over and pull up a loop, yarn over and draw through 1 loop on hook (forming a chain), yarn over and draw through 2 loops on hook (forming the single crochet)
Next fsc: Insert hook into base of previous stitch (in the “chain” space), yarn over and pull up a loop, yarn over and draw through 1 loop on hook (forming a chain), yarn over and draw through 2 loops on hook (forming the next single crochet). Repeat directions for desired amount of sts.
⭐️Third Loop: Also known as middle or back bar. Horizontal strand located under the top 2 loops, created by the yarn over when making the hdc. When working in non-turned rows the third bar is on the back side of the fabric facing away from you.
STITCH DIAGRAMS
✨ Stitch Diagrams are only available in the ad-free PDF
NOTES
- Directions are for baby blanket (36” wide); changes for lapghan (42” wide), throw (51.5” wide), and twin bed (60.75” wide) are in parentheses. When only one number is given, that number applies to all sizes.
- In the first and last section, push the trebles to the RS of the fabric (away from you while you are stitching) to form a bump.
- Start of double crochet rows can use a ch 3 turning chain or a stacked double crochet as written.
- Before the CABLE SECTION, divide the yarn into 4 separate balls.
- In the cable section, watch when to turn. Most of the work is done on the RS
VIDEO TUTORIAL
- How to Read Crochet Diagrams >> Click Here for Video Help <<
- Weave in Ends Watch on YouTube >> Click Here for Video Help <<
- Stacked Double Crochet Watch on YouTube>> Click Here for Video Help <<
- Segmented Cable / Horizontal Cable Watch on YouTube>> Click Here for Video Help <<
GROW
To Unlock Exclusive Subscriber Content click the Box below and join for free by simply adding your email and creating a password! If you are having troubles, clear your cache or reset your password or login to the Grow Publisher Portal.
>> Learn More About Grow Here <<
I’m thrilled to share this amazing pattern with you, many patterns on my blog are absolutely free! I kindly request that you don’t copy and paste or distribute this pattern. Prefer an ad-free experience? Buy a digital PDF pattern for a small fee from one of my online stores for a seamless crafting journey.
I appreciate your support and readership. You are the reason I can keep doing what I love and sharing it with others. So, thank you from the bottom of my yarn-loving heart! Disclosure: This post contains affiliate links, meaning I get a commission if you decide to make a purchase through my links at no cost to you.
SANDWELLEN CROCHET BLANKET PATTERN
FIRST SECTION
Row 1 (WS): 111 (131, 161, 191) fsc, turn.
Row 2: Stacked dc in first st, dc in each st across, turn.
Row 3: Ch 1, sc in next 3 dc, *tr in next dc, sc in next 2 dc, tr in next dc, sc in next 6 dc; repeat from * across to last 8 dc, tr in next dc, sc in next 2 dc, tr in next dc, sc in last 4 dc, turn.
Rows 4-5: Repeat Rows 2-3
Row 6: Repeat Row 2
Row 7: Ch 1, sc in next 8 dc, *tr in next dc, sc in next 2 dc, tr in next dc, sc in next 6 dc; repeat from * across to last 13 dc, tr in next dc, sc in next 2 dc, tr in next dc, sc in last 9 dc, turn.
Rows 8-9: Repeat Rows 6-7
Rows 10-13: Repeat Rows 2-3
Row 14: Repeat Row 2
Row 15: Ch 1, sc in each dc across, turn.
CABLE SECTION
Make 3 additional balls of yarn for this section. Keep first section ball of yarn attached, which means using 4 balls of yarn at once.
Row 1a (RS): Ch 2 (counts as hdc), hdc in next 2 sts, lay first ball down with working tail in front of fabric, place stitch marker in free loop, do not turn.
Row 2a: Join second ball with sl st to top of Row 1a tch, ch 2 (counts as hdc), hdc in 3rd loop of next 2 hdc, lay second ball down with working tail in front of fabric, place stitch marker in free loop, do not turn.
Row 3a: Join third ball with sl st to top of Row 2a tch, ch 2 (counts as hdc), hdc in 3rd loop of next 2 hdc, make sure previous 2 balls are in front of work, hdc in next 6 sts 2 rows below, lay down third ball with working tail in front of fabric, place stitch marker in free loop, do not turn.
Row 4a: Join fourth ball with sl st to top of Row 3a tch, ch 2 (counts as hdc), hdc in 3rd loop of next 8 hdc, lay down fourth ball with working tail in front of fabric, place stitch marker in free loop, do not turn
Row 1b: Pick up row 1 ball, make sure ball 2 yarn is to the right side (so it won’t get tangled), hdc in 3rd loop of next 6 hdc just made, make sure previous 2 balls are in front of work, hdc in next 4 sts 2 rows below, lay first ball down with working tail in front of fabric, place stitch marker in free loop, do not turn.
Row 2b: Pick up row 2 ball, hdc in 3rd loop of next 10 hdc just made, lay second ball down with working tail in front of fabric, place stitch marker in free loop, do not turn.
Row 3b: Pick up row 3 ball, make sure ball 4 yarn is to the right side (so it won’t get tangled), hdc in 3rd loop of next 4 hdc just made, make sure previous 2 balls are in front of work, hdc in next 6 sts 2 rows below, lay down third ball with working tail in front of fabric, place stitch marker in free loop, do not turn.
Row 4b: Pick up row 4 ball, hdc in 3rd loop of next 10 hdc just made, lay down fourth ball with working tail in front of fabric, place stitch marker in free loop, do not turn
Repeat Rows 1b-4b across until there are 2 sts left on first section
Row 1c: Pick up row 1 ball, hdc in 3rd loop of next 6 hdc just made, make sure previous 2 balls are in front of work, hdc in last 2 sts 2 rows below, fasten off first ball, do not turn.
Row 2c: Pick up row 2 ball, hdc in 3rd loop of next 8 hdc just made, fasten off second ball, do not turn.
Row 3c: Pick up row 3 ball, hdc in 3rd loop of next 2 hdc just made, fasten off third ball, do not turn.
Row 4c: Pick up row 4 ball, hdc in 3rd loop of next 2 hdc just made, DO NOT FASTEN OFF, turn.
Row 5 (WS): Ch 1, sc in 3rd loop of each hdc across to tch, sc in top of tch, turn. Note: place stitch marker every 10/ 20 stitches to watch stitch count. It is easy to lose stitches on this row. Make sure you have 111 (131, 161, 191) sts at the end of the row.
Row 6a (RS): Ch 2 (counts as hdc), hdc in next 3 sts, lay first ball down with working tail in front of fabric, place stitch marker in free loop, do not turn.
Row 7a: Join second ball with sl st to top of Row 6a tch, ch 2 (counts as hdc), hdc in 3rd loop of next 3 hdc, lay second ball down with working tail in front of fabric, place stitch marker in free loop, do not turn.
Row 8a: Join third ball with sl st to top of Row 7a tch, ch 2 (counts as hdc), hdc in 3rd loop of next 3 hdc, make sure previous 2 balls are in front of work, hdc in next 4 sts 2 rows below, lay down third ball with working tail in front of fabric, place stitch marker in free loop, do not turn.
Row 9a: Join fourth ball with sl st to top of Row 8a tch, ch 2 (counts as hdc), hdc in 3rd loop of next 7 hdc, lay down fourth ball with working tail in front of fabric, place stitch marker in free loop, do not turn
Row 6b: Pick up row 6 ball, hdc in 3rd loop of next 4 hdc just made, make sure previous 2 balls are in front of work, hdc in next 6 sts 2 rows below, lay first ball down with working tail in front of fabric, place stitch marker in free loop, do not turn.
Row 7b: Pick up row 7 ball, hdc in 3rd loop of next 10 hdc just made, lay second ball down with working tail in front of fabric, place stitch marker in free loop, do not turn.
Row 8b: Pick up row 8 ball, hdc in 3rd loop of next 6 hdc just made, make sure previous 2 balls are in front of work, hdc in next 4 sts 2 rows below, lay down third ball with working tail in front of fabric, place stitch marker in free loop, do not turn.
Row 9b: Pick up row 9 ball, hdc in 3rd loop of next 10 hdc just made, lay down fourth ball with working tail in front of fabric, place stitch marker in free loop, do not turn
Repeat Rows 6b-9b across until there are 3 sts left on Row 5
Row 6c: Pick up row 6 ball, hdc in 3rd loop of next 4 hdc just made, make sure previous 2 balls are in front of work, hdc in last 3 sts 2 rows below, fasten off first ball, do not turn.
Row 7c: Pick up row 7 ball, hdc in 3rd loop of next 7 hdc just made, fasten off second ball, do not turn.
Row 8c: Pick up row 8 ball, hdc in 3rd loop of next 3 hdc just made, fasten off third ball, do not turn.
Row 9c: Pick up row 9 ball, hdc in 3rd loop of next 3 hdc just made, DO NOT FASTEN OFF, turn.
Row 10: Ch 1, sc in 3rd loop of each hdc across to tch, sc in top of tch, turn.
Repeat Rows 1-10 three times
Repeat Rows 1-4 once more
LAST SECTION
Row 1 (WS): Ch 1, sc in 3rd loop of each hdc across to tch, sc in top of tch, turn- 111 (131, 161, 191) sc.
Row 2: Stacked dc in first st, dc in each st across, turn.
Row 3: Ch 1, sc in next 3 dc, *tr in next dc, sc in next 2 dc, tr in next dc, sc in next 6 dc; repeat from * across to last 8 dc, tr in next dc, sc in next 2 dc, tr in next dc, sc in last 4 dc, turn.
Rows 4-5: Repeat Rows 2-3
Row 6: Repeat Row 2
Row 7: Ch 1, sc in next 8 dc, *tr in next dc, sc in next 2 dc, tr in next dc, sc in next 6 dc; repeat from * across to last 13 dc, tr in next dc, sc in next 2 dc, tr in next dc, sc in last 9 dc, turn.
Rows 8-9: Repeat Rows 6-7
Repeat Rows 2-9 [8 (10, 13, 22)] more times or to desired length.
Repeat Rows 2-3 once more
Repeat Row 2 once more
Last Row: Ch 1, sc in each dc across, fasten off. Weave in all ends.
FINISHING
Edging
Round 1: Join yarn to any corner with sl st, ch 1, 2 sc in corner, *sc evenly across edge of blanket, 3 sc in next corner, place stitch marker in middle sc just made; repeat from * around to beginning corner, sc in same corner as join, sl st to first sc, do not turn.
Round 2: Ch 1, 2 sc in first sc, *sc in each sc across to marker, 3 sc in marked sc, move marker to middle sc just made; repeat from * around, sc in first sc of previous round, sl st to first st of current round, do not turn.
Repeat Round 2 until edging measures 1” or to desired width. Fasten off and weave in ends.

We hope you love making this Textured Crochet Blanket Pattern with Caron Blossom Cakes!

FAQs ❓
Is this textured crochet blanket pattern beginner-friendly?
Confident beginners can absolutely make this blanket. The stitch pattern is repeat-based and becomes easier once you find your rhythm. Video support is available to help with the textured stitches.
Does this crochet blanket stitch use a lot of yarn?
Textured stitches do use slightly more yarn than basic stitches, but the result is a thicker, cozier fabric that many makers feel is well worth it.
Can I make this crochet blanket larger or smaller?
Yes! The stitch pattern is based on a repeat, which makes it easy to adjust the width and length for different blanket sizes.
Will the texture show up in solid yarn?
Yes — solid and lightly variegated yarns actually highlight the texture beautifully.
Is this a good crochet blanket pattern for gifts?
Absolutely. This pattern is often used for baby gifts, holidays, weddings, and comfort blankets because it’s both beautiful and practical.
Can I use this stitch pattern for other projects?
Many crocheters enjoy using textured blanket stitches for pillows, scarves, or smaller home décor projects once they’re comfortable with the repeat.
Final Thoughts
If you’re looking for a textured crochet blanket pattern that feels engaging to make and results in a truly special finished piece, Sandwellen checks all the boxes. The stitch repeat keeps things approachable, the texture adds visual interest, and the flexibility to customize size makes it a pattern you can use again and again.
Whether you’re crocheting a cozy throw for your own home or creating a meaningful handmade gift, this blanket is designed to be both practical and beautiful — the kind of project that reminds you why you love crochet in the first place.
If you give Sandwellen a try, don’t forget to share your finished blanket on Ravelry or tag me on social media. I love seeing how you make each version your own 🧶✨
❤️ Your BiCrafty Bestie,
Marly Bird

Categories: Crochet, Free Patterns, Our Free Patterns, Pattern, Uncategorized


I see yarn requirements for three sizes, but the pattern has 4 sizes included. How do the yardages match up for each of the 4 sizes?
the balls of yarn are 4 (7, 9, 16) cakes for the different sizes. can’t wait to crochet this blanket.
Can I use Caron cotton cakes yarn instead of caron blossom cakes yarn for this pattern? Thank you
yes
The instructions for the ” Last Section” tells you to Repeat Rows 2-9 [8 (10, 13, 22)] more times or to desired length. This will make the Last Section longer than the First section. To have the cables in the middle of the blanket wouldn’t you also increase the number of repeats for rows 2-9 in the First Section?
the cables are not in the middle of the blanket. they are designed to be in the bottom 1/3 of the blanket.