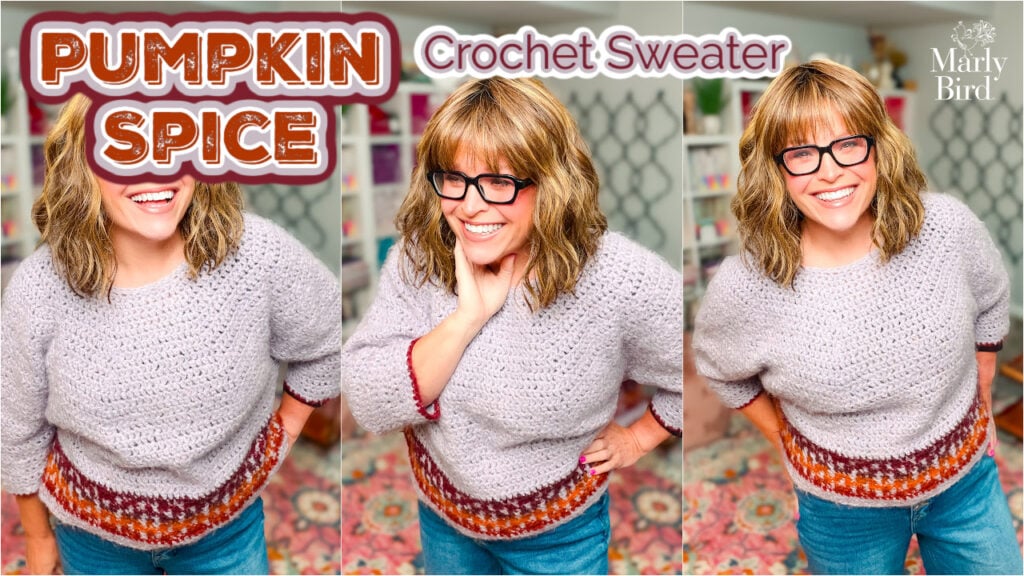
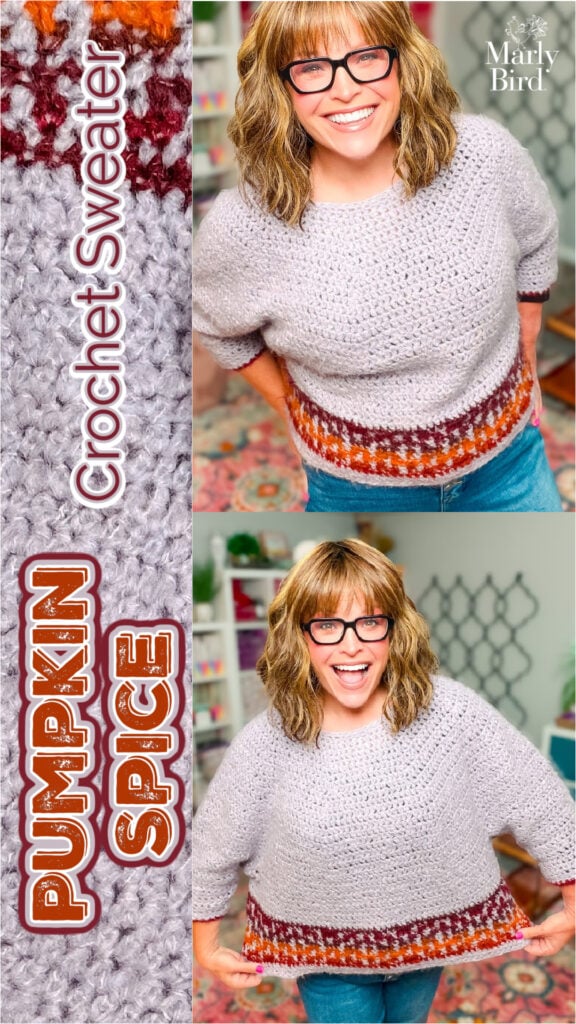
Free Crochet Oversized Sweater Pattern — My Pumpkin Spice Sweater Gets a Makeover
Originally published October 2020 · Updated June 2026 with new photos, yarn alternatives for discontinued Bernat Plentiful, and expanded step-by-step guidance throughout.
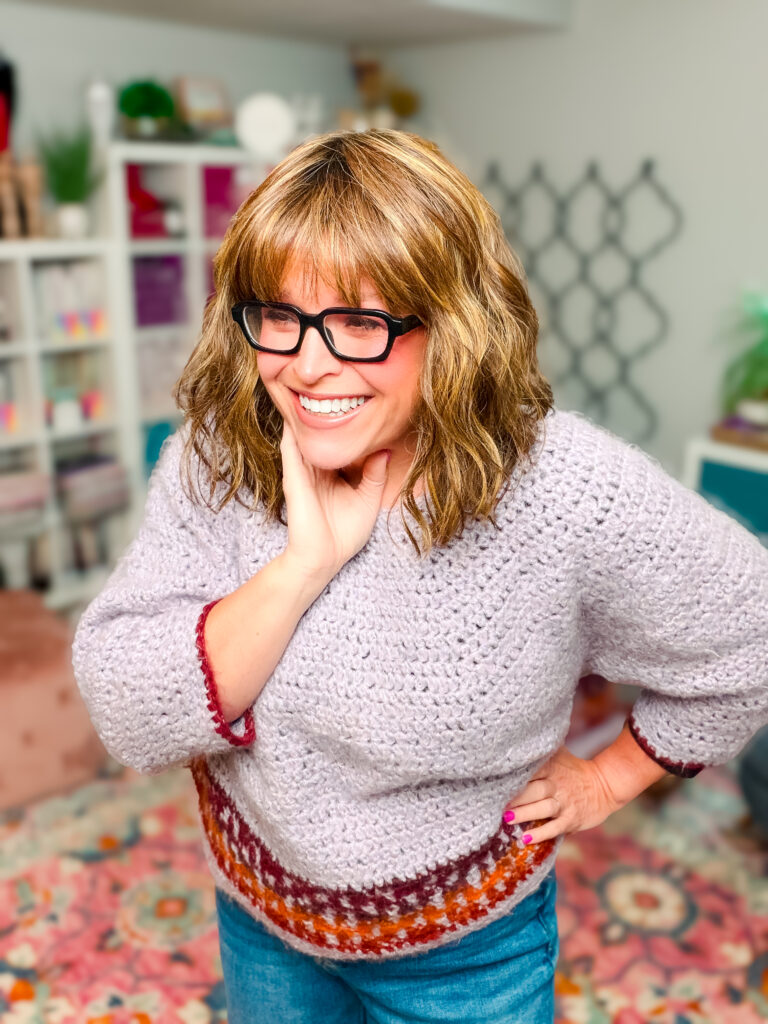
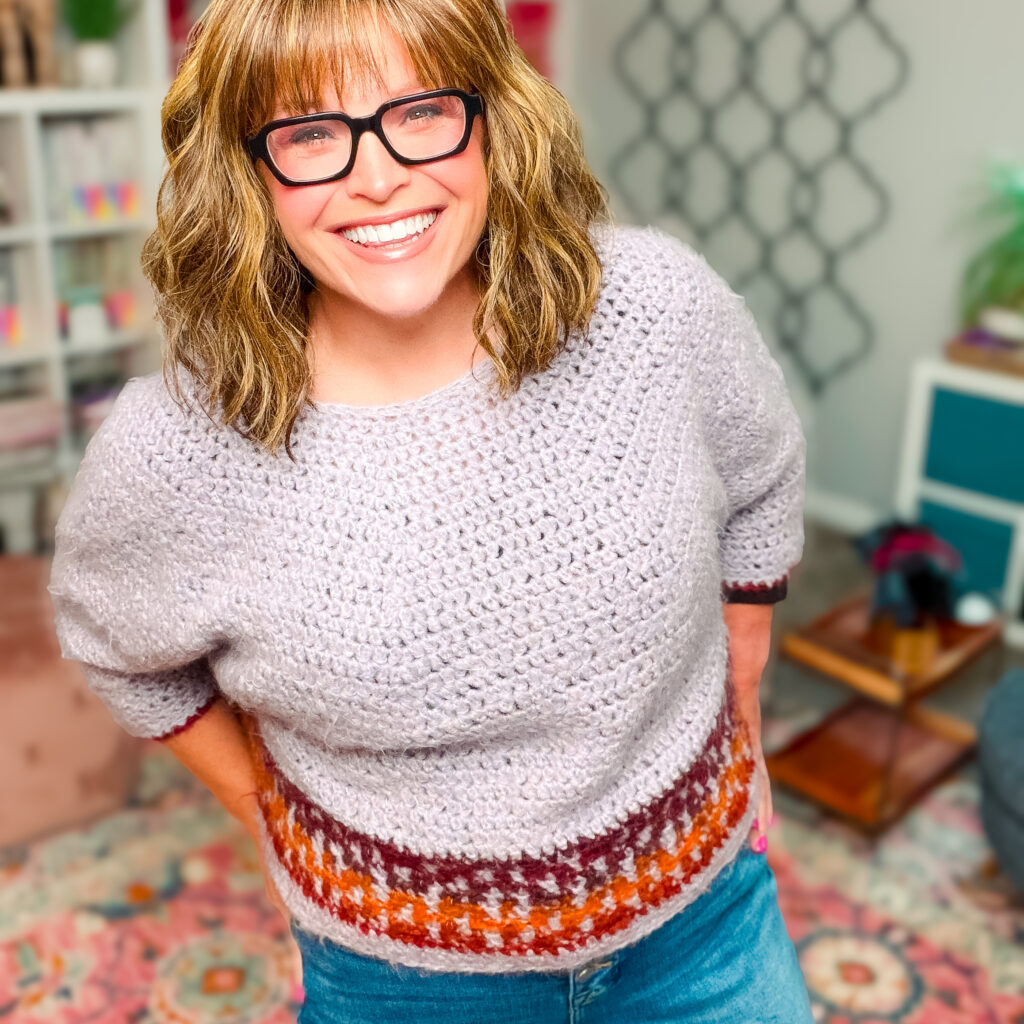
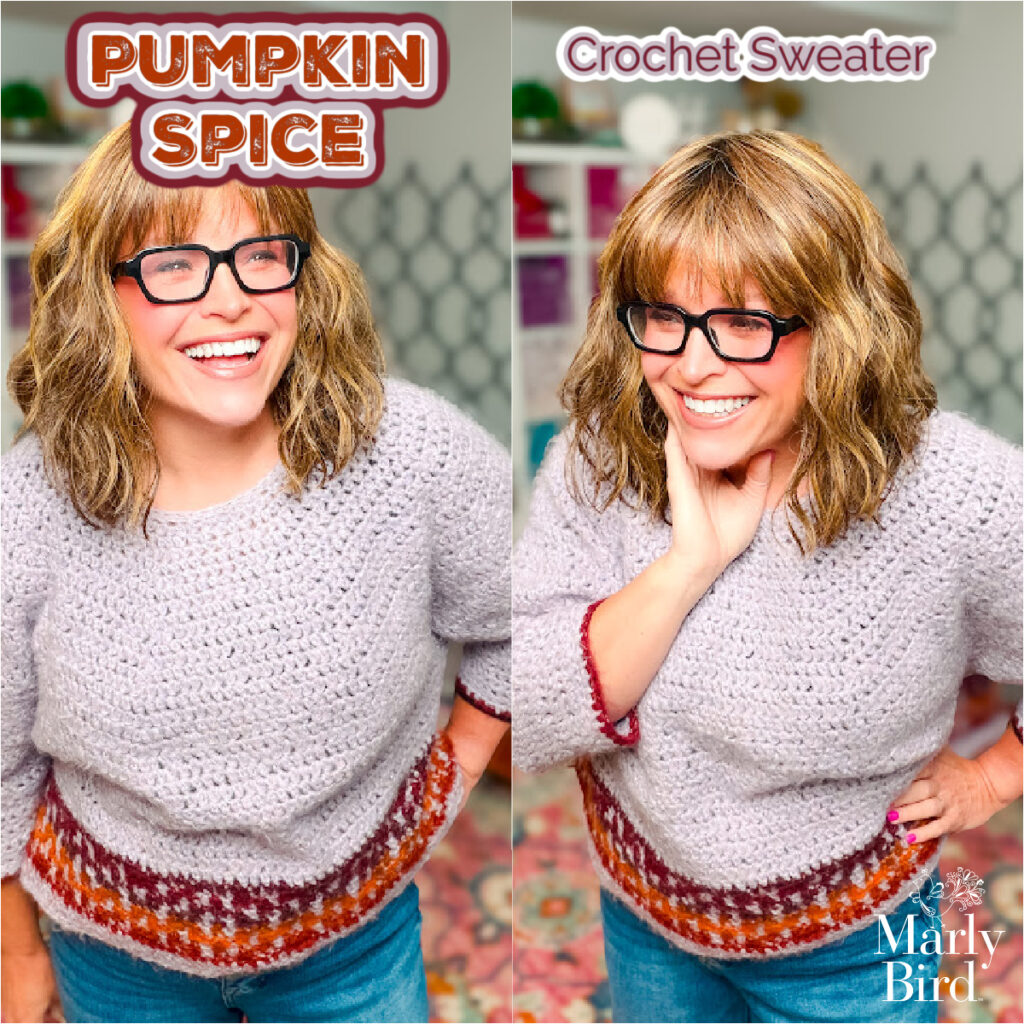
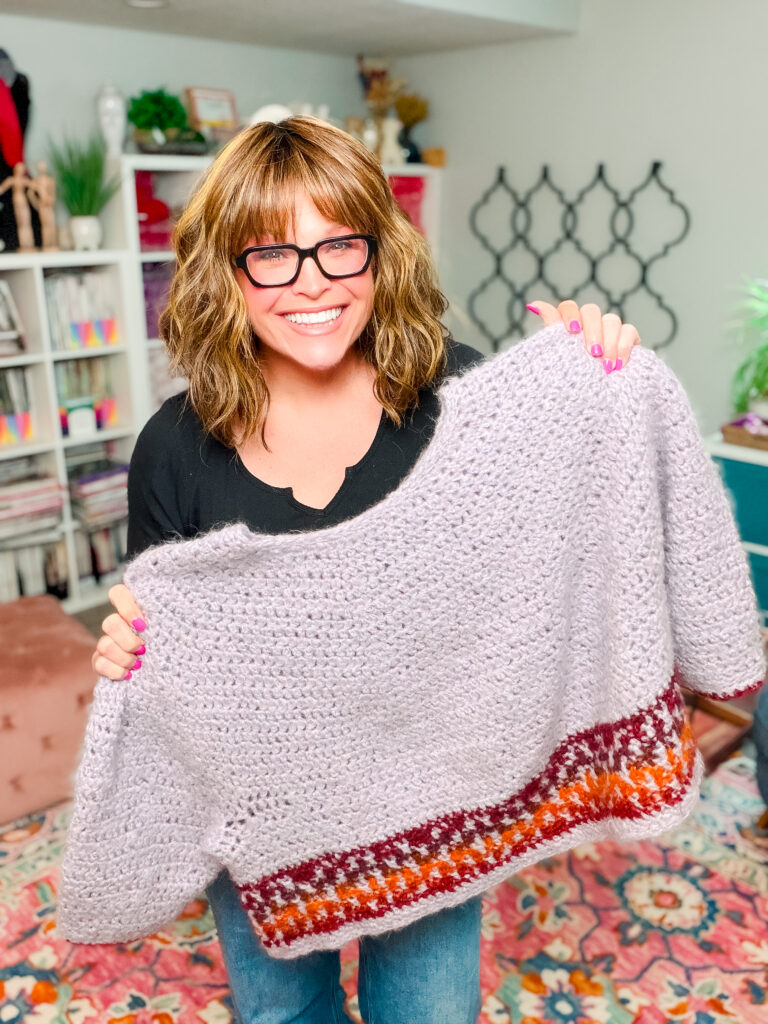
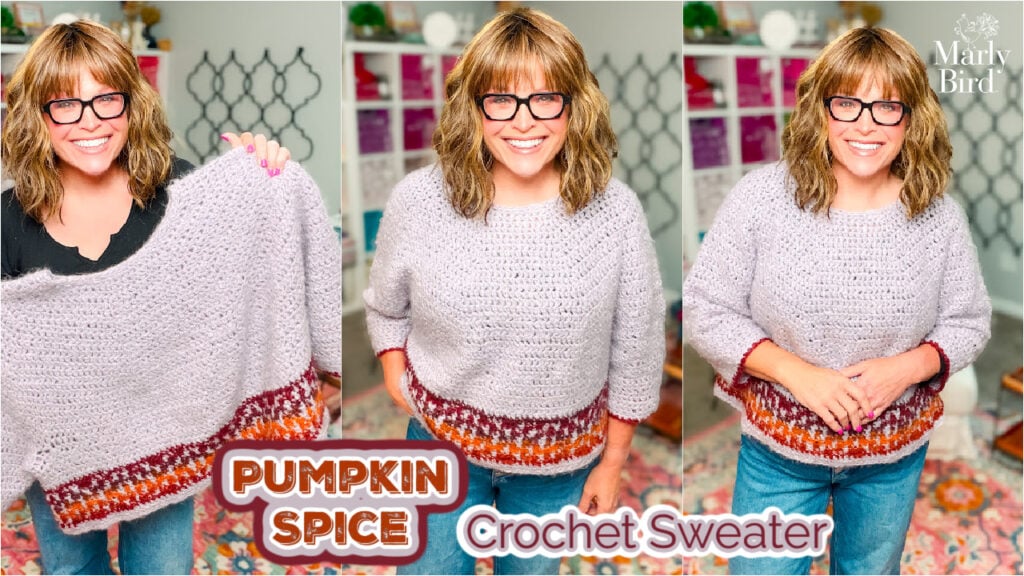
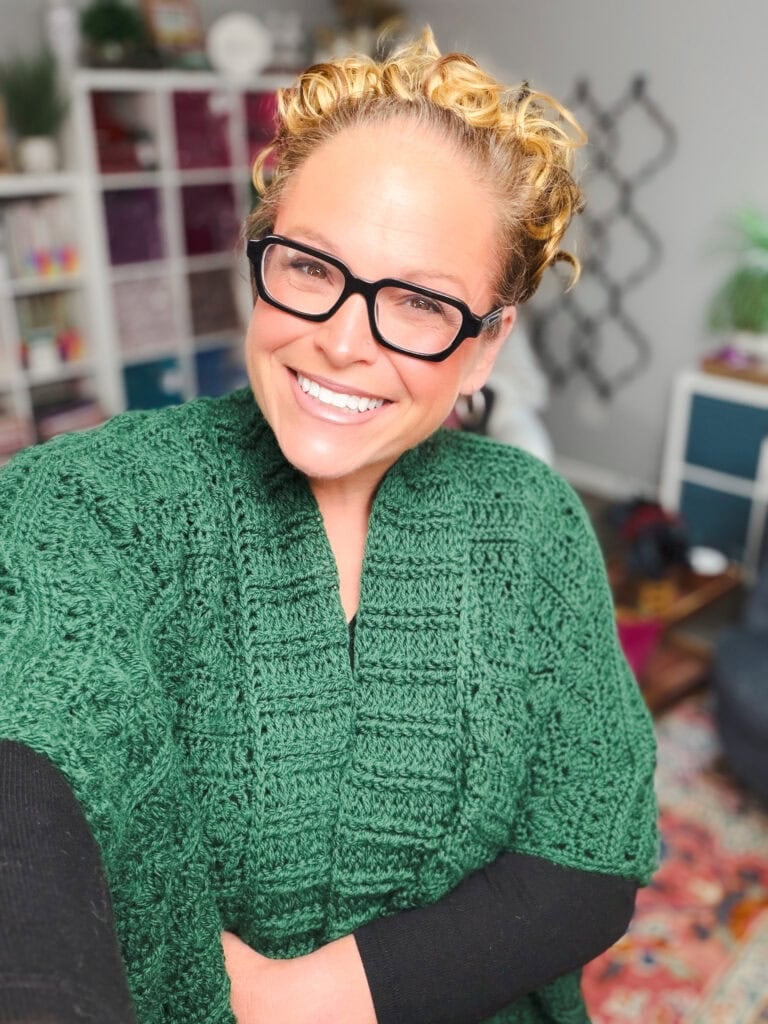
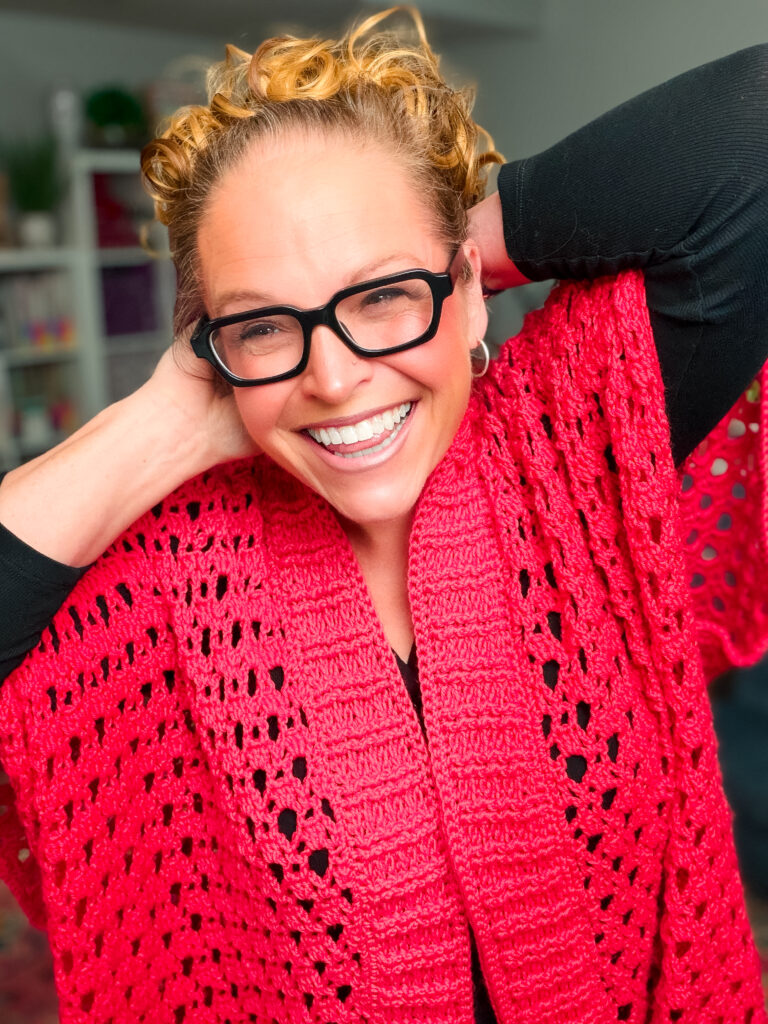
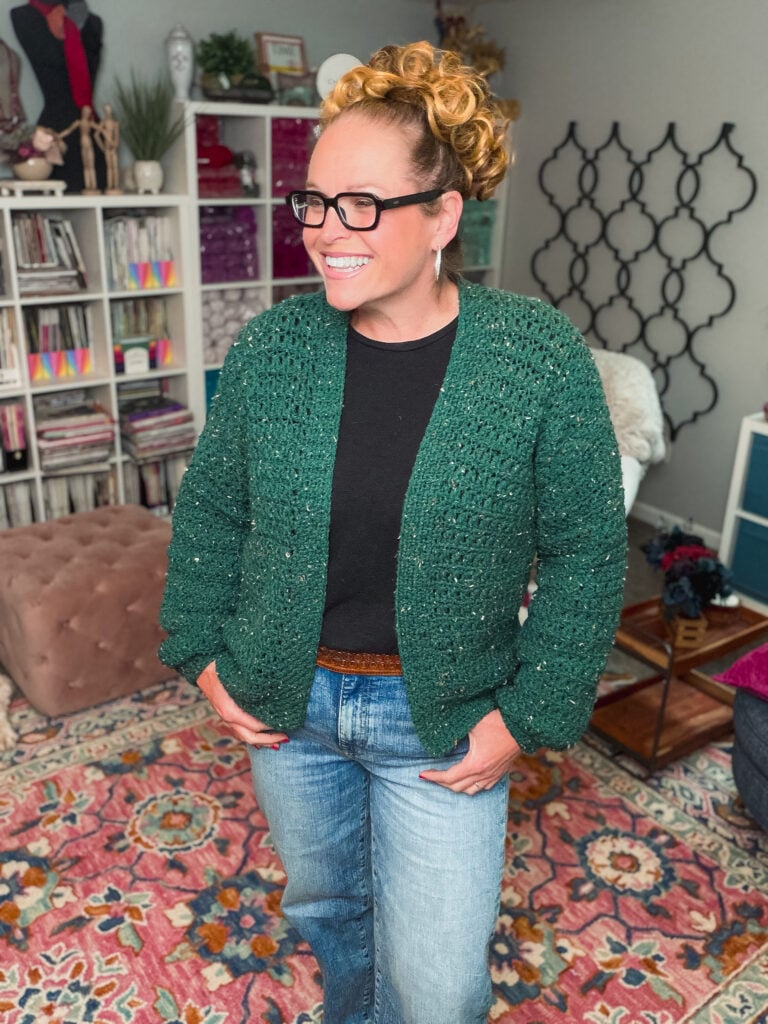
The Pumpkin Spice Cropped Crochet Sweater is a free beginner mosaic crochet sweater pattern by Marly Bird and Robyn Chachula. This free crochet cropped sweater features top-down construction, beginner-friendly colorwork at the hem, and six sizes from XS to 3X with finished busts from 33.5″ to 61.5″. The complete free pattern is right here on this page.
Okay, real talk first: Bernat Plentiful is gone and I'm still not over it. (I'm fine. I'm totally fine.) It was the perfect yarn for this sweater and it's discontinued… and that genuinely stings. Good news: I've put together a full yarn section with five beautiful alternatives. You are not stuck. Scroll down and I'll walk you through everything.
Heads up, friend… this post contains affiliate links. If you click through and buy something, I earn a small commission at no extra cost to you. It helps keep free patterns like this one coming to the blog, and I only recommend things I genuinely love with my yarn-loving heart. 🧶
What You Will Love About This Sweater 💖
Mosaic colorwork that looks complex but uses ONE color per round.
Here's the secret: you're never juggling two yarns at the same time. Color A does its round, Color B does its round, and the pattern emerges like magic from how the stitches interact. (Yes, really. That's it. That's the whole technique. 🤫)
Top-down construction… you never have to seam a body.
The yoke grows naturally as you work in the round, then the front, back, and sleeve sections separate cleanly… no armhole math, no trying to match up seams across three different pieces. Each step makes complete sense when you're in it. (I say this every time. It keeps being true.)
Six sizes, XS through 3X, with 6–9 inches of ease built in.
The relaxed, drapey silhouette is intentional… this is a sweater that's supposed to be roomy 😍. (Just check the finished bust measurements before picking your size… the increments are bigger than usual.)

Bulky yarn means this sweater moves FAST.
Bulky yarn + weekend = sweater. Do the math. 😄 You can see real progress with every single round, and most crocheters are genuinely surprised by how quickly this one comes together. (Spoiler: you'll be wearing it before you expect to.)
The full pattern is free on this blog, always.
To access the complete pattern, you’ll just need to log in with Grow, which is completely free. This helps keep the pattern available here on the blog while giving you an easy way to save, access, and enjoy the content. (Prefer a clean, printable version with no ads or login? You can purchase the ad-free PDF on Ravelry.)
Co-designed with Robyn Chachula, my best friend and co-owner of MarlyBird.com.
Robyn is one of the most talented crochet designers I know, and when we collaborate, we push each other to do something neither of us would have done alone. This sweater is the proof 💛. (Also: when your best friend is a genius crochet designer, you make things like this.)
Quick Pattern Overview
🧵 Yarn: Bulky #5 weight, approximately 952 yards Color A (main) + 80 (100, 120, 140, 160, 180) yards Color B (accent) depending on size. The original yarn, Bernat Plentiful, is discontinued… see the full yarn section below for five great alternatives!
🪝 Hook: US K/10.5 (6.5mm)… or whatever size you need to match gauge. Gauge is always the boss, especially for garments.
📐 Gauge: 10 esc and 8 rows = 4″. Please, please check your gauge before casting on for a sweater… it genuinely matters here.
📏 Sizes: XS, S, M/L, XL, 2X, 3X. Sizes run in 5.5-inch increments… that's larger than the standard 4″ range, so be sure to check the finished bust measurement rather than just going by the size label.
📏 Finished Bust: 33.5 (39.25, 44.75, 50.5, 56, 61.5)”
🎯 Skill Level: Advanced Beginner. Some experience working in the round is helpful but not required… the pattern walks you through every step.
⏱️ Time: Weekend project for most sizes. Bulky yarn means faster progress than you'd expect… many crocheters finish the body in a single session.
📏 Sizing Note:
Sizes go in 5.5″ increments… that's a bigger jump than most patterns. Check the finished bust measurement before picking your size. The sweater has 6-9″ of ease built in, so it's designed to be roomy… you can also go down a size for a closer fit.
Find This Pattern on Ravelry 🧶
The complete pattern is always free right here on the blog… no gates, no tricks. But if you'd rather have a clean, beautifully formatted, ad-free PDF you can print and take to your craft room, I've got you! The PDF includes all pattern instructions, the mosaic chart, the stitch diagrams, and the schematic in one tidy document that's easy to follow whether you're curled up on the couch or working at your local yarn shop. Grab it from any of the links below!
📬 Never miss a free pattern!
Join thousands of BiCrafty besties who get new free patterns delivered straight to their inbox every week.
Join our Newsletter
Get Free Crochet & Knitting
Pattern Links & Coupons!

Never Crocheted a Garment? This Is Your Sweater. 🧶
“I've never crocheted a garment before.” Good. Start here. We're talking flat rectangular panels and a top-down yoke that grows naturally round by round… no armhole math, no complicated seaming, no puzzles to solve on your own. I walk you through every single step in the pattern below. This is genuinely the sweater that turns “I could never make a sweater” into “wait… I just made a sweater.” 🙌
“Mosaic sounds really advanced.” I hear this all the time, and I promise… it's not what you think. You only ever use one color per round. Color A does its round all the way around, Color B does its round all the way around, and the colorwork magic happens automatically from how the stitches interact. One color at a time. That's really all it is. 🤫 If you can single crochet, you can do this.
“I'm not sure I'll actually finish it.” Bulky yarn is the cure for the unfinished project pile. This sweater works up so much faster than you'd expect… one solid weekend of crocheting and you could have the entire body done 🙌. The mosaic section is only about four inches, and then it's sleeves and finishing. This is genuinely not the pattern that sits in your WIP basket forever.
“Will it actually fit me?” The oversized, cropped design is forgiving by intention… you're not chasing a precise fit, you're going for a relaxed, drapey look that works beautifully across a lot of different body types. Check the finished bust measurements rather than just grabbing your usual size, since sizing runs in 5.5-inch increments. Find the finished bust with a comfortable amount of ease over your own measurements… and that's your size.
“What yarn do I use now that Bernat Plentiful is gone?” You are completely covered. Scroll down to the full Yarn Situation section for five specific alternatives with notes on how each affects the mosaic look. Short version: brushed or fuzzy yarn = soft, dreamy mosaic effect 😍. Smooth yarn = bold, graphic lines. Both are gorgeous. Both are totally achievable.
Blocking Tips for Your Pumpkin Spice Sweater 🌊
Please block this sweater. Please. I know it looks finished right off the hook… but blocking is what takes it from “handmade” to “where did you buy that?” 🙌
Wet blocking is the move for this one. Fill a basin with lukewarm water, submerge the sweater, and let it soak for 10–15 minutes. Don't wring it out — gently press the water out, then roll it in a towel to absorb the excess.
Lay it flat on a blocking mat, pin it to your schematic measurements, and let it dry completely. Overnight. Don't rush it.
With a mohair-look yarn especially, blocking is transformative. The fibers bloom and soften, the mosaic stitches relax and pop, and the drape goes from “stiff” to “dreamy.” It's genuinely worth the wait. ✨
🎓 Designer Tip:
Pin the sweater to the FINISHED measurements on your schematic, not the measurements you want it to be. Blocking can stretch fabric but it can't shrink it. Check your schematic numbers, pin to those, and let the yarn settle where it wants to live.
What Is Mosaic Crochet? 🎨
Mosaic crochet is one of those techniques that stops people mid-scroll. You see a sweater with this gorgeous geometric, woven-looking pattern and immediately think “that must be SO complicated.” Here's the thing: it's not. One color per round. Color A works its complete round, you drop it, pick up Color B, and Color B works its complete round. That's the entire system 🤯. You never hold two yarns at once. You never carry a color across the back of your work. Just… one color at a time.
The colorwork magic comes from a simple, clever trick: some stitches in a given round are worked into the row below… those are the “hdc in next st 1 row below” instructions you'll see in the mosaic section. When Color A leaves little stitches visible, and Color B comes along and works around them… the contrast creates the visual pattern. It's an optical illusion built one stitch at a time 😍. It looks complex from across the room and surprisingly approachable from inside the pattern.
Mosaic is also perfect for a first colorwork garment because you're only ever dealing with one yarn at a time. Your tension can't go haywire, there's nothing complex to track across a row, and if you lose your place… you can look at the fabric and see exactly where you are. The stitches tell the story. And in this sweater, the mosaic section is only about four inches of the total garment 🧶… just enough to fall in love with the technique without feeling overwhelmed.
Here's the honest secret: the chart does all the thinking for you. You're not memorizing a complicated stitch sequence… you're following a visual map where each square tells you exactly what to do. The chart is in the Stitch Diagrams section below, and once you match what you're crocheting to what you see on it, that famous “click” moment happens fast. First-time mosaic crocheters regularly tell me it changed how they felt about colorwork entirely… and I love that for every single one of them. 🧶
🎨 More Mosaic Crochet Patterns from Marly Bird
- Free Mosaic Crochet Blanket — the perfect mosaic starter project
- Mallow Mosaic Crochet Hat — practice mosaic in hat form before tackling a sweater
- Mosaic Tile Crochet Blanket — geometric mosaic for home decor
The Yarn Situation: Bernat Plentiful Is Gone 🥺
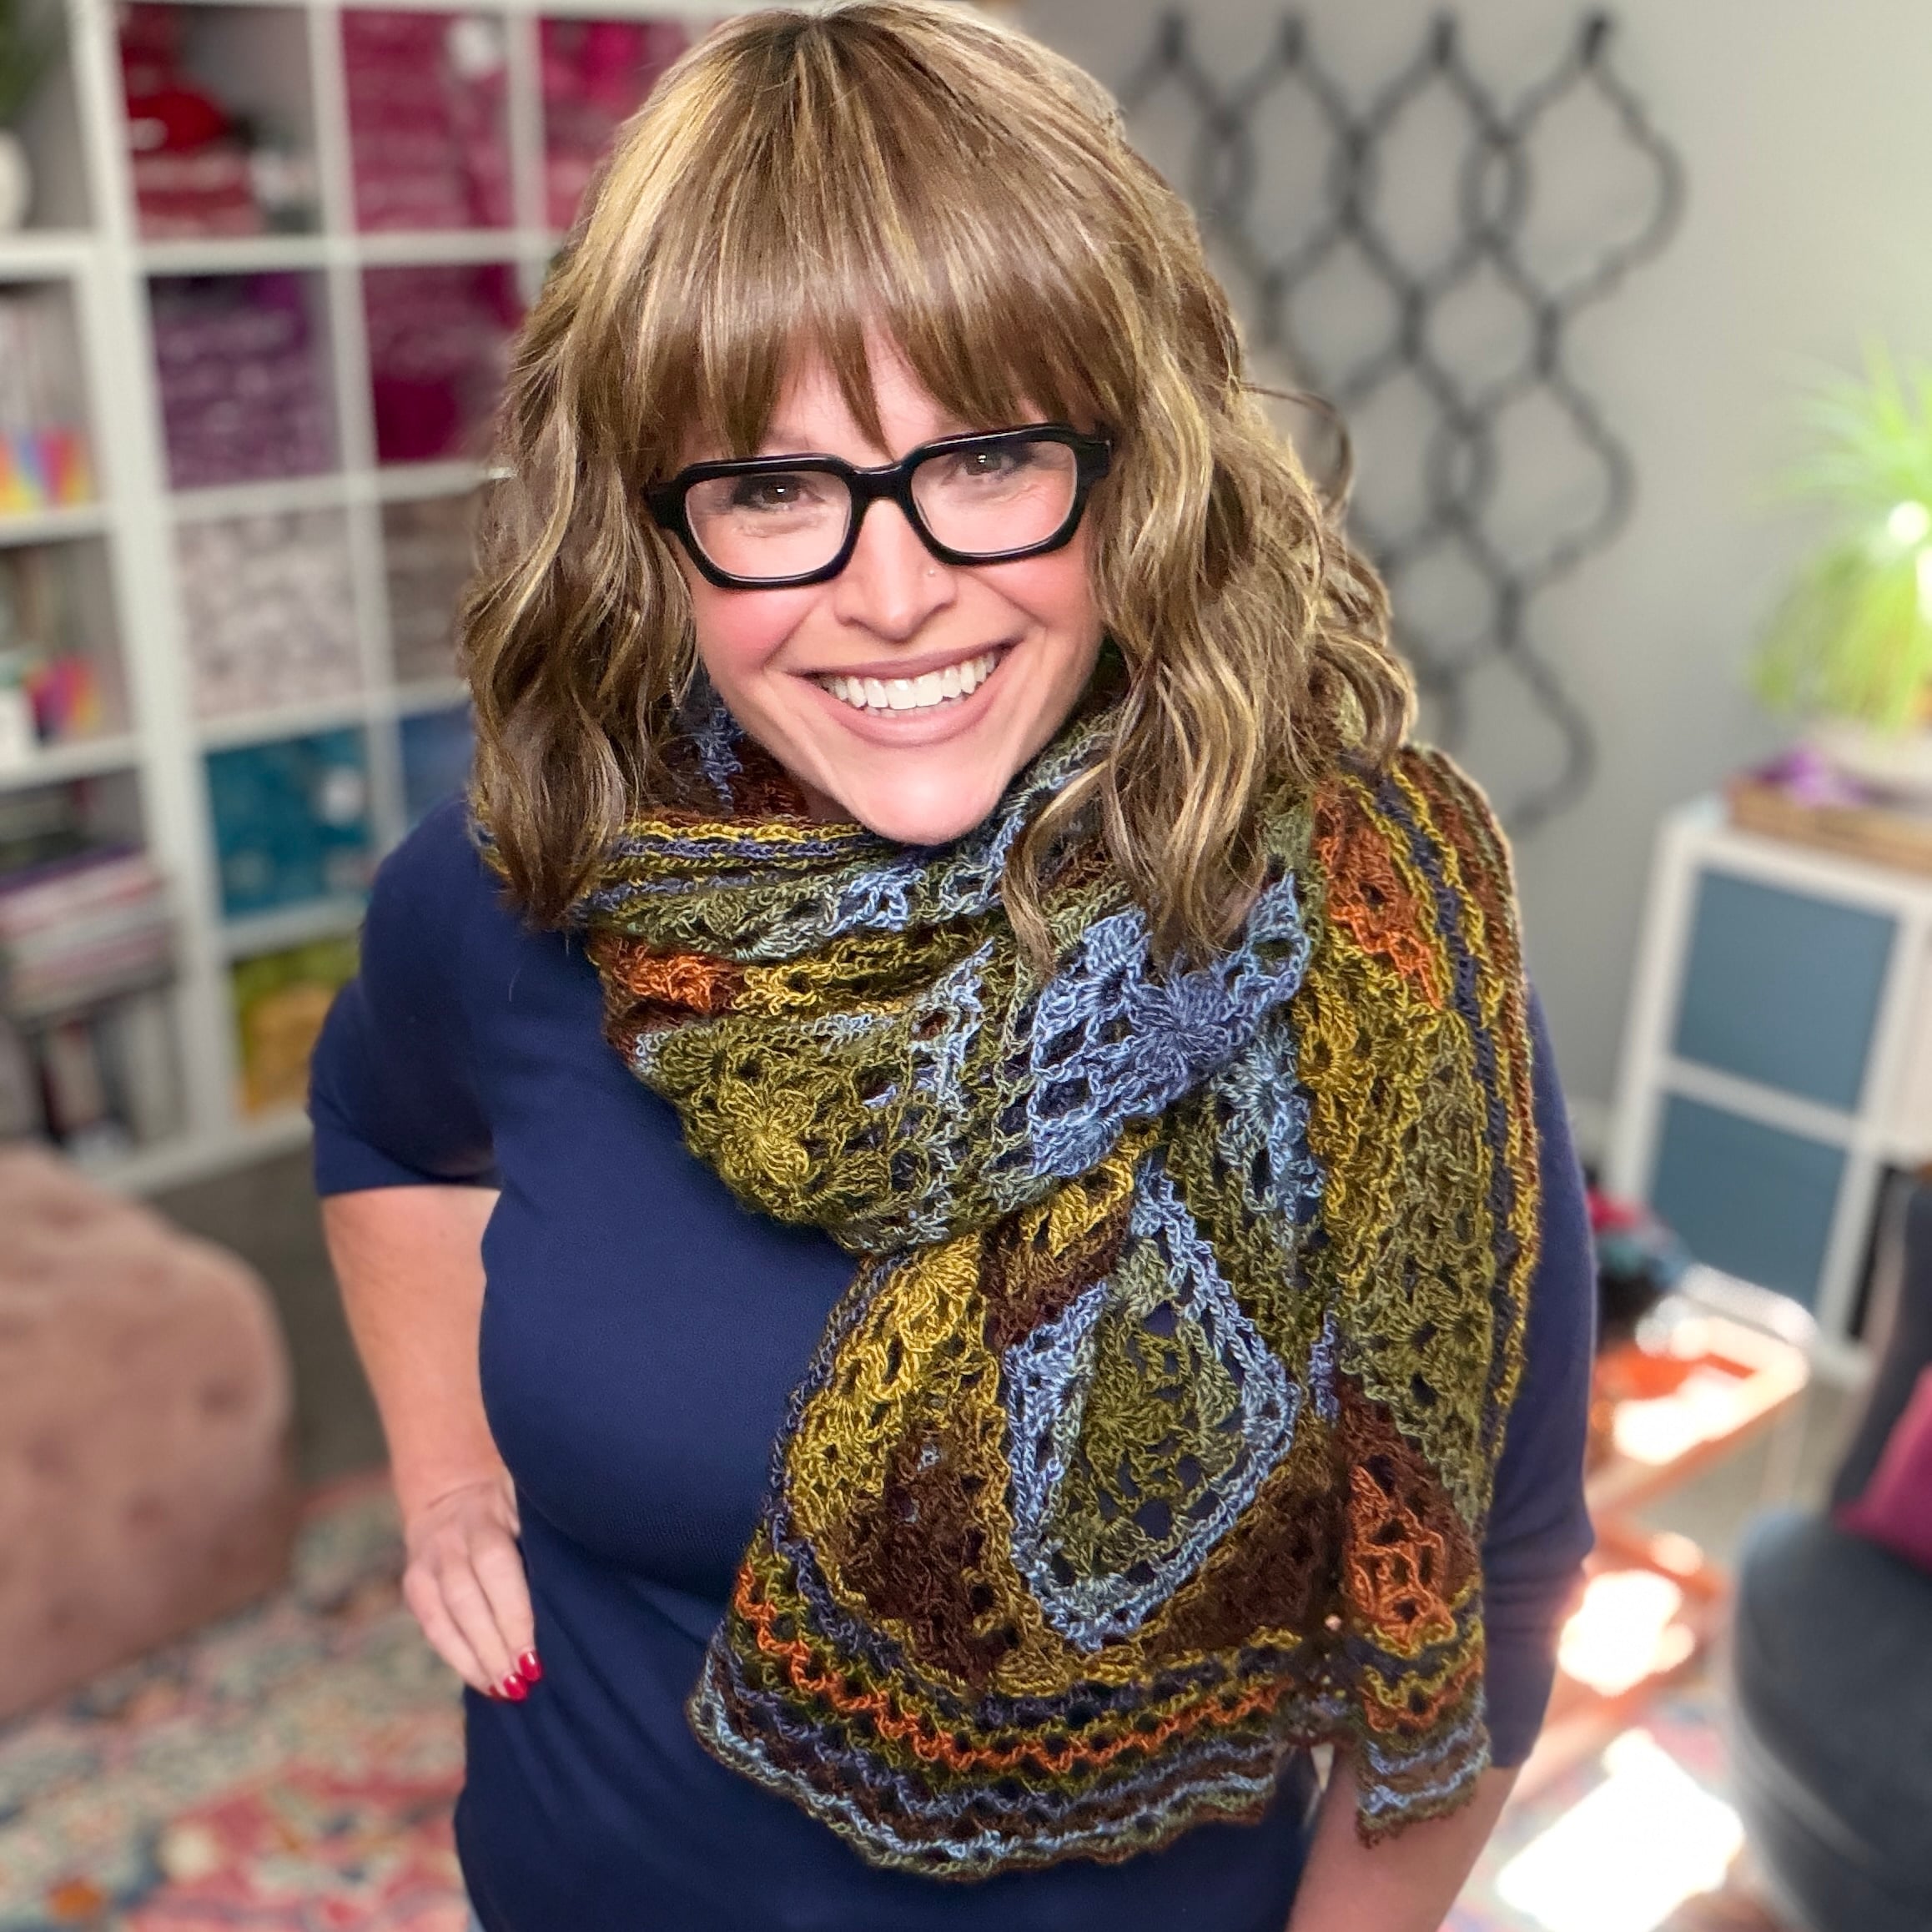
Bernat Plentiful is discontinued and I'm not going to pretend that doesn't sting a little. (I'm fine. I'm totally fine.) It was a bulky (#5) weight yarn with a brushed, slightly bouclé texture that mimicked the look of mohair without the mohair price… gorgeous self-striping colorways, extraordinary yardage at roughly 952 yards per skein, and a 60% acrylic / 26% wool / 14% polyester blend that gave it warmth and drape while staying machine-friendly. One skein made the entire body of this sweater with plenty to spare. It was discontinued around 2021–2022 and crafters across every platform are still mourning it. Valid.
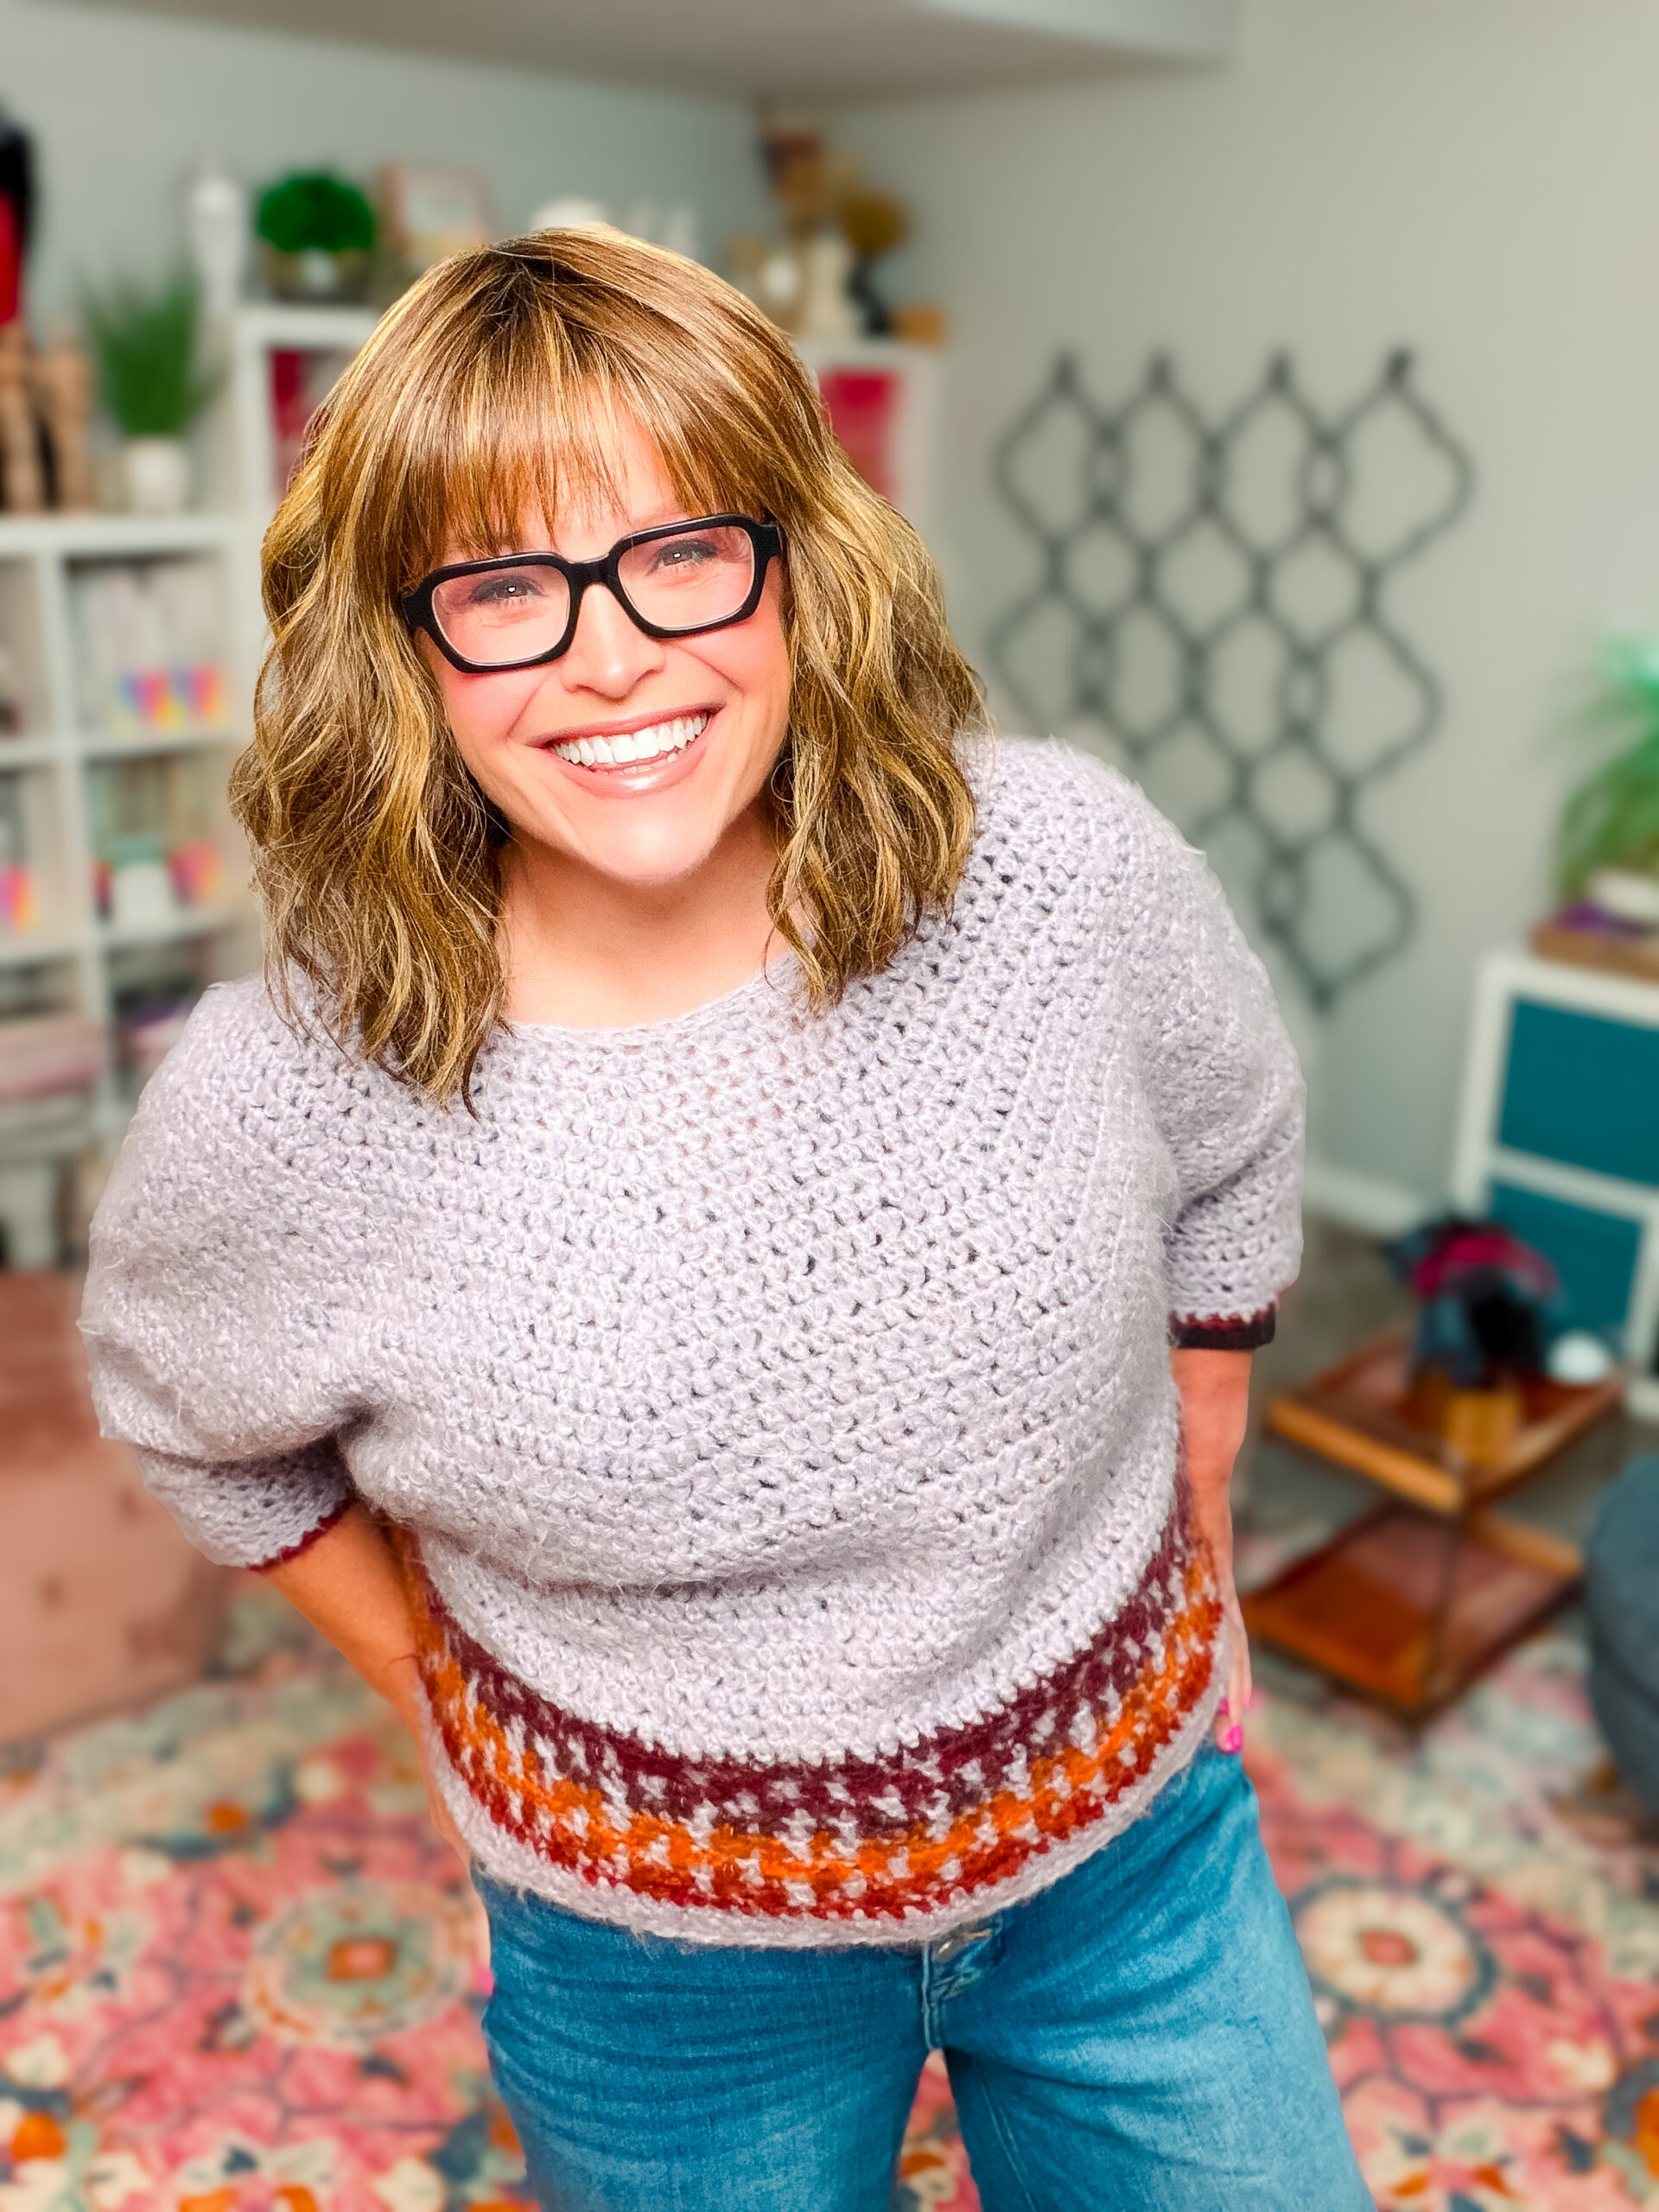
Here's what matters for your substitute: the fuzzy, brushed quality of Bernat Plentiful is what gives this sweater's mosaic its soft, impressionist, watercolor-wash look. The fibers from each color slightly blend at the edges, softening the mosaic lines in the most gorgeous way 😍. Swap in a smooth yarn and you get clean, graphic mosaic lines instead… completely different vibe, equally beautiful. (Fuzzy = dreamy. Smooth = bold. Neither is wrong.) Keep that in mind as you choose your substitute from the table below.
A note on gauge: Bernat Plentiful was labeled Bulky #5… but a big part of what made it knit/crochet to bulky gauge was its halo. The brushed acrylic fibers puffed out around each stitch and filled the fabric, giving you that bulky gauge even though the actual strand wasn't as thick as a true bulky. Yarns with a similar brushed or fuzzy texture should behave closest to the original. For smoother yarns that are technically a lighter weight, holding two strands together can help you reach the right gauge… but always let your swatch be the final answer. Never skip the gauge swatch on a sweater. 🙏
⚠️ Important Note on Yarn Substitutions:
These are suggestions only… I have not personally tested any of them with this specific pattern. Please do a gauge swatch before casting on. Bulky yarn patterns are especially sensitive to gauge differences, and a half-stitch off can mean a full size off in your finished sweater.
| Yarn | Weight | Notes |
|---|---|---|
| Caron Latte Cakes | Bulky #5 | Gradient/ombre, ~530 yds per skein… soft and drapey |
| Caron Cloud Cakes Perfect Phasing | Worsted #4 | Hold 2 strands together to reach bulky gauge… beautiful color phasing effect |
| Caron Cinnamon Swirl Cakes | Bulky #5 | Warm gradient tones… perfect for the cozy sweater vibe |
| Skyscape by Loops & Threads | Aran #4 | Self-patterning ombre… swatch carefully, this is lighter than bulky |
| Caron Macchiato Cakes | Bulky #5 | Rich gradient coloring, excellent yardage |
| KnitPicks Oceana | Bulky | Soft superfine alpaca + SEAQUAL recycled fiber… fluffy, sustainable, beautiful drape |
| KnitPicks Wonderfluff | Bulky #5 | Alpaca + merino blown into nylon mesh… incredibly soft with a gorgeous halo |
| Lion Brand Feels Like Bliss | Bulky #5 | 100% nylon chainette, ultra-soft and fuzzy… note: ~109 yds/skein, you'll need several |
🎓 Designer Tip:
Always swatch for a garment. Both stitch gauge AND row gauge matter here… both affect the finished fit. If your gauge is off by even half a stitch, your sweater could end up a full size different. Make your swatch, block it, THEN measure.
What You'll Need
- Hook: US K-10.5 / 6.5mm (or size needed to obtain gauge)
- Color A (Main): ~952 yards bulky #5 (Lavender Fog in the original)
- Color B (Accent): 80 (100, 120, 140, 160, 180) yards bulky #5, by size (Blood Orange in the original)
- Scissors + tapestry needle for weaving ends
- Stitch markers — grab several before you start; you'll use them throughout the yoke shaping
- Measuring tape for your gauge swatch and checking finished measurements as you go
What You'll Learn
- Foundation Single Crochet (FSC) — a flexible cast-on that creates a beautiful, stretchy collar edge instead of a stiff chain (way better than regular chains, trust me)
- Extended Single Crochet (esc) — adds height and gorgeous drape to your fabric; the main stitch of this sweater (once the rhythm clicks, it's genuinely addictive)
- Top-down yoke construction — watch your sweater grow from the collar down; try it on as you go!
- Working in the round — joining rounds with a slip stitch and turning, creating a seamless tube for the body
- Mosaic colorwork — one color per round (yes, that's really all it is), genuinely so satisfying 🎨
- Basic sleeve shaping — simple decreases that create a tapered, flattering fit
- Wet blocking a finished garment — the step that takes your sweater from “handmade” to “looks like a boutique find” 😍 (do not skip this step, it's transformative)
Video Tutorial
A video tutorial is in the works! *(I'm planning to make a new sample in a different yarn so you can see exactly how a substitute looks finished — which feels way more useful than just talking about it.)* Subscribe to my YouTube channel so you don't miss it when it drops. 🎬
Pumpkin Spice Cropped Crochet Sweater || Pattern Details
Skill Level
Advanced Beginner… comfortable working in the round, willing to learn mosaic colorwork (it's easier than it sounds, I promise!).
Finished Measurements
| Size | XS | S | M/L | XL | 2X | 3X |
|---|---|---|---|---|---|---|
| Finished Bust | 33.5″ | 39.25″ | 44.75″ | 50.5″ | 56″ | 61.5″ |
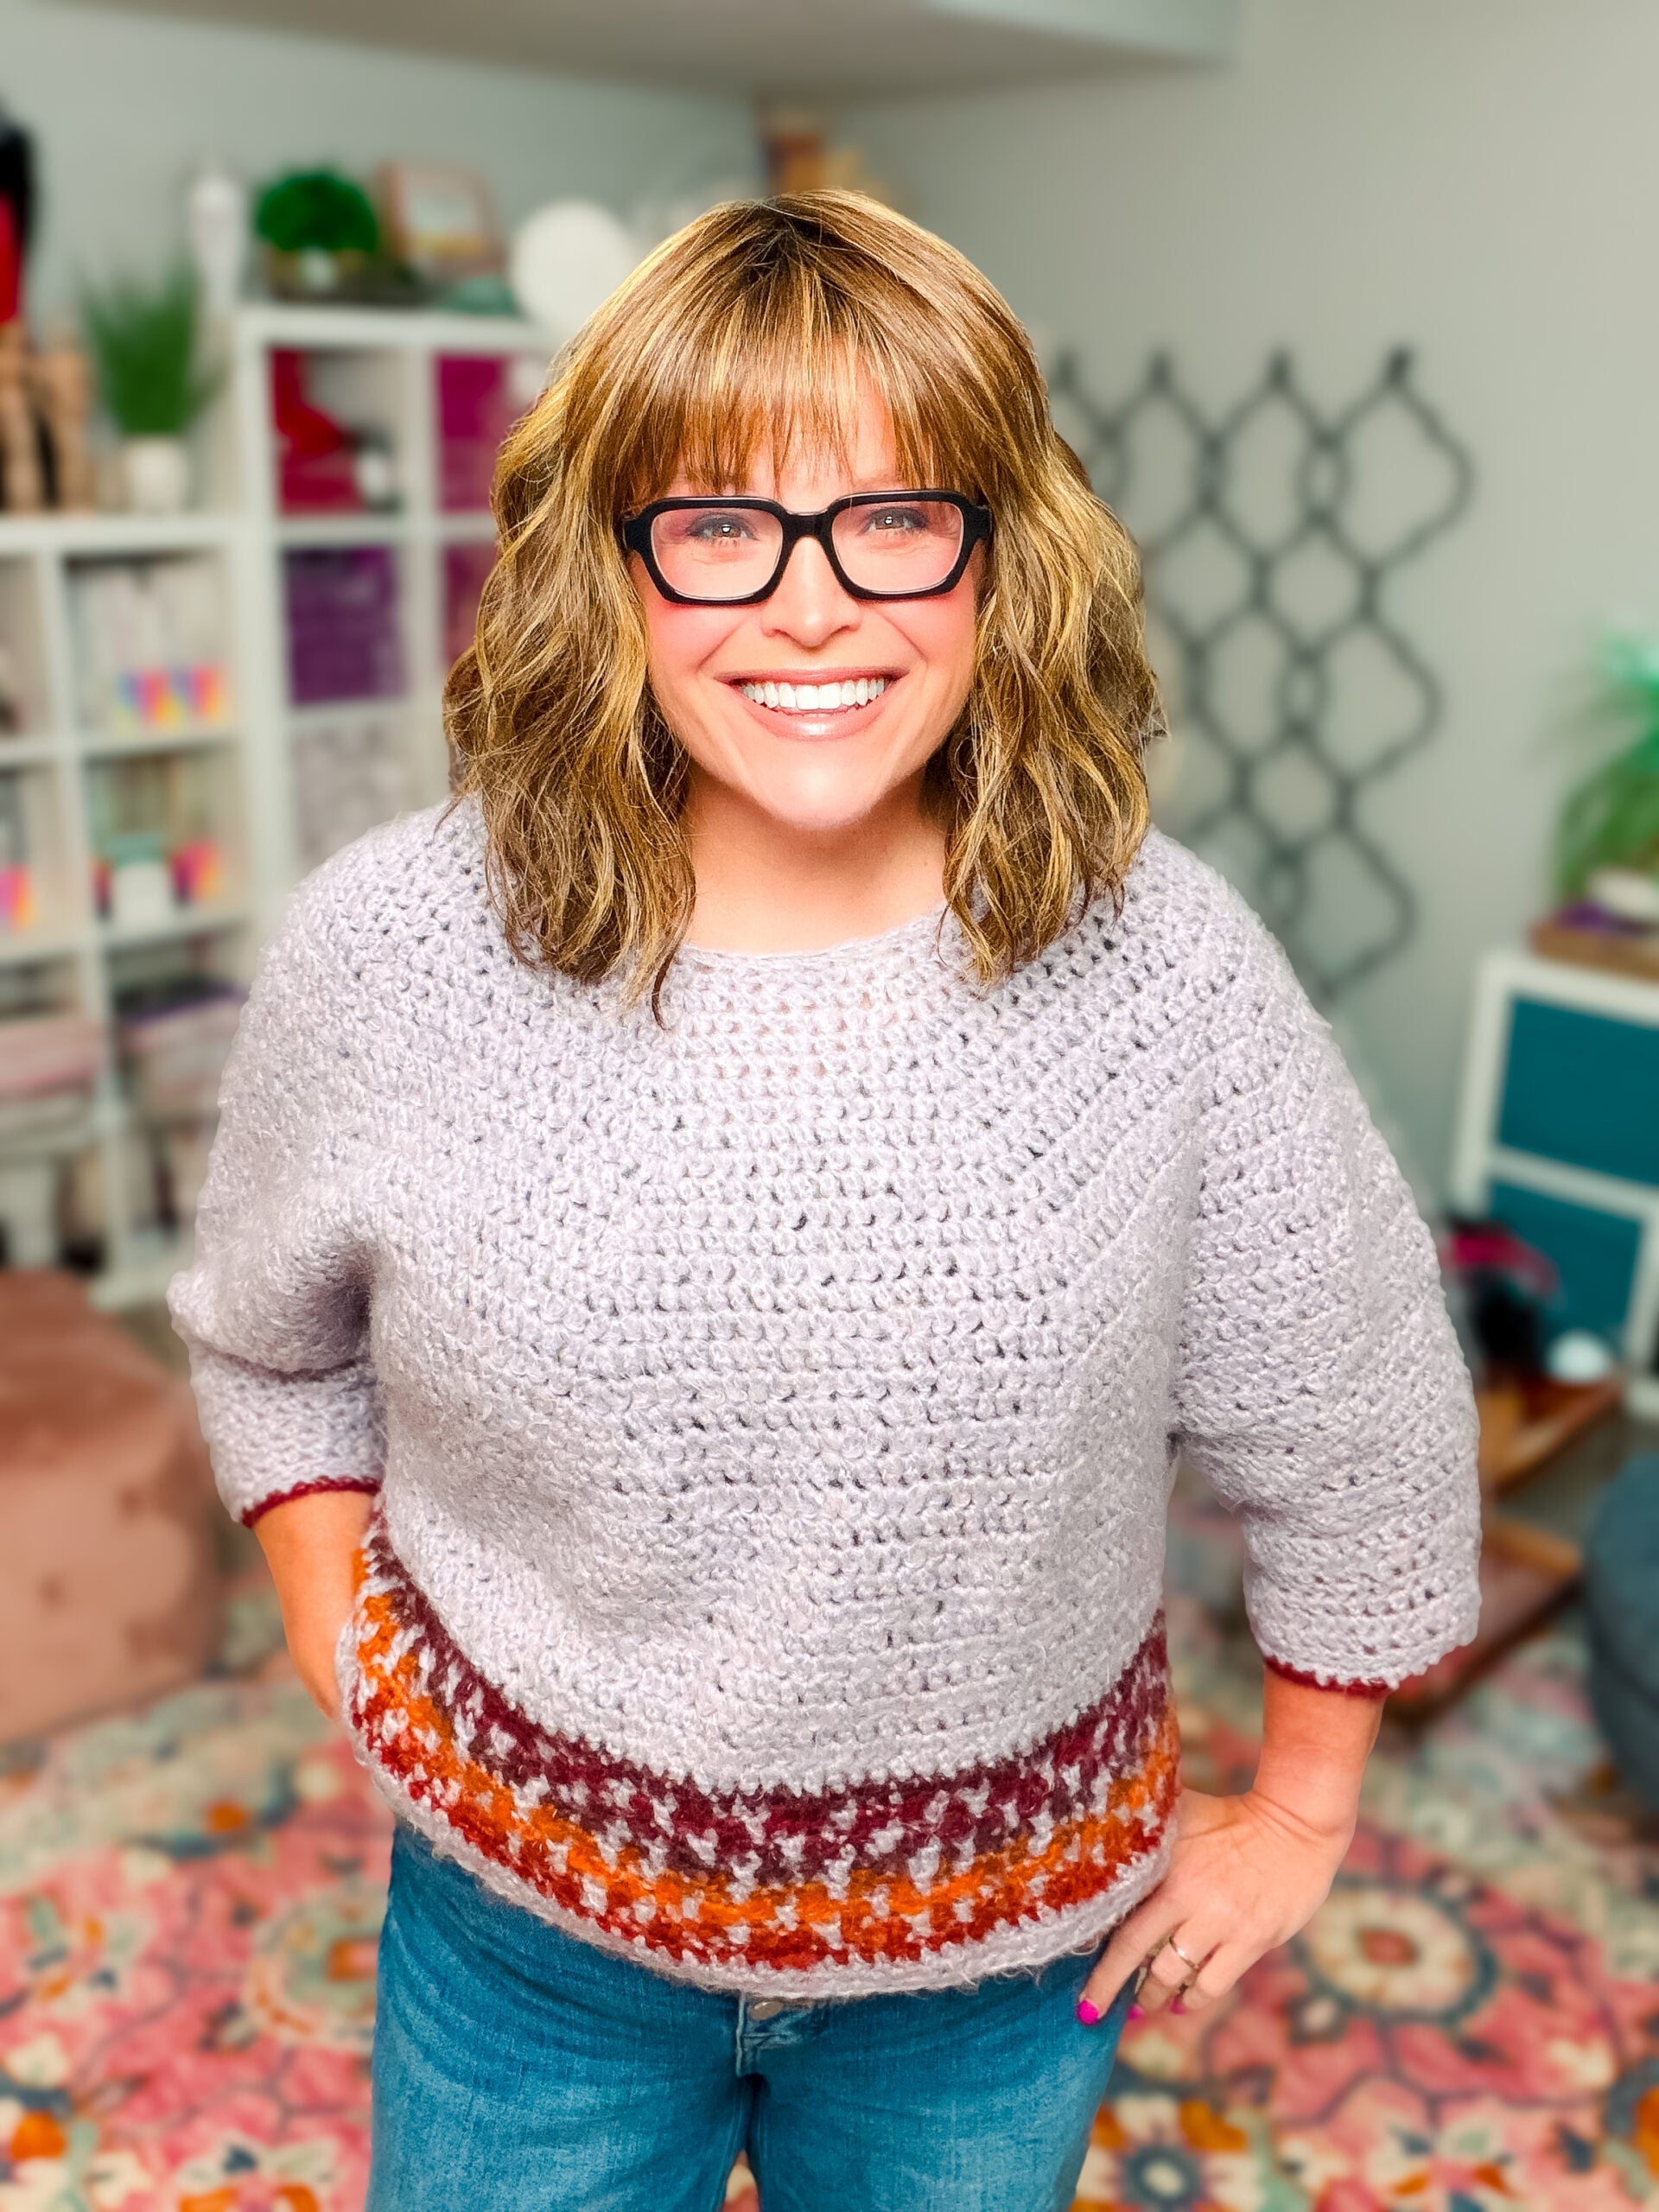
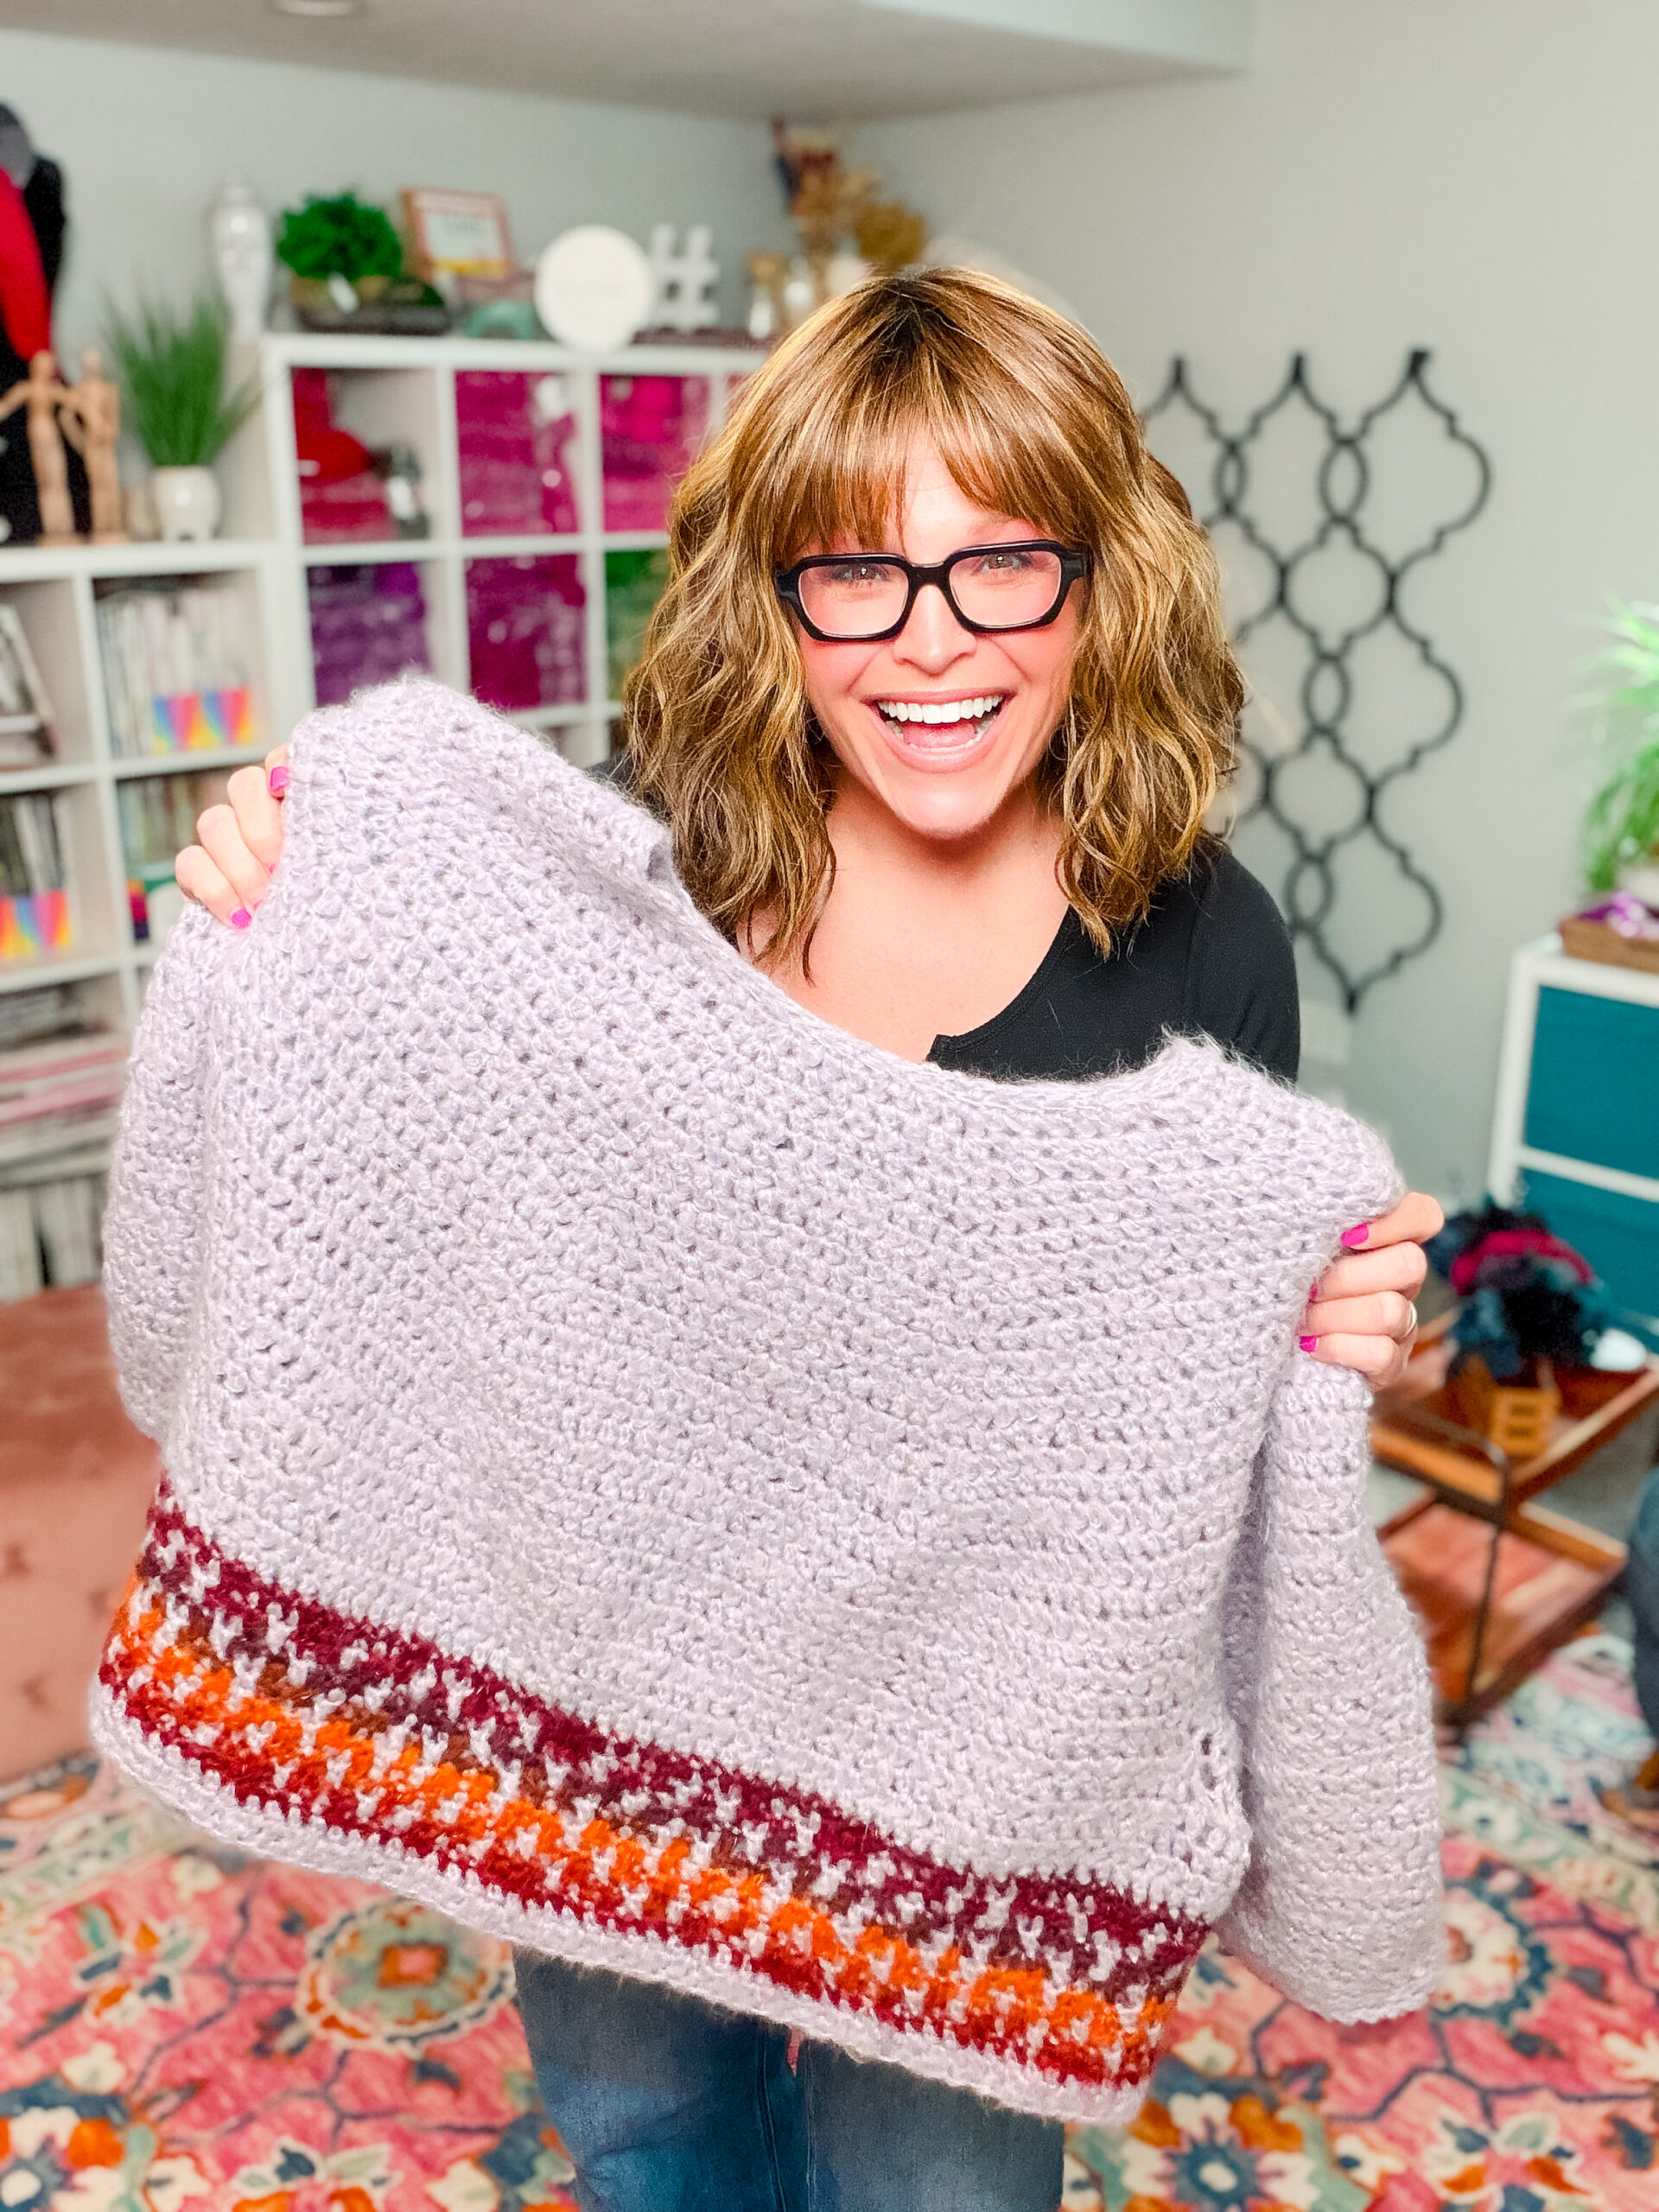
Sweater has 6–9″ of ease. Sweater shown is size 2X.
Gauge
10 esc and 8 rows = 4″. Use any size hook needed to obtain gauge.
🎓 Designer Tip:
Gauge matters more for sweaters than any other project. If your gauge is off by even half a stitch, your sweater could end up a full size different. Make your swatch, block it, THEN measure. Don't skip this. I know it's tempting. Don't skip this.
Materials
Yarn: Bernat Plentiful (60% Acrylic, 26% Wool, 14% Polyester; 10.6 oz/300 g; 952 yds/871 m; bulky size CYCA 5) — note: Bernat Plentiful is discontinued. See the Yarn Situation section above for alternatives!
Color A (Main): Lavender Fog — 1 (1, 1, 1, 1, 1) ball
Color B (Accent): Blood Orange — 80 (100, 120, 140, 160, 180) yards
Hook: US K/10.5 (6.5mm)… or size needed to obtain gauge.
Notions:
- Stitch Markers
- Tapestry Needle
- Scissors
- Tape Measure
- Notions Bag for Supplies (Optional)
- Leather tags (Optional)
- Leather rivets (Optional)
Abbreviations
- ch — chain
- sc — single crochet
- hdc — half double crochet
- sc2tog — single crochet 2 together (decrease)
- sl st — slip stitch
- esc — extended single crochet (see Special Stitches)
- esc2tog — extended single crochet 2 together (see Special Stitches)
- RS — right side
- WS — wrong side
- st(s) — stitch(es)
- sp — space
- tch — turning chain
- FSC — Foundation Single Crochet (see Special Stitches)
- A — Color A (Main color)
- B — Color B (Accent color)
Special Stitches
🎓 Designer Tip… Foundation Single Crochet:
The Foundation Single Crochet is one of my favorite techniques for garments. Instead of chaining first and then crocheting back into the chain… which creates a stiff, curled edge… the FSC builds your chain and your single crochets at the same time. The result is a collar edge that's flexible, non-curling, and comfortable to stretch over your head. Take your time learning the rhythm on the first few stitches. Once it clicks, it moves quickly!
Foundation Single Crochet (FSC)
First stitch: Ch 2 (does not count as sc), insert hook into 2nd ch from hook, yarn over and pull up a loop, yarn over and draw through 1 loop on hook (this forms a chain; placing a stitch marker can help identify the chain in the next stitch), yarn over and draw through 2 loops on hook (this forms the single crochet).
Next stitch: Insert hook into bottom of previous stitch (in the “chain” space), yarn over and pull up a loop, yarn over and draw through 1 loop on hook (forming a chain), yarn over and draw through 2 loops on hook (forming the next single crochet).
Repeat “Next stitch” for each additional Foundation Single Crochet needed.
Extended Single Crochet (esc)
Insert hook into indicated stitch, yarn over and pull up a loop, yarn over and draw through 1 loop on hook, yarn over and draw through 2 loops on hook.
🎓 Designer Tip… Extended Single Crochet:
The Extended Single Crochet is my secret weapon for fabric with beautiful drape. That one extra step… yarn over, pull through one loop… gives the stitch a little extra height and creates fabric that moves and flows. It's the whole reason this sweater hangs so gorgeously.
Extended Single Crochet 2 Together (esc2tog)
Insert hook into indicated stitch, yarn over and pull up a loop, yarn over and draw through 1 loop on hook, insert hook into next stitch, yarn over and pull up a loop, yarn over and draw through 1 loop on hook, yarn over and draw through all 3 loops on hook. (1 st decreased)
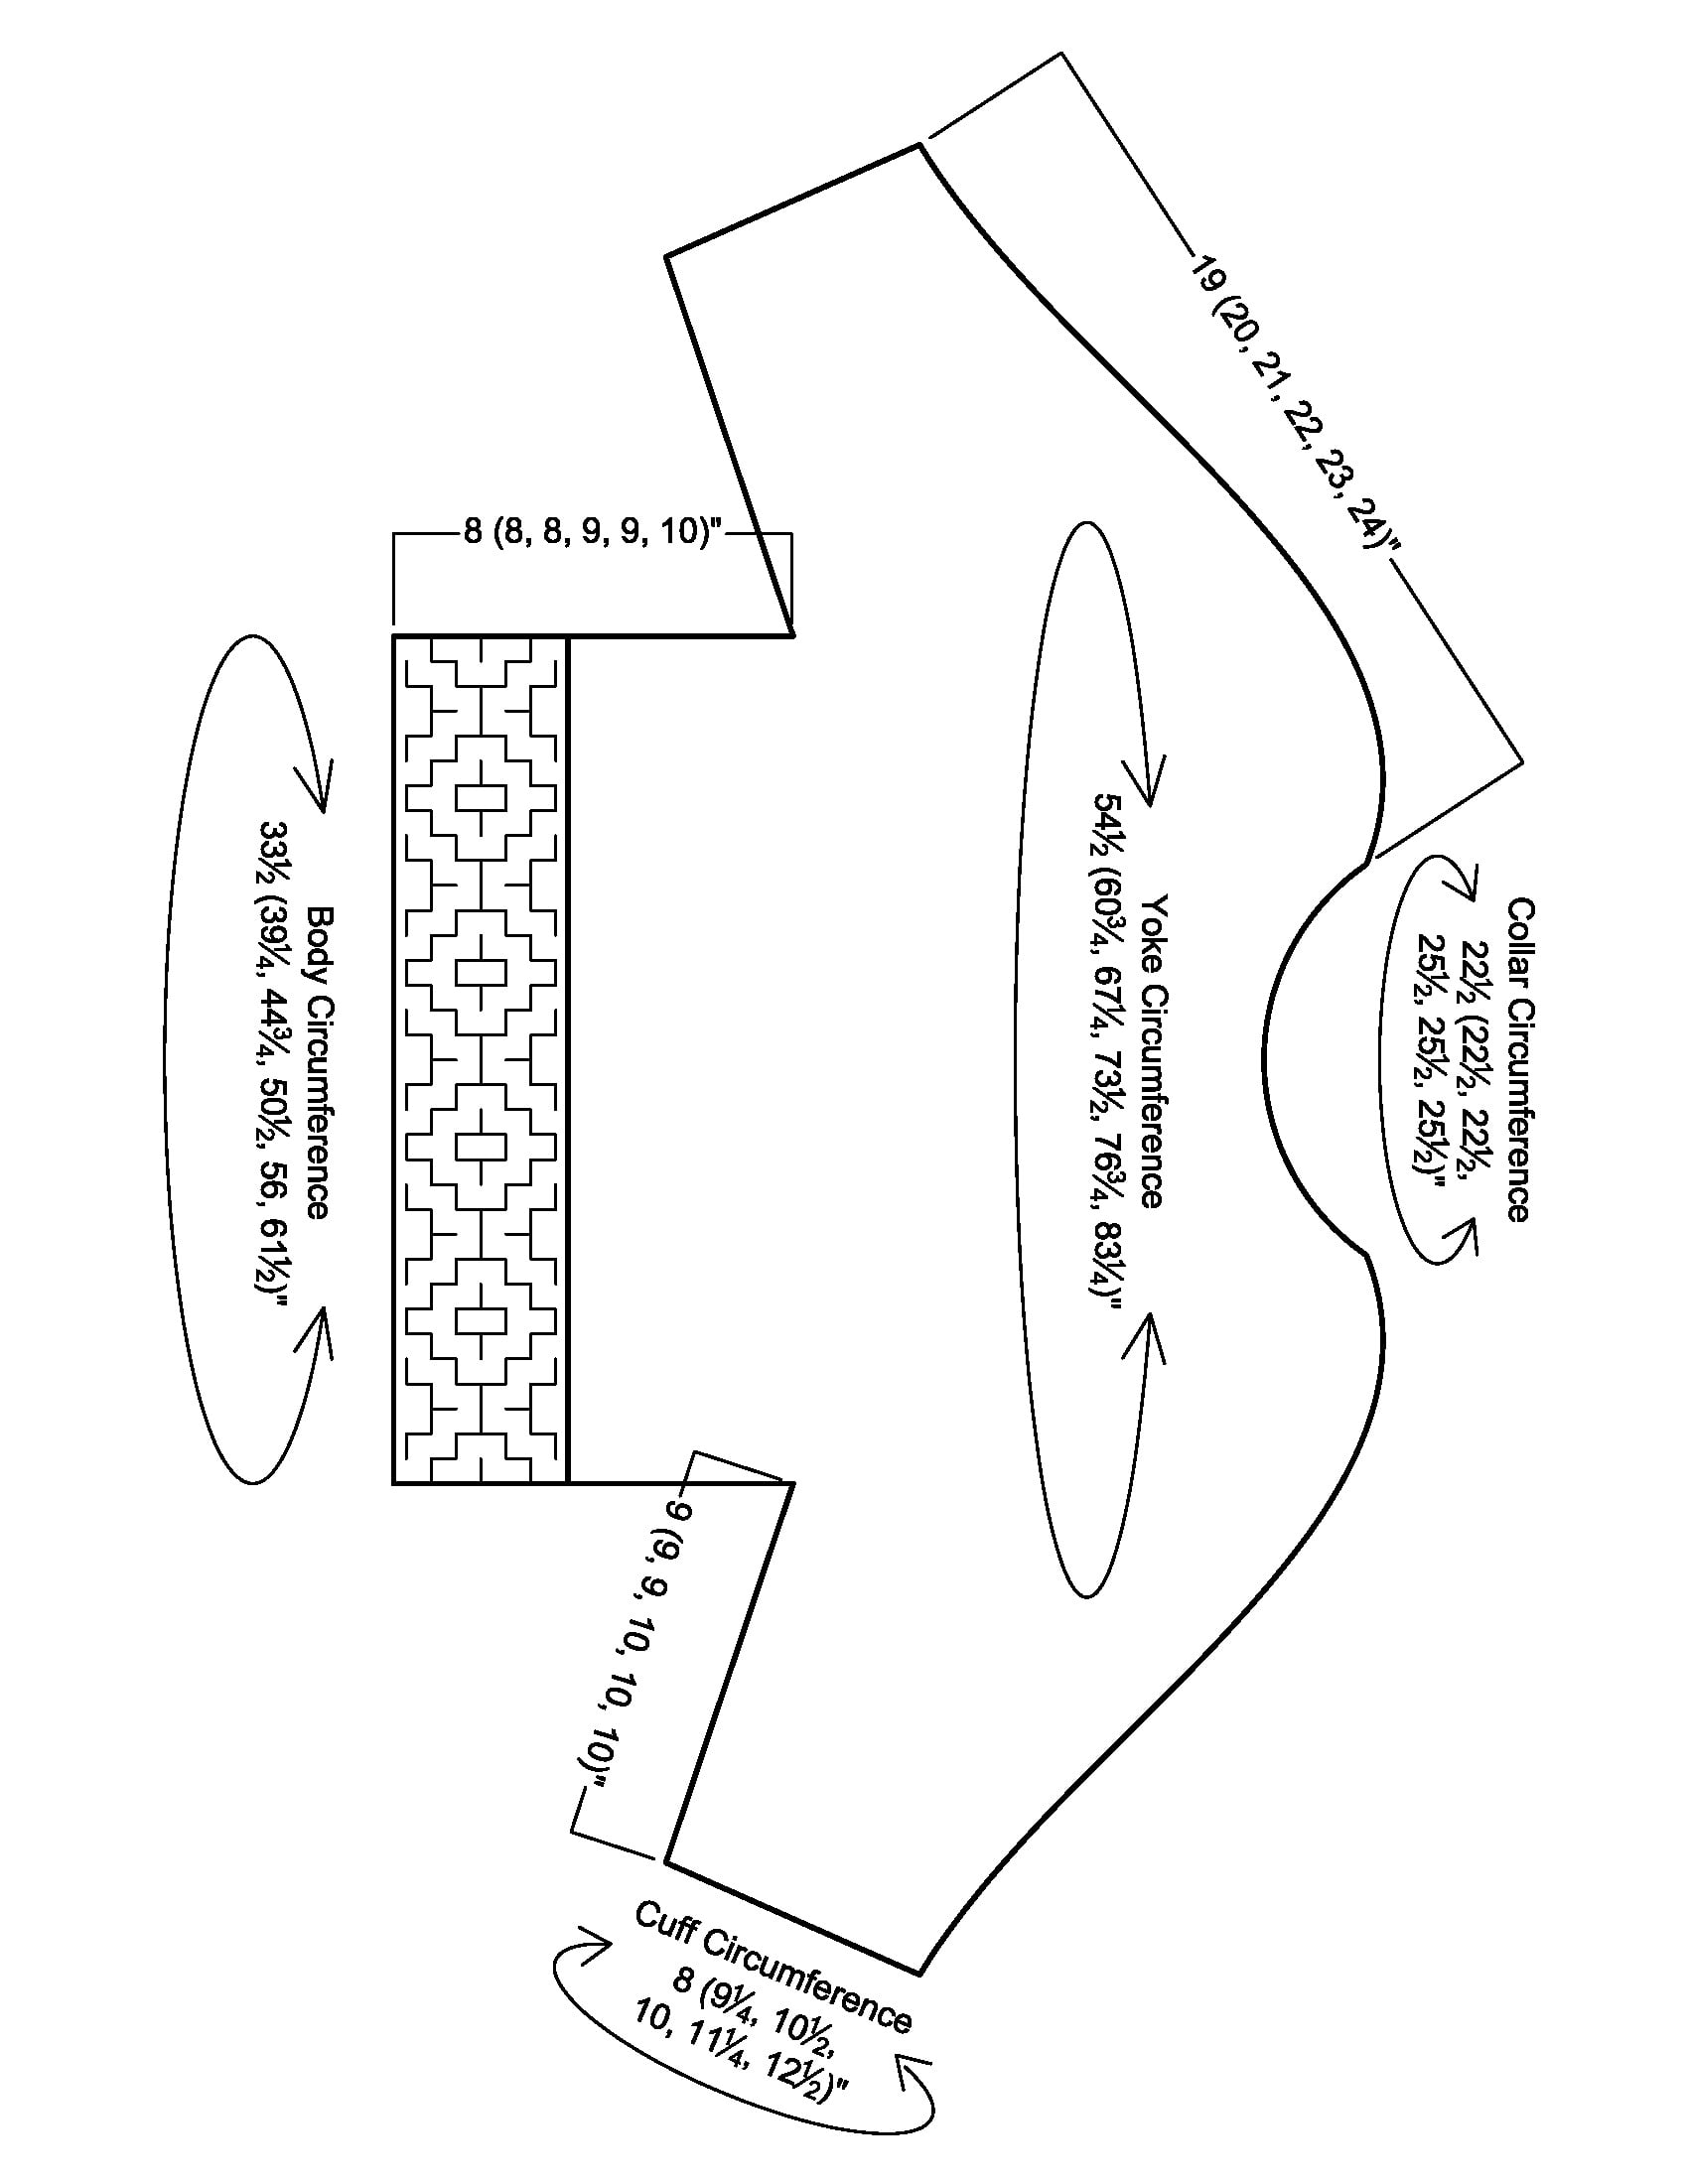
Schematic
Stitch Diagrams
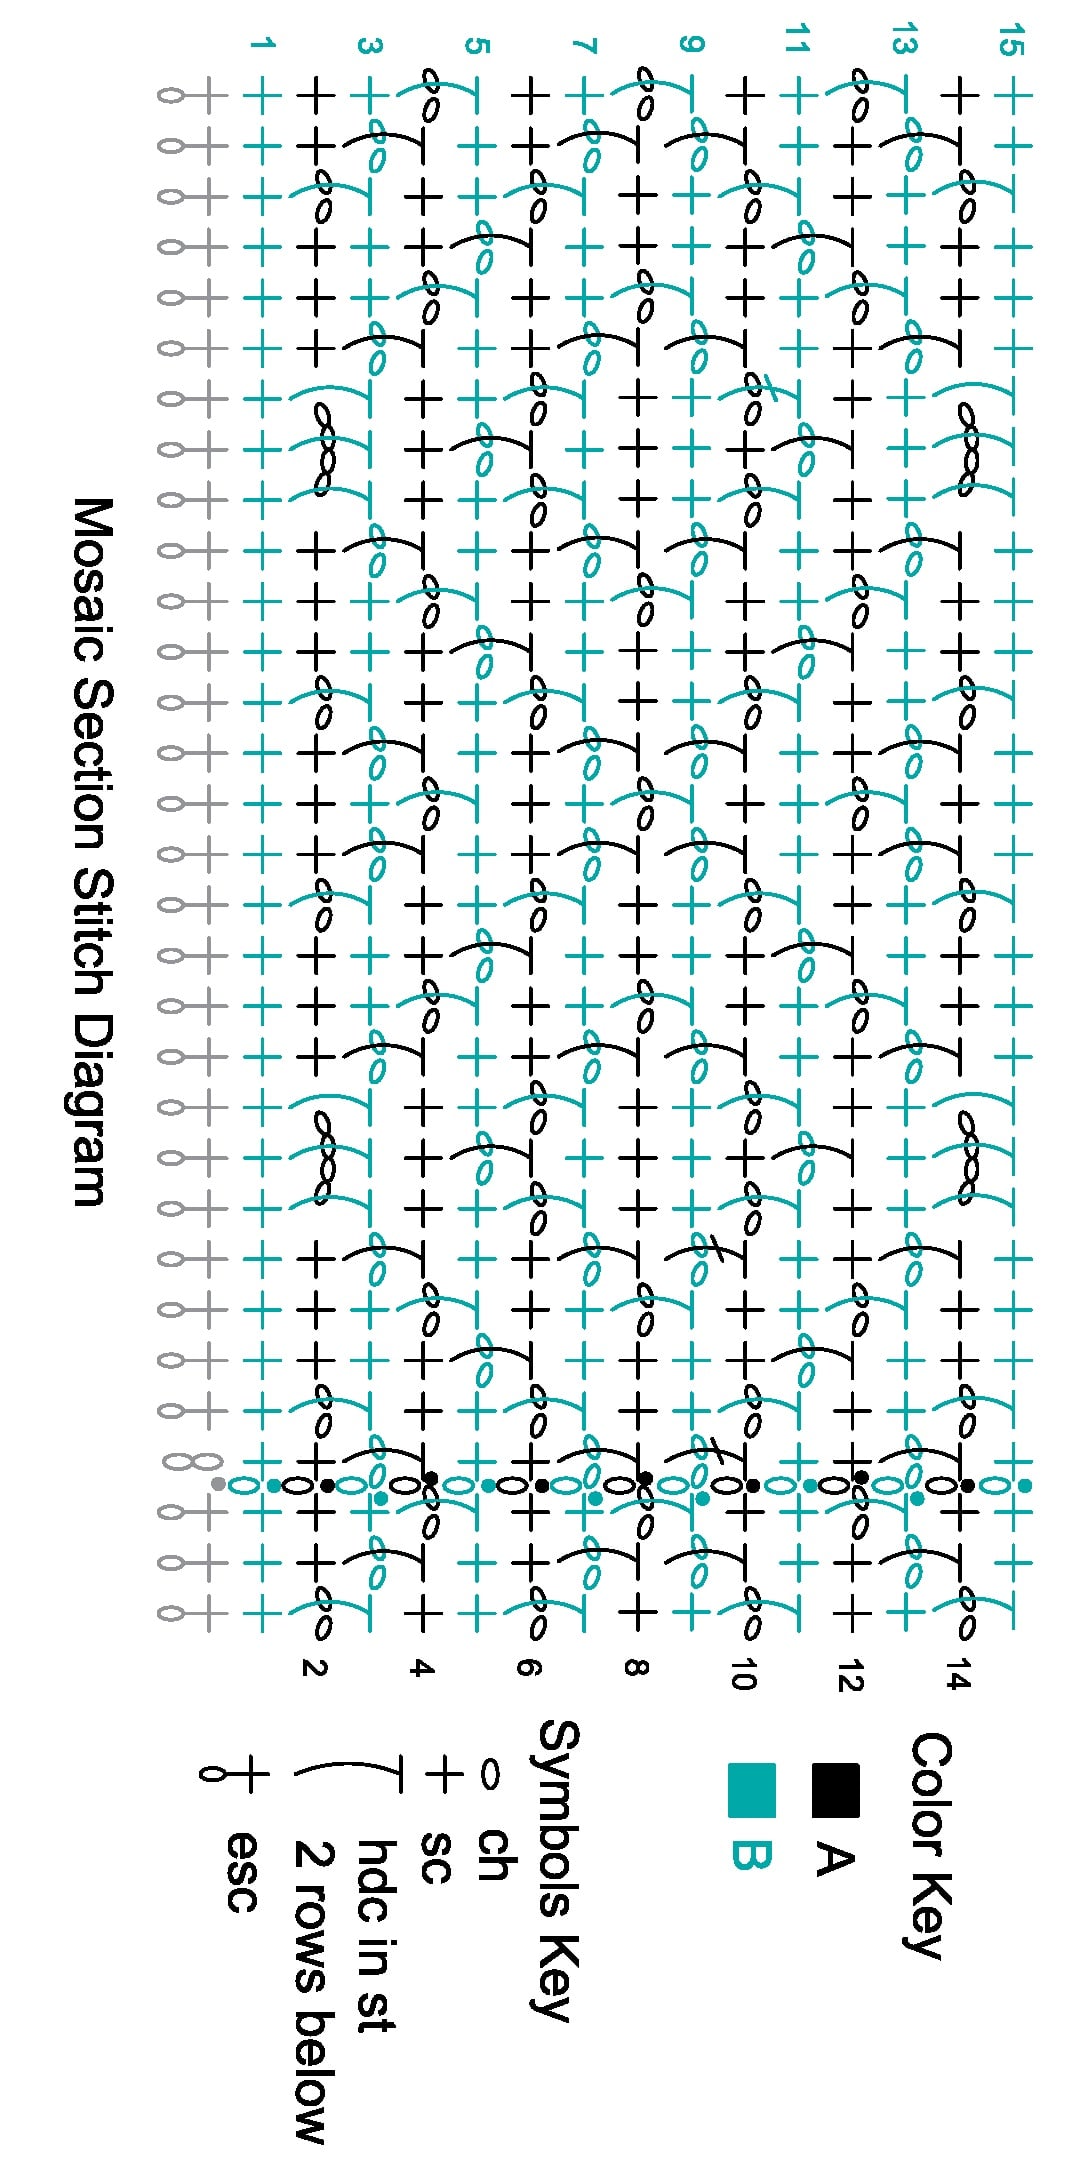

These diagrams are also available in the ad-free PDF for easy printing.
Notes
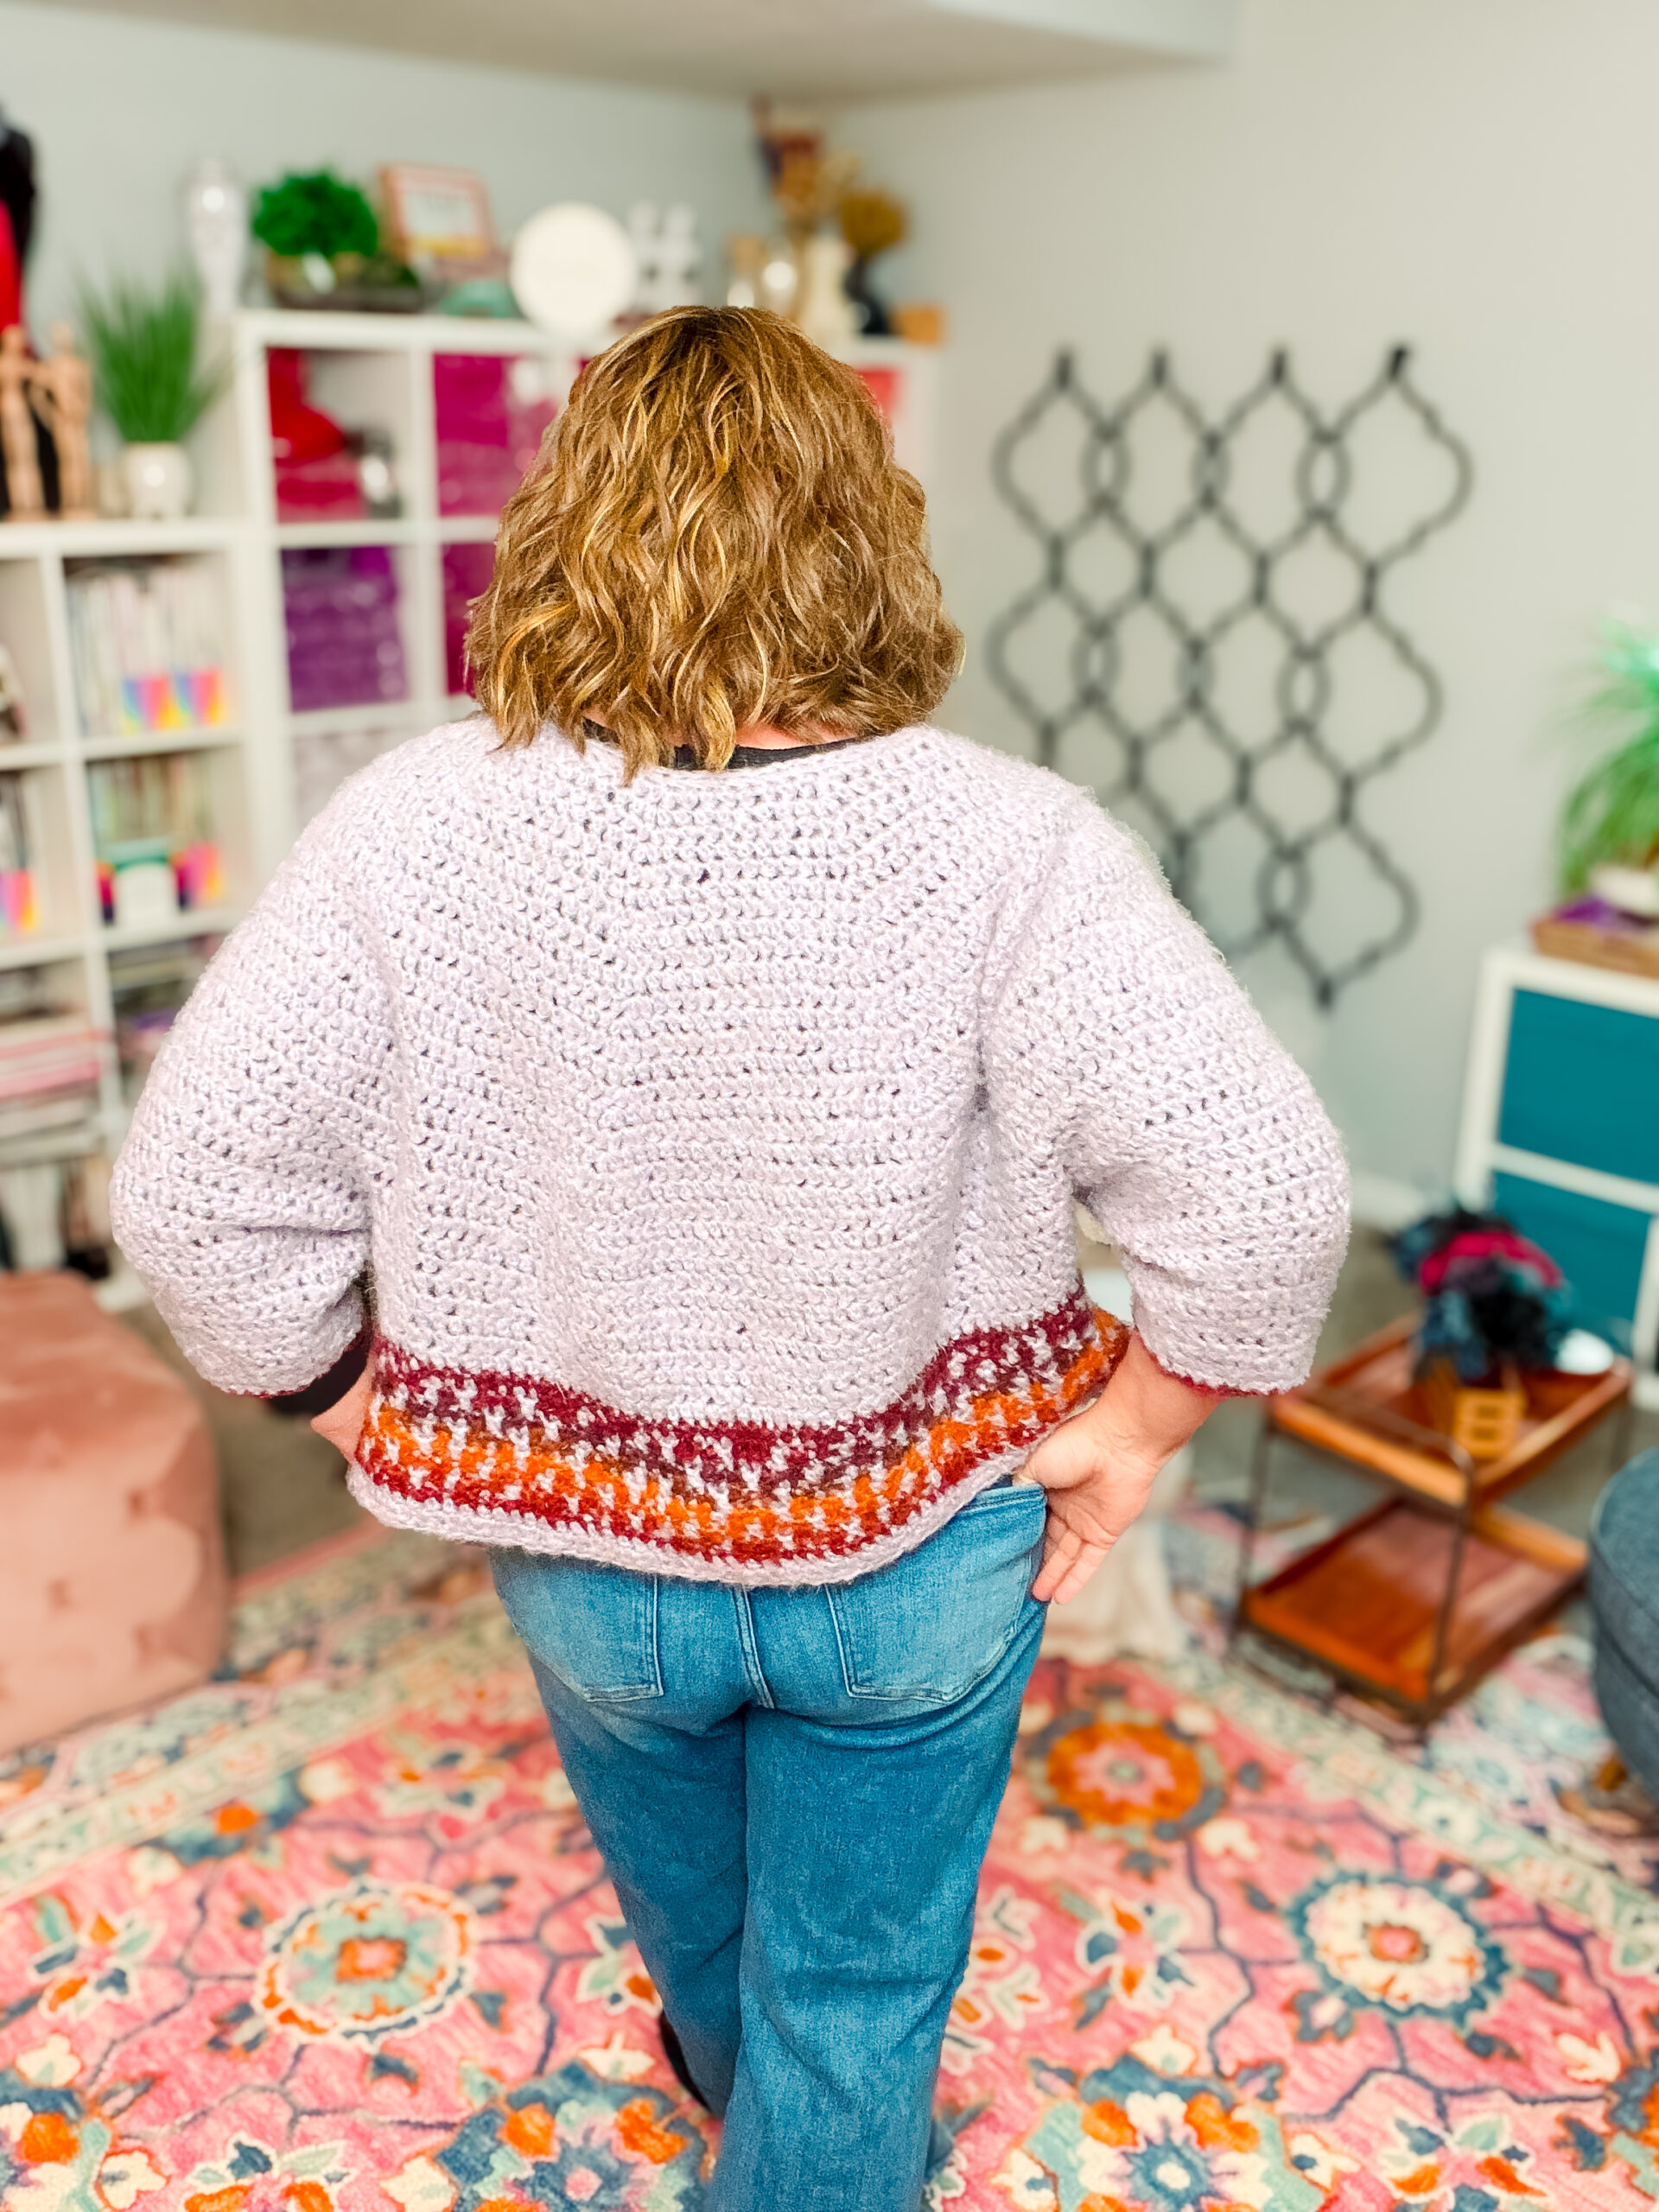
* Sweater is worked from the collar down to the end of the yoke, then split into front, back, and sleeve sections. Front and back are joined and worked in the round down to the edging.
* Sweater is worked in joined rounds. At the end of each round, join as instructed, then turn your work when the pattern says to turn. Turning helps create the stitch texture and keeps the fabric balanced.
* Ch 2 counts as an extended single crochet unless otherwise noted. When joining rounds, join to the top of the turning chain when instructed.
* Use stitch markers generously. Mark the beginning of the round, yoke increase points, front and back panel sections, and sleeve sections as instructed. Move markers up as the pattern tells you so your shaping stays easy to follow.
* Sweater can be customized with body and sleeve length by crocheting more or fewer rounds after the split for the front, back, and sleeves. Keep in mind that adding length may require more yarn.
* This sweater is designed with generous positive ease for an oversized fit. Check the finished bust measurement before choosing your size, especially if you are between sizes.
* Colorwork is a modified mosaic crochet pattern worked with one color of yarn for each round. You will change colors at the end of the round as instructed, but only one color is used at a time.
* In the mosaic section, some stitches are worked into stitches 1 row below. Pay close attention to whether the pattern says to work in front of or behind the chain space, as this creates the colorwork design.
* The mosaic section includes written instructions, a stitch diagram, and a chart. Beginners may find it helpful to read the written instructions first, then compare them to the chart to understand how the design is built.
* Check your stitch count at the end of shaping rounds and before starting the mosaic section. Correct stitch counts will make the body split, sleeves, and mosaic repeat much easier to follow.
* When working foundation single crochet for the collar or underarms, take your time and keep the stitches relaxed so the edge does not become too tight.
* Weave in ends securely and block the sweater to the schematic measurements for the best finished shape.
GROW
To Unlock Exclusive Subscriber Content click the Box below and join for free by simply adding your email and creating a password! If you are having troubles, clear your cache or reset your password or login to the Grow Publisher Portal.
>> Learn More About Grow Here <<
I'm thrilled to share this amazing pattern with you, many patterns on my blog are absolutely free! I kindly request that you don't copy and paste or distribute this pattern. Prefer an ad-free experience? Buy a digital PDF pattern for a small fee from one of my online stores for a seamless crafting journey.
I appreciate your support and readership. You are the reason I can keep doing what I love and sharing it with others. So, thank you from the bottom of my yarn-loving heart! Disclosure: This post contains affiliate links, meaning I get a commission if you decide to make a purchase through my links at no cost to you.
Pumpkin Spice Cropped Crochet Sweater — Pattern Instructions
🎓 Designer Tip:
We're starting at the collar and working our way DOWN the sweater — this is called top-down construction, and it's one of my favorite ways to build a garment because you can try it on as you go. Start with your Foundation sc to create the flexible collar edge.
Yoke
Foundation Round (RS): 56 (56, 56, 64, 64, 64) Foundation sc with A (see Special Stitches), join with sl st to first st, turn.
Round 1 (WS): Ch 2 (counts as esc), esc in next 5 (5, 5, 6, 6, 6) st, 2 esc in next st, place marker in st just made, *esc in next 6 (6, 6, 7, 7, 7), 2 esc in next st, place marker in st just made; repeat from * around to beginning, sl st to top of tch to join, turn. (64, 64, 64, 72, 72, 72 sts)
Round 2: Ch 2 (counts as esc), 2 esc in next marked st, move marker to st just made, *esc in each st to marker, 2 esc in marker, move marker to st just made; repeat from * around to last marker, esc in each st to beginning, sl st to top of tch to join, turn. (72, 72, 72, 80, 80, 80 sts)
Round 3: Ch 2 (counts as esc), *esc in each st to marker, 2 esc in next st; repeat from * around to last marker, esc in each st to beginning, sl st to top of tch to join, turn. (80, 80, 80, 88, 88, 88 sts)
Repeat Round 3 once (once, once, 3 times, 3 times, 5 times). (88, 88, 88, 112, 112, 128 sts)
Front/Back Panels
Pick any marker to be the center front of your sweater. Remove the rest of the yoke shaping markers. Place new markers 18 (21, 24, 26, 28, 31) sts in each direction from the center front marker (include center front st in one direction). This locates the front panel of 36 (42, 48, 52, 56, 62) sts. Skip 32 (34, 36, 40, 40, 42) sts from front panel markers, place marker in next st. These are the sleeve sts. The sts now marked are the back panel, which should match your front panel.
Row 1 (WS) — Front Panel: Join A with sl st to first front panel marker, ch 2 (counts as esc), esc in same st as join, esc in each st across to marker, 2 esc in marker, turn. (38, 44, 50, 54, 58, 64 sts)
Row 2 (RS) — Front Panel: Ch 2, esc in first st, esc in each st across to last, 2 esc in last st, fasten off. (40, 46, 52, 56, 60, 66 sts)
Row 1 (WS) — Back Panel: Join A with sl st to first back panel marker, ch 2 (counts as esc), esc in same st as join, esc in each st across to marker, 2 esc in marker, turn. (38, 44, 50, 54, 58, 64 sts)
Row 2 (RS) — Back Panel: Ch 2, esc in first st, esc in each st across to last, 2 esc in last st, turn. Do not fasten off. (40, 46, 52, 56, 60, 66 sts)
Body
Note about body: To create the body, we will work across the back panel, make some Foundation sc for the underarm, continue to the front panel, make more Foundation sc for the opposite underarm, and join to create a complete round.
Round 1 (WS): Ch 2, esc in each st across back panel, 2 (3, 4, 7, 10, 11) foundation sc, esc in each st across front panel, 2 (3, 4, 7, 10, 11) foundation sc, sl st to top of tch to join, turn. (84, 98, 112, 126, 140, 154 sts)
Round 2 (RS): Ch 2, esc in each st around, sl st to top of tch to join, turn.
Repeat Round 2 twice (twice, twice, 4 times, 4 times, 6 times). Do not fasten off, turn.
Note about length: If you would like a longer body, you can add as many extra rounds here as you wish before continuing with the mosaic section. The mosaic section is about 4″. If you add a lot of rounds, the larger sizes might need an extra ball of yarn.
🎓 Designer Tip:
Here we go — this is the part people are intimidated by, and I promise it's much friendlier than it looks. Mosaic crochet works ONE color per round. You never hold two yarns at the same time. The pattern emerges because you're working some stitches INTO the row below — those “hdc 1 row below” stitches are pulling the previous color's yarn up through the fabric to create the visual pattern. Use the chart and stitch diagram above! They make it so much easier to see what's happening.
Mosaic Section
Note about mosaic: We now start the colorwork section with one color being worked at a time on each round. See stitch diagram and chart for assistance.
Round 1 (WS): Join B, ch 1, sc in each st around, sl st to first sc, change to A, turn.
Round 2: Ch 1, sc in first sc, *ch 2, skip 1 sc, sc in next 3 sc, ch 4, skip 3 sc, sc in next 3 sc, ch 2, skip 1 sc**, sc in next 3 sc; repeat from * around body ending at **, sc in last 2 sts, sl st to first sc, change to B, turn. (6, 7, 8, 9, 10, 11 ch-4 sps)
Round 3: Ch 1, sc in first sc, *ch 2, skip 1 sc, hdc in next st 1 row below (work behind ch-sp), sc in next 2 sc, ch 2, skip 1 sc, hdc in next 3 sts 1 row below, ch 2, skip 1 st, sc in next 2 st, hdc in next st 1 row below, ch 2, skip 1 st**, sc in next st; repeat from * around body ending at **, sl st to first sc, change to A, turn.
Round 4: Ch 1, *hdc in next st 1 row below (work in front of ch-sp), sc in next 2 sts, ch 2, skip 1 sc, hdc in next st 1 row below, sc in next 3 sts, hdc in next st 1 row below, ch 2, skip 1 sc, sc in next 2 sts, hdc in next st 1 row below, ch 2, skip 1 st; repeat from * around, sl st to first st, change to B, turn.
Round 5: Ch 1, *hdc in next st 1 row below (work behind ch-sp), sc in next 2 st, ch 2, skip 1 sc, hdc in next st 1 row below, sc in next 2 sts, ch 2, skip 1 st, sc in next 2 sts, hdc in next st 1 row below, ch 2, skip 1 st, sc in next 2 sts; repeat from * around, sl st to first st, change to A, turn.
Round 6: Ch 1, sc in first sc, *ch 2, skip 1 sc, hdc in next st 1 row below (work in front of ch-sps), sc in next 2 sts, ch 2, skip 1 st, hdc in next st 1 row below, ch 2, skip 1 st, sc in next 2 sts, hdc in next st 1 row below, ch 2, skip 1 st**, sc in next 3 sts; repeat from * around ending at **, sc in last 2 sts, sl st to first st, change to B, turn.
Round 7: Ch 1, *sc in next st, ch 2, skip 1 st, hdc in next st 1 row below, sc in next 2 sts, ch 2, skip 1 st, hdc in next st 1 row below, sc in next st, hdc in next st 1 row below, ch 2, skip 1 st, sc in next 2 sts, hdc in next st 1 row below, ch 2, skip 1 st; repeat from * around, sl st to first sc to join, change to A, turn.
Round 8: Ch 1, *hdc in next st 1 row below, sc in next 2 sts, ch 2, skip 1 sc, hdc in next st 1 row below, sc in next 3 sts, hdc in next st 1 row below, ch 2, skip 1 sc, sc in next 2 sts, hdc in next st 1 row below, ch 2, skip 1 st; repeat from * around, sl st to first st, change to B, turn.
Round 9: Ch 1, *hdc in next st 1 row below, ch 2, skip 1 st, sc in next 2 sts, hdc in next st 1 row below, ch 2, skip 1 st, sc in next 3 sts, ch 2, skip 1 st, hdc in next st 1 row below, sc in next 2 sts, ch 2, skip 1 st; repeat from * around, sl st to first st to join, change to A, turn.
Round 10: Ch 1, *hdc in next st 1 row below, ch 2, skip 1 st, sc in next 2 sts, hdc in next st 1 row below, ch 2, skip 1 st, sc in next st, ch 2, skip 1 st, hdc in next st 1 row below, sc in next 2 sts, ch 2, skip 1 st, hdc in next st, sc in next st; repeat from * around, sl st to first st, change to B, turn.
Round 11: Ch 1, sc in first 2 sts, *hdc in next st 1 row below, ch 2, skip 1 st, sc in next 2 sts, hdc in next st 1 row below, ch 2, skip 1 st, hdc in next st 1 row below, sc in next 2 sts, ch 2, skip next st, hdc in next st 1 row below**, sc in next 3 sts; repeat from * around ending at **, sc in last st, sl st to first st, change to A, turn.
Round 12: Ch 1, *sc in next 2 sts, hdc in next st 1 row below, ch 2, skip 1 st, sc in next 2 sts, hdc in next st 1 row below, sc in next 2 sts, ch 2, skip 1 st, hdc in next st 1 row below, sc in next 2 sts, ch 2, skip 1 st; repeat from * around, sl st to first st, change to B, turn.
Round 13: Ch 1, *hdc in next st 1 row below, ch 2, skip 1 st, sc in next 2 sts, hdc in next st 1 row below, ch 2, skip 1 st, sc in next 3 sts, ch 2, skip 1 st, hdc in next st 1 row below, sc in next 2 sts, ch 2, skip 1 st; repeat from * around, sl st to first st to join, change to A, turn.
Round 14: Ch 1, *hdc in next st 1 row below, ch 2, skip 1 st, sc in next 2 sts, hdc in next st 1 row below, ch 4, skip 3 sc, hdc in next st 1 row below, hdc in next 2 sts, ch 2, skip 1 st, hdc in next st 1 row below, sc in next st; repeat from * around, sl st to first st, change to B, turn.
Round 15: Ch 1, sc in first 2 sts, *hdc in next st 1 row below, sc in next 3 sts, hdc in next 3 sts 1 row below, sc in next 3 sts, hdc in next st 1 row below**, sc in next 3 sts; repeat from * around ending at **, sc in last sc, sl st to first st, change to A, fasten off B, turn.
Rounds 16–17: Ch 2, esc in each st around, sl st to top of tch, turn.
Round 18: Ch 1, sc in each st around, sl st to first sc, fasten off.

🎓 Designer Tip:
When you pick up stitches for the sleeves, you'll work into the ends of the rows along the side of the front and back panels — that's what the “3 esc in side of front or back panel” instruction means. Don't worry if it feels a little awkward at first; those picked-up stitches are what create a smooth underarm join.
Sleeves (Make 2)
Round 1 (WS): Join A to underarm with sl st, ch 2 (counts as esc), esc in each st across underarm, place 3 esc in side of front or back panel (working over the row ends), esc in each st around, place 3 esc in side of front or back panel, esc in each st across underarm to beginning, sl st to top of tch, turn. (40, 43, 46, 53, 56, 59 sts)
Round 2: Ch 2 (counts as esc), esc in each st around, sl st to top of tch, turn.
Round 3: Ch 2 (counts as esc), esc in next 5 (6, 7, 8, 9, 9) sts, esc2tog over next 2 sts, place marker in st just made, *esc in next (6, 6, 7, 8, 9, 9) sts, esc2tog over next 2 sts, place marker in st just made; repeat from * around, (S, XL, 3X only) esc in each remaining st to beginning, (all sizes) sl st to top of tch, turn. (35, 38, 41, 48, 51, 54 sts)
Rounds 4–5: Ch 2 (counts as esc), esc in each st around, sl st to top of tch, turn.
Round 6: Ch 2 (counts as esc), *esc in each st around to 1 st before marker, esc2tog over next 2 sts, place marker in st just made; repeat from * around, esc in each st to beginning, sl st to top of tch, turn. (30, 33, 36, 43, 46, 49 sts)
Repeat Rounds 4–6 twice (twice, twice, 3 times, 3 times, 3 times). (20, 23, 26, 28, 31, 34 sts)
Repeat Round 4 a total of 4 (4, 4, 3, 3, 3) more times. (16, 16, 16, 18, 18, 18 rounds total)
Note about sleeves: Sleeves are ¾ length. If you wish for longer sleeves, add more rounds after the shaping is finished before working the cuff.
Cuff
XS / S / M/L Only
Round 1 (WS): Ch 1, sc in each st around, sl st to first sc, turn. (20, 23, 26 sts)
Round 2: Ch 1, sc in each st around, sl st to first sc, turn.
Round 3: Ch 1, sc in each st around, sl st to first sc, change to B, fasten off A, turn.
Round 4: Ch 1, sc in each st around, sl st to first sc. Fasten off B.
XL / 2X / 3X Only
Round 1 (WS): Ch 1, *sc in next 6 sts, sc2tog over next 2 sts; repeat from * around, sc in each st to beginning, sl st to first st, turn. (25, 28, 31 sts)
Round 2: Ch 1, sc in each st around, sl st to first sc, turn.
Round 3: Ch 1, sc in each st around, sl st to first sc, change to B, fasten off A, turn.
Round 4: Ch 1, sc in each st around, sl st to first sc. Fasten off B.
Finishing
Weave in all ends.
Join A to RS of collar with sl st, ch 1, sc in each foundation sc around collar, sl st to first sc, fasten off.
For detailed blocking guidance, see Blocking Made Easy. Pin sweater to schematic size, lightly spray with water, and allow to dry.
🎓 Designer Tip:
Please block this sweater before you declare it finished. Pin it to the schematic measurements, spritz it lightly with water, and let it dry completely — usually overnight. Blocking evens out the stitches, sets the mosaic pattern, and can add an inch or two of ease. The difference between a blocked and unblocked crocheted garment is genuinely dramatic.
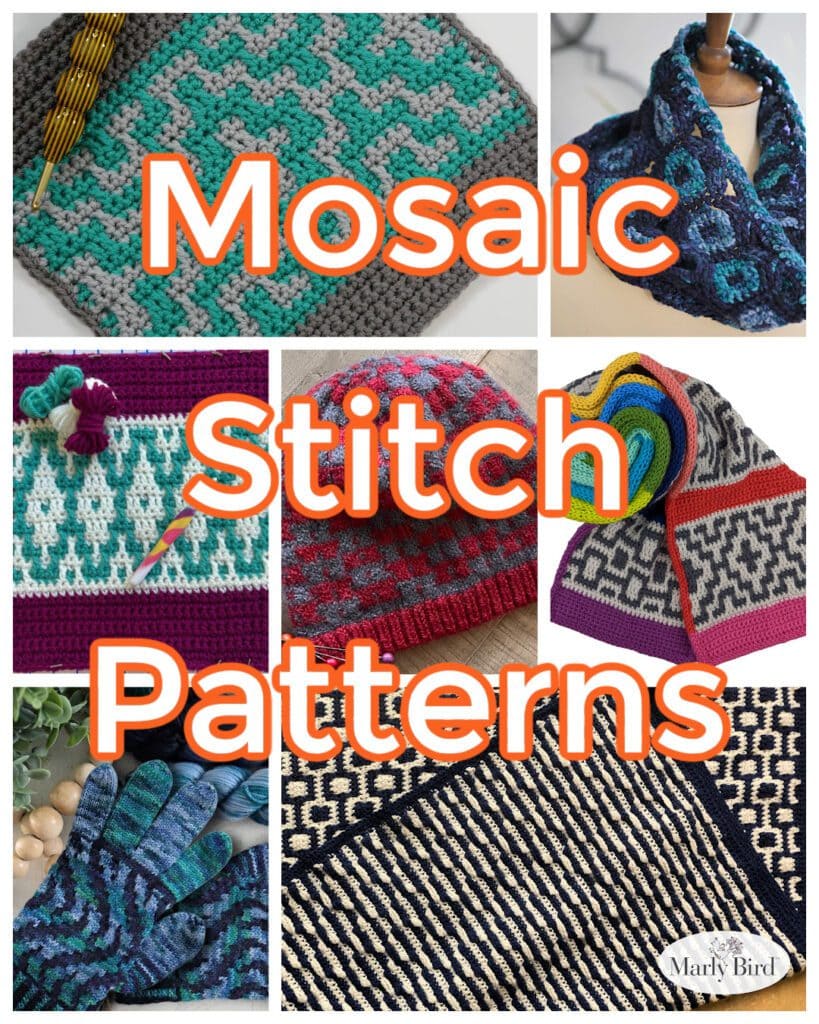
More Mosaic Crochet Patterns 🎨
Fallen in love with mosaic crochet? Same 😄. Once you try it, the geometric possibilities are endless… and the results always look like you spent three times as long on them. Here are some of my favorites to try next, ranging from an easy starter blanket all the way to wearables!
- Free Mosaic Crochet Blanket — the perfect mosaic starter project; build your skills before tackling a garment
- Mallow Mosaic Crochet Hat — practice mosaic in hat form; a wonderful warm-up for this sweater
- Mosaic Tile Crochet Blanket — geometric mosaic in a beautiful home decor piece
- Rockford Crochet Ruana — this exclusive Marly Bird House workshop is a fan favorite pattern
- Autumn Breeze Mosaic Crochet Hat — watching this hat come to life is addictive, you will love it
Need more mosaic resources? We got you covered 👉 https://marlybird.com/blog/mosaic-knitting-and-mosaic-crochet-resources/

More Free Crochet Sweater Patterns You'll Love
Caught the garment-making bug? Welcome to the club. It's a truly wonderful place to be 🧶. Here are some of my other favorite free crochet sweater patterns to try next!
- Moss Stitch Cropped Crochet Sweater — another cropped beauty, this one using the gorgeous moss stitch
- Free Crochet Crew Sweater Pattern — a classic crew neck silhouette, perfect for beginners
- Garden Party Crochet Cardigan — this is one of the Marly Bird's most popular patterns
- Creekside Crochet Ruana — this is the #1 selling patterns of all time
- Northwoods Crochet Cardigan — cozy, warm, and perfect for layering
- Sookie Crochet Cardigan — a beautifully draped open-front cardigan
- 10 Free Sweater Patterns (Knit and Crochet) — even more options if you can't decide what to make next!

Favorite This Pattern on Ravelry 🧶
Love this sweater? Add it to your Ravelry queue so you can find it again later… and when you you make it, add your project photos there too. I love seeing every single one. 😍

Frequently Asked Questions
Is the Pumpkin Spice Sweater really beginner-friendly if I've never crocheted a garment?
Yes, and I mean that for real. This sweater uses flat rectangular panels and a top-down yoke that grows naturally round by round… no complicated armhole shaping, no math puzzles. If you can crochet in the round (like a hat or a granny square), you have every skill you need. Take it section by section and you will genuinely surprise yourself. 🙌
What is mosaic crochet and how hard is it to learn?
Mosaic crochet is a two-color technique where you only ever work one color per round… no juggling two balls, no carrying a second strand across the back. Color A does its complete round, Color B does its complete round, and the colorwork effect happens automatically from how the stitches interact. It looks way harder than it is. That's kind of the whole appeal. 😄 Full explanation in the What Is Mosaic Crochet section above.
The pattern calls for Bernat Plentiful — that's discontinued. What yarn should I use?
Bernat Plentiful is discontinued and I feel your pain. (I really do.) For the original soft, impressionist mosaic look, grab a brushed or mohair-look bulky like Lion Brand Halo. For clean, graphic mosaic lines, a smooth bulky like Lion Brand Pound of Love or Caron One Pound held double works beautifully. Scroll up to the yarn table for all five alternatives with full notes on each one.
How long will this sweater take to make?
Most crocheters finish this sweater in a weekend to about a week of regular crafting sessions. Bulky yarn means progress is fast and visible… smaller sizes (XS through M/L) in a dedicated weekend is very realistic. The mosaic section requires a bit of chart attention, but once the repeat clicks it goes quickly. (And honestly? Watching this one come together is kind of addictive.)
Can I make this sweater longer, or adjust the sleeve length?
Absolutely! Length customization is built right into the pattern. For a longer body, add extra esc rounds in the Body section before the mosaic (the pattern notes call this out specifically). For longer sleeves, add extra rounds after the decrease shaping and before the cuff. Try the sweater on as you go and make it exactly the length you want 🙌.
How do I wash and care for this sweater?
Always check your ball band first since care depends on the yarn you use. For most bulky yarn substitutes, cool water hand washing and laying flat to dry is the safest bet. Never hang a wet sweater… the weight will stretch it out of shape. When in doubt, lay flat to dry. Your sweater will thank you for years to come.
Is this pattern really free? Where do I find the full instructions?
Yes, 100% free, right here on this page… just scroll up to the Pattern Instructions section. No Ravelry account, no email required, no tricks. (A small portion is behind a free Grow account… takes about 30 seconds to set up.) If you'd prefer a completely ad-free, print-friendly PDF, that's available in my Etsy, Shopify, and Ravelry shops… but the full pattern will always live right here for free.
Final Thoughts
You can do this. Seriously… I designed this sweater to be someone's first garment, and the messages I get from people who made it are some of my favorites. “I never thought I could make a sweater.” Now they're making their third. 🙌
Two colors. One at a time. A yoke that grows round by round. And then you put it on and someone asks where you bought it. (You didn't. You made it. And that feeling never gets old.)
If you make your version, please share it with me. Tag me on Instagram, add it to the Ravelry project gallery, drop a photo in the comments. Seeing your finished sweaters is one of my absolute favorite parts of this job. Go make something beautiful, bestie! 💛
❤️ Your BiCrafty Bestie,
Marly Bird

Categories: Crochet, Free Patterns, Marly Bird Premium Patterns, Our Free Patterns, Pattern