6 Steps for Quick A Crochet Teacher Gift
Any time is a good time to start thinking about teacher gifts. It’s always great to be open to giving even a small gift to teachers who work hard to help your children learn and grow. There’s no shame in not making a handmade gift for your kid’s teachers. Gift cards and flowers are a great alternative. But let me show you a quick crochet teacher gift idea that doesn’t take a ton of time and still lets you work on a little of your favorite craft.
*This post contains affiliate links. By clicking on one of these links and making a purchase a portion will go to the blog. The price you pay will not change and the small commission I receive helps me to keep bringing you free content and giveaways on the blog. Thank you for your continued support.*
Here’s The Story:
Katelyn, a great friend of mine, has two young kids and one was getting ready for the end of their preschool year. When my kids were in preschool I still did teacher gifts and Katelyn thought of a super cute way to incorporate crochet without needing a ton of time.
So, here’s Katelyn to show you how to make a teacher gift using your crochet skills.
Work this project up in just a few hours and have it ready to gift next week.
Crochet Teacher Gift Supplies:
- 8×8″ Shadow Box Frame
- 24 no. 2 pencils (purchased from the dollar tree)
- Super Glue
- Hot Glue Gun
- Silhouette Cameo Cutting Machine
- Permanent Vinyl
- Teacher quote to cut out
- Transfer tape (or contact paper)
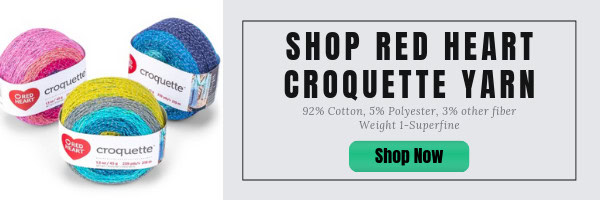
- Red Heart Croquette yarn
- Size C Crochet Hook
- Blocking Materials (blocking board and pins)

6 Steps to Make a Fun Crochet Teacher Gift:
First of all, gather your materials.
Select the colors for your vinyl and Red Heart Croquette yarn based on your chosen teacher.
Then, follow these 6 simple steps to create your own personal crochet teacher gift.
1 – Making Your Crochet Border:
- Crochet two 8″ lengths of your favorite border. This was my first step so that I could block them while I worked on the other parts of this project. Blocking is important when using Red Heart Croquette because it contains cotton which needs blocking to show off its beauty.
- I selected border #72 from Eddie Eckman’s Crochet Border Book and modified it slightly so it wasn’t too long. Choose any pattern you like, but keep in mind you don’t want it to be too wide. You need room for your quote.
- When you’re finished, block the borders, particularly if there is any lace work involved. This will ensure you see the details of the border you selected.
2 – Find Your Teacher Quote:
- Download a quote you love to stick on the glass of your frame. I searched in the Silhouette Design Studio to find teacher quotes and landed on the one I’m using for my project.
- Follow the instructions for your machine and cut out the quote in permanent adhesive vinyl.
- Weed your quote (pull all the excess vinyl away from the quote lettering), move the cleaned-up quote to the transfer tape (clear, easily removed vinyl), and set it aside for later. Do not remove the adhesive backing yet.
3 – Creating Your Background:
- Next, I worked on creating the background of my crochet teacher gift.
- Open your frame and gather your pencils.
- Before starting to glue, check how many pencils you need to fill the shadow box. 24 seems a good fit for an 8″ x 8″ shadow box. I found that if I alternated directions they fit into the box in a uniform way that I preferred.
- Once you know how many pencils you need, glue them in place with your hot glue gun. Use any pieces that came inside your frame to help line up your pencils, then you know you’re centering the pencils. Don’t use so much glue that it oozes through to the front. You need just enough glue to stick them securely.

4 – Adding Your Crochet Border:
- After your pencils are in place, carefully glue on your crochet border. I glued mine to the top of the pencil so I could put the frame around it to help hold it down. It also helped hide the edge of the border and make it look a little cleaner.
- Using hot glue along the side of the pencil carefully place your border. NOTE: the glue is VERY hot so be careful when pushing it firm. You want it to be as flat as possible but watch for glue seeping through so you don’t get burned.
- Because this teacher gift meant to be hung on a wall or set on a table I wanted to make sure that the points of my crochet border were stuck down and didn’t flop around inside. I chose to use super glue for this step since I knew that using a hot glue gun would not be as clean.
5 – Adding Your Quote:
- Clean the glass that comes with your frame. Make sure there’s no dust or grease on the outside of the glass so the vinyl will stick firmly and not peel off.
- Use the transfer tape to line up the quote squarely on the glass and burnish (roll) it firmly in place.
6 – Putting It All Together:
- Assemble your pieces.
- Place the glass back in the frame with the vinyl quote facing out.
- Add your pencil and crochet background and seal up the shadow box…and you’re all finished!
- Wrap your gift and see how impressed the teacher is with your crafty skills.
More Crochet Teacher Gift Ideas…
Categories: Crochet, Dibble Dabble Inspiration


