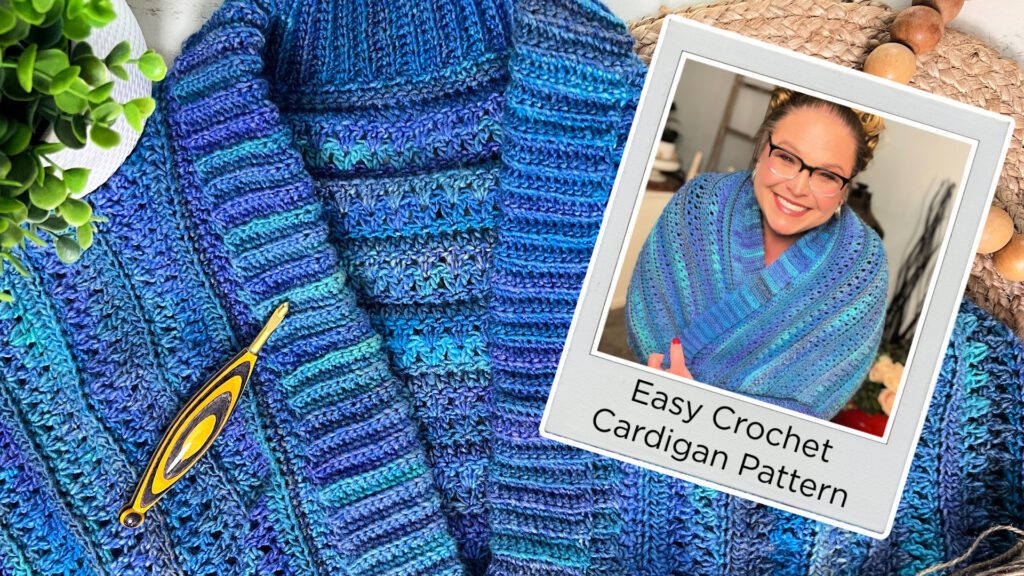
Discover Cozy Crafting with Marly Bird’s “You Are Valued” Crochet Cocoon Cardigan
Get ready to cozy up and get crocheting with Marly Bird’s oversized crochet sweater design and video tutorial on making a “You Are Valued” Crochet Cocoon Cardigan. If you’re just starting out or looking for a relaxing project, this pattern is a great pick.
In a world where it’s easy to feel overlooked or undervalued, this oversized crochet cardigan is a gentle reminder that you are cherished, appreciated, and worthy of all the love and recognition in the world. 💖 Inspired by personal experiences, I’ve created this pattern as a symbol of self-affirmation and empowerment. Because, let’s face it, we all have those moments where we need a little extra reminder of our own worth.
💫 Just like the “Know Your Worth” cardigan, this piece is more than just clothing – it’s a wearable hug from the special people in our lives who lift us up when we need it most. 🤗 So, wrap yourself in the warmth and comfort of this beautifully crafted cardigan, and remember that you are valued beyond measure. 🌸✨
Psst: here are a couple other beginner crochet cardigan patterns you might like. I love the Lyvia Crochet Ruana Cardigan, the Coldwater Creek Crochet Ruana, the Amimono Cardigan, the Hamilton Crochet Cardigan, the Garden Party Sweater, the Granny Square Cardigan (crochet-along sweater) and the Midnight in Paris Crochet Cardigan.
Disclosure: This post contains affiliate links, meaning I get a commission if you decide to make a purchase through my links, at no cost to you.
What You’ll Love About This Crochet Cocoon Cardigan Pattern
- Beginner Friendly – Even if you’re still new to crochet, you got this! I’ve got a video tutorial to walk you through each step.
- Flat Construction – No tricky seams or complicated shaping, just smooth sailing!
- Versatile – Pair it with jeans, leggings, or your comfiest PJs for that cozy-chic vibe!
Easy Beginner Crochet Cocoon Cardigan – Great Sweater Pattern for All Skill Levels
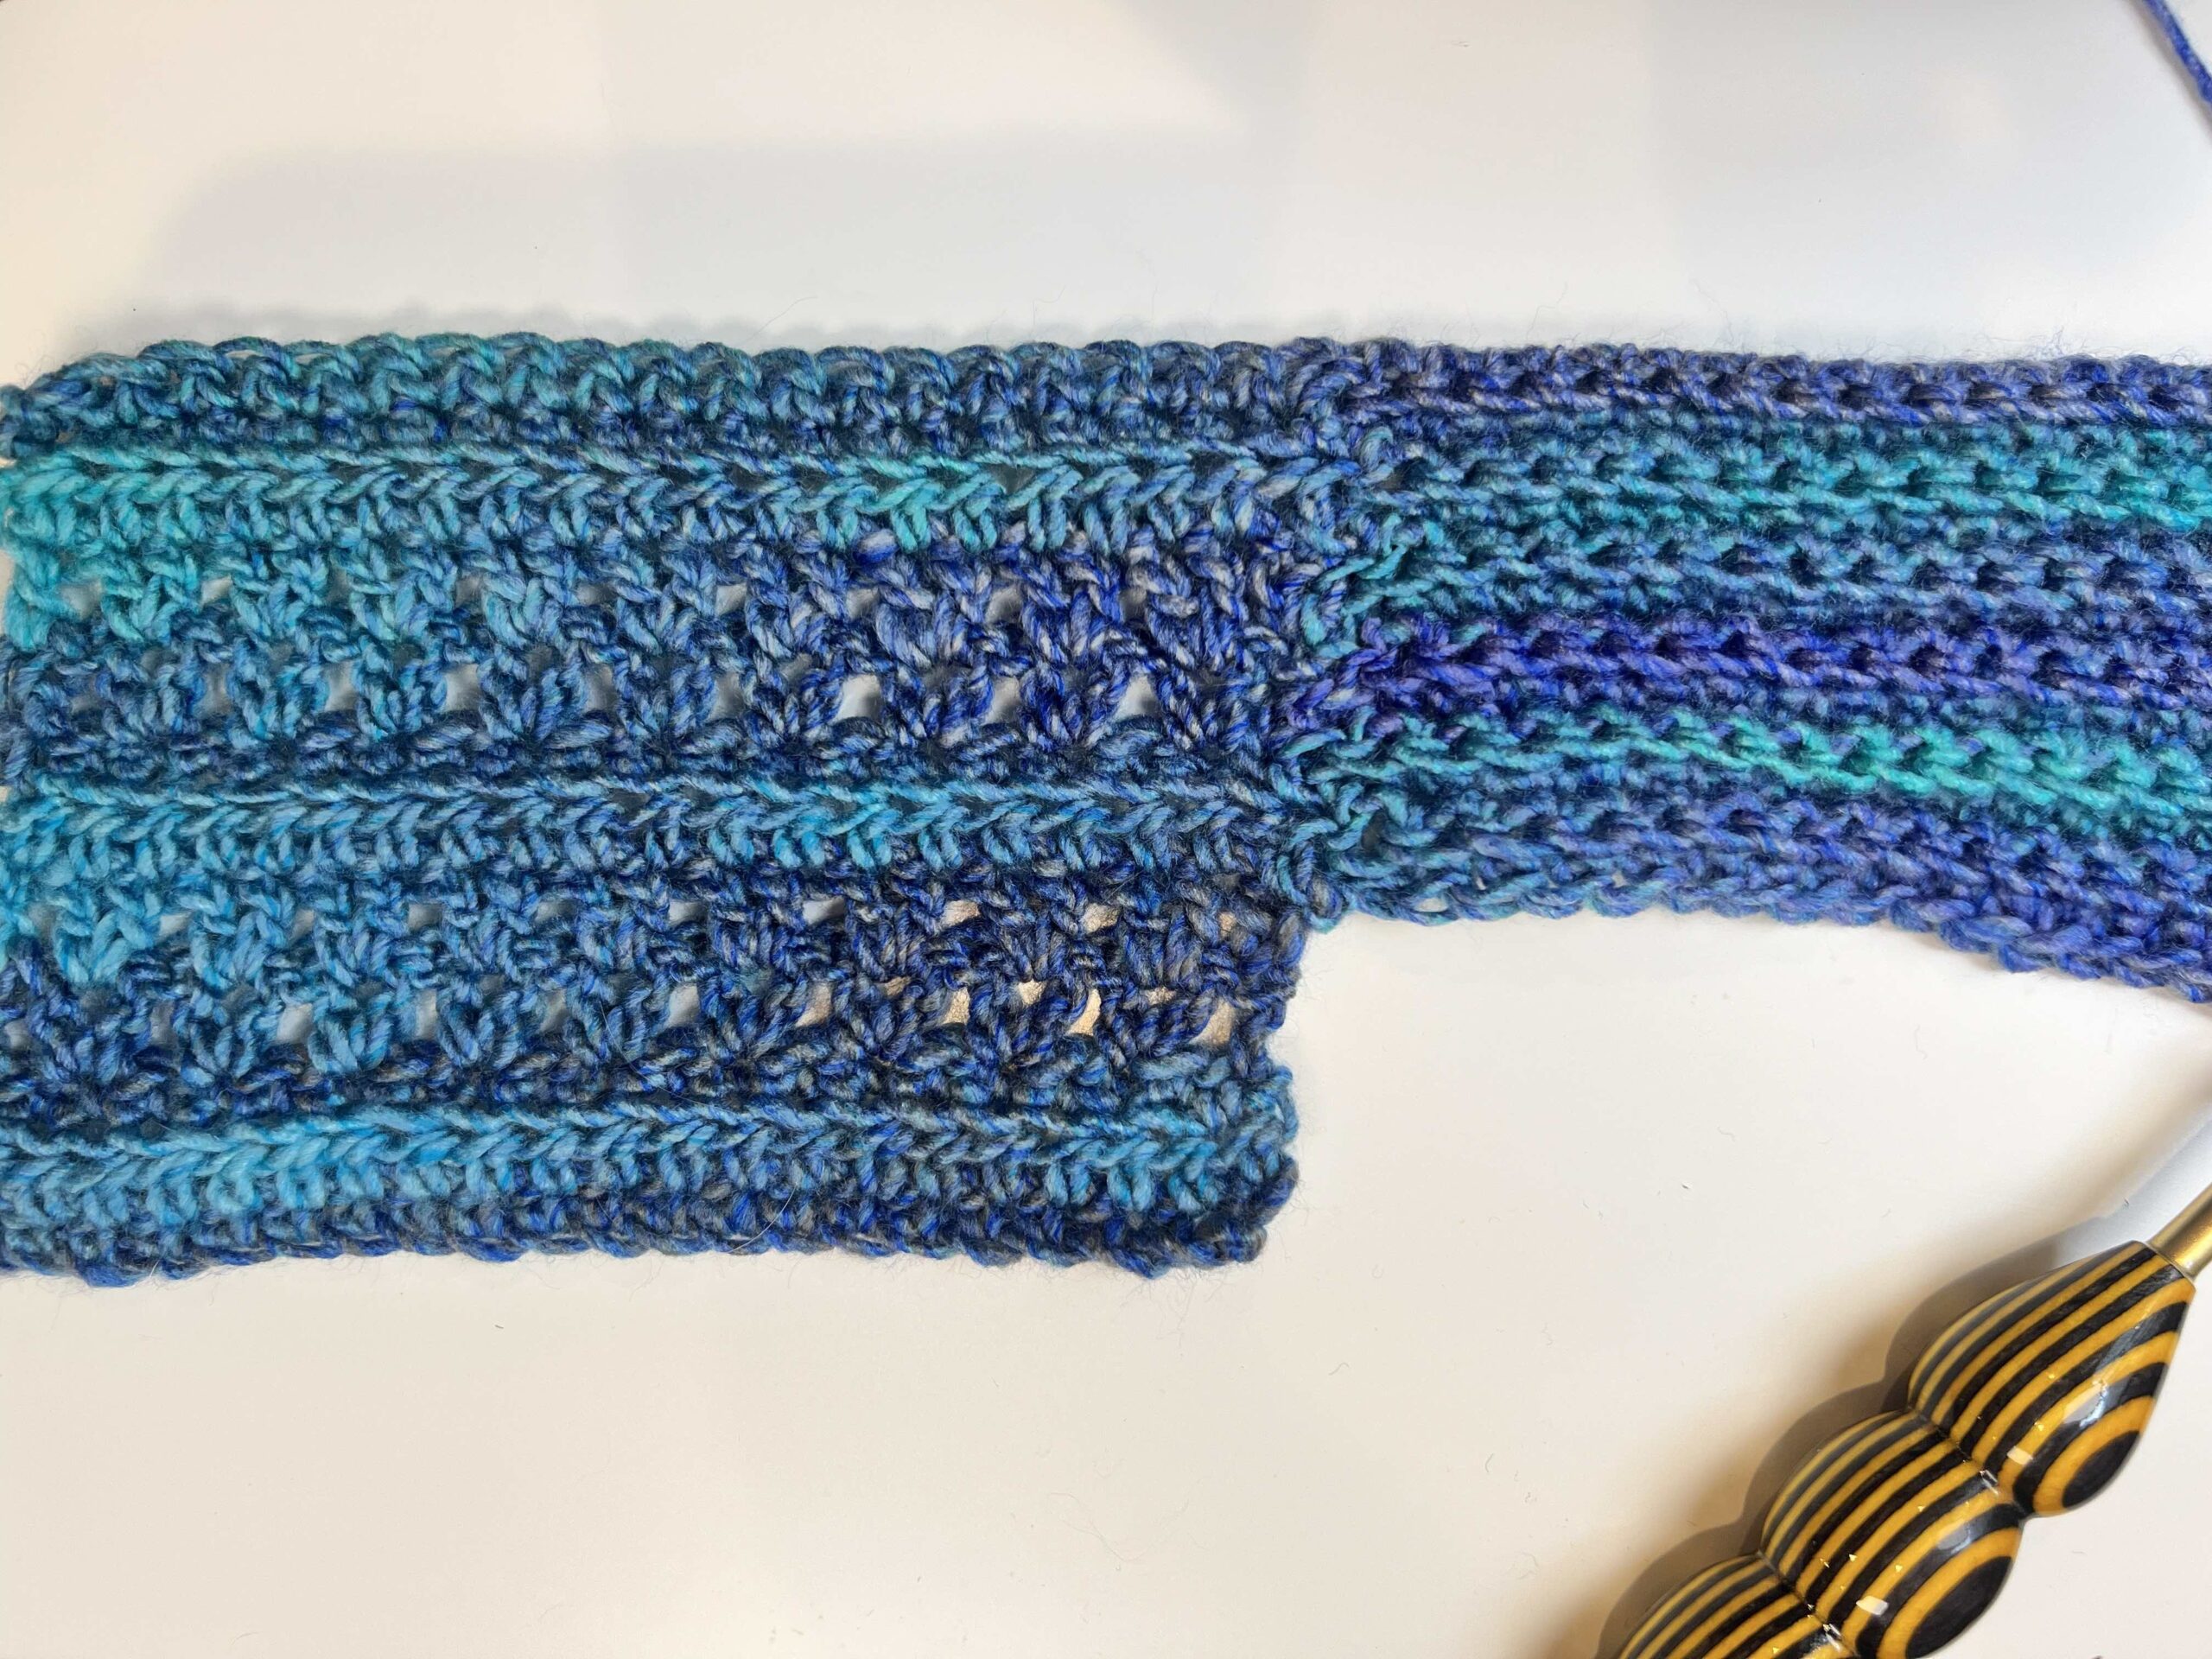
This pattern is made up of a large rectangle that is strategically folded to create a cozy crochet cocoon cardigan. The skills needed to make this piece are the basic crochet skills of any adventurous beginner crocheter. These crochet stitches include:
⭐ Back Loop Only: This is the furthest loop to you of the top 2 loops of the stitch indicated, regardless if you are on the RS or WS.
⭐️ Chain (Ch): With slip knot or free loop on hook, yarn over hook and pull through loop on hook.
⭐️ Half Double Crochet (Hdc): Yarn over hook, insert hook into indicated stitch, yarn over and pull up a loop, yarn over and draw through 3 loops on hook.
⭐️ Double Crochet (Dc): Yarn over hook, Insert hook into indicated stitch, yarn over and pull up a loop, * yarn over and draw through 2 loops on hook; repeat from * once more..
⭐️ Foundation Single Crochet (fsc):
First fsc: Ch 2, insert hook into 2nd ch from hook, yarn over and pull up a loop, yarn over and draw through 1 loop on hook (forming a chain), yarn over and draw through 2 loops on hook (forming the single crochet)
Next fsc: Insert hook into base of previous stitch (in the “chain” space), yarn over and pull up a loop, yarn over and draw through 1 loop on hook (forming a chain), yarn over and draw through 2 loops on hook (forming the next single crochet). Repeat directions for desired amount of sts.
⭐️ Single Crochet (Sc): Insert hook into indicated stitch, yarn over and pull up a loop, yarn over and draw through 2 loops on hook.
⭐️ Slip Stitch (Sl st): Insert hook into indicated stitch, yarn over and pull up a loop and draw through loop on hook. ⭐️ Stacked Double Crochet (Stacked Dc): (Do not ch 1 prior to making the first sc) Sc in first stitch, insert hook in between two legs of the base, yarn over and pull up a loop, yarn over and draw through 2 loops on hook.
⭐️ Stacked Double Crochet (Stacked Dc): (Do not ch 1 prior to making the first sc) Sc in first stitch, insert hook in between two legs of the base, yarn over and pull up a loop, yarn over and draw through 2 loops on hook.
Looking for more crochet stitch instructions? How to videos for each of these beginner skills can be found in the crochet definitions area on the website.
Oversized Crochet Cocoon Cardigan – A Must-Have For Every Closet
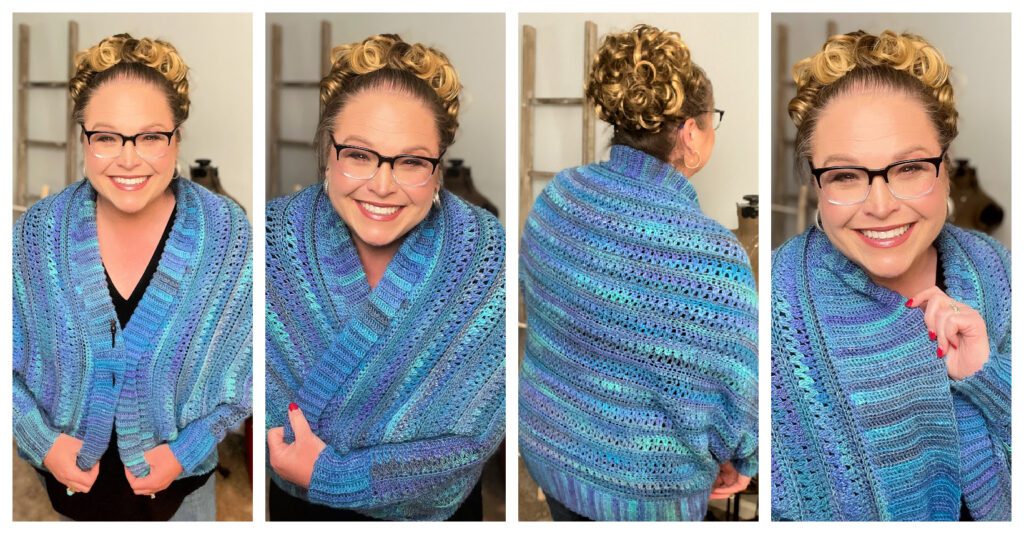
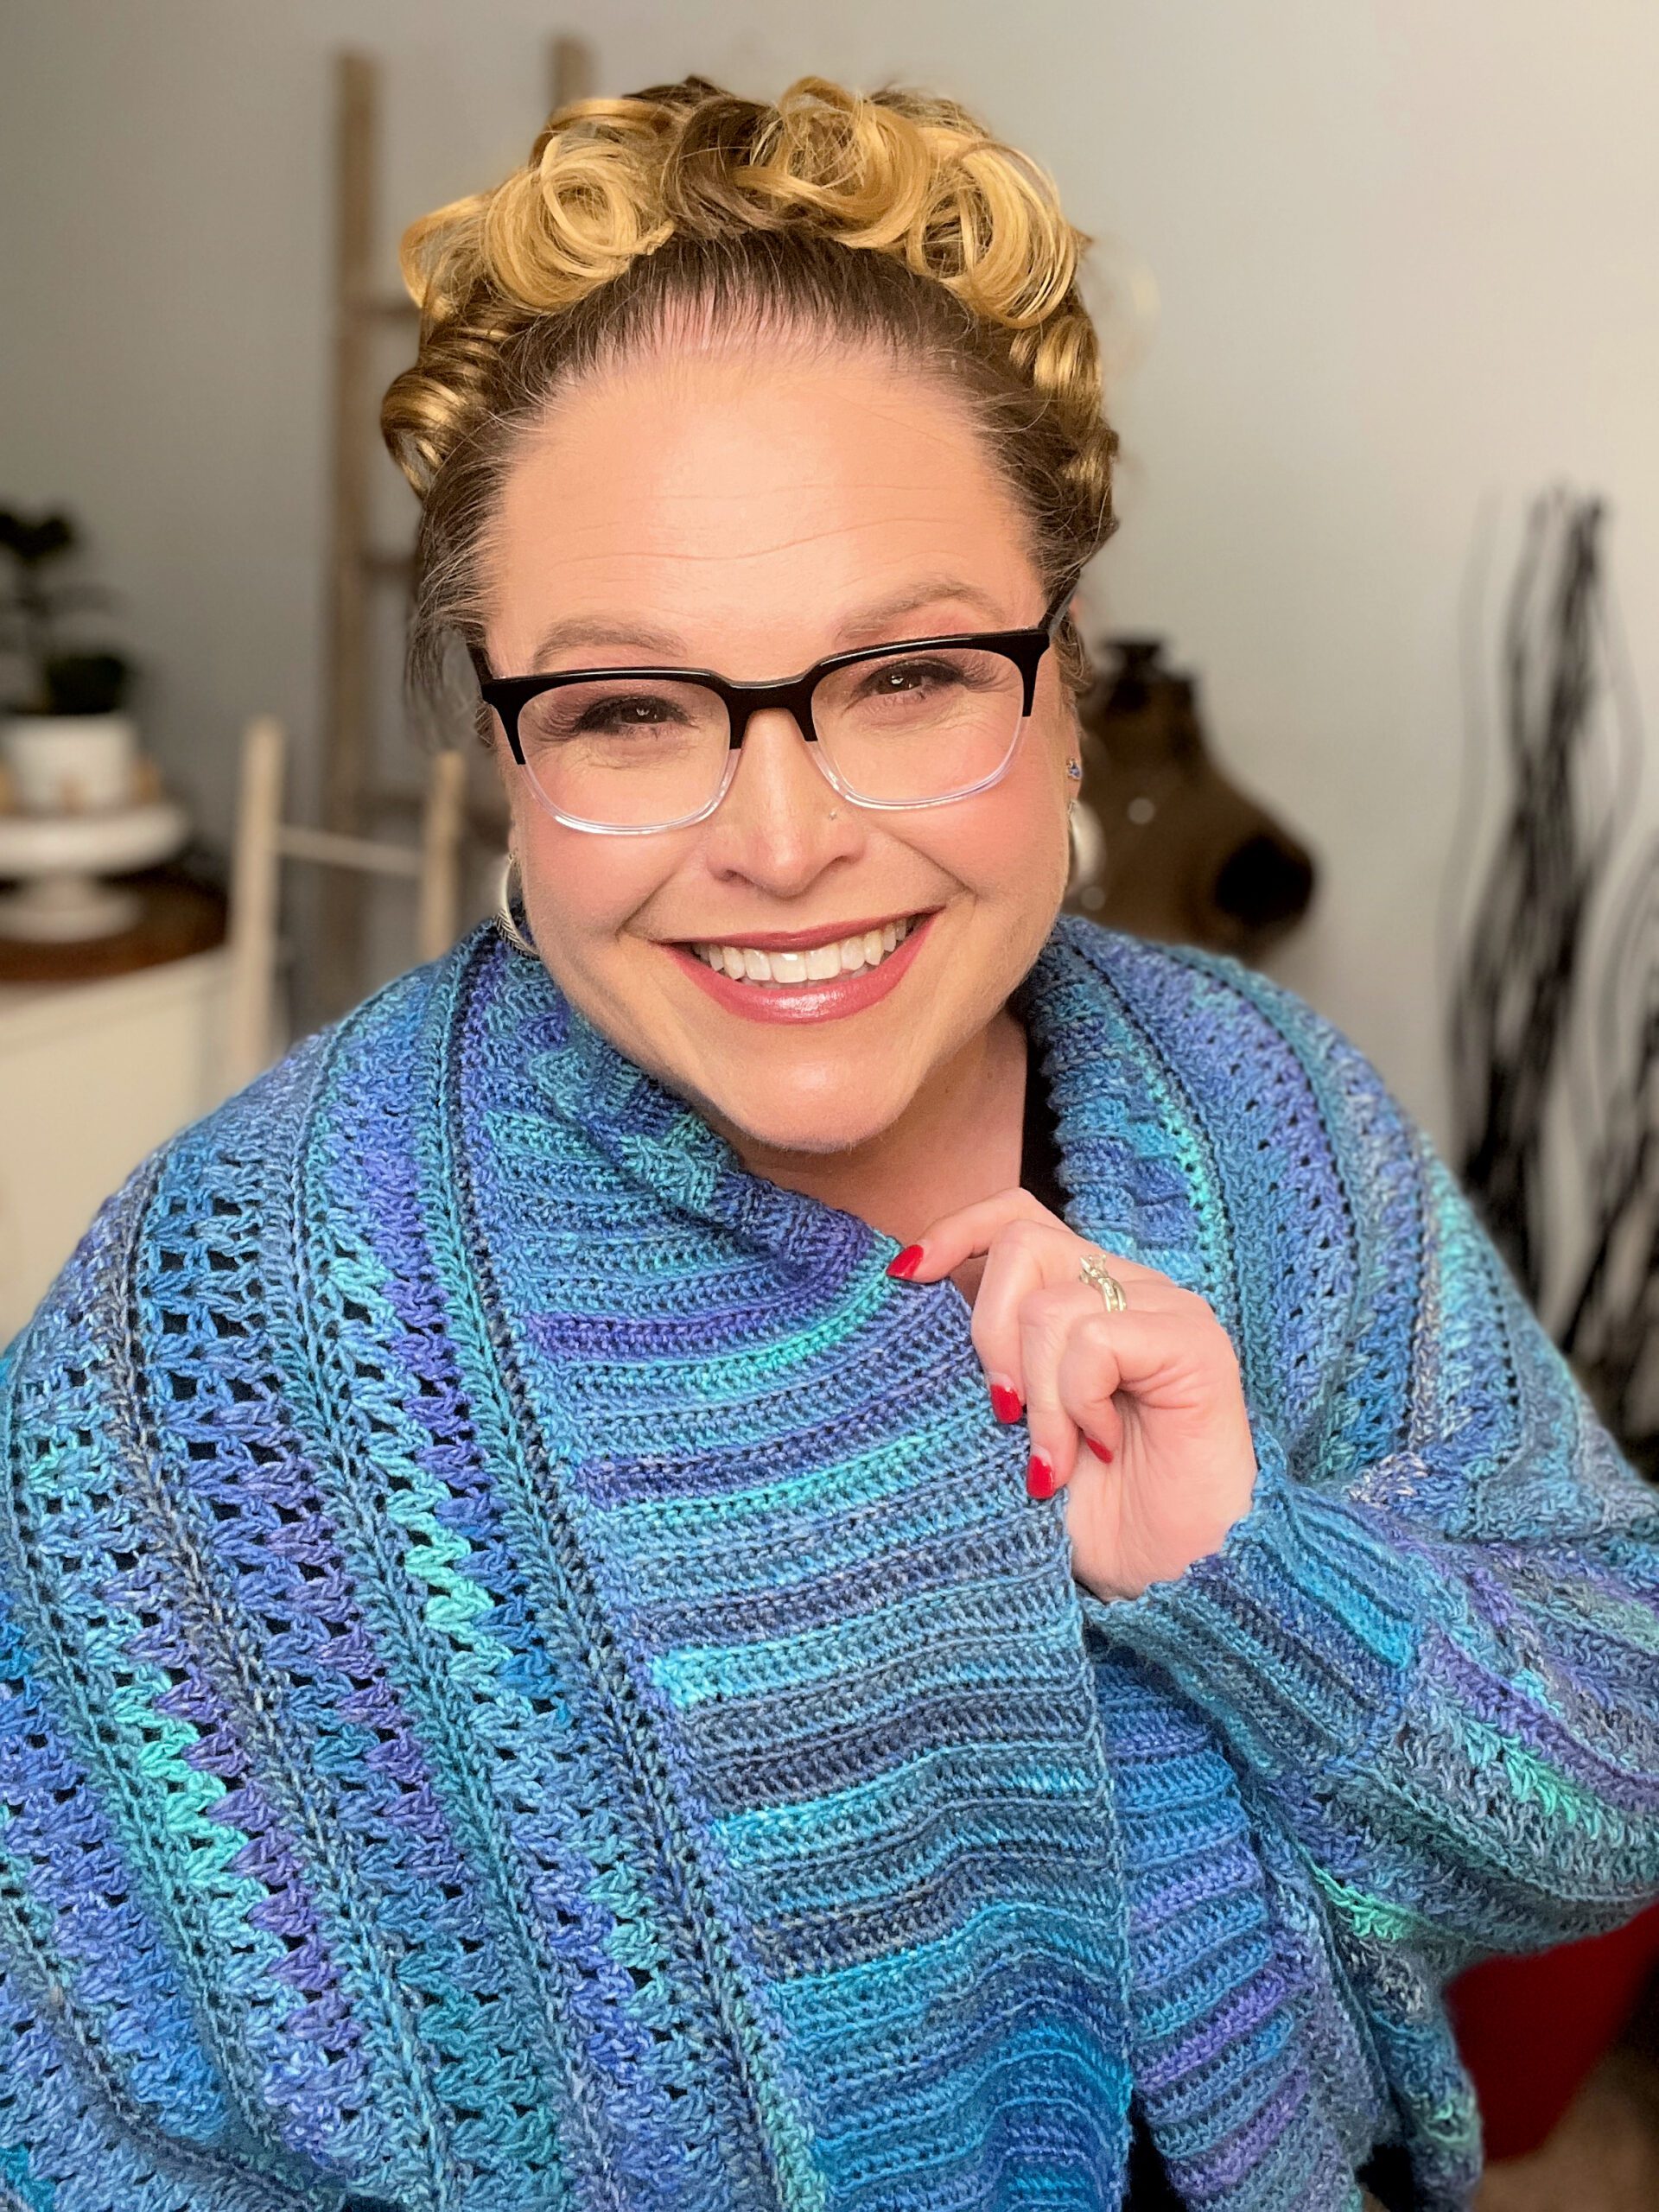
Embrace the trend of comfort-meets-style with the “You Are Valued” Crochet Cocoon Cardigan. This oversized delight is the epitome of coziness, crafted to enfold you in a warm and stylish hug.
Designed with an artful touch, it features a size-inclusive pattern that drapes elegantly across all body types, ensuring everyone can revel in its comfort. Sized for xs – 5xl size.
The cardigans thoughtful construction minimizes seaming, leaving only two small seams that are cleverly placed to maintain the fluidity and seamless appearance of the piece. This design choice not only simplifies the making process but also enhances the overall comfort, allowing the cardigan to become an extension of your warmth.
Perfect for a chilly evening in or a casual day out, this cocoon cardigan is a versatile staple that promises to keep you snug and fashionable throughout the seasons. With its mix of practicality and chic allure, it’s the wardrobe essential you didn’t know you needed, until now.
Fold Over Ribbed Collar on Crochet Cardigan – Dramatic Look
In the video, I show you how to create the crochet ribbed collar using the join-as-you-go method. It makes putting the cardigan together super easy, while still keeping it trendy. The end product is a cute and cozy cardigan that you’ll enjoy making as much as wearing it.
The collar can easily be made larger simply by adding to the chain amount at the start; same goes for the cuffs.
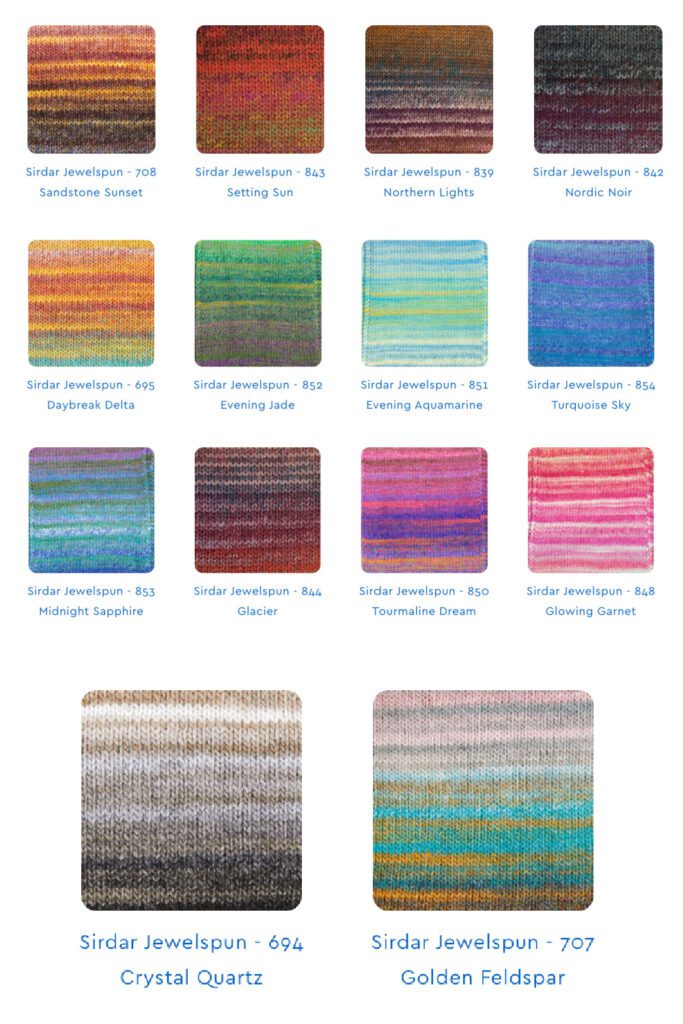
The Star of the Show: Jewelspun Long Color Changing Yarn
The show-stopping Sirdar Jewelspun Yarn, which brings a kaleidoscope of color to your crochet work. The self-striping Aran acrylic yarn elevates the crochet cardigan, ensuring each piece is as unique as the crafter behind it.
Mind the fact that although the label reads Aran, I would classify this closer to a worsted weight yarn.
For this project, we estimate you will need 4 or 5 balls of yarn for the cocoon cardigan. That is a generous amount and allows you to have enough for a gauge swatch or two.
Our friends over at Jimmy Beans Wool has put together a kit just for this project! You can select how much yarn you want for the size you plan to make and remember, there is more than enough there for you!
In the video tutorial I do showcase various hues, inspiring viewers to imagine their personal cardigan in the colorway of their dreams. Here is a snap shot of the beautiful yarn (available at Jimmy Beans Wool)
Best Crochet Hook Size for the Crochet Cocoon Cardigan – Do a Gauge Swatch!
The perfect crochet hook size for your cardigan is the one that gives you the right gauge. The easiest way to figure this out is by doing a gauge swatch. It’s much simpler to work a swatch over 14 stitches and a couple row repeats than to just get started on your sweater only to realize your project is too big or small after crocheting a long way. I used a size J or 6mm hook for the gauge of 14 sc = 4″.
Just remember, if you’re getting too many stitches in 4 inches, your stitches are too small and you should switch to a larger hook; if you’re getting too few stitches, your stitches are too big and you should try a smaller hook.
When it comes to this oversized crochet cardigan pattern, it’s better to go too big than too small. I’ve seen one that was way wider (like ten inches) than it should be and still looked good. But when it’s too narrow (again, ten inches), it looks silly. So, when you’re not sure, use a bigger hook!
Don’t bother ripping out your gauge swatch, you’ll have enough yarn for your project and a few extra swatches. Plus, you can practice working on crochet ribbing on the edge of your swatch. It’s a great way to get the hang of the stitches before starting on your project. And you can also test out different sizes for the collar or cuffs if you want to make adjustments.
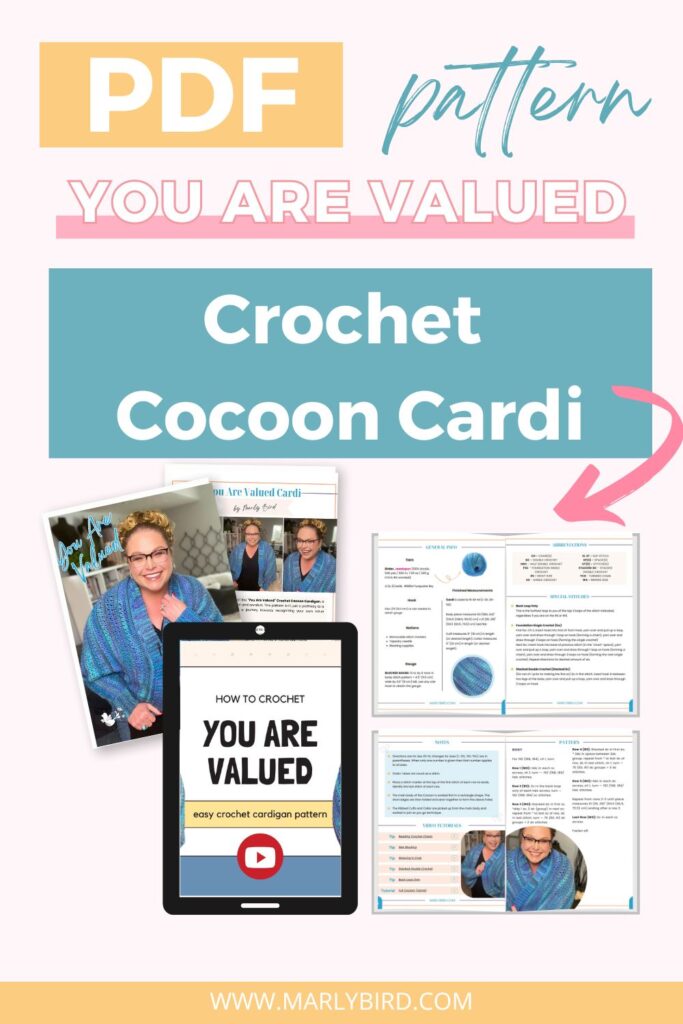
Get the full PDF with links to full-color PDF stitch diagrams for each pattern size. Click the button below to purchase the pattern.
If you use Ravelry, please take a minute and favorite and queue up the pattern to show some love.

How to Crochet the You Are Valued Crochet Cocoon Cardigan Video Tutorial
My tutorial is more than just a guide to make a cardigan; it’s filled with encouragement and motivation throughout. “Her enthusiasm and expertise shine through, encouraging viewers to take their skills to the next level. By following along, you’ll not only learn to create a gorgeous garment but will become a confident crocheter! ” ~ fellow Marly’s Minion.
By the end of the how to crochet a sweater video tutorial, you’ll be ready to craft a “You Are Valued” Crochet Cocoon Cardigan of your own, and you too will believe that every crafter is capable of creating something beautiful. So, grab your hooks and yarn, and let me, Marly Bird, guide you through each cozy stitch on the path to crafting your new favorite cardigan.
YouTube Video Tutorial Transcript
We know that there are crocheters out there that love to have a transcript of the videos on YouTube. So we’ve added the transcript for the How to Crochet the You Are Valued Crochet Cocoon Cardigan video here.
Easy Beginner Crochet Cardigan – Learn How to Crochet the You Are Valued Crochet Cocoon Cardigan 💕 – YouTube
Transcript:
(00:00) are you ready to crochet your new favorite cardigan I’m Marley bird you’re by crafty bestie and I’m here to show you how let’s go show me show [Music] me hello my friends and welcome to the Marley bird YouTube channel your One-Stop shop for everything knitting and crochet to help you become a better crafter in this this video I am showing you how to make this lovely crochet cocoon cardigan this is the you valued crochet cardigan I designed this piece after everybody fell in love with the know your worth knit cardigan because my
(00:48) my crocheters needed to have something too so what you will find here is the exact same construction similar stitch pattern and a nice big Shaw collar that you can choose to close with a Shaw pin or you can absolutely remove that and just have a nice open cardigan to wear this pattern is so much fun and it’s super duper beginner friendly so whether you are a brand new crochet you’re ready to venture into garments that are just a little bit beyond a blanket or you’re an experienced crocheter ready to make your
(01:24) next favorite cardigan I have the pattern for you you can find this pattern over at Marley bird.com I’ve put a link in the video description box right down there below in that pattern you will find the written instructions a chart links to a whole bunch of videos that you might need and of course you’ll have all of the materials speaking of materials I’m sure you noticed that the colorway on this cardigan is absolutely stunning and that is because the jewel spun yarn by Sardar is absolutely gorgeous and it lends
(01:59) itself to a beautiful colorway with this stitch pattern this color here is called turquoise sky but there are so many other Jewel spun colors you could choose from let me show you a few the SAR company was nice enough to send me a bunch of their Yarns so that way I could show you guys all of the color possibilities with this beautiful yarn and this is only some of them you guys I mean look at these colors they are absolutely stunning I’m going to point out this one first because this is what I made the know your worth cardigan in
(02:35) this color here is called Golden green and it’s not to be confused with this color here called evening Jade this one here has more purples and turquoises in it but it is absolutely gorgeous of course if you wanted to have something a little bit more mild and Browns and blacks and Grays this is your go-to colorway it’s called crystal quartz this would be absolutely stunning in this pattern I telling you it’d be great all right for all of my pink fans out there come on this is glowing Garnet this color is absolutely to die for oh my
(03:16) gosh it’s so darn pretty this one here this just screams jewel tones to me it is called Midnight Fords and it is like I I have have no words you guys absolutely beautiful I mean use this yarn to make this cardigan wear it with a black top and some black slacks and you have an outfit for the night out on the town I mean it would be absolutely stunning then of course we have this beautiful oranges and pinks and reds this colorway is called Sunstone Amber and it is equally just as as pretty if you are a fan of orange Yarns and you
(03:58) really like gravitate to this this color this this Hue this would be just great and then last but not least obviously the turquoise Sky those are only a few of the jewel spun Yarns you could choose to make this cardigan out of and you will have a beautiful cardigan no matter which one you choose besides the yarn you will also need a size J or a 6 mm crochet hook or whatever size you need to get gauge you will need some Stitch markers of course a bent tip tapestry needle to weave in your ends and to seam together the minimal seaming that is on
(04:34) this piece and then we have a good pair of scissors and last but not least like I mentioned if you wanted to use a Shaw pin you absolutely could do this um I love these Shaw pins I think they’re absolutely beautiful I’ll be sure to put a link in the video description box below in case you want to check these out they are from Indian Lake Artisans they’re absolutely gorgeous if you’re ready to get started grab that pattern grab your yarn grab your hook and all of the little extras that you could
(05:04) possibly need for this pattern join me back here and I will get you started on the stitch pattern how you’re going to construct this cocoon cardigan we’ll talk about the collar and the join as you go method and you will be Off to the Races making your very own hugable [Music] wearable we begin with the foundation single crochet for this project because we want the elasticity of our beginning row to match that of our ending row so it’s important that we begin with the foundation single crochet if you’ve
(05:42) never done it before let me show you how to do it we will begin with a slip knot on our hook so begin with a slip knot and then you will chain two stitches one 2 in that first chain you did or the second chain from Hook however you want to think about it insert your hook right into that chain okay and then yarn over and pull up a loop that Loop you just pulled up is going to become a chain okay even though this looks like you’re on your way to making a single crochet we want to create a chain right here into that
(06:23) first Loop so what you will do is you will yarn over and draw through one it’s at this point you will take a stitch marker and put it right into that chain you just created that’s going to help you know exactly where your next Stitch is going to have to be completed okay now we have two loops on our hook and this is where we will complete our single crochet so you yarn over and draw through two so to start the next one we’re going to come over here to that Stitch I had you mark you’re going to go
(06:53) into the chain and try and get through two Loops okay It’s tricky at the start but then you’ll get used to it you want to go underneath two Loops of your chain okay it just makes the edge a lot easier to seam yarn over pull up a loop again that first Loop is going to become a chain so you will yarn over and draw through one take your marker and move it up into that chain you just created so that way you know where you’re going to create your next Stitch yarn over draw through two so here we go into our
(07:29) marked Stitch which is a chain I went under so I have two Loops yarn over draw through one uh draw through those yarn over draw through one move the marker up yarn over draw through two let’s do that one more time together go into your marked chain make sure you have two two of those uh legs yarn over pull up a loop yarn over draw through one move your marker up yarn over draw through two you’ll see here you’re getting a nice stretchy start right here go ahead and complete the number of foundation single crochets
(08:16) you need to make for the size you are [Music] needing once you reach the number of foundation single crochets you need go ahead and leave that marker down there at the bottom so that way you can quickly identify what is the bottom of your row here to begin with because it’s really easy to get disoriented we will go ahead and we will turn our work and chain one you can chain one and turn as well it doesn’t really matter and it’s at this point we want to work half double crochets into each of the stitches that we just
(08:54) created all the way down so we’re just going to work half double crochet into each single crochet all the way down if you don’t know how to do a half double you yarn over your hook to begin with just like so go into the Stitch yarn over pull up a loop so you have three loops on your hook yarn over draw through all three when you get to the end of your row take a second go back and count all of your stitches make sure you have the correct Stitch count then you will go ahead and chain one in turn or turn in chain one whichever one you
(09:31) want to do and it’s at this point we will be doing single crochets into the back Loop of those stitches we just did so if you’re looking at your work just like so you can see it kind of looks like you have a loop right here a loop right there and then one in the very back we want the one all the way back here and we will work a single crochet so come to the all the way in the back and work a single crochet all the way and back working that single crochet what that’s doing is it’s leaving this front Loop the front Loop
(10:08) right there and the one down here it’s leaving them open and it gives the illusion of a v right there that is the very nice subtle line that you get in this fabric it’s created by working single crochets in the back Loop of these half doubles and it just looks really great okay at the end of the row your your work should look just a little something like this and it’s at this point we will turn our work and complete a stacked double crochet so you turn your work you do not chain go into the top of that first single crochet yarn
(10:45) over pull up a loop yarn over draw through two and then just right here that that Stitch that you just created just pierce your hook right through the middle of it yarn over pull up a loop yarn over and draw through two that is a step double crochet it’s at this point we’re going to continue with the V stitch so we’re going to skip one stitch and we’re going to work two double crochets in the next Stitch okay so you Skip One and work two double crochets in the next do not put a chain between them
(11:19) just work two double crochets skip one two double crochets in the next skip one two double crochets in the next and you will do this all the way down until you get to the very last single crochet and you will work a double crochet in the very last Stitch of the row once you’ve reached the end of that row we will turn our work and again we start off with a stacked double crochet so you complete one single crochet and then you work right through the middle of that one and work another one and it’s at this point you won’t
(12:06) skip right here in the beginning you’re going to go between these two double crochets of the V stitch go between them and you will create two doubles so there’s one and two you do not work a chain or anything else you will skip this space right there between that double and that one and right here these two doubles that were the V stitch the next one over go right between them and complete another V stitch so two doubles okay we’re going to do this all the way across and be very careful make sure you don’t accidentally put a V
(12:48) stitch in the wrong place meaning let me get myself some more yarn here do not accidentally put it like right here it always goes in the middle of the V stitches okay we’re working in the middle of those V stitches all the way down when you get to the end of the row you will end with a double crochet into that very first double crochet and you have some work that looks like this pretty nice right okay let’s move on to the next row we will turn our work and chain one or chain one and turn it doesn’t matter and now we want to work
(13:24) half double crochets all the way down this row okay so we’ll work half double crochets all the way down so into each of these stitches just work your half doubles when you get to the end of this row you should have the exact same number of stitches that you had when you started and now you will turn and chain one or chain one and turn and we are back to row two where we did the single crochets through the back Loop only so we turn go to the back Loop of those half doubles right and work our single crochets all the way down and that’s it
(14:07) you guys that’s the pattern for the entire cardigan you just continue working this four row repeat and you get this really beautiful stitch pattern once you finish that single crochet row you can set it down and it’s here you can begin to see where your pattern is beginning to take shape and it’s just those four rows that you continue repeating for the entire cardigan it’s really that easy I was not lying when I said this is a very crochet beginner friendly pattern now as you’re working on this you do want to make sure
(14:45) you’re not accidentally getting tighter as you create your stitches so make sure you pause every now and again and measure your work in progress to make sure that it’s still on track to be the same measurement as it is in the schematic and I will will’ll give you a little tip it’s okay to be a little bit bigger than the schematic but I would not go any smaller than the schematic okay if you have a fabric that’s smaller when you go to wear your cardigan it’s not going to really like fit over your
(15:15) bust and feel like it’s it’s it’s kind of snuggly it’s going to feel like it’s it’s more of a shrug than a cocoon so it’s better to have it a little bit bigger I mean you could go as big as like 10 in wider if you if you wanted to um but the measurements that we have chosen for this cardigan they they tend to be the most perfect sizing I’ve made so many Cardigans with these measurements and they tend to be the most perfect size um that we’ve experienced but I just wanted to give
(15:42) you a heads up on that it’s better to be a little bit bigger versus a little bit smaller once you have crocheted the fabric to the correct length not just the width it’s at that point you would work one more row of single crochets across the top of your project once you get the full rectangle of your cardigan complete it’s at that point you will work the seaming which is just some whip stitches together so let’s take a peek at how you would do [Music] that once you’ve completed that final
(16:17) row of single crochets I highly recommend giving your piece a little bit of a block so Pin It Out On A blocking board sprit it with some water and let it dry or maybe lightly steam it it will make the joint as you go process for the collar and the Cuffs a lot easier if you do that once that is all done you’ll have a piece of fabric that looks similar to this obviously much much larger and it’s at that point we’re ready to seam now what we want to seam together are actually the short edges so you’re going to take your Fabric and you
(16:52) will fold it with the wrong sides facing and you’ll know what the wrong side is because you want to be able to see that nice line of V’s right there that you created with the um single crochet in the back Loop only and once you do that what will happen is you want to whip stitch together starting down here at the The Edge this is the foundation single crochet Edge and your last Edge and you want to just whip Stitch this Edge together but you want to leave an opening for the cuff right there okay and to whip Stitch it’s really just as
(17:27) easy as grabbing your tapestry needle and some yarn and we’re just going to whip these two pieces together I like to get as close to the corner as I can to start to match up the two corners and then we really are just going to whip them together okay we don’t have to do anything super special about it um if you wanted to do a more decorative like single crochet join or a slip stitch join you could and that could be a really great design feature but it is is not necessary okay I’m just going once you get it all seam together
(18:03) go ahead and weave in your tail I’m just going to snip mine off because I can we’re just doing a little Swatch here and I’m going to seam together the opposite side as well so I’ll go to the opposite side make sure the two ends meet up and then let’s just whip these together quickly once the two ends are seam together you have a piece that looks like this right but as you open up the center you’re GNA see that this is your cocoon right so these openings here that you left here and here that’s where your cuff goes and
(18:44) then this right here that’s where your your body fits in right so it’s at this point this is where you’re going to create your [Music] collar let’s talk about the collar it is made in a join as you go technique so you work the ribed collar and you join it to the fabric at the same time you absolutely could make the collar separate and then seam it to the Cocoon cardigan or if you’re by crafty like me and want to do a knitted collar you could pick up and knit stitches all the way around this opening here and work
(19:22) like a 2 x two collar if you wanted to but for the join as you go collar that I created for this piece we are going to join our yarn right here at the corner we will chain some stitches and then as we work back every time we work back towards the piece here we will join it to these stitches that we have either on the foundation single crochet Edge or our final single crochet Edge that’s why we have those nice stitches there we get to work into and it’s going to turn out really great so let’s go ahead and see
(19:55) how this is done for the collar you will begin at your seam here and you want to join with a slip stitch so put your hook in and just join your yarn with a slip stitch now the pattern tells you to chain X number of chains and I will let you know if you want a larger more dynamic or drastic collar chain more than written in the pattern it’s totally up to you but go ahead and chain however many stitches is written in the pattern I’m just going to do a few stitches here and once you’ve reach that we want to
(20:30) then work back in a row of single crochets but when we get to the end of the row here we’re going to join two times to our fabric one join is going to be to represent the row we were on and the next join which will be one stitch up will represent our turning chain so let’s go ahead in the single crochet from or in the second hook the second chain from Hook let’s single crochet and and we will do this all the way down get into that last one there and then once you’ve worked all of those single crochets you’re going to go to the so if
(21:21) I joined right here I’m going to go to the next stitch up and I’m going to put my hook in and do a slip stitch and then I go to the next stitch up from there and I do another slip stitch so this second slip stitch here takes the place of my my turning chain okay so now I’m going to turn my work I do not want to work into that slip stitch or that slip stitch I want to come down here to the single crochet and I want to work into the back Loop only and I will work single crochets all the way back when you get to the end of the row chain
(22:15) one and turn or turn and chain one doesn’t matter and then you’re going to work single crochets in the back Loop only all the way back and when you you get to the edge of your fabric again you will join with that slip stitch once again going to get all the way back here when you go to join this time make sure you don’t join where you already have a slip stitch kind of A good rule of thumb is any of the stitches along the actual body if there has already been a stitch worked into it don’t go into it again go into the next stitch up
(23:01) so I go to the next stitch up and do a slip stitch that’s the first one that joins the ribbing I just did to the body and then I go to the following stitch up and that takes the place of my turning chain so I will turn my work don’t work into either one of those slip stitches go down to the single crochet and work back Loop only and just go back and forth and this is how you make the collar this is how you do the cuff it’s this very simple ribbing okay can you see how that works up see how that works up real nice and neat now the
(23:39) difference between the collar ribbing and the cuff ribbing is the collar ribbing you know we have these nice stitches right here that we can easily work into and here at the cuff it’s at the edge of our work so there are no stitches there so you’ll notice that on the cuff I have you do one round of single crochet to begin with and then create your cuff and just like the collar if you want your cuff to be longer you want to chain more stitches than what is written in the pattern so for my sample let me grab it right
(24:13) here the cuff on the sample is just this nice little cuff right here but if you wanted this to be double the size you would double the chain amount and then you could have a folding cuff so like this one folds right but it’s just like this little dainty little fold if I wanted it to be a full fold then I would double this up and you absolutely could do that um you just want to make sure you have enough yarn to do that once your collar and cuffs are complete weave in any tail that you have and your cardigan is all done next thing you know
(24:44) you’re going to throw it on and look like this isn’t this cardigan amazing I love it so much the minute I got it back from my contractor Tammy I put it on and I have been in love ever since I know you’re going to love your C again as well be sure to share with me on social media as you work on yours snap a picture and send it my way use #m marlybird and I’ll be sure to smash your like button and give you all the encouragement you need all right everybody that’s it for me you’re by crafty bestie I’ll see you in the next
(25:19) video bye [Music] guys this is show me love this is all we got show me show me love show me
Enjoy your crochet time!
xoxo Marly Bird