
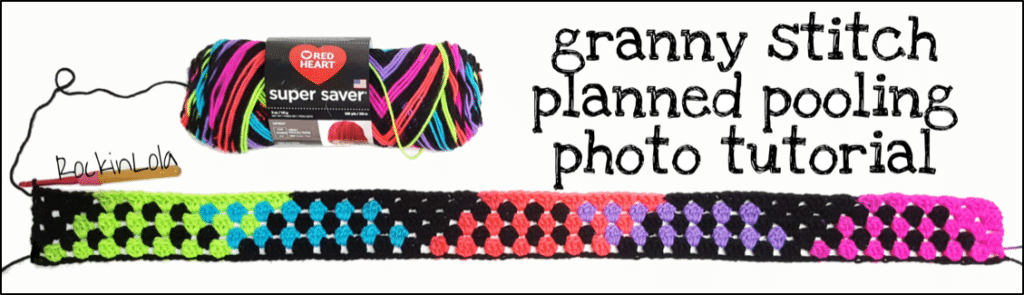
Granny Stitch Planned Pooling Crochet
Today we have a special guest that is going to be telling you all about the Granny Stitch Planned Pooling Crochet. This is another variation that you can use for planned pooling. Typically I use the moss stitch as you have seen in my previous videos (which can be found on my YouTube Channel). Since the granny stitch planned pooling crochet isn't something I typically design with I thought that I would bring in someone who has done a lot of work to perfect this style of planned pooling. Please welcome Rocky to the blog to teach us the granny stitch planned pooling to add to our tool box.
Learn about Granny Stitch Planned Pooling Crochet:
Photo Tutorial by: RockinLola
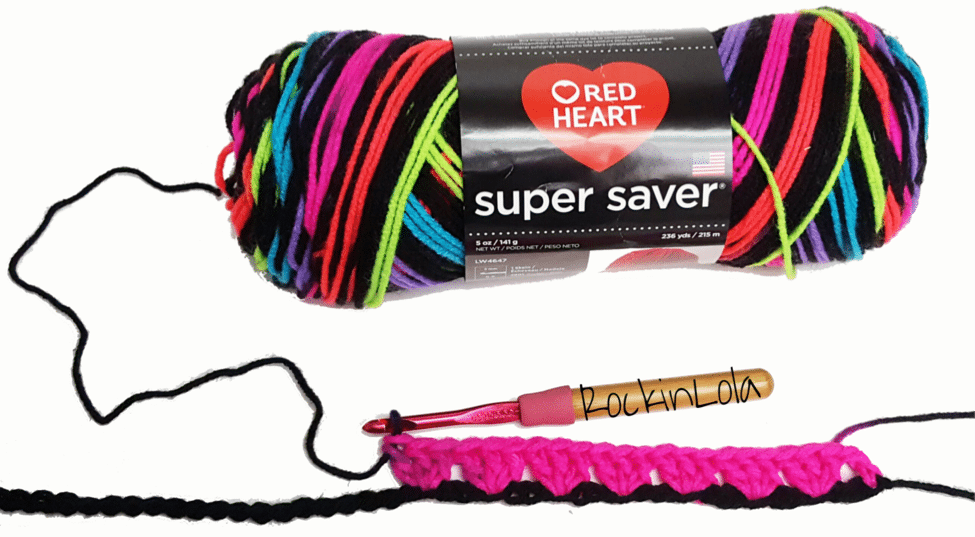
YARN: Red Heart Super Saver (RHSS) in Neon Stripes & Red Heart Super Saver in Black (or color you wish to use for border) for the starting chain
HOOK: I hook, 5.50mm (recommended hook size on yarn label)
STITCHES USED:
- chain (ch)
- double crochet (dc)
- granny cluster (3dc in same space)
Planned Pooling Tip: your hook size and amount of clusters per color that you get may vary from person to person or may be different due to yarn dye lot.
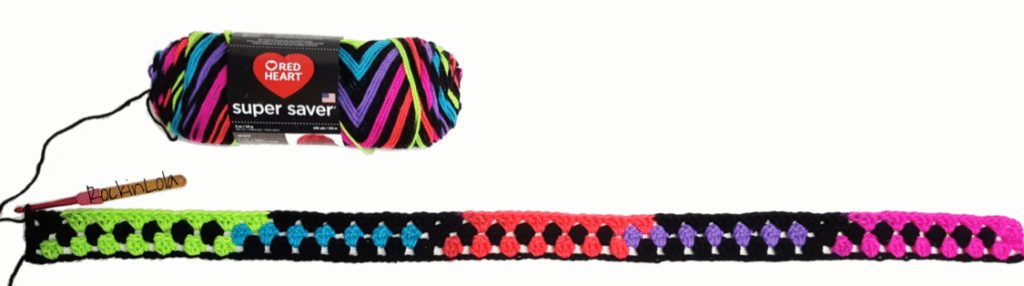
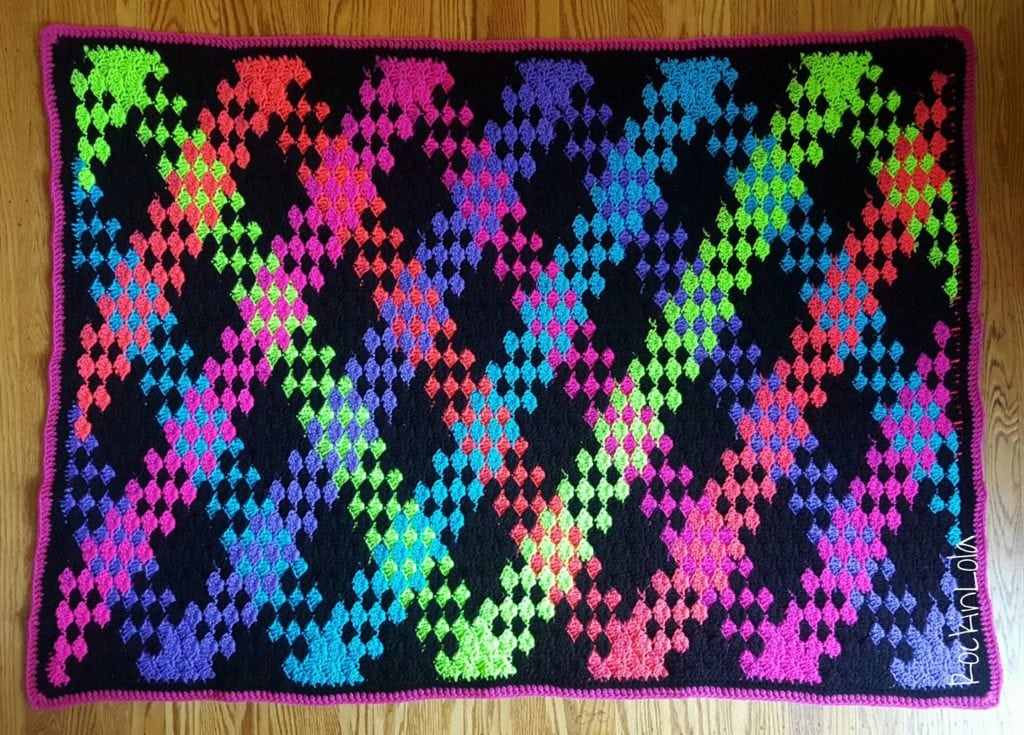
Notes on Neon Stripes: This yarn has 10 colors in one sequence (pink, black, orange, black, green, black, blue, black, purple, black). Think of each color in the sequence as being the exact same length. There are many ways to pool this yarn which will give you a variety of outcomes. For the purpose of this tutorial and ease of capturing photos, I will be demonstrating working through half of a color sequence (5 out of the 10 colors).
Starting Notes:
- Use a separate alternative color of yarn for the starting chain. It is best to think ahead to which border color you will want and use that color for the starting chain.
- Determine how many granny clusters you will have by working through one color. You may need to change your hook size or adjust your tension to get the same amount of granny clusters for each color. Using an I hook (5.50mm) yielded me 7 granny clusters per color.
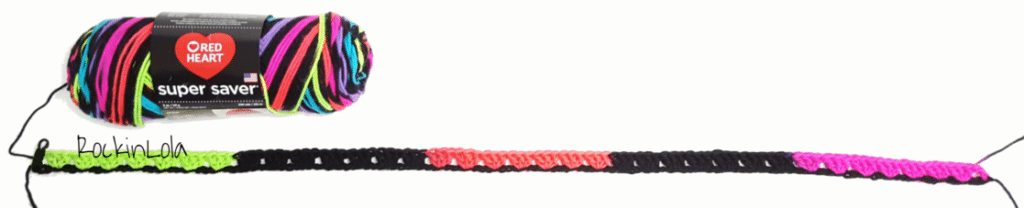
- I worked through a half sequence (5 colors) and 7 clusters per color which gave me a total of 35 granny clusters in my first row. Estimate 3 chains per cluster plus an additional 3 chains for the extra dc at the end of the row. 35×3=105 105+3=108
Chain 108 and leave a tail. Either fasten off the starting chain yarn or keep it attached for the border.

Row 1: Using the RHSS Neon Stripes, start at the beginning of a new color. Make a standing alone double crochet in the start of a color by attaching the Neon Stripes to the first chain of the starting chain using a slip stitch. Chain 2 (counts as a stand alone dc). Skip 2 chains and make a granny cluster (3dc) in the next chain. Make 7 granny clusters total in each color across row 1 to the last three chains. Skip two chains and make a stand alone dc in the last chain in the next color of the sequence. Turn. (35 clusters + 1 stand alone dc at each end).
*You will be making 1 stand alone dc on each end of the odd rows (1, 3, 5, 7…). This does NOT count as a separate cluster.


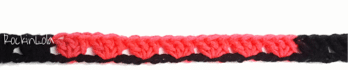


Row 1= 35 granny clusters across, plus a stand alone dc on each end
*This piece measures approximately 36 inches across. For a wider piece, work through an entire color sequence (all 10 colors and 70 granny clusters across Row 1).
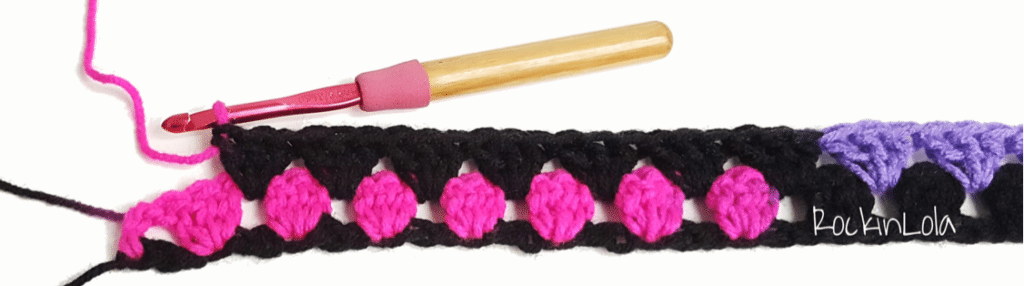
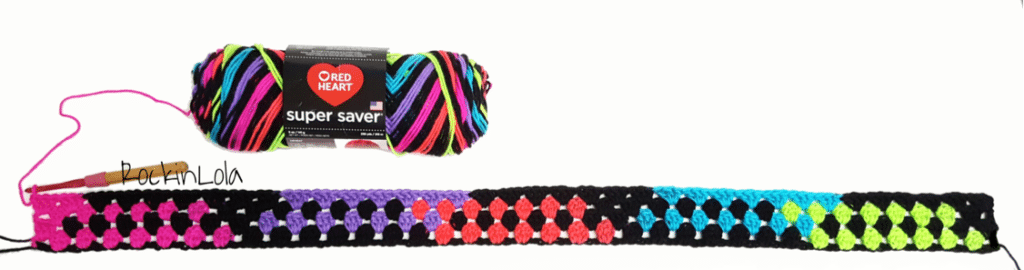
Row 2: Chain 2 (counts as dc) and make 2dc in space between the dc and the first cluster of row 1. Continue working 3dc clusters across row 2 in the space between the clusters of row 1, maintaining 7 granny clusters in each color.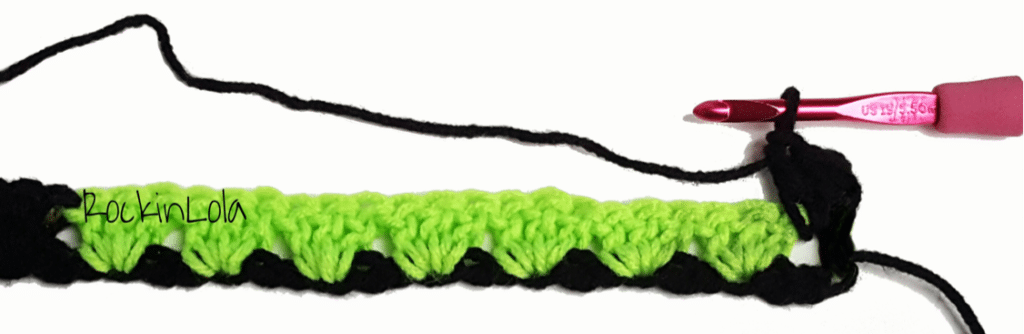
The last cluster on Row 2 will be the first color in the next color sequence (the color you started with on Row 1).

Odd Rows (1, 3, 5, 7…) will have 35 granny clusters across
Even Rows (2, 4, 6, 8…) will have 36 granny clusters across
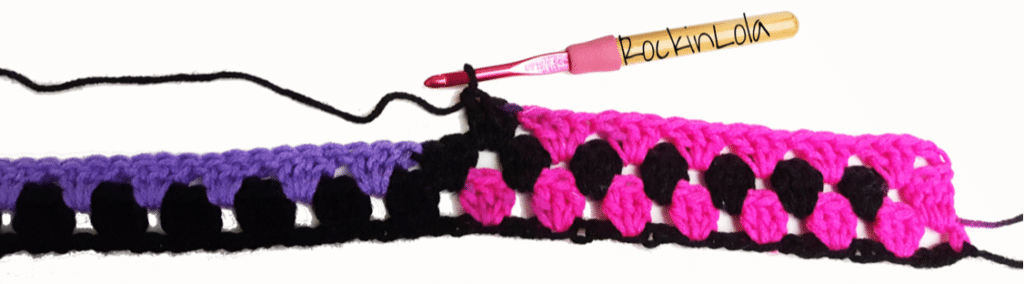
*The yarn pools into a diagonal pattern because of the extra granny cluster on the even numbered rows.

End of Row 2
Row 3: Chain 2 (counts as stand alone dc), make 3dc cluster in the next space between clusters. Continue to make 7 granny clusters across until the end of row 3. End with a stand alone dc at the end of Row 3 (and every odd row).
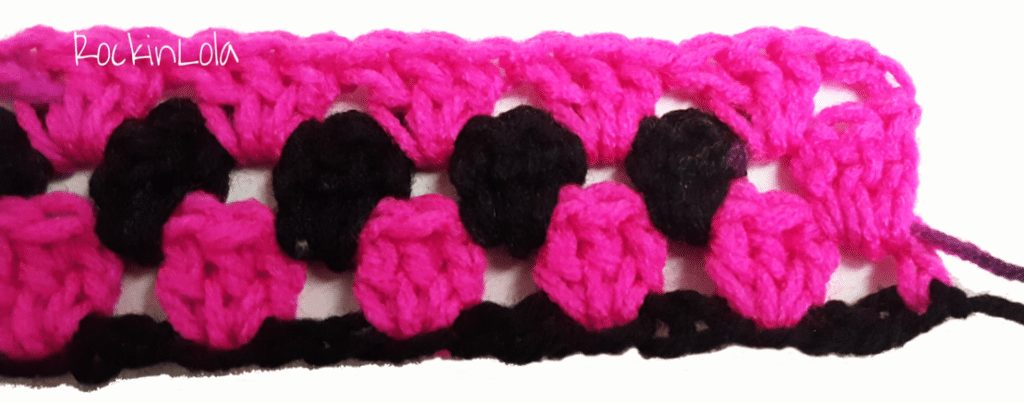
You will now start to see the diagonal pooling on row 3! Keep the same amount of clusters per color and there will be a shift of one cluster from 2 rows below.
Remember to end Row 3 with a stand alone dc.
End of Row 3
Row 4: You will now see the shift in both directions.
End of Row 4
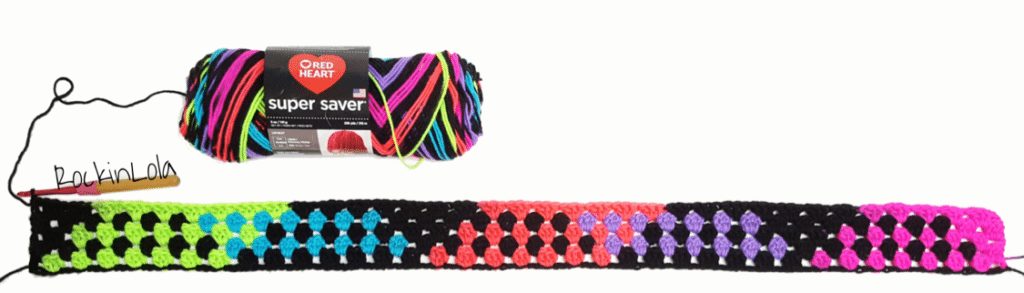
End of Row 5
Continue with the granny stitch pattern, repeating Rows 2 and 3 and maintaining the same amount of granny clusters per color until you reach your desired size.
End your granny stitch project after an odd row, making sure that all of your corners contain a stand alone dc. This method ensures that when adding a border, you will be able to work evenly in each corner.
Who is Rocky:
 My name is Rocky and I am owner and designer at RockinLola. I taught myself how to crochet when I was in middle school by reading patterns in magazines and crochet books. I love color and find myself drawn to bright colors and rainbow themes. I began to design baby blankets and clothing for friends of mine having children and I haven't stopped since. I work in the public school system and am able to incorporate teaching children how to crochet as part of my job. When I get home after a long day of work, I get to play with yarn and design new things. In October 2016, planned pooling became my new obsession which opened a ton of new possibilities and design concepts. I love to be able to share things that I've learned along the way and always hope to inspire the creativity of others.

Marly Bird's Planned Pooling Posts:
Thanks so much to Rocky for sharing with us her method of Granny Stitch Planned Pooling Crochet. If you want to learn more about Crochet Planned Pooling you can view my other posts on how to use the moss stitch.
- The Best Crochet Planned Pooling Argyle Tutorial
- 10 Secrets to Perfect Planned Pooling in Crochet
- Planned Pooling-Finished Starting Chains
- How to create Crochet Planned Pooling Argyle Charts

You can also head to my YouTube Channel to see all of the tutorial videos I have for Crochet Planned Pooling Argyle.
Be sure to join us later this week for another special Guest Post with more information on Crochet Planned Pooling.

Yarn Pooling Made Easy by Marly Bird:
Did you know that Marly has published a book on Planned Pooling Crochet? In this book, published by Leisure Arts, you will find 10 beautiful designed patterns that you can create using Red Heart yarns.
Frequently Asked Questions
What is granny stitch planned pooling?
Granny stitch planned pooling is a variation of planned pooling where you use a specific stitch count with the granny stitch (alternating clusters of double crochet with chain spaces) to intentionally align the color repeats in a self-striping yarn into a plaid or diagonal pattern. The result looks like a woven plaid fabric and is absolutely stunning… people genuinely can't believe it's done with a simple variegated yarn and basic stitching.
What yarn do I need for granny stitch pooling?
Self-striping or variegated yarn with long, consistent, REPEATING color segments is essential. The color changes need to happen at predictable intervals for the math to work. Some yarns are specifically designed for planned pooling and may say so on the label or have a documented color repeat length. Many sock yarns work well for this technique. Avoid yarn with short random color changes… those won't create the organized plaid effect you're looking for.
How does granny stitch pooling differ from regular moss stitch pooling?
Both techniques use planned pooling principles but with different stitches. The moss/granite stitch (alternating sc and chain) is the most commonly used for pooling. The granny stitch uses clusters of 3 dc separated by chains… it creates a different visual texture in the pooled fabric. Granny stitch pooling tends to give a slightly bolder, more open plaid look because of the larger stitch clusters. Both techniques require finding your “magic number” stitch count and careful swatching to get the pooling right.
How do I find my magic number for granny stitch pooling?
You'll need to measure your yarn's color repeat length (how many yards or stitches before the colors repeat) and then swatch to find the chain count where the colors start to pool into the plaid pattern. The math involves the stitch repeat of the granny stitch and the length of each color segment. This takes some trial and error upfront… but once you find your magic number, the actual crocheting is straightforward. The video tutorials available for planned pooling techniques walk through this calculation step by step.
Is granny stitch pooling beginner friendly?
The crocheting itself is very simple once you've found your magic number… it's just the granny stitch repeated consistently. The setup (finding the right stitch count, getting your tension perfectly consistent) is where the challenge lies. This is probably intermediate territory rather than true beginner… not because the stitches are hard, but because the precision required for consistent tension and stitch count is a more advanced skill. That said, if you love a technical challenge and have patience for swatching, it's totally achievable and SO satisfying when it clicks.


Go Rocky!!! This is amazing ~ what a great artist you are. <3
I’m hoping I can get this technique down pact. I have tried regular Planned Pooling and have been unsuccessful. I’ve tried Marly’s way, watched hers and others videos, all to no avail.
Be sure to give the granny stitch method a try. You might find it to be easier. You won’t know until you try it out! 🙂 Be sure to check out the other guest post this week about multiple sequence planned pooling. Maybe there will be some tips in there that help you to make it work for you.
I’m very appreciative of your advice and references. Really enjoy your tutorials, they are well developed and easy to follow. I am lefty, self taught knitter & crocheter. It’s not easy to find tutorials that I I can follow as a lefty. Thanks!
Has anyone come up with a list of yarns that work well with the Granny stitch planned pooling technique?
I know that Red Heart has put together a list of Super Saver and With Love colors that they feel work well for planned pooling on their blog. You can use the link below to get to their blog to read more about it. They also have some great FREE patterns listed there that you might want to try. Hope that helps! https://bit.ly/2gVbpiq
This is a really cool idea! I love it!
This is a great thought out video… You gals ROCK !!! Keep up the great work. Thank you <3
Thanks so much! Be sure to check out the other guest post this week about multiple sequence planned pooling!
This might be a silly couple of questions but 1- how many should i chain for the larger version with all the colors in one stripe? And 2- any idea how many skeins I’d need for a small blanket?
I cannot for the life of me get mine to come out evenly. I’ve upped my hook size, lowered my hook size, changed the length of my beginning tail, and now I’m just cutting my working yarn when I finish 7 solid granny clusters because if I don’t, I end up having a cluster that has only one or two in a color and then the last dc or two in black…. tips?
There aren’t really any tips other than finding the sweet spot for the stitches to work for you. You might not get the exact number of granny clusters as I do but you need to see how many _you_ get in order to make it work. I would just do a simple swatch with the granny stitch in general (not trying to get it to pool) and find how many granny clusters you get on average with a H, I, or J hook. Once you know how many you need to strive for, then you can try and get that number on the actual project.
I had same problem so I would wrap the yarn around twice as in to do a TC but then still do a DC but through two hoops& 3…and I did that for a few of the clusters until the last few like…hmm #5,6,7 was able to do normal DCs. Lots of ripping out and playing with how many of the “not true DCs” sequence but then it worked. Does that make sense?
Hi!
Thank you for sharing this tutorial 🙂
Quick question. I’m planning on making a friend a blanket with this technique for her children, but I feel the neon colors are too bright for what I’m looking for. Can you explain how you know what yarn is good for this technique or share some other yarns (or colors) you may have tried?
you want a yarn with distinct color sequence that is consistent. To use the granny stitch technique you will need each section of color to be long so that you can get the granny stitch to work.
Okay, so would yarn like the red heart unforgettable work?
I really would love to try this and wanted to know how many skeins did it take to make a throw…I know I should get all the same dye lot for any project and don’t want to come up short.
Thank you
Kathy
I haven’t made one yet but from others I’ve seen they are using at least 10 skeins. It all depends on how large you want yours to be.
I am wondering what to do when a skein of yarn ends… do you just find the next color in the pattern in the new skein? and do you try to make the next stitch at the very beginning of the color?
Hi there, this is such a beautiful pattern but unfortunately I am unable to grasp it. I’ve started like you said with the sl st then 1dc …..do I ch any and do I skip two stitch and then in the 3rd st I do 3 clusters. After this do I do any chains before I start my 3dc clusters in the 3rd st. I’m confused and the blanket is not coming out right. Am I missing something. Thanks in advance
for the help.
Somehow my clusters are shifting 4 spaces to the left instead of one to the right…? (im a lefty)
This is really easy to understand. Thanks. Maybe it will work with other stitches like the moss stitch, going to save it. Thanks again
How many balls of your did you use for this blanket?
can you please do a vid tutorial on how to get the granny color pooling started. I dont seem to understand the photo tutorial. Thank you so much.
How many do I chain for all 10 colors?
I would like to make a planned pooling blanket for my husband. I was thinking of making it with the seed stitch, but the granny stitch would be much easier and faster. Can I use other colors like the Caron yarn for this? I used all your videos to learn planned pooling this week, love the pattern!
I just finished a blanket just like this following your pattern and I just absolutely love it. THANK YOU!!
its my first colpur pooling pattern and so far i love it but ive just realized my colours arent shifting! just to reiterate: odd rows end with 1 DC, even end as a 3 dc cluster?
what about at that beginning of the rows?
I’m so glad there are smart people like you who can figure this out for the rest of us. I used a blue/green/teal combination of red heart stripes on a knitted pattern that was offered at joanne’s….it turned out beautiful, the yarn had a nice thickness and loft. My grandson wanted one in the neon stripes but after making one square I realized I had the wrong pattern to show off these stripes…..didn’t really understand that this yarn was for planned pooling…the other had a beautiful ombre outcome….so, luckily I found your tutorial …love the argyl pattern….really shows off the yarn. Thanks again.
I’m about to attempt this project, I going to work through have a skein of the neon stripe, how many skeins will I need to make the full blanket in your example?
Hi! I just wanted to make sure if I understood this right. After you do 108 starting chains and leave the tail. But said to either fasten off the starting chains or keep it to add in the border. Do I fasten off normally and then do the slip stitch with the Red Heart Super Saver Primary Stripes(which is what I have currently to use in this project) to make a stand alone DC?
Thank you for reading this comment.