Marly Bird

YouTube Instructor, Knitter, Crocheter, Teacher

  • Patterns
    • Crochet Patterns
    • Knitting Patterns
    • Planned Pooling
    • Marly Bird Crochet Along
    • Marly Bird Knit Along
  • Workshops / Marly Bird House
    • Camp Colorwork Course
    • Classic and Colorful Crochet Sock Workshop
  • Videos
  • Blog
    • Crochet
    • Knitting
    • FREE
    • Giveaways
    • Craft Inspiration
    • Round Ups
    • Reviews
  • Marly Bird House || Online Courses
  • Crochet and Knit Gifts: 24 Days of Quickies || 2022
  • SEARCH
  • About
    • Newsletter Sign up
    • Contact
    • Marly Bird Media
    • Terms of Use || Privacy Policy

March 12, 2019 By admin Leave a Comment

Granny Stitch Planned Pooling Blanket

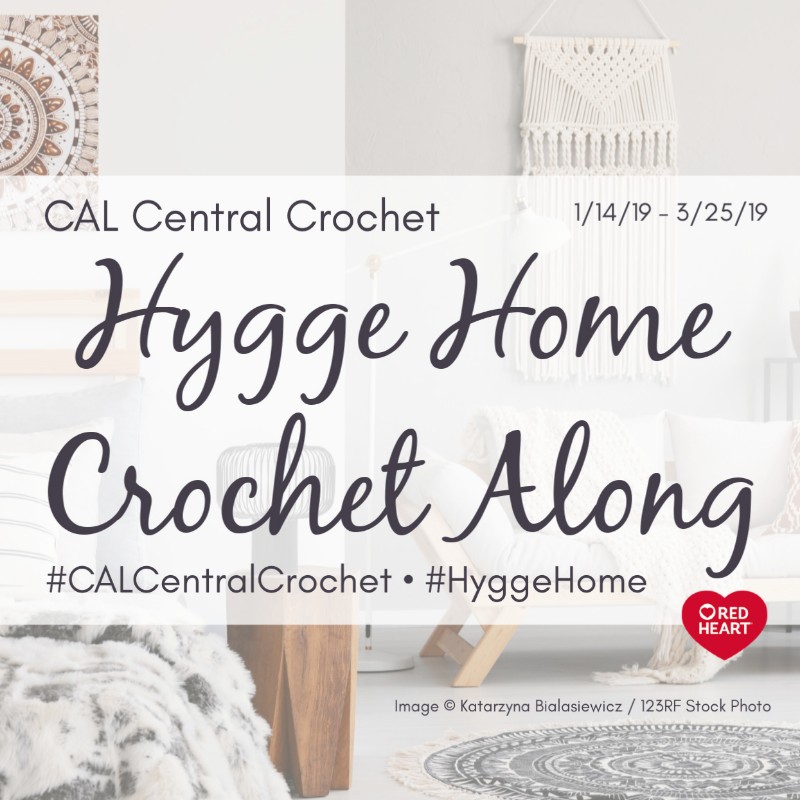
As part of the Hygge Home CAL, run by my wonderful friend Marie (Underground Crafter), I have designed a granny stitch planned pooling blanket for you to hygge your home with. Be sure to check out this great blanket pattern along with 9 other Hygge Home patterns from other great designers.

2019 Hygge Home Crochet Along with CAL Central and Red Heart Yarns

*This post contains affiliate links. By clicking one of these links and making a purchase a small portion of that purchase will go to support the blog. The price that you pay does not change. The small commission I make allows me to keep bringing you free patterns like this. Thank you for your continued support.*

Hygge Home CAL:

If you haven’t heard about the Hygge Home CAL yet hurry up and check out the original blog post over on the Underground Craft blog.

In a nut shell, Marie has brought together ten top crochet designers to bring you free crochet patterns for making your home more cozy, comfy, and hygge.

2019 Hygge Home Crochet Along with CAL Central and Red Heart Yarns

Not only are you going to end up with 10 FREE crochet patterns, two of our favorite companies are providing prizes for our end-of-CAL giveaway. To learn more about joining the CAL and how you can enter to win head over to the Underground Crafter blog and read all of the details.

Pixie Dust Granny Stitch Planned Pooling Blanket:

The Pixie Dust Granny Stitch Blanket uses the crochet planned pooling technique in a unique way. Rather than using the traditional moss stitch, this blanket uses the granny stitch. Using a long striping yarn and a special crochet planned pooling technique, you can create this large crochet blanket.

Granny Stitch Planned Pooling Blanket by Marly Bird -- Free Pattern
GET THE FREE PATTERN HERE

Crochet Planned Pooling is not traditional crochet. Typically in crochet you want to keep perfect tension and perfect pattern stitch and everything will come out perfectly. In planned pooling crochet if you follow those same principals it won’t. Why? There is a third factor when talking about planned pooling crochet, the yarn!

If the yarn is not dyed absolutely perfectly with all the yarn lengths of the same color exactly the same then there will need to be adjustments made. If you look around online you can find some people who have had great success with planned pooling and others that have had disasters.

Even if you have tried the traditional moss stitch planned pooling crochet you should give this blanket a try. Working with the granny stitch takes out some of the fiddling you will need to do to get the colors to sit just right.

Moss Stitch vs. Granny Stitch Planned Pooling:

Traditionally, when working a planned pooling crochet pattern you would use the moss stitch. When a variegated or striped yarn is dyed, it is not specifically done so to be the exact lengths of color for each section of that color. There is always a slight variation in length.

Because of this you are required to change your tension and stich counts throughout your project when using the moss stitch. This can be tedious and frustrating over time.

The good news is that most crocheters have found that using the granny stitch planned pooling technique vs the moss stitch planned pooling technique. They find it to be easier for them and requires little adjusting. Give it a try with this FREE Pixie Dust Granny Stitch Planned Pooling blanket.

Ravelry Link to the Granny Stitch Planned Pooling Blanket Pattern, Pixie Dust by Marly Bird

Favorite this project on Ravelry!

Want to Make Planned Pooling Crochet Easier:

If you are looking to try your hand at crochet planned pooling I encourage you to try out Red Heart Yarn’s Super Saver Pooling yarn.

Red Heart's Super Saver Planned Pooling Yarn
Learn More about Red Heart’s Planned Pooling Yarn by clicking on the image above

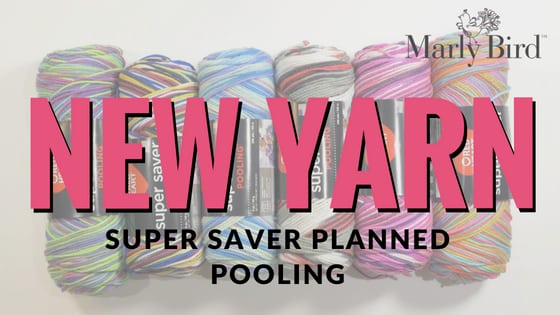
I personally worked with the team at Red Heart to create a pallet of colors that would be great for planned pooling. The reason that this yarn is ideal for working this technique is that it has consistent lengths for each of the colors. Could it be that planned pooling crochet was just made a little easier?

Don’t get me wrong, just because the colors are the same length doesn’t mean that you will magically get it on the first try. There are still other factors to play around with to get the colors exactly where you need them to go, but this yarn makes it a WHOLE lot EASIER!

Ravelry Link to the Granny Stitch Planned Pooling Blanket Pattern, Pixie Dust by Marly Bird

Favorite this project on Ravelry!

Planned Pooling Crochet Resources:

Over on my YouTube channel you will find an entire playlist of planned pooling videos. Find more information and tips on getting planned pooling to work for you on the blog. The links below will take you to other planned pooling posts.

  • The Basics of Planned Pooling Crochet
  • The Best Crochet Tutorial for Planned Pooling Argyle
  • Multiple Sequence Planned Pooling Crochet
  • 10 Secrets to Perfect Planned Pooling Crochet
  • Red Heart’s Super Saver Planned Pooling Yarn
  • Red Heart’s FREE Planned Pooling eBook

Also on the Blog:

  • Planned Pooling Crochet Throw
  • 10 Secrets to Perfect Planned Pooling in Crochet
  • Planned Pooling Basics

Filed Under: Crochet, FREE, Planned Pooling, Red Heart Tagged With: crochet planned pooling, free crochet blanket, Free Crochet Pattern, free pattern, Free Pattern Friday, Granny Stitch Planned Pooling, hygge crochet, hygge home, hygge patterns

Previous Post: « Marly Bird Free Patterns
Next Post: Learn about Marly Bird »

Reader Interactions

Leave a Reply Cancel reply

Your email address will not be published. Required fields are marked *

Granny Stitch Planned Pooling Blanket

Use the crochet planned pooling technique in a unique way with this granny stitch planned pooling blanket. Use a long striping yarn by Red Heart yarns and a special crochet planned pooling technique that uses granny clusters, you can create this large crochet blanket.

Granny Stitch Planned Pooling Blanket by Marly Bird -- Free Pattern

Personal note from Marly: I have had a lot of people contact me over the last couple of years in tears that they just can’t get the planned pooling technique to work for them…even though they have been crocheting for YEARS! 😭I will often tell them that it quite possibly is that they are so good that this technique will be hard for them. See, this technique is very ‘artsy fartsy’ and requires a willingness on the crocheter to adjust the way he or she crochets to get the desired effect.

Crochet Planned Pooling is not traditional in that you simply keep perfect tension and perfect pattern stitch and everything will come out perfectly…it wont. Why? Because there is a third factor…the yarn! 🧶And if the yarn is not dyed absolutely perfect with all the yarn lengths of the same color exactly the same then there will need to be adjustments made.

Traditionally, when a variegated or striped yarn is dyed it is not specifically done so to be the exact lengths of color for each section of that color. There is always a slight variation in length. Because of this, the way to achieve this crochet technique you must adjust YOUR tension or YOUR stitches sometimes.

The good news is that most crocheters have found that using the granny stitch planned pooling technique vs the moss stitch planned pooling technique is easier for them and requires little adjusting. 🥰

Ravelry Link to the Granny Stitch Planned Pooling Blanket Pattern, Pixie Dust by Marly Bird
Favorite this project on Ravelry!

Be sure to favorite and queue this project on Ravelry!

Granny Stitch Planned Pooling Blanket by Marly Bird -- Free Pattern

MATERIALS

YARN: Red Heart Soft Essentials Stripes: Pixie Stripe 21 balls (color A). Red Heart Soft Essentials: Peony, 4 balls (color B); Greyhound, 3 balls (color C); Cream, 1 ball (color D).

HOOK: J [6mm] or size to obtain correct stitch technique.

PLANNED POOLING TIP: your hook size and amount of clusters per color that you get may vary from person to person or may be different due to yarn dye lot.

SPECIAL STITCHES

  • chain (ch)
  • double crochet (dc)
  • beginning granny cluster: Chain 2, 2 dc in space between the last dc and the first cluster of previous row
  • granny cluster: 3 dc in same space

Pattern

FINISHED SAMPLE SIZE: 63 x 66 inches.

⭐️You must work through these bullet points to figure out how many chains you need for your granny stitch planned pooling blanket.⭐️

The yarn used in the blanket, Pixie Stripe, has 4 colors in one sequence (dark pink, light pink, cream, grey). Think of each color in the sequence as being the exact same length. To make this blanket, you will work through half of a color sequence (2 out of the 4 colors). Figure out how many colors are in the yarn you are using.

  • Use a separate alternative color of yarn for the starting chain. It is best to think ahead to which border color you will want and use that color for the starting chain. Sample used Greyhound colorway.
  • Determine how many granny clusters you will have by making a large swatch. Working through one color. You may need to change your hook size or adjust your tension to get the same amount of granny clusters for each color. Using an J hook (6 mm) yielded me 24 granny clusters per color.
  • Worked through a half sequence (2 colors) and 21 clusters per color which gave me a total of 42 granny clusters in my first row. Estimate 3 chains per cluster plus an additional 3 chains for the extra dc at the end of the row. 42×3=126  126+3=129 chains.

With the border color, Chain 129 (or your established number) and leave a tail. Fasten off border color.

Row 1: With color A and at the start a new color, join to the first chain of the starting chain with a slip stitch, ch 2 (counts as a dc), *skip 2 chains, granny cluster (see special stitches) in the next chain; repeat from * across the row to last 3 chains [maintain the number of granny clusters per color as established in your swatch, for this example it is 21 per color], skip 2 chains, dc in last ch [this should dc should be the next color]. Turn — (42 clusters + ch 2 (counts as dc) and 1 dc at each end).

Row 2: Beginning granny cluster (see special stitches). Continue working granny clusters across row 2 in the space between the clusters of previous row, maintaining 21 [or the your established number] granny clusters in each color. Turn.

Note: The last cluster on Row 2 will be the first color in the next color sequence (the color you started with on Row 1). Also, The yarn pools into a diagonal pattern because of the extra granny cluster on the even numbered rows.

Odd Rows (1, 3, 5, 7…) will begin and end with dc and have 42 [or your established number] granny clusters across

Even Rows (2, 4, 6, 8…) will begin with a beginning granny cluster and have 43 [or your established number] granny clusters across

Row 3: Chain 2 (counts as dc), granny cluster in the next space between clusters; repeat from * to end of row, dc in last stitch of row. Turn.

You will now start to see the diagonal pooling on row 3! Keep the same amount of clusters per color and there will be a shift of one cluster from 2 rows below.

Continue with the granny stitch pattern, repeating Rows 2 and 3 and maintaining the same amount of granny clusters per color until you reach your desired size. End after a row 3. Fasten off.

NOTE: when you need to add new yarn, match up the color sequence so you can maintain the pattern. This will mean that sometimes when adding new skeins you sometimes have to “waste” what seems to be a huge amount of yarn. I kept these sections and used as filler between skein changes to conserve yarn.

If you would like a photo tutorial for the pattern above, please check out the wonderful one done for us by Rockin Lola! You can find it here!

BORDER

Granny Border

With color C, join with a slip stitch to any corner space, work beginning granny cluster, then working around the blanket, granny cluster in the space between each granny cluster and to make sure the corners lay flat, (granny cluster, ch 1, granny cluster) in each corner.

Work in this color sequence:

When working rounds of color you can change color in last stitch of round on final pull through. Here is a video to help if you need it: https://youtu.be/klBMm9gCqig

  • 2 rounds Greyhound,
  • 3 rounds Peony,
  • 1 round Cream,
  • 3 Rounds Peony,
  • 2 Rounds Greyhound, and final round of SC in each stitch. Fasten off.

FINISHING

Weave in all ends. I highly recommend the bury in ends method by Anne Berk aka Annetarsia!

This free pattern was part of the Hygge Home CAL with Marie Segaras of the Underground Crafter. Learn more here!

Marly Bird’s Planned Pooling Posts:

Thanks so much to Rocky for sharing with us her method of Granny Stitch Planned Pooling Crochet. If you want to learn more about Crochet Planned Pooling you can view my other posts on how to use the moss stitch.

  • The Best Crochet Planned Pooling Argyle Tutorial
  • 10 Secrets to Perfect Planned Pooling in Crochet
  • Planned Pooling-Finished Starting Chains
  • How to create Crochet Planned Pooling Argyle Charts

You can also head to my YouTube Channel to see all of the tutorial videos I have for Crochet Planed Pooling Argyle.

Be sure to join us later this week for another special Guest Post with more information on Crochet Planned Pooling.

new red heart super saver pooling yarn

Yarn Pooling Made Easy by Marly Bird:

Did you know that Marly has published a book on Planned Pooling Crochet? In this book, published by Leisure Arts, you will find 10 beautiful designed patterns that you can create using Red Heart yarns.

Yarn Pooling Made Easy by Marly Bird

Primary Sidebar

LIMITED TIME 🎉 YARN SALE

Classic and Colorful Crochet Socks Online Course

Search

MARLYBIRD.COM is a division of YARNSPORTS. LLC

  • Patterns
  • Workshops / Marly Bird House
  • Videos
  • Blog
  • Marly Bird House || Online Courses
  • Crochet and Knit Gifts: 24 Days of Quickies || 2022
  • SEARCH
  • About

Copyright © 2023 · Yarnsport LLC

  • Patterns
    • Crochet Patterns
    • Knitting Patterns
    • Planned Pooling
    • Marly Bird Crochet Along
    • Marly Bird Knit Along
    • Back
  • Workshops / Marly Bird House
    • Camp Colorwork Course
    • Classic and Colorful Crochet Sock Workshop
    • Back
  • Videos
  • Blog
    • Crochet
    • Knitting
    • FREE
    • Giveaways
    • Craft Inspiration
    • Round Ups
    • Reviews
    • Back
  • Marly Bird House || Online Courses
  • Crochet and Knit Gifts: 24 Days of Quickies || 2022
  • SEARCH
  • About
    • Newsletter Sign up
    • Contact
    • Marly Bird Media
    • Terms of Use || Privacy Policy
    • Back