
The Basics of Planned Pooling Crochet
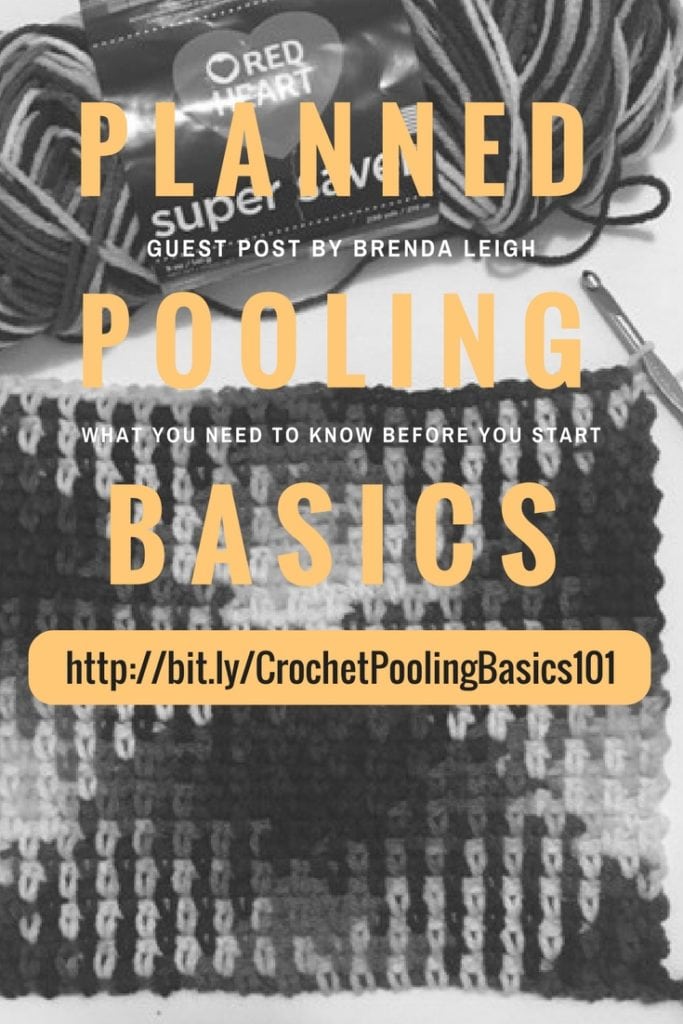
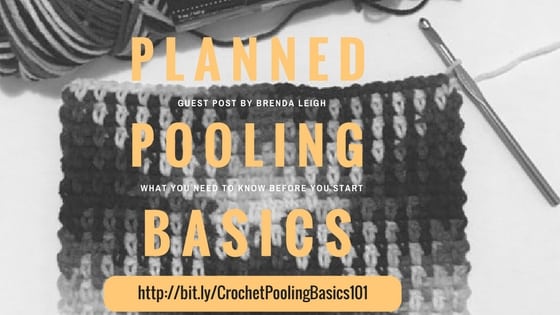 Planned Pooling Crochet 101 – The Basics
There are two ways to get into the pool. You can slowly wade in from the shallow end, learning how things work and taking your time to carefully plan or you can just go ahead and jump into the deep end. This tutorial is for those who want to just jump into the deep end of planned pooling crochet.
*This post contains affiliate links. By clicking one of these links and making a purchase a portion of the sale will go back to the blog. The price you pay will not be changed. Thank you for your support of the blog.*
First let’s talk about pooling. Pooling simply means the colors gather in one area to create a pool of color. There are many ways to pool variegated yarns. Some are accidental and others are more structured and planned. Any pooling pattern that you love is a great pattern.
We will address how to achieve the basic crisscross pattern using the single crochet, chain one version of the moss stitch. You can use one or two turning chains as you please. I find two beneficial as it provides an easier space to fit in the last stitch of the next row.
Even jumping into the deep end requires a swim suit and checking the water depth and temperature.
Step 1: Identifying the color sequence (your swim suit)
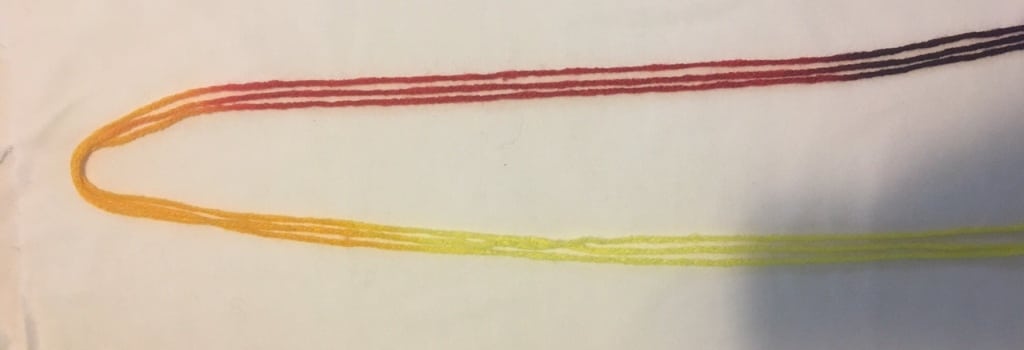
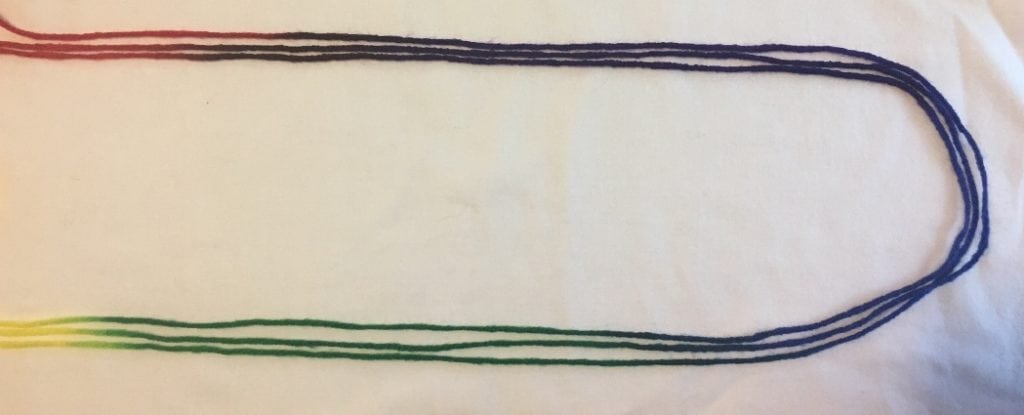
To make any repeating pattern, you need to know your color sequence. You will want to pull out several meters to identify the repeat. Once you identify a repeat of colors, make a circle (see fig. 001, fig. 002) with the yarn to compare the color lengths. Make sure each instance of the color is close to the same length. It doesn’t have to be exact, but it does need to be close.
I split it into two photos to make it easier to see. I have pulled out three full color sequences and you can see in fig. 001 each instance of red and each instance of orange is very close to the same length. In fig. 001 each yellow starts in the same place and in fig. 002 you can see each yellow ends in the same place. Fig. 002 also shows each instance of green, blue, and purple are very close to the same length.
Swim suit is in place; now let’s check the depth of the water.
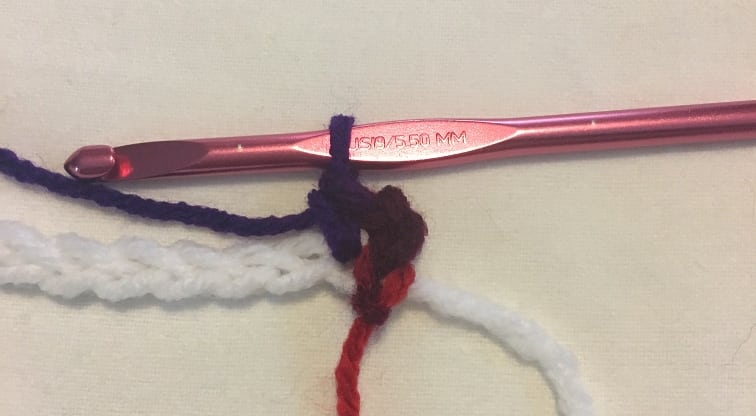
Step 2: Choosing your hook size (water depth)
You can use any hook size you like, however it is best to start with the hook size recommended on the yarn label. If you are a tight crocheter, you may find it beneficial to use a hook size larger than that indicated on the wrapper. Conversely, if you tend to work very loosely, a smaller hook size may be best.
Step 3: Make your foundation chain (water temp)
Using your chosen hook size, make a chain longer than you want your project width to be. Many tutorials suggest chaining through one full color sequence, but that isn’t necessary; it just needs to be a little longer than your desired project width. You can use your pooling yarn or you can use a separate yarn to create the foundation chain. I prefer to create the foundation chain in the color I intend to use for my border, in this case RHSS Soft White. If you’re using a separate yarn, do not cut it until you have completed the first row.

Step 4: Row one (swimming)
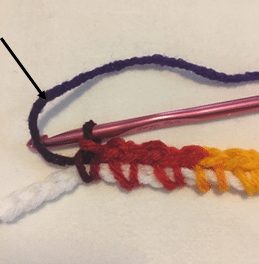
If you have used a separate foundation chain, slip stitch to attach your pooling yarn to the first chain after the slip knot; chain two and single crochet in the same stitch (see fig. 004) with the second chain being a new color, right after a color change in the yarn. If you are using your pooling yarn for the foundation chain, single crochet in the third chain from the hook.
Note: It might require a little fiddling to get it so your slip stitch plus chain two has a distinct color change on the second chain. Pro tip: measure the length of yarn used to slip stitch and chain one, then start that distance from your first color.
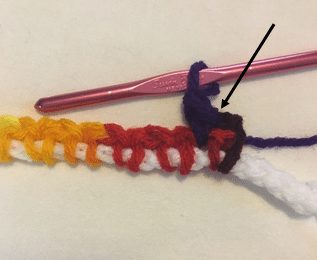
You then work in moss stitch through your color sequence until you get close to the end of your chain/number of color sequences you desire. I’ve chosen to work around the foundation chain as it uses slightly more yarn than working into the chain. In row two and beyond, your single crochet stitches will be worked around your chain one between each stitch. You can work into the foundation chain if that is your preference, but perhaps try to make those first row stitches slightly looser than normal.
Row two should start in the same spot within the sequence as row one. So the working loop on your hook should be the same distinct color change as when you started row one after you have done your turning chain(s). I find I often have to fiddle around a bit here to get this is in just the right spot. So you may have to undo a couple of stitches in row one to make them looser or tighter, but do what is needed to get that same color change for the start for row two as you had in row one.
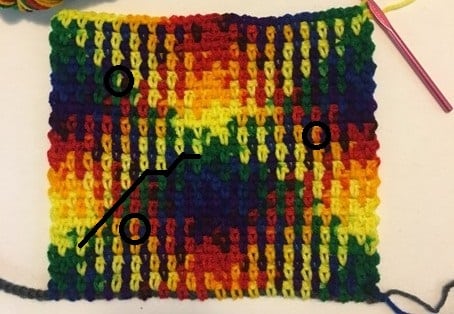
Now you are going to go ahead and work in your normal tension. You will have some stitches that are two different colors and some instances of a two stitch offset instead of a one stitch offset. When you look at the fabric as a whole, it will look pretty cool and your non crochet friends will think you are a yarn wizard!
This is my fabric made just using my normal tension. I made it using the size 5.5 mm hook recommended on my RHSS Mexicana, while I was watching television and enjoying a cool beverage. It has some mistakes and half stitches, etc., but overall the fabric is quite pretty and I had zero stress making it.
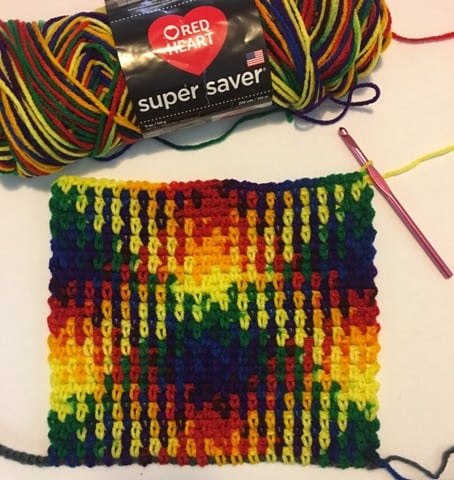
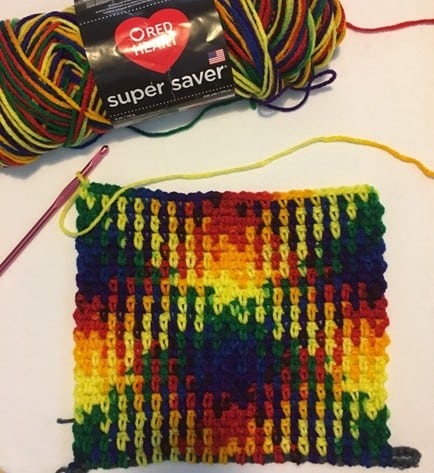
Fig. 009 Shows a close up of the same fabric where you can more easily see the imperfections. If you want to get rid of those, stayed tuned for Planned Pooling The Basics 102, coming to the blog on next week.
WHO IS BRENDA-LEIGH:
My name is Brenda-Leigh and I taught myself how to knit when I was seven using a book. Shortly after I began knitting my mother wanted to learn as well so I taught her. It was a great bonding experience to be able to show her something I had learned.
When I was eleven I taught myself how to crochet and my first project was a pineapple doily made with crochet thread.
I’ve continued with both over the years and have recently fallen in love with crochet. When planned pooling became popular last fall, I caught on right away and have had to opportunity to teach others. Since that early experience with my mother, I’ve loved being able to teach others and witness their success. Nothing makes me happier than giving someone that “aha!” moment.
You can find me on Ravelry as CrochetbyAlexina.
PLANNED POOLING CROCHET BLOG POSTS WITH MARLY BIRD:
Thanks so much to Brenda-Leigh for sharing with us planned pooling crochet basics. If you want to learn more about Crochet Planned Pooling you can view my other posts on the topic. Prefer learning through video? On the Marly Bird YouTube Channel you will find an entire Planned Pooling Playlist. Be sure to subscribe so you don’t miss a new video.
- The Best Crochet Planned Pooling Argyle Tutorial
- 10 Secrets to Perfect Planned Pooling in Crochet
- Planned Pooling-Finished Starting Chains
- How to create Crochet Planned Pooling Argyle Charts
- Multiple Sequence Planned Pooling Crochet
- Granny Stitch Planned Pooling Crochet
- Planned Pooling Crochet: Choosing the Best Hook Size
- Planned Pooling Crochet: Color Placement
- Planned Pooling Crochet: Deciding Where to Create Your Offset Shift

Yarn Pooling Made Easy by Marly Bird:
Did you know that Marly has published a book on Planned Pooling Crochet? In this book, published by Leisure Arts, you will find 10 beautiful designed patterns that you can create using Red Heart yarns.
Also on the Blog:
- Wonderful Big Stitch Throw Free Knit Pattern and Video Tutorial
- Goldenrod Crochet Cardigan
- 6 Free Scrubby Shape Patterns
Frequently Asked Questions
What exactly IS planned pooling crochet?
So here's the thing… planned pooling is when you use variegated yarn and your crochet stitches to create a repeating color pattern. It's like magic, but totally achievable with a little planning!
How do I know if my yarn will work for planned pooling?
Honestly… you'll want to pull out a good few yards of your yarn and look at the color repeats. Make sure each section of a color is pretty close to the same length. You can even make a little circle with the yarn to compare the lengths!
Can I use any hook size for planned pooling?
Yes! While the yarn label usually has a good suggestion, you might want to go up a hook size if you tend to crochet tightly, or down a size if you're a loose crocheter. It's all about getting that fabric to work with the colors.
My colors are getting all wonky, what do I do?
Oh, that can be frustrating… Sometimes, you might need to fiddle a bit with your tension in the first row to make sure the color changes line up just right for the next row. It can take a little adjusting to get that perfect start!
Where can I learn more about planned pooling?
You're in luck! There are tons of resources… Check out Marly's other blog posts on planned pooling, or head over to the Marly Bird YouTube Channel where there's a whole playlist dedicated to it!


I’ve spent days trying to do my first planned pooling scarf. It started out fine – I got about 10″ of wonderfully pooled design. Then, slowly, things started to go away. I’d end a color right where I should, but the next color would want to start 2 stitches earlier. I started varying my tension more and more…I’ve pulled half of it out and started again…and again. Now I’m having to crochet so tight that the fabric feels horrible and the scarf is a half inch narrower then when I started.
All the instructions I’ve read seem to say, “fiddle with tension or do extra slip stitches” to keep the pooling happening. But I don’t see anything that addresses when things go this far awry. Any suggestions? *sigh* Guess it’s time to frog again.