My First Knit Socks on Double Pointed Needles Part 4 of 6
This pattern is part of the 2018 spring knit-along for Red Heart Yarn and has video support for each part as well as a wonderful facebook group that is there to help as well. If you’ve never knit socks before this will be a great time to start, with my help.
The My First Knit Socks on Double Pointed Needles Part 4 of 6 pattern is FREE and fun to make, so join in!
Note: the full pattern will NOT be released until the KAL is complete; only the instructions for the part of that week is released during the KAL.
Queue it up and Like the Pattern on Ravelry
A PDF of the pattern will be available on REDHEART.COM soon for those of you who want the pattern all in one place.
*This post contains affiliate links. By clicking one of the links and making a purchase a small portion will go to support the blog. The price that you pay is not changed. Thank you for your support of the blog.*
Need help with knitting? You can find help with basic knitting, fair isle knitting and intarsia on the MarlyBirdYouTube Channel. By the way, have you subscribed to my YouTube Channel yet?

My First Knit Socks on Double Pointed Needles Part 4 of 6
FINISHED FOOT CIRCUMFERENCE MEASUREMENTS
Ladies (Mens)
8 (10.5)” [ 20.5 (26.67) cm]
MATERIALS
Yarn–RED HEART® Chic Sheep by Marly Bird™; 2 balls: #r170 Poolside
Needles–US #5/3.75mm set of 5 double pointed needles
Notions
- Removable Stitch marker
- Tapestry needle
- WIP Tube (as seen in video)
- Wooden Sock Blockers (as seen in video)
PATTERN NOTES
Watch the video for help with the short rows to turn the heel and for ways to prevent holes at the top of the gusset.
If you are working along with a second set of double pointed needles and yarn to combat the dreaded second sock syndrome, I would complete the heel turn first on both, then work a couple rounds of the gusset on one sock…then a couple rounds of the gusset on the second sock; and repeat that until all the gusset is complete. It will help you keep them both the same.
Have no fear, the heel turn is NOT that bad, and the gusset is NOT that bad. Once you get past this part it is smooth knitting!
My First Knit Socks on Double Pointed Needles Part 4 of 6
PATTERN (cont.)
Heel Turn
The heel turn is a series of short rows worked to create a sort of triangle at the bottom of the heel flap in order to change the direction of your knitting and allow for a smooth transition from the heel flap to the gusset.
Notice, the number of stitches worked on the heel flap is 1/2 the total number of stitches you cast-on for the cuff.
Row 1 (WS): P13 (17), P2tog, P1, turn.
Note: leave all remaining stitches unworked on needle.
Row 2 (RS): With yarn in back slip 1 as if to purl, k3, ssk, k1, turn.
Note: there will be a small gap between the stitches that form the heel turn and the unworked stitches on the needle.
Row 3 (WS): With yarn in front slip 1 as if to purl, purl to 1 st before the gap, p2tog, p1, turn.
Note: the p2tog will close the gap.
Row 4 (RS): With yarn in back slip 1 as if to purl, knit to within 1 st before the gap, ssk, k1, turn.
Note: the ssk will close the gap.
Repeat rows 3-4 until all stitches are worked ending with a completed row 4. There should be 14 (18) sts left on the heel flap now.
Gusset
Note: if you don’t watch ANY video during this KAL but one, I highly suggest that you watch this one video to see how to do the gusset.
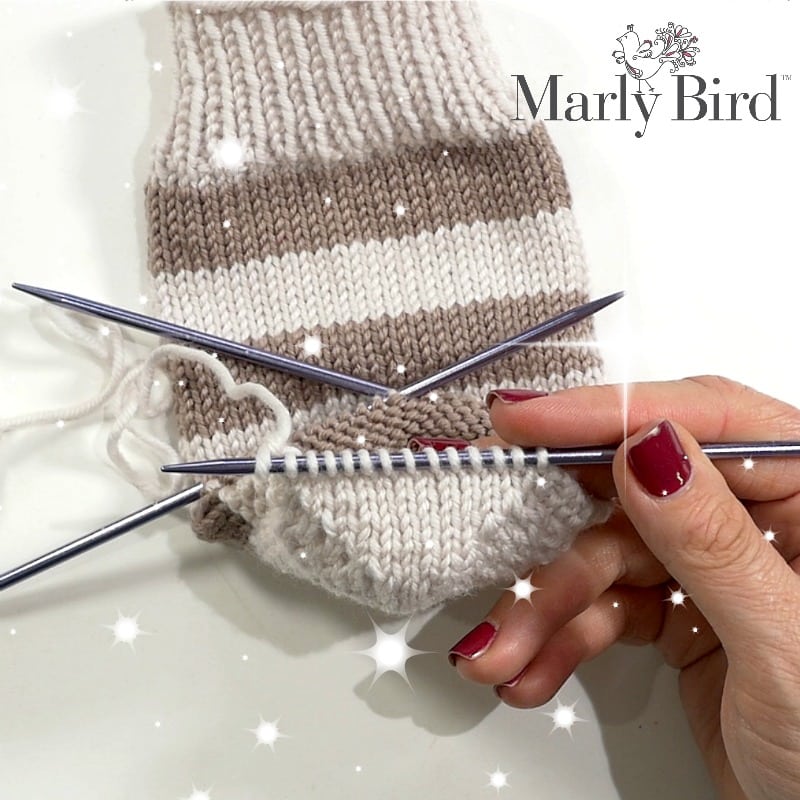
We now want to divide the stitches remaining on the heel flap onto two needles so that we can work in the round again. Do this by slipping half the number of stitches remaining onto a spare needle which is needle 5 at this point.
Pick Up Round for Gusset:
Needle 1: Using the needle to the left of the center heel (this is now needle 1), pick up and knit 12 (16) sts from the side of the heel flap, then pick up 2 stitches at the top of the gusset (see video for help)
Needles 2 and 3: work across tin stockinette stitch
Needle 4: using the spare needle, pick up 2 sts at the top of the gusset and 12 (16) stitches down the side of the heel flap, then, WITH THE SAME NEEDLE, knit the remaining stitches on needle 5.
Now you have 4 needles with stitches on them and a 5th needle as the spare needle you use as your right hand needle.
Ladies stitches per needle:
- needle 1: 21 sts
- needle 2: 12 sts
- needle 3: 12 sts
- needle 4: 21 sts
Mens stitches per needle:
- needle 1: 27 sts
- needle 2: 16 sts
- needle 3: 16 sts
- needle 4: 27 sts
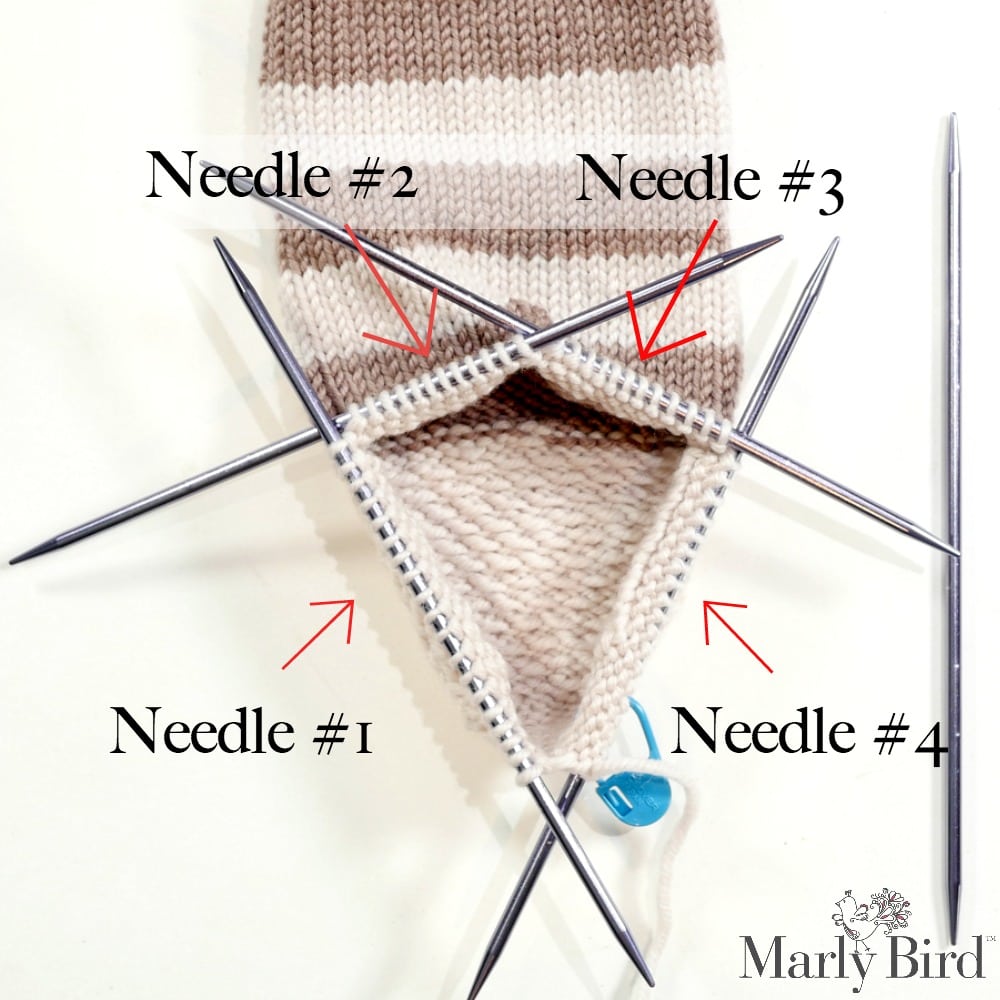
The beginning point of the round is NOW the center of the heel, so if you have been using a stitch marker to mark the 4th needle or the last needle of the round then you will want to move the marker to the needle on the needle to the right of the center heel (see image).
The goal now is to get all the needles to have the same number of stitches as they did when you cast on. Therefore, we will be decreasing the stitches on needles 1 and 4 every other round until all the they have 12 (16) sts on them just like needles 2 and 3.
Set-up round:
Needle 1: Knit to the last 2 sts, ssk.
Needles 2 and 3: work across tin stockinette stitch
Needle 4: k2tog, knit to the end of the round.
Now you have 1 less stitch on needles 1 and 4 and you have eliminated (or drastically reduced) the gap at the top of the gusset.
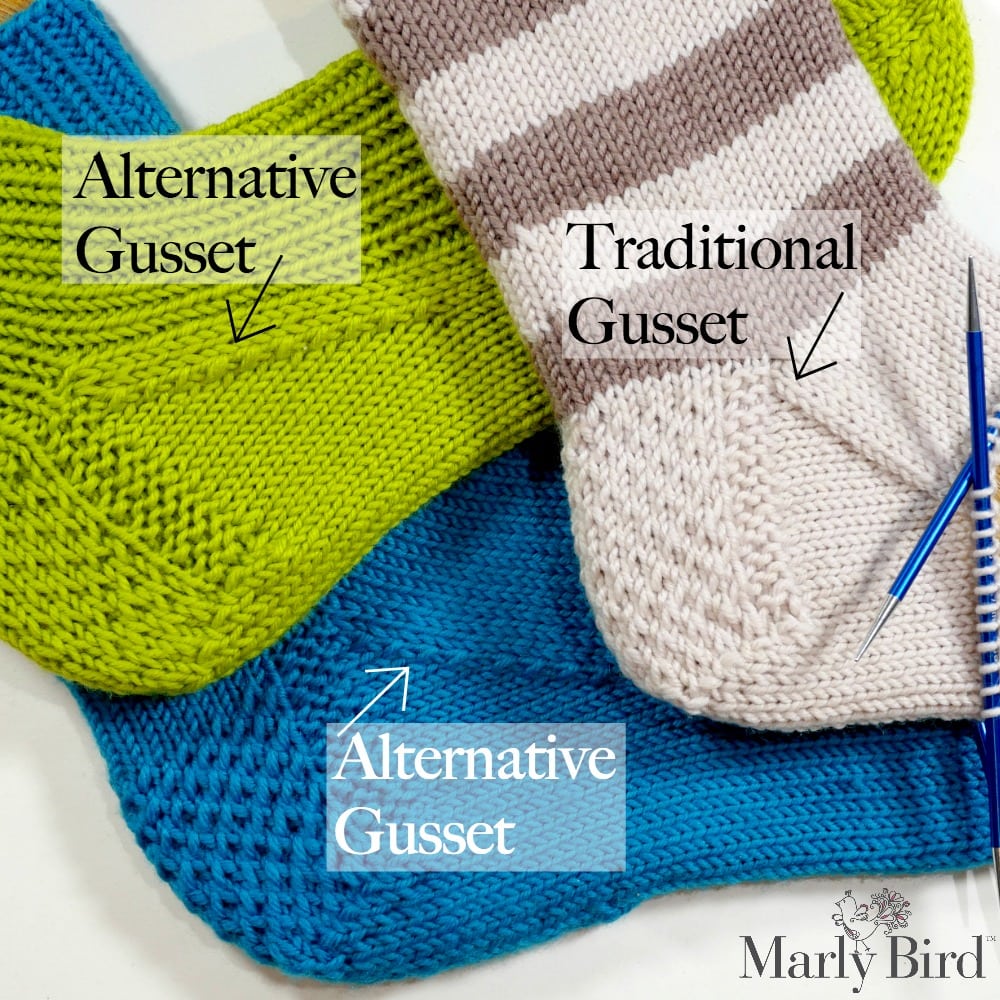
Next, choose either the traditional gusset or the alternative gusset for the next section, but choose only one! Either one will get the job done but you have a choice of how you want your socks to look.
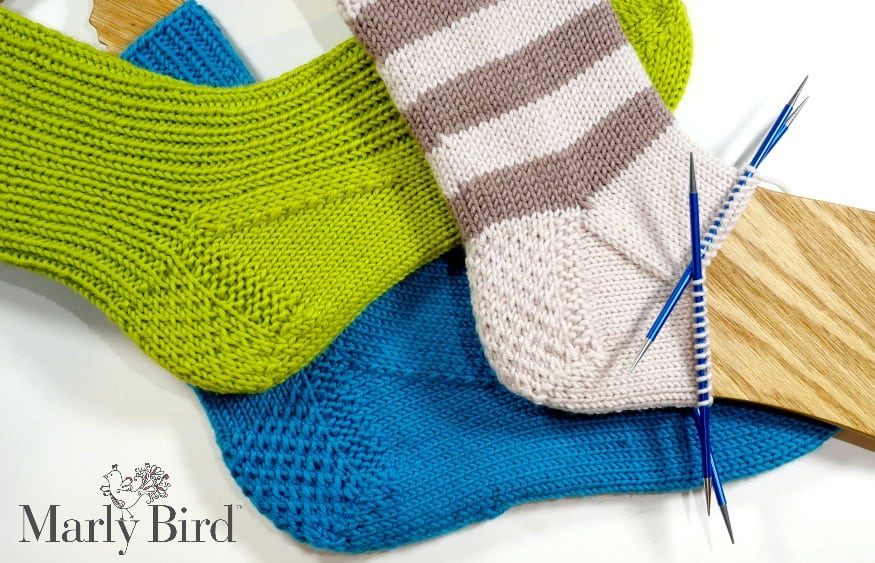
TRADITIONAL GUSSET–the gusset decreases form an uninterrupted stockinette stitch line down the gusset (as seen on the stripe sock)
Round 1:
Needle 1: Knit to the last 3 sts, k2tog, k1.
Needles 2 and 3: work across in stockinette stitch
Needle 4: K1, ssk, knit to the end of the round.
Now you have 1 less stitch on needles 1 and 4.
Round 2: Knit all stitches
Repeat rounds 1 and 2 until there are 48 (64) stitches remaining on the needles.
OR
ALTERNATIVE GUSSET–the gusset decreases are more visible and are a design feature (as seen on the blue or green socks)
Round 1:
Needle 1: Knit to the last 3 sts, ssk, k1.
Needles 2 and 3: work across in stockinette stitch
Needle 4: K1, k2tog, knit to the end of the round.
Now you have 1 less stitch on needles 1 and 4.
Round 2: Knit all stitches
Repeat rounds 1 and 2 until there are 48 (64) stitches remaining on the needles.
Video Tutorial:
Knit-Along Schedule:
Each week I’ll have a new video showing how to knit the section for that week. To get notified as soon as the video is posted, subscribe to the Marly Bird YouTube channel.
Week 1-March 28, 2018
Cast on
Week 2-April 4, 2018
Leg
Week 3-April 11, 2018
Heel
Week 4-April 18, 2018
Turning Heel and Gusset
Week 5-April 25, 2018
Foot
Week 6-May 2, 2018
Toe and Finishing
Enter to Win:
Post your progress pictures each week in the Marly Bird KAL Facebook group to be entered for a chance to win a Red Heart prize pack! We’ll choose one winner each week for the prize pack. One week after the final video is posted we’ll ask you to share a photo of your finished socks, and we’ll choose 3 winners to each win a $50 prize pack from everyone who finished.
To enter: Post your picture of your in-progress shawl in the Facebook group before Tuesday at 11:59pm Mountain Time (Marly’s time zone) to be entered. Winners will be announced on Thursdays.
Week 1: Post your progress picture by Tuesday, April 24; 1 winner of a $25 prize pack announced Thursday, April 26, 2018
The Community:
There is a dedicated Facebook group for this KAL that is monitored by me and several of the WONDERFUL sampler knitters who tested this pattern for me. We are all there to help you with this project. Please join us!

