Free Crochet Pattern Faux Cable Square
Are you looking for a fun and easy crochet project that yields stunning results? Look no further than the Free Crochet Pattern Faux Cable Square! This pattern is a great way to add a touch of elegance to any project, whether you’re making a cozy blanket, a stylish hat, or a decorative pillow. The faux cable technique, which uses crochet slip stitches and strategically placed ch-1 spaces, creates the illusion of cables without the need for a cable needle. And the best part? This pattern is completely free and perfect for crocheters of all skill levels. So grab your hook and let’s get started!
Happy crocheting!
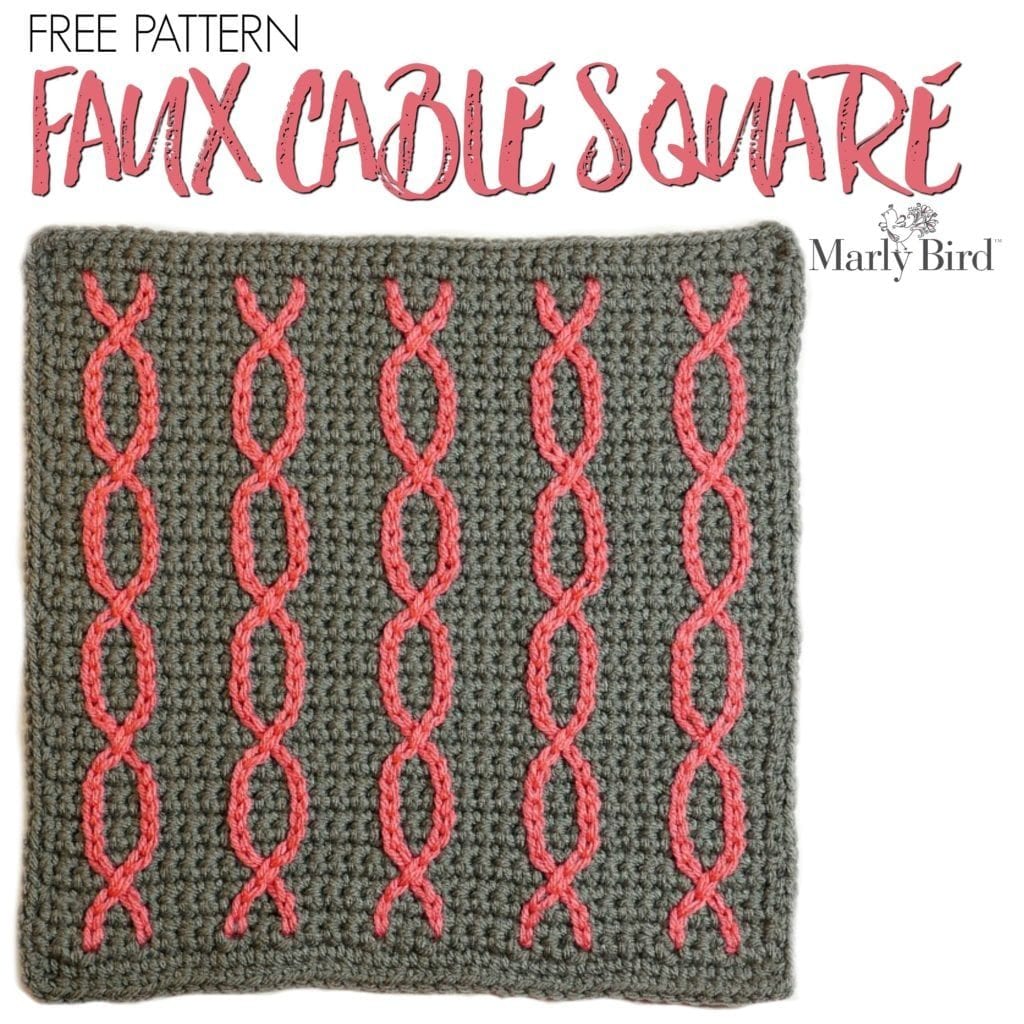
This square was made as block #17 of the 2018 Moogly CAL which has some really intricate and beautiful squares. For my square, I wanted to have the crocheter make a block that was simple yet could still stand up to the wonderful squares already designed for the blanket. Do you agree that the free crochet pattern faux cable square square fits the bill?
If you are just getting started with the Moogly CAL Click here to get the info. If you want to see all the squares in one place, you can check out the Pinterest Board that Moogly has put together.
So, let’s get to it. Here is the pattern and extras you need to know 🙂
Queue it up and Like the Pattern on Ravelry
Disclosure: This page may contain affiliate links which help me cover the cost of publishing my blog. Should you choose to make a purchase, at no additional cost to you, I may earn a small percentage of the sale.
Free Crochet Pattern Faux Cable Square
by Marly Bird
Materials
Yarn With Love–RED HEART® With Love®, Art. E400 available in solid color 7 oz (198 g), 370 yd (338 m), multicolor 5 oz (141 g), 230 yd (211 m) and stripes 5 oz (141 g), 223 yd (204 m) skeins;
- 1 skein Pewter (color A)
- 1 skein Papaya (color B)
Hook J/5.5mm
Notions
Measurements
Gauge: 14 sc and 14 rows = 4” CHECK YOUR GAUGE. Use any size hook to obtain the gauge.
Finished Size: 12” by 12”
Abbreviations
Special Stitches
Slip Stitch Embroidery: Hold working yarn on backside of fabric, insert hook from front of fabric, yarn over hook on backside of fabric, pull loop through fabric and loop on the hook. When the second slip stitch row overlaps first slip stitch row from the right side to the left side, work the new slip stitch under the old slip stitch. See images to help.
Pattern
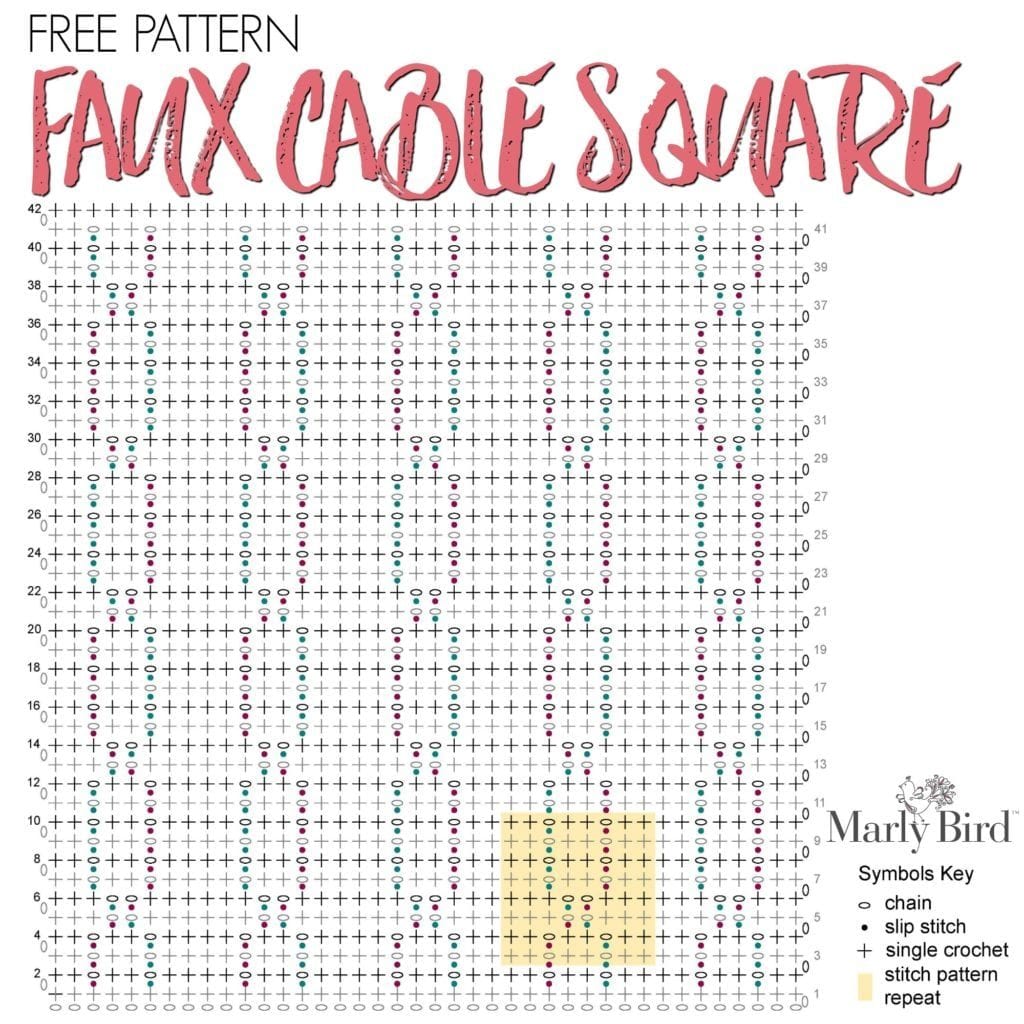
[You can follow the stitch diagram / chart below as well]
With A, Ch 41.
Row 1 (WS): Sc in 2nd ch from hook and in each ch across. Ch 1, turn. – 40 sc.
Row 2: *Sc in next 2 sc, ch 1, sk 1 sc, sc in next 2 sc, ch 1, sk 1 sc, sc in next 2 sc; repeat from * across to end. Ch 1, turn.
Rows 3-4: *Sc in next 2 sc, ch 1, sk ch-1 sp, sc in next 2 sc, ch 1, sk ch-1 sp, sc in next 2 sc; repeat from * across to end. Ch 1, turn.
Row 5: *Sc in next 2 sc, sc in ch-1 sp, ch 2, sk 2 sc, sc in ch-1 sp, sc in next 2 sc; repeat from * across. Ch 1, turn.
Row 6: Sc in first 3 sc, *ch 2, sk ch-2 sp, sc in next 6 sc; repeat from * across to last 5 sts, ch 2, sk ch-2 sp, sc in last 3 sc. Ch 1, turn.
Row 7: *Sc in next 2 sc, ch 1, sk 1 sc, 2 sc in ch-2 sp, ch 1, sk 1 sc, sc in next 2 sc; repeat from * across. Ch 1, turn.
Rows 8-10: *Sc in next 2 sc, ch 1, sk ch-1 sp, sc in next 2 sc, ch 1, sk ch-1 sp, sc in next 2 sc; repeat from * across. Ch 1, turn.
Rows 11-34: Repeat Rows 3-10
Rows 34-41: Repeat Rows 3-9
Row 42:: Sc in first sc, sc in each sc and ch-1 space across. Ch 1, turn.
Border: *3 sc in first sc, sc in each sc and ch-1 sp across to last sc, 3 sc in last sc, rotate square 90 degrees, sc evenly along side edge of square to end, rotate square 90 degrees; repeat from * once more, then join with a slip stitch to first sc. Fasten off.
Free Crochet Pattern Faux Cable Square Stitch Diagram / Chart
Slip Stitch Embroidery
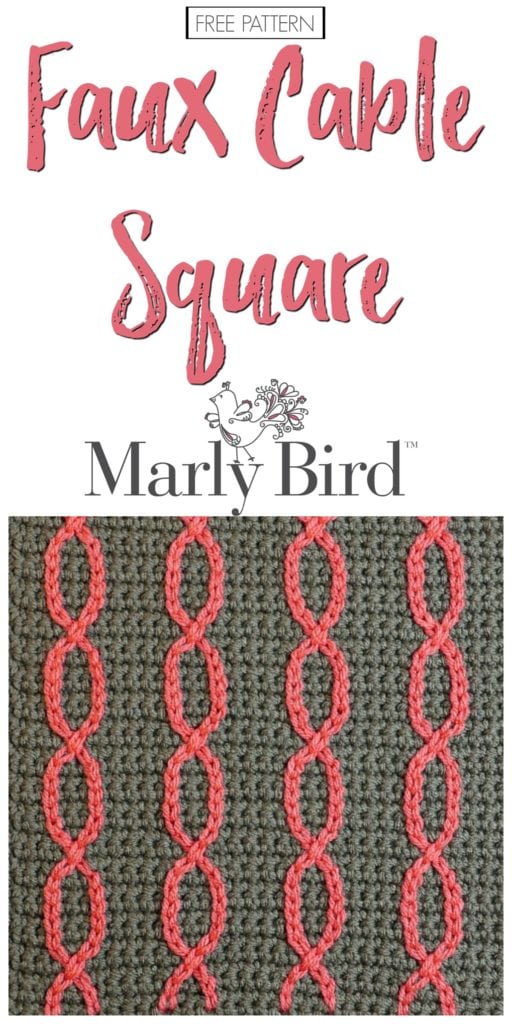
Join B to square at Row 2 in first ch-1 sp. Using chain spaces as a guide, slip stitch embroider up each ch-sp on square. Fasten off B. Repeat with a new strand of yarn for each line of chain spaces. See stitch diagram for location of slip stitches in chain spaces. Follow the blue dots first then the pink dots in the stitch diagram for each strand of yarn.
If you want to make it truly cable like, work the slip stitches of the pink under the slip stitch of the blue every other time the two cross [see special stitches].
Don’t forget to favorite this pattern on Ravelry and link to it when you make your square 🙂





I just love the hat you made