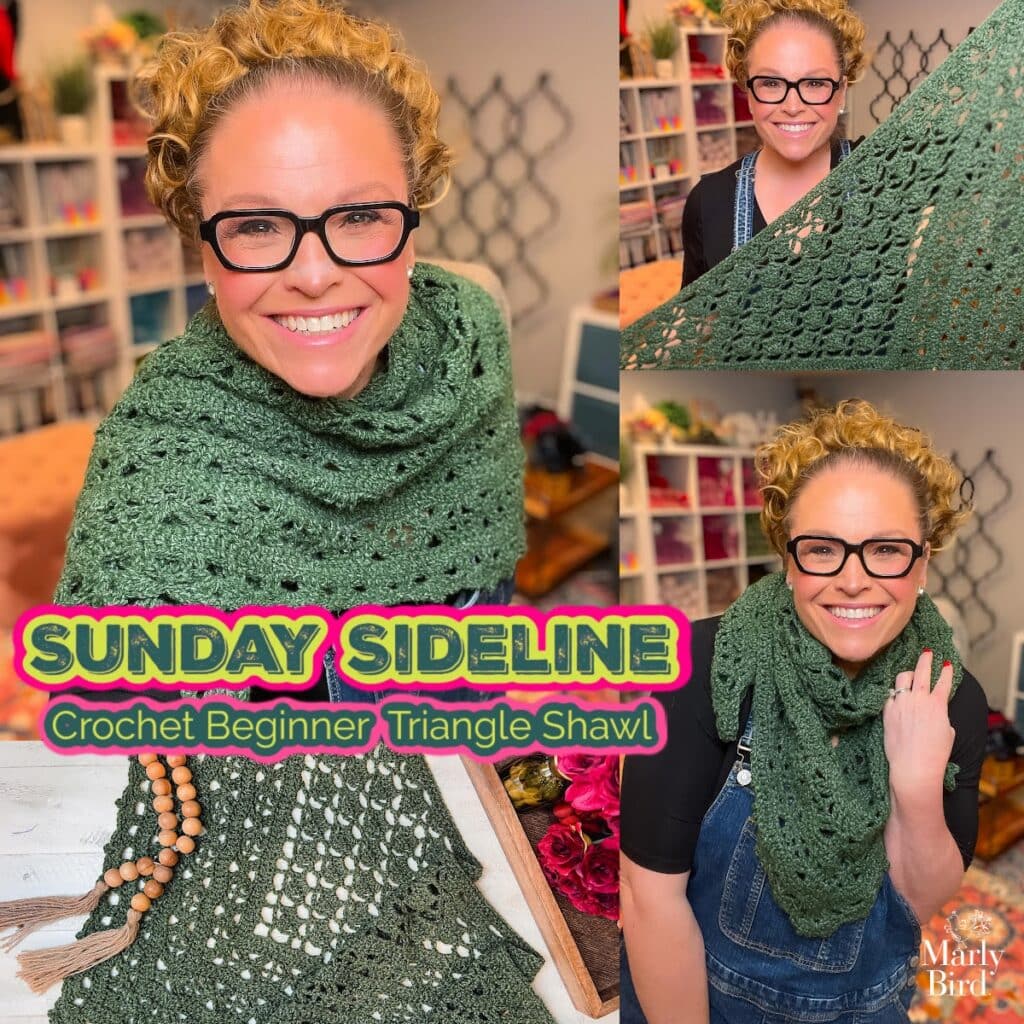
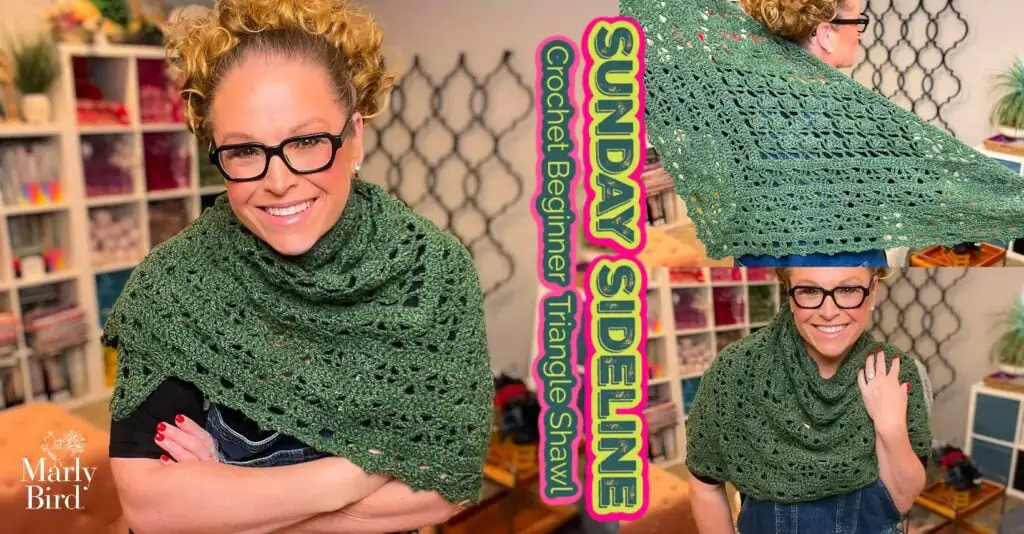
Sunday Sideline Crochet Shawl – Free One Skein Crochet Triangle Shawl Pattern
You’re settling into the bleachers for your kid’s game, project bag in hand, when someone leans over and says, “Did you make that?”
Yes. Yes, you did. With one skein of yarn and a pattern you could practically work in your sleep. 💚
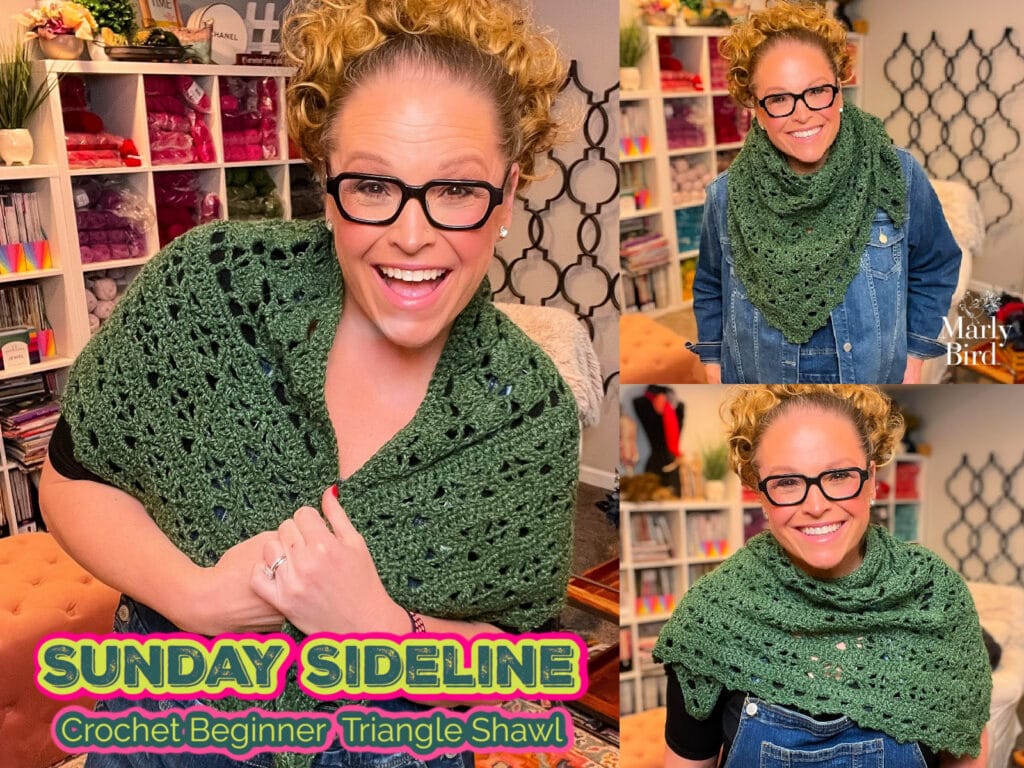
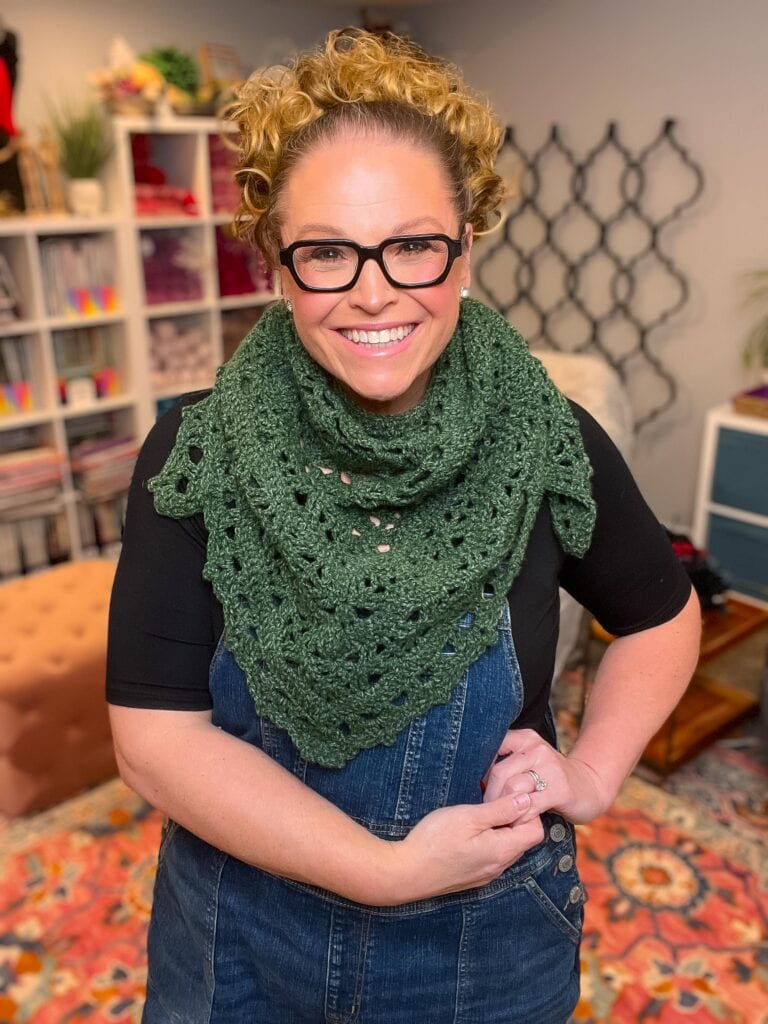
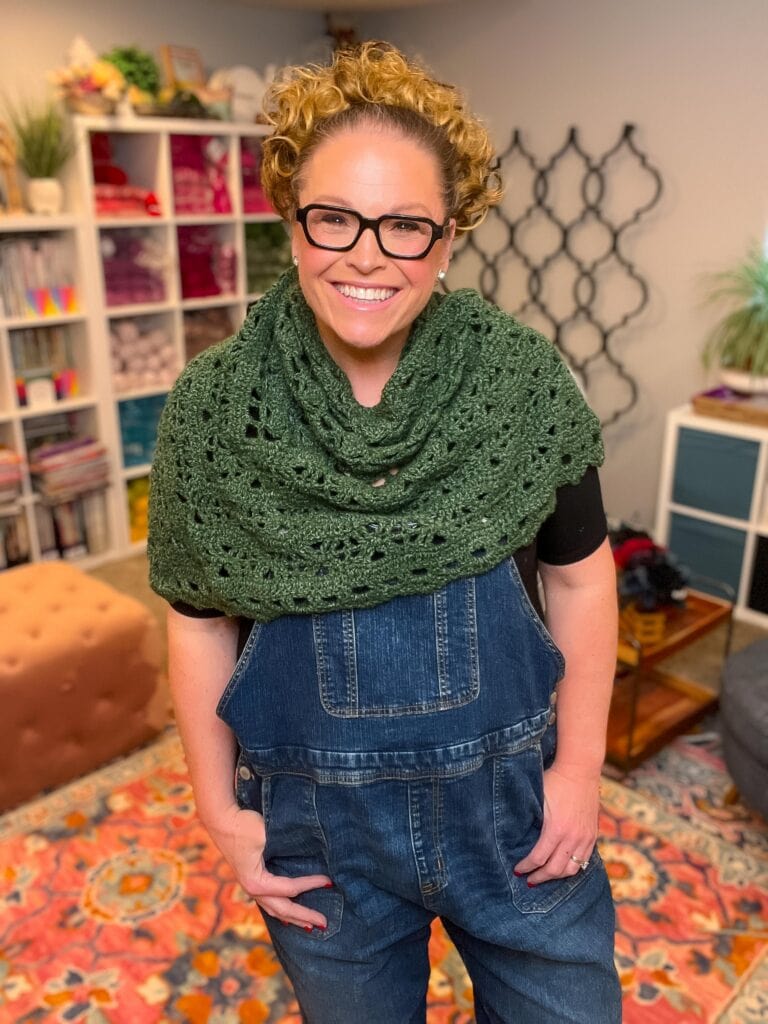
The Sunday Sideline Crochet Shawl is a free one skein crochet triangle shawl pattern designed for advanced beginners who are ready to dip into lace without stress. It’s lightweight, wearable, rhythmic, and built for real life stitching — from game days to road trips to cozy Sunday afternoons.
If you love easy crochet lace, worsted weight yarn, and projects that feel impressive without being complicated, you are going to adore this one.
Affiliate Disclosure: This post contains affiliate links. To learn more please visit my privacy policy here💖
What Is a One Skein Crochet Shawl?
A one skein crochet shawl is exactly what it sounds like — a full, wearable shawl made using just one ball of yarn. These projects are popular because they are budget-friendly, travel-friendly, and perfect for trying new techniques without a huge yarn investment.
Sunday Sideline was designed intentionally to maximize yardage, shape, and drape using a single skein of worsted weight yarn.
👉 See all crochet projects and tutorials
Link: https://marlybird.com/blog/craft/crochet/
| Feature | Details |
|---|---|
| Skill Level | Advanced Beginner |
| Construction | Top-down triangle shawl |
| Stitches Used | Double crochet, chain stitches |
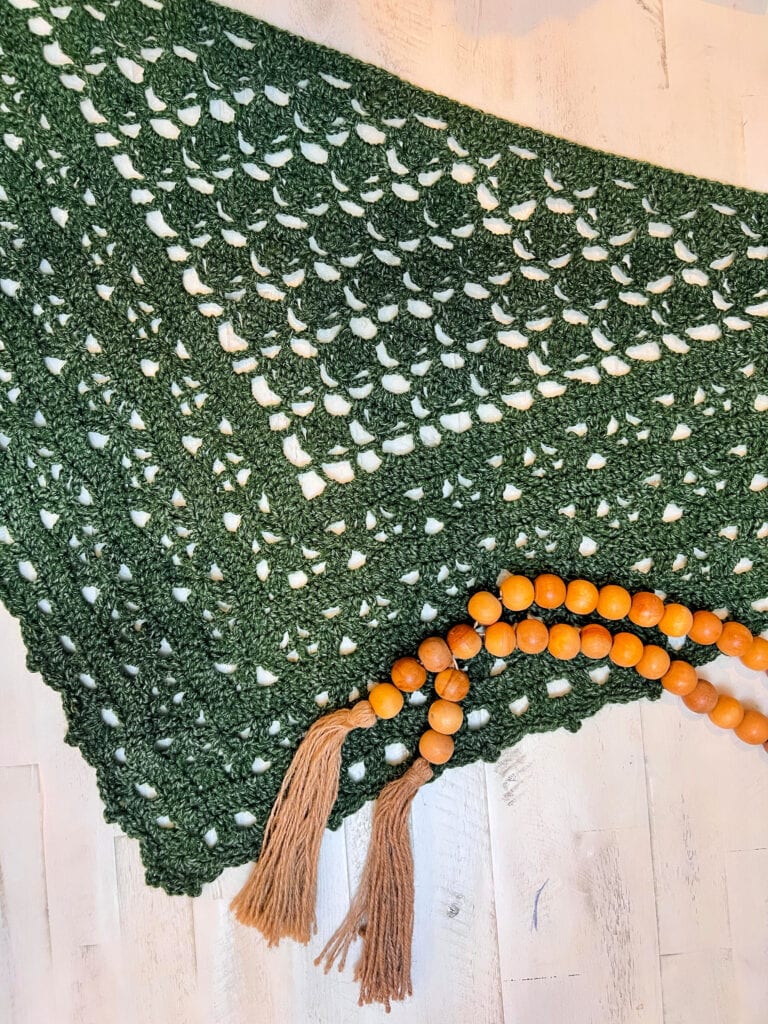
| Style | Lightweight lace crochet |
| Wearability | Scarf-style wrap or full triangle drape |
| Season | Fall, Spring, transitional layering |
| Yarn Weight | Worsted Weight |
| Pattern Type | Free crochet pattern on blog with Ad-Free PDF available for purchase on Shopify, Etsy or Ravelry |
What You’ll Love About This Shawl 💖
- Uses just one skein of worsted weight yarn
- Advanced beginner friendly lace repeat
- Lightweight but cozy fabric
- Rhythmic stitch pattern you can memorize
- Clean, modern edging
- Perfect for travel or game day crochet
- Easy to dress up or down
This is one of those patterns that makes you feel accomplished without making you feel overwhelmed.
👉 Add variety with must-make crochet shawl patterns
Link: https://marlybird.com/blog/more-than-5-crochet-shawl-patterns/
Let’s Talk Construction (Because It’s Clever 👀)
Most crochet triangle shawls start at the tip and grow outward.
This one does the opposite.
You begin along the longest edge first — yes, really — and with each row, the project gradually shortens. Row by row, that beautiful triangle reveals itself.
It feels like magic, but it’s really just smart math. ✨
Why this construction works beautifully:
- You see the lace pattern immediately
- The rows become shorter, so the project feels faster as you go
- The triangle shape forms naturally without complicated shaping
Once the stitch pattern clicks, your hands will remember it. That’s what makes this such a great “sideline” project.
Skill Level: Advanced Beginner (Here’s What That Really Means)
If you’ve successfully completed a simple blanket or scarf and you’re wondering “what’s next?” — this is it.
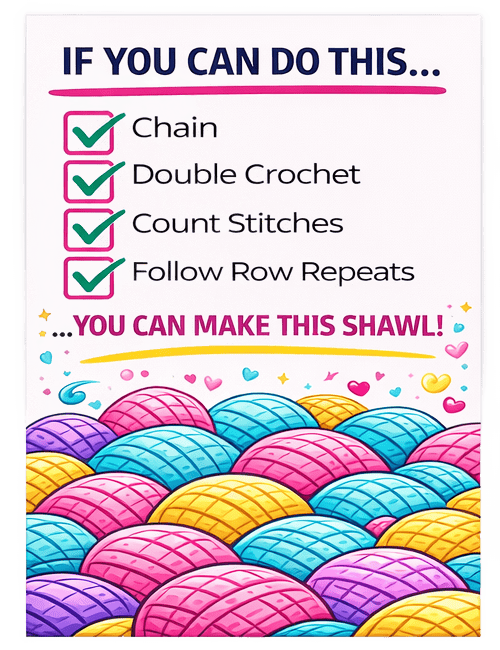
You should be comfortable with:
- Double crochet
- Treble crochet
- Working stitches together (dc3tog, tr2tog)
- Stitching into chain spaces
The lace repeat is predictable and consistent. You are not juggling complicated stitch charts or constant stitch count changes. It’s structured, supportive lace.
This is growth without panic. 😉
The Magic of a One Skein Project 🧶
Let’s talk about why one skein projects are so loved right now.
They’re:
- Budget friendly
- Quick to finish
- Lower commitment
- Ideal for gifts
- Perfect for stash busting
The original sample was made with:
Herrschners Heathers 8 Worsted
100% acrylic
489 yards
Because lace can grow depending on chain tension, if your stitches are loose, your shawl may use slightly more yarn. Keep that in mind.
👉 Another fun one-skein crochet shawl to try
Link: https://marlybird.com/blog/favorite-one-skein-crochet-shawl/
Choosing the Right Yarn 🧵
Before we jump straight into substitutions, let’s talk about why the original yarn works so well.
Acrylic is:
- Lightweight
- Easy care
- Soft against the neck
- Steam-block friendly
- Excellent for lace stitch definition
Because this shawl uses open lace stitches, you want a yarn that:
- Has good drape
- Isn’t overly stiff
- Isn’t overly fuzzy (which would blur stitch definition)
- Has enough yardage per skein
If you choose wool, you’ll get more elasticity and bounce.
If you choose a wool blend, you’ll get warmth with durability.
If you choose acrylic, you’ll get easy care and accessibility.
Quick Yarn Substitution Guide
| Yarn Type | Fiber | Look | Best For |
|---|---|---|---|
| Acrylic | Lightweight | Smooth stitch definition | Budget-friendly option |
| Wool Blend | Soft & warm | More drape | Fall layering |
| Cotton Blend | Breathable | Crisp stitch texture | Spring shawl |
⭐️ Budget Option | Lion Brand Basic Stitch, Premier Anti-Pilling Worsted,
🐑 Wool | Lion Brand Local Grown, Patons Classic Wool
💕 Blend | Madelinetosh Wool + Cotton Yarn – Favorite Pair
🥂 Luxury Option | Malabrigo Rios, Knit Picks Swish Worsted
🚨 What to Look For | 450–550 yards worsted weight, soft hand, good drape
If you switch yarns, especially fibers, swatch first! Lace can grow depending on your chain tension.
Loose chains = larger shawl = more yardage used.
Better to test than to panic at the edging. 😅
Gauge & Finished Measurements 📏
Finished Triangle Shawl Size:
Approximately 55 inches wide
Approximately 27.5 inches deep
Crochet Gauge:
2 stitch repeats and 8 rows = about 5.5 inches by 5 inches
Gauge in lace is flexible, but it absolutely affects:
- Overall size
- Depth of triangle
- Yarn usage
- Drape
If your tension is loose, your shawl will grow larger and may use more yarn.
If your tension is tight, your shawl will be smaller and slightly denser.
Neither is wrong — but knowing this helps you control the outcome.
Tools & Helpful Extras 🧶
Hook: Size J/10 (6.0 mm) or size needed to obtain gauge
Helpful Notions:
- Stitch markers (especially at center points during edging)
- Tapestry needle
- Scissors
- Tape measure
- Blocking mats and pins
- Steamer
Stitch markers are your friend. Use them to mark pattern repeats if needed. And if you ever feel unsure, don’t hesitate to drop in a lifeline.
Confident crocheters use lifelines. It’s not cheating. It’s smart. 😉
The Perfect Travel Crochet Project ✈️
Once established, the pattern repeat becomes very memorizable. That makes this shawl ideal for:
- Sports games
- Road trips
- Waiting rooms
- Airplane travel
- Coffee shop stitching
Just pack:
- Yarn
- Hook
- Small notions pouch
- Extra stitch markers
And you’re ready.
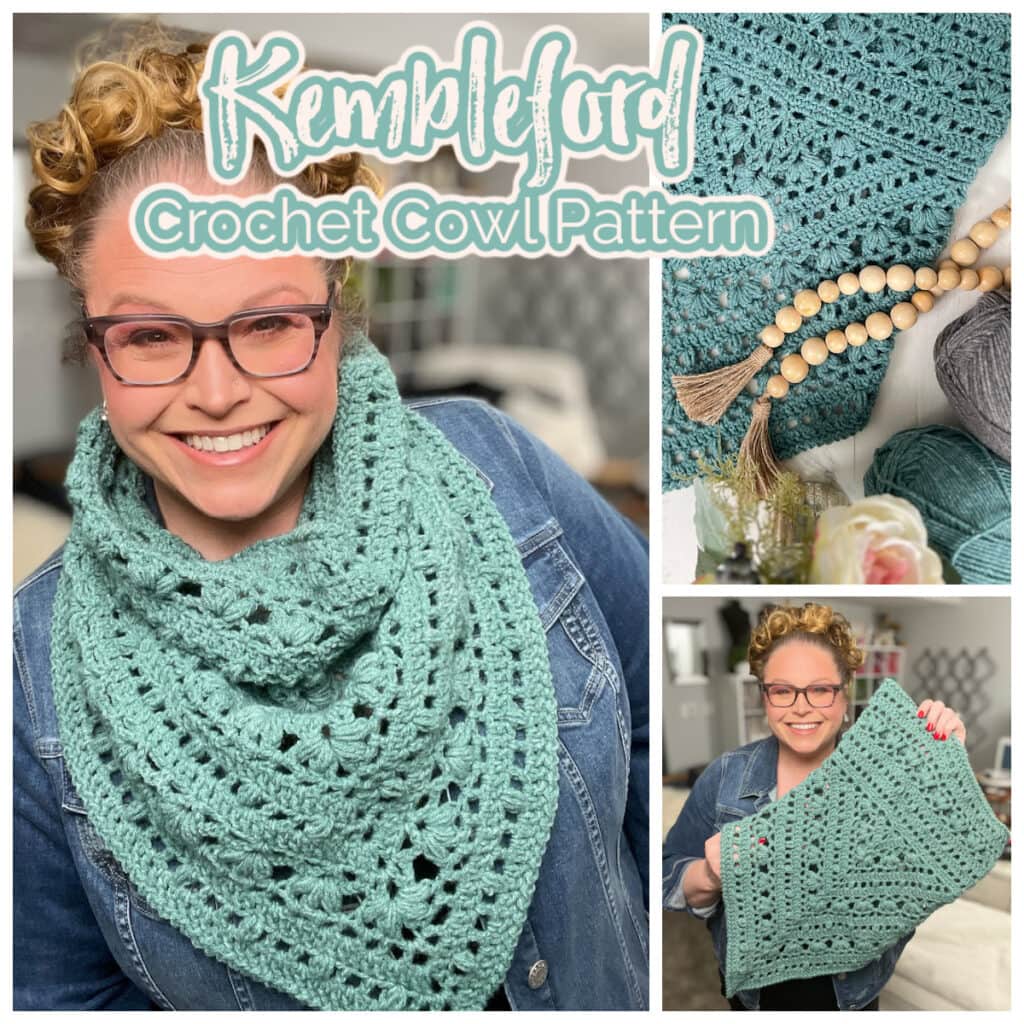
Looking for something similar but not a shawl?
👉 Check out this amazing one skeing crochet lace cowl.
It is a fan favorite 💕
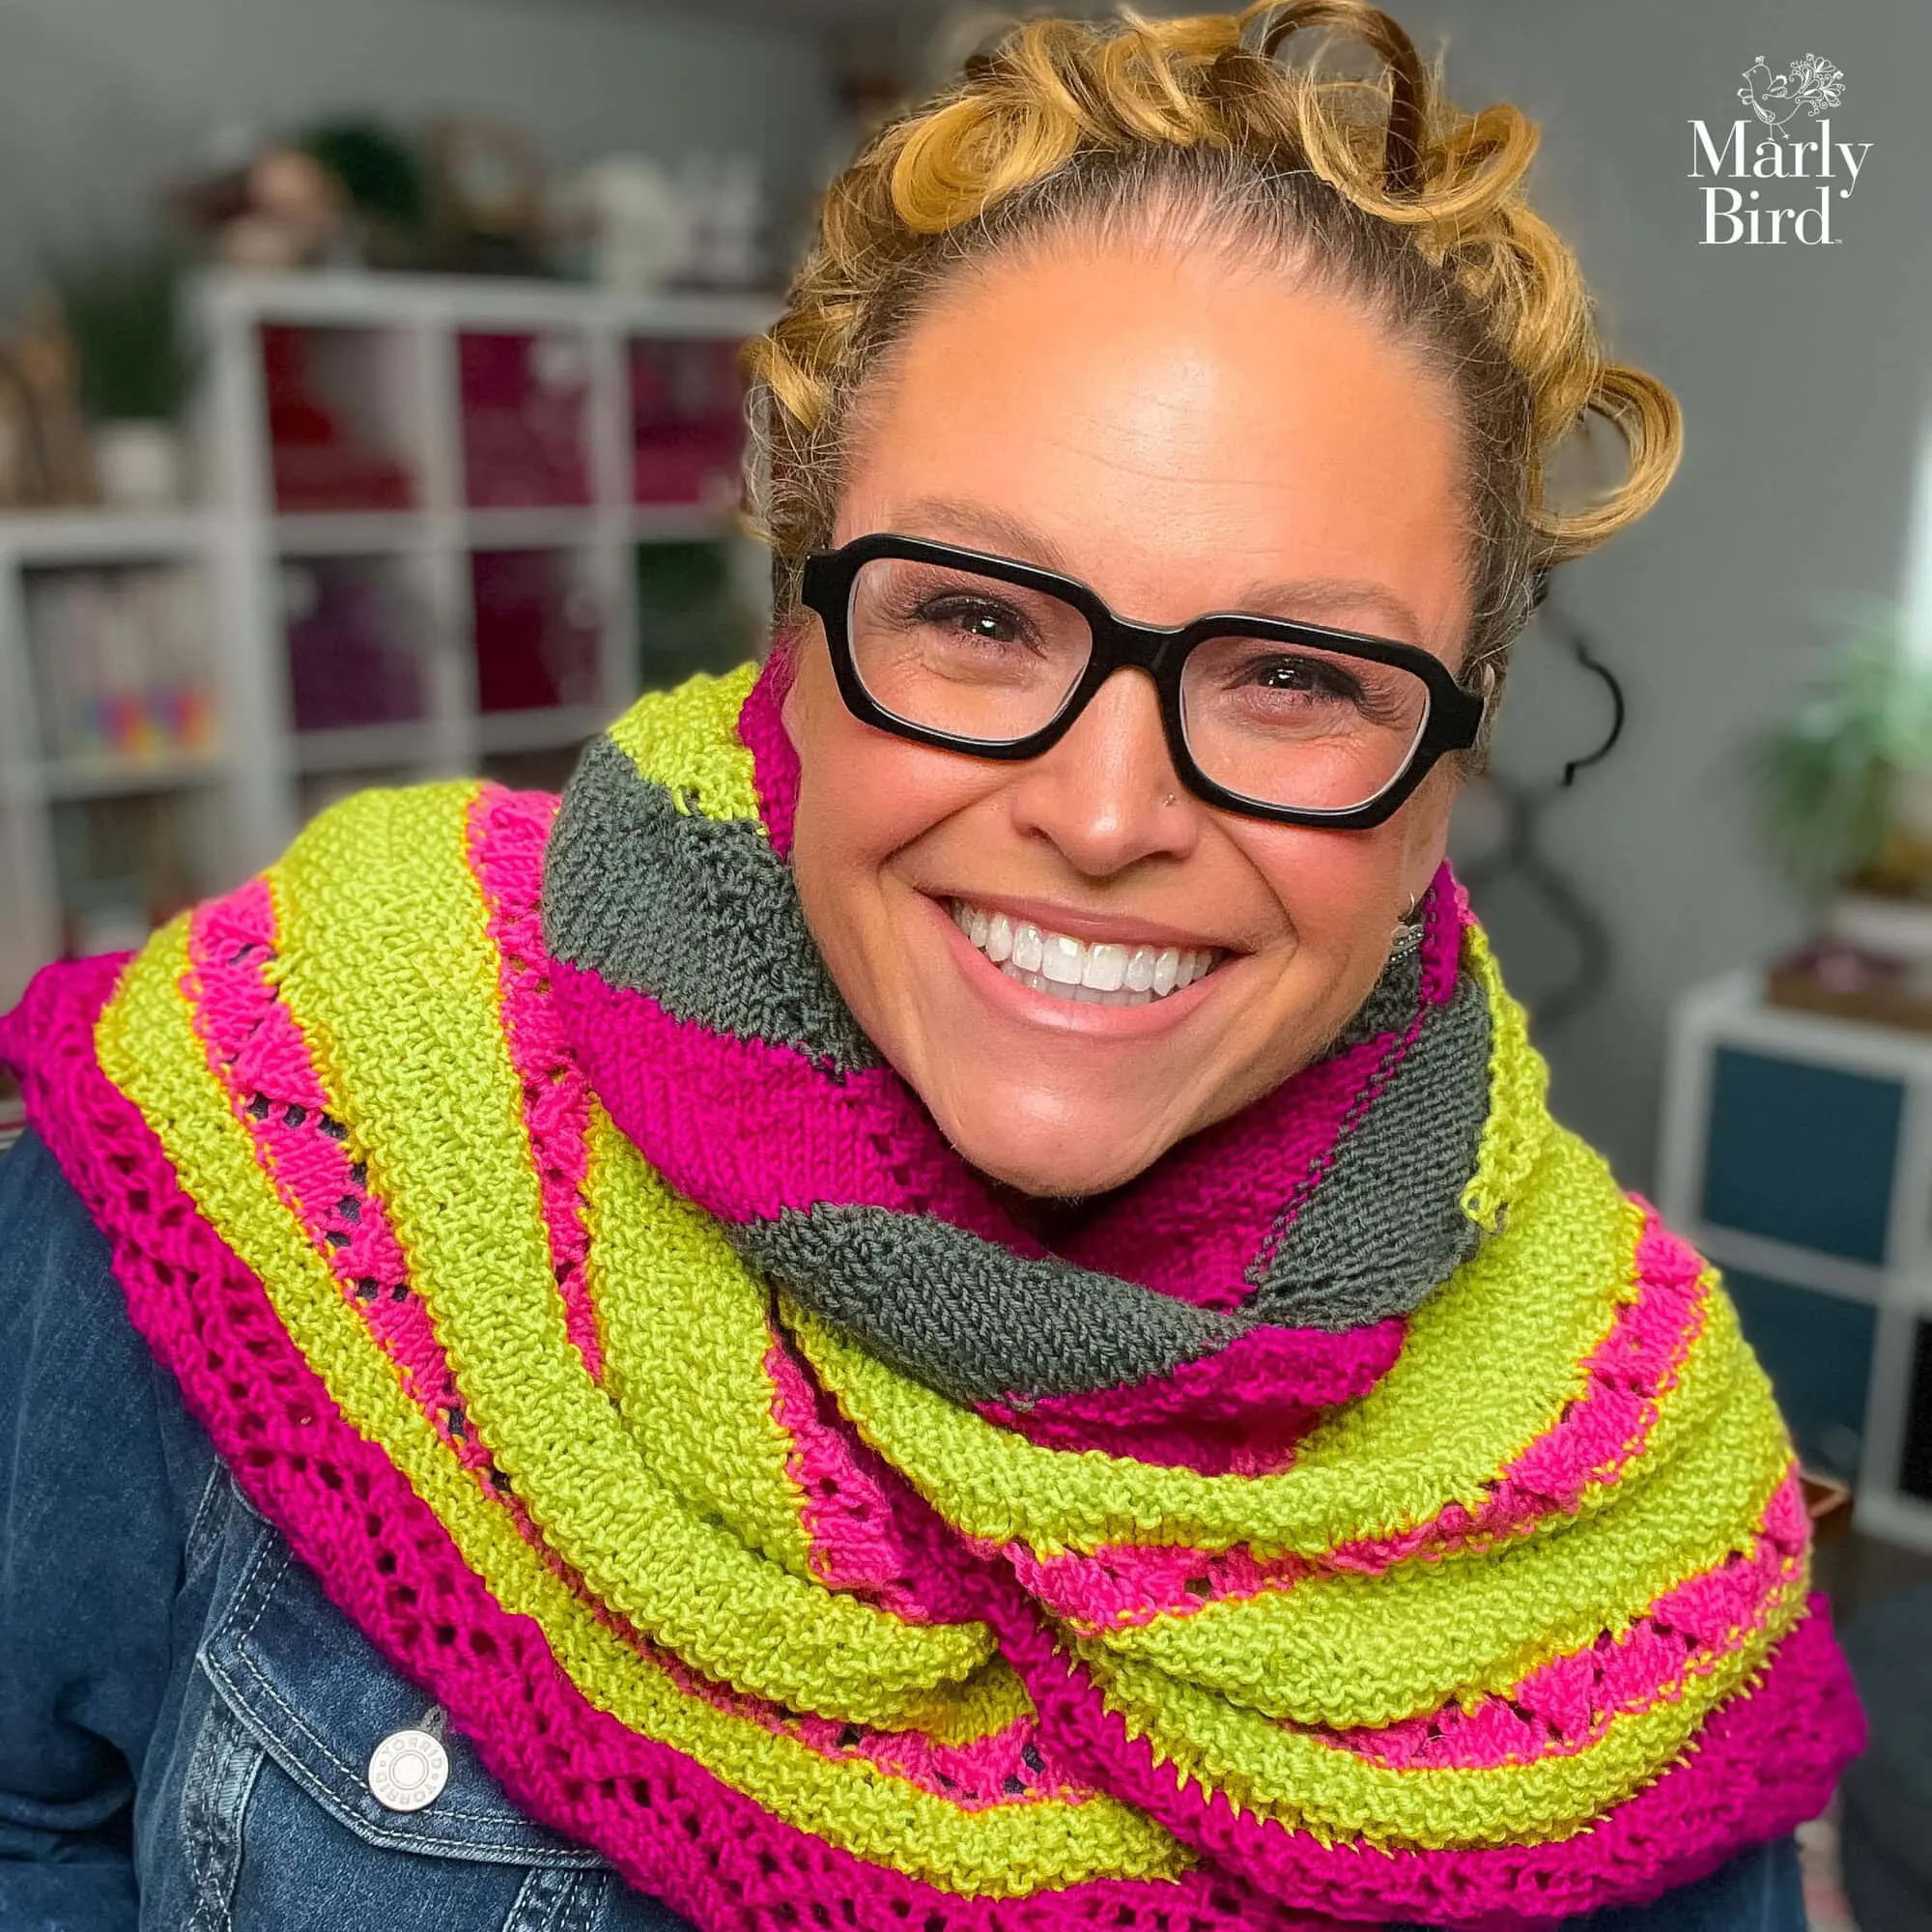
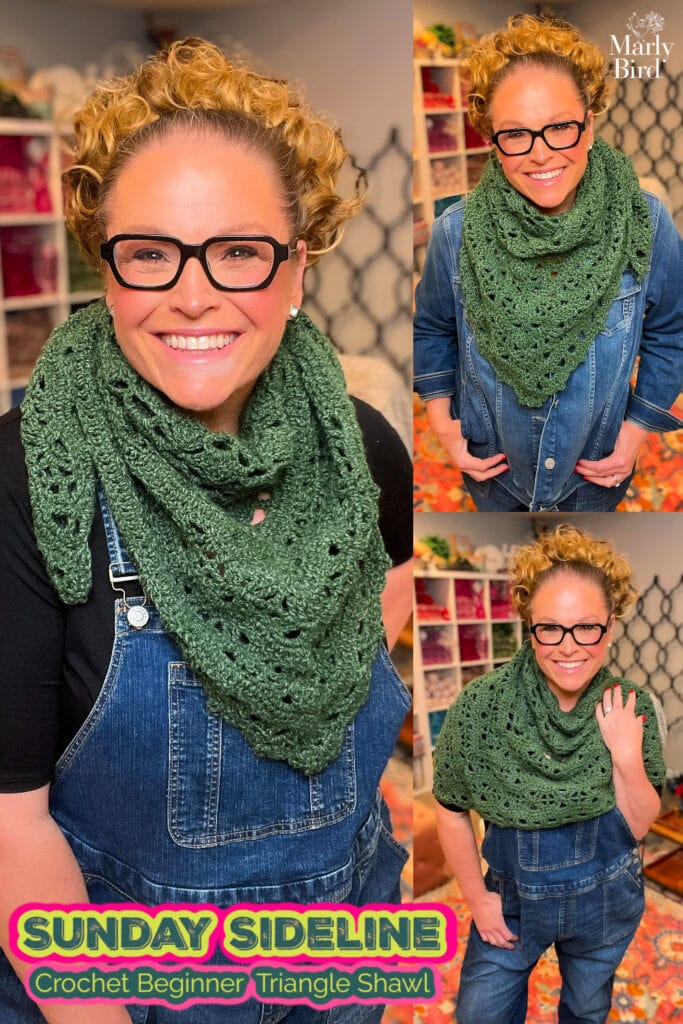
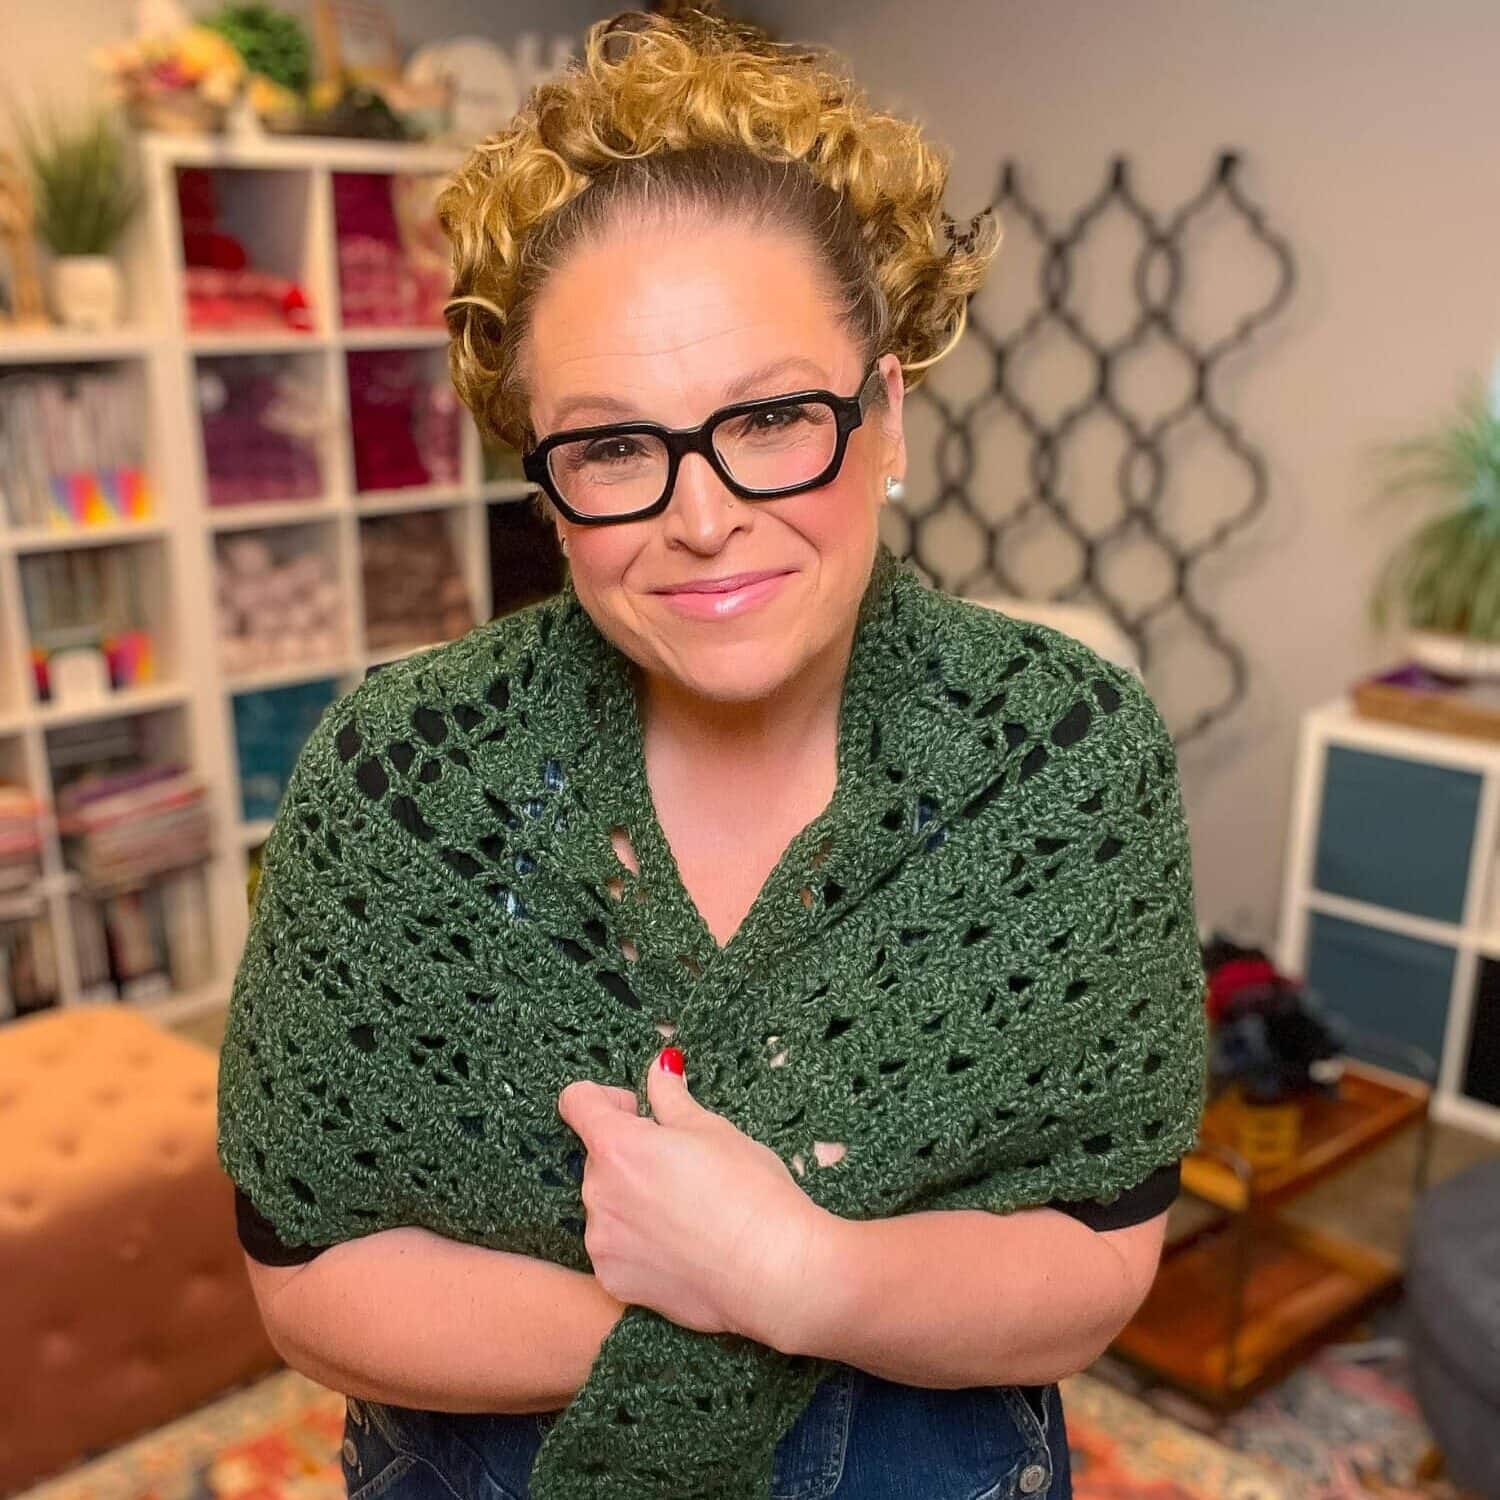
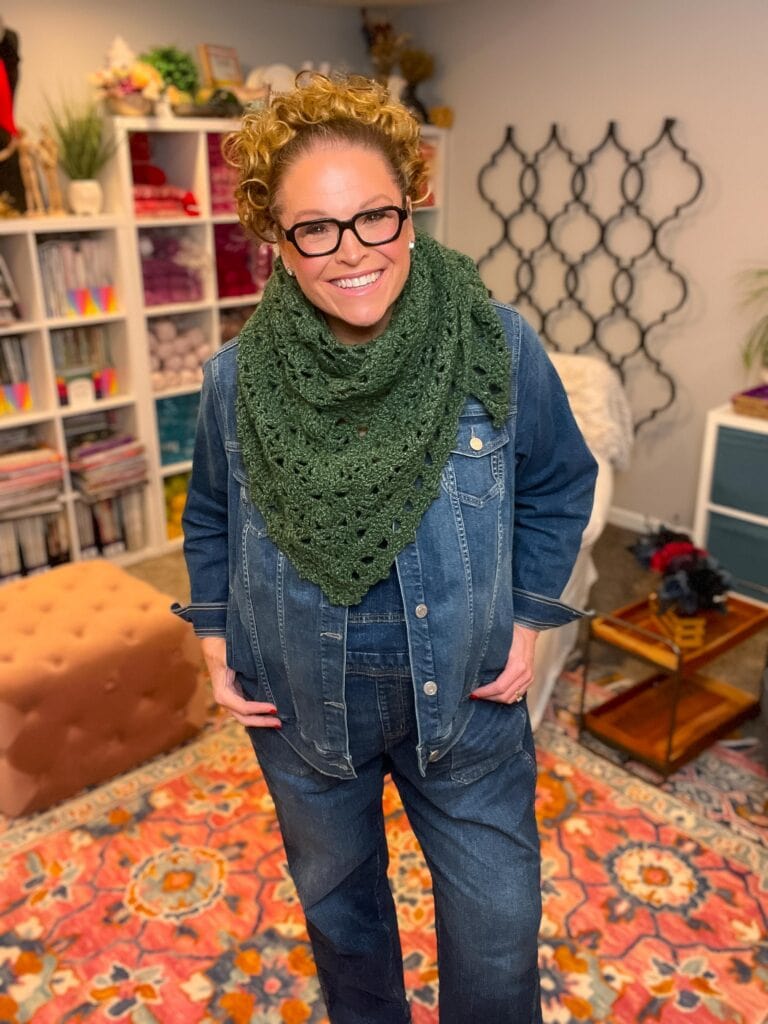
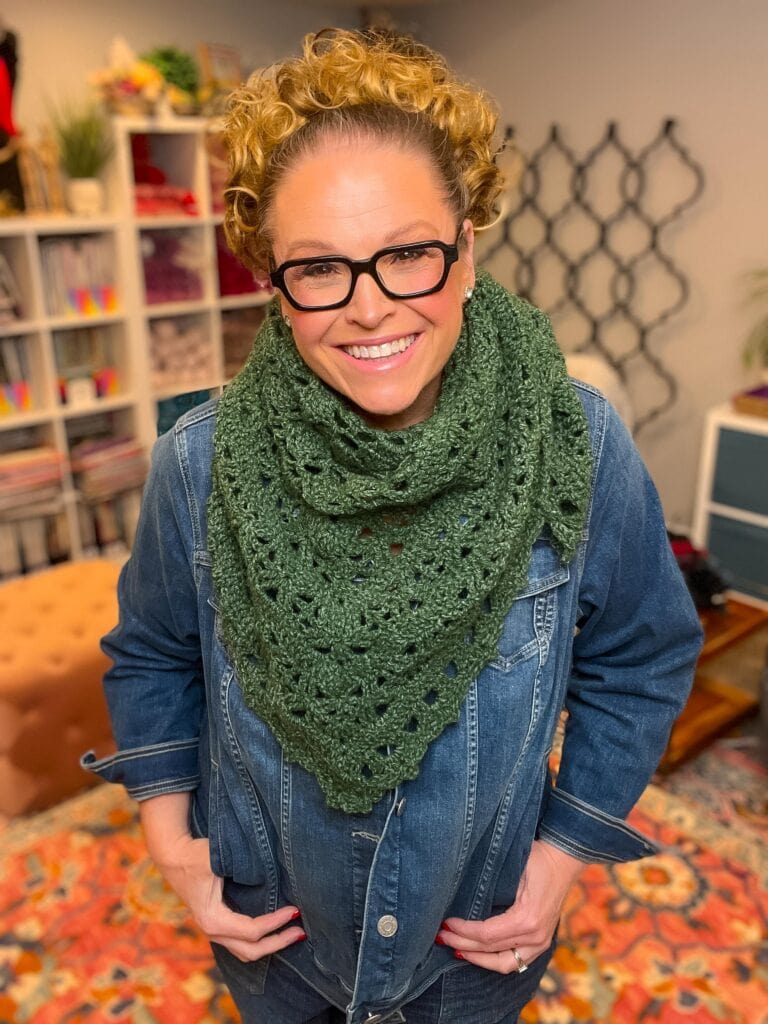
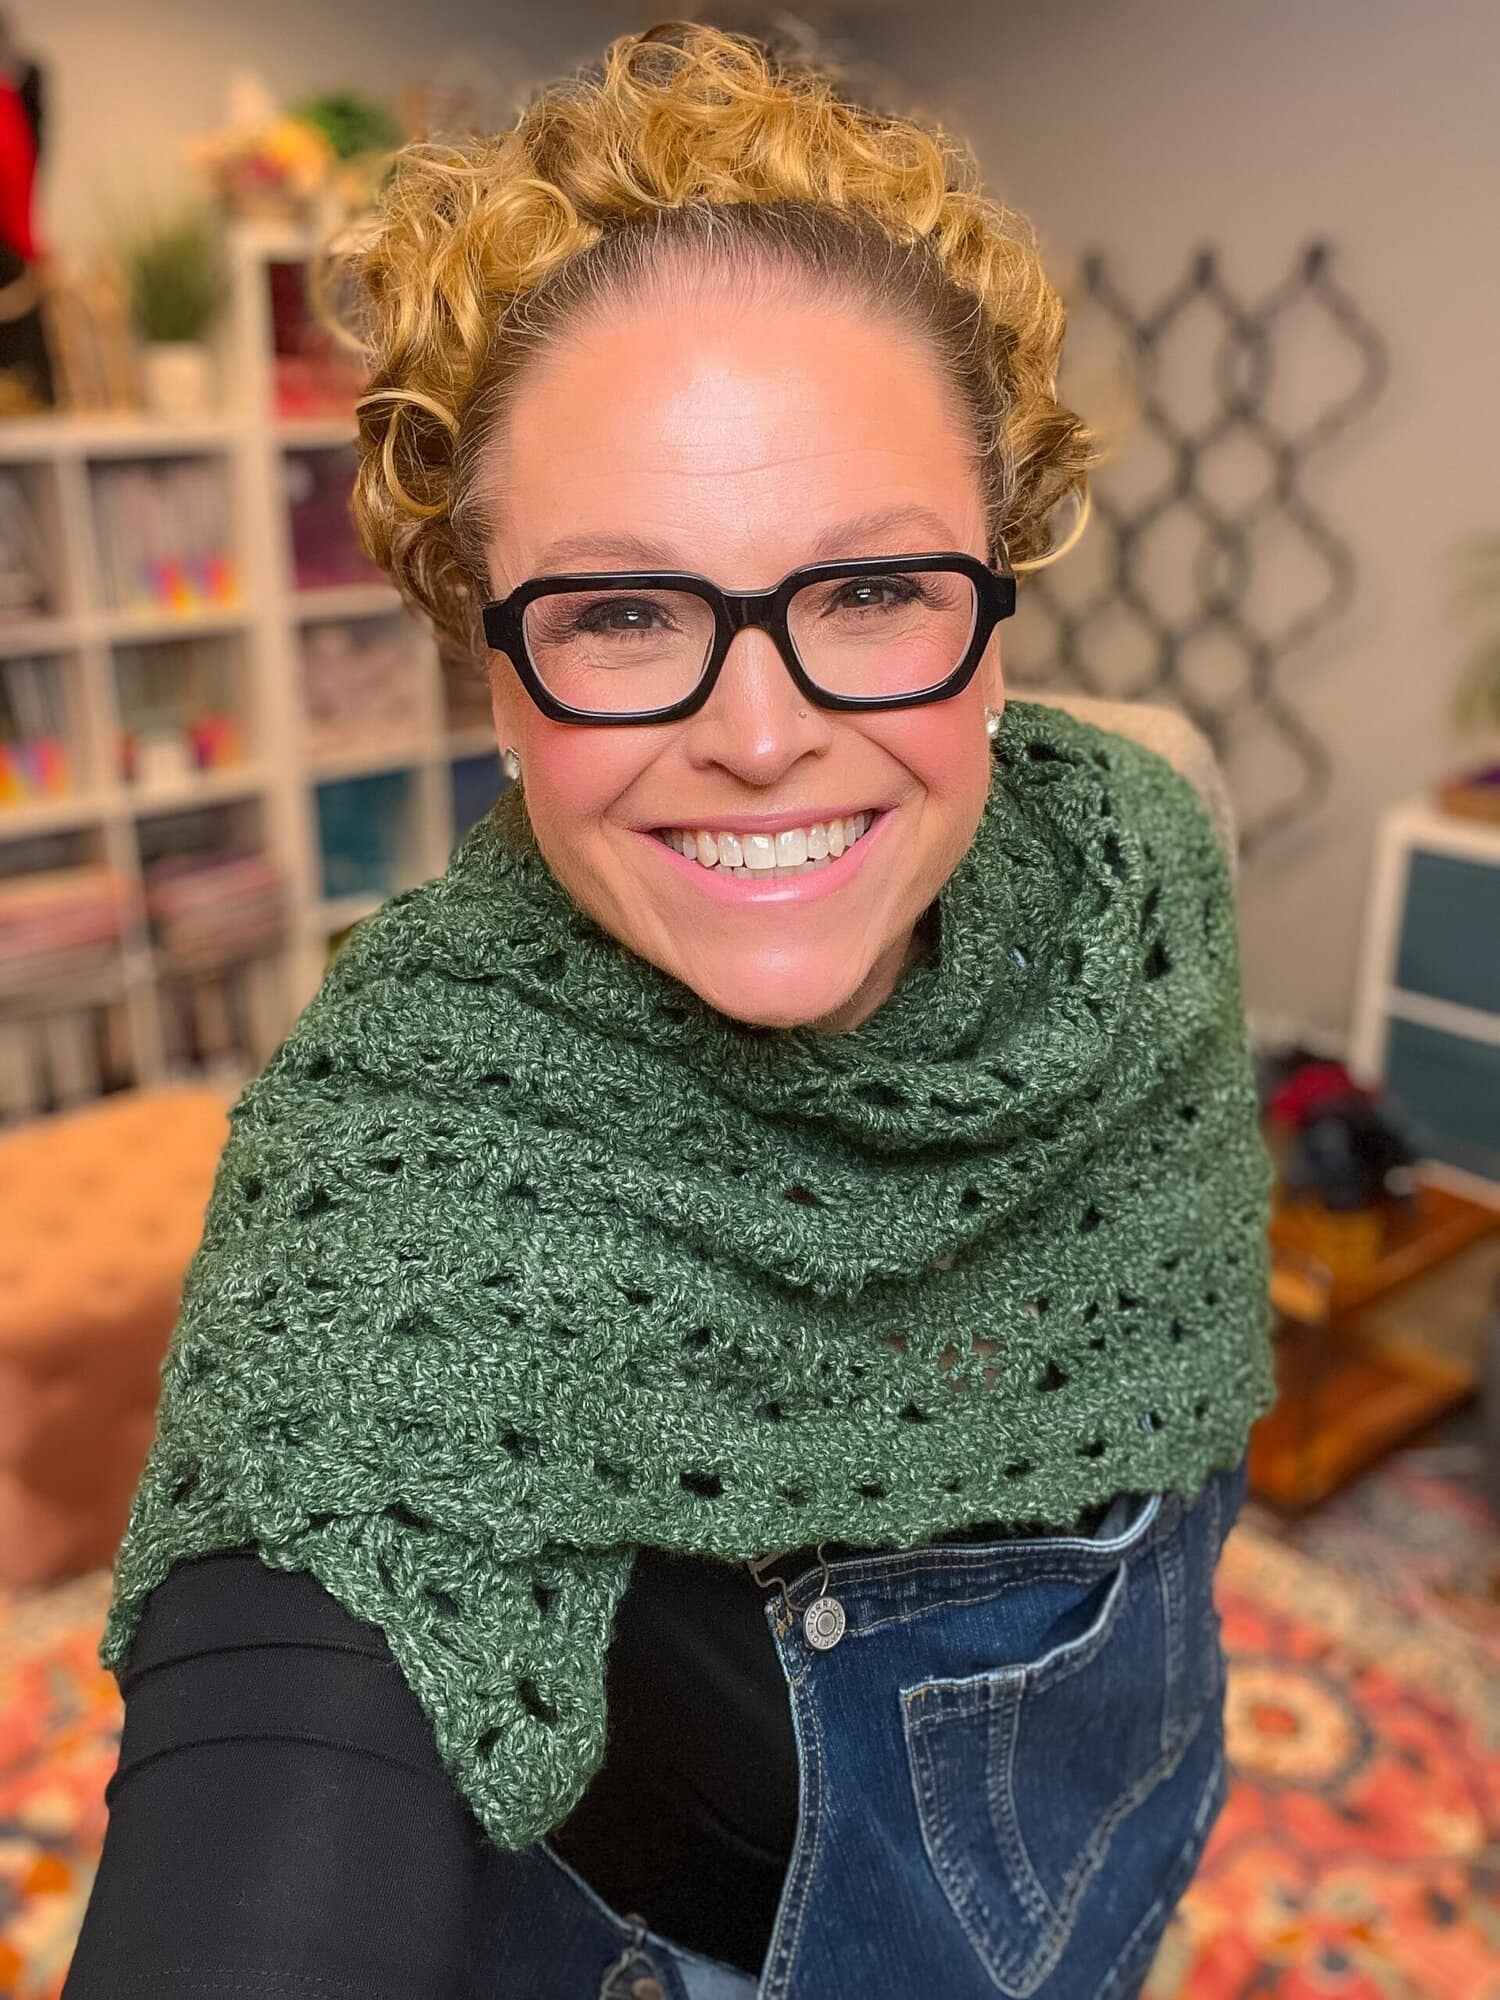
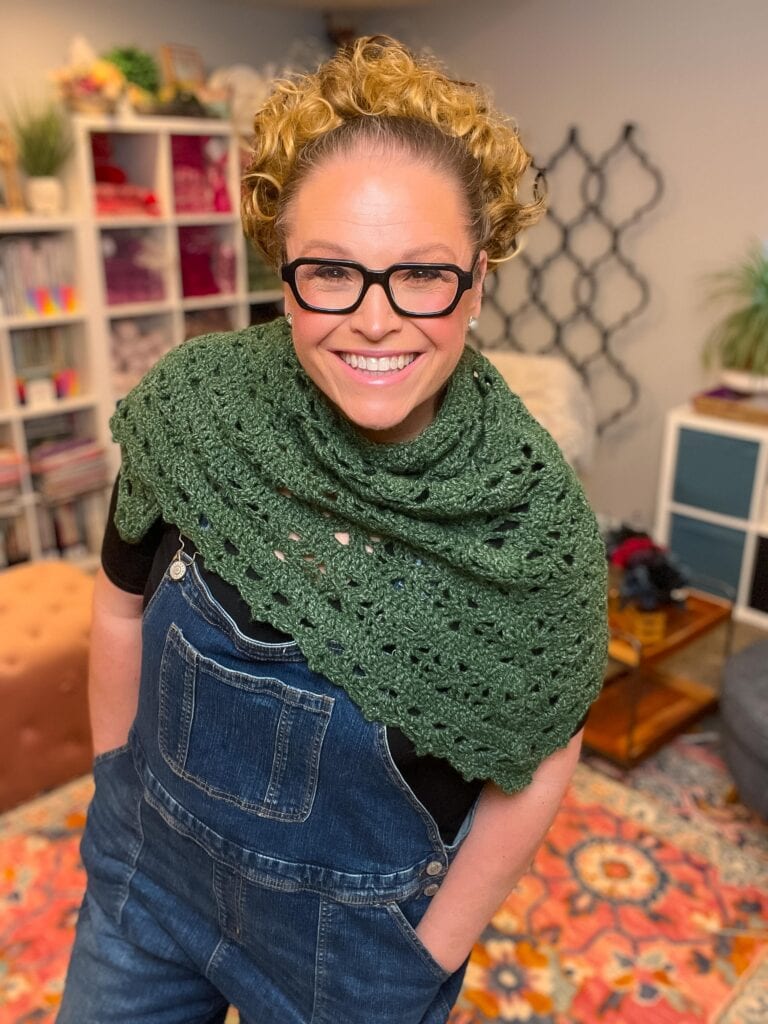
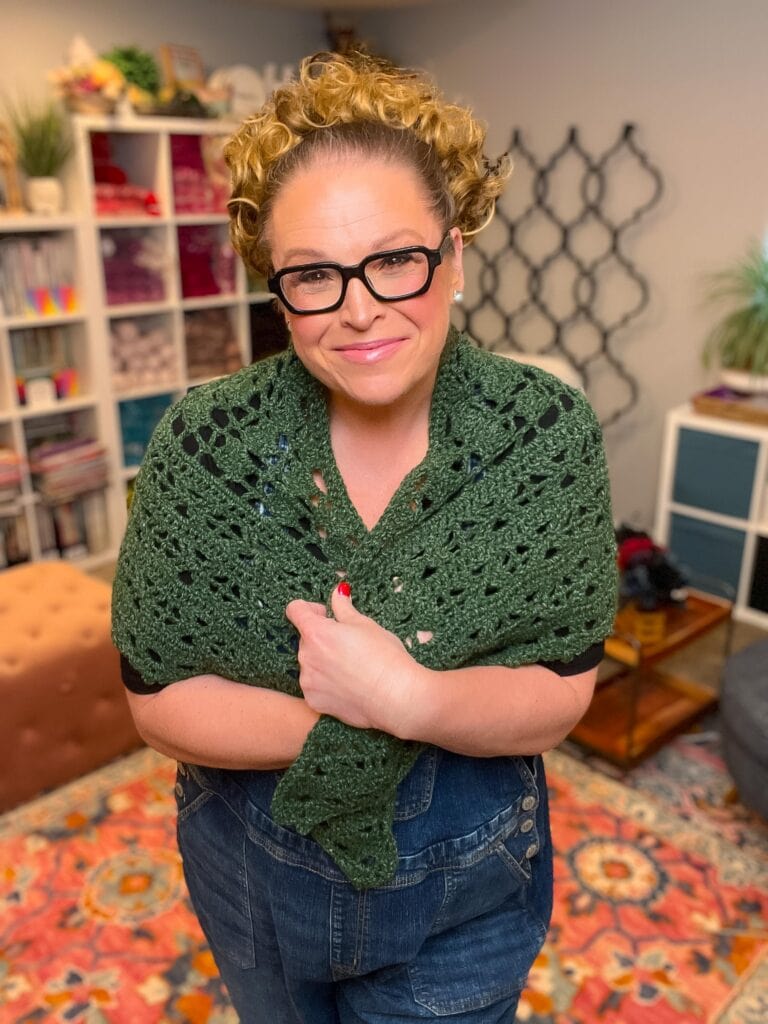
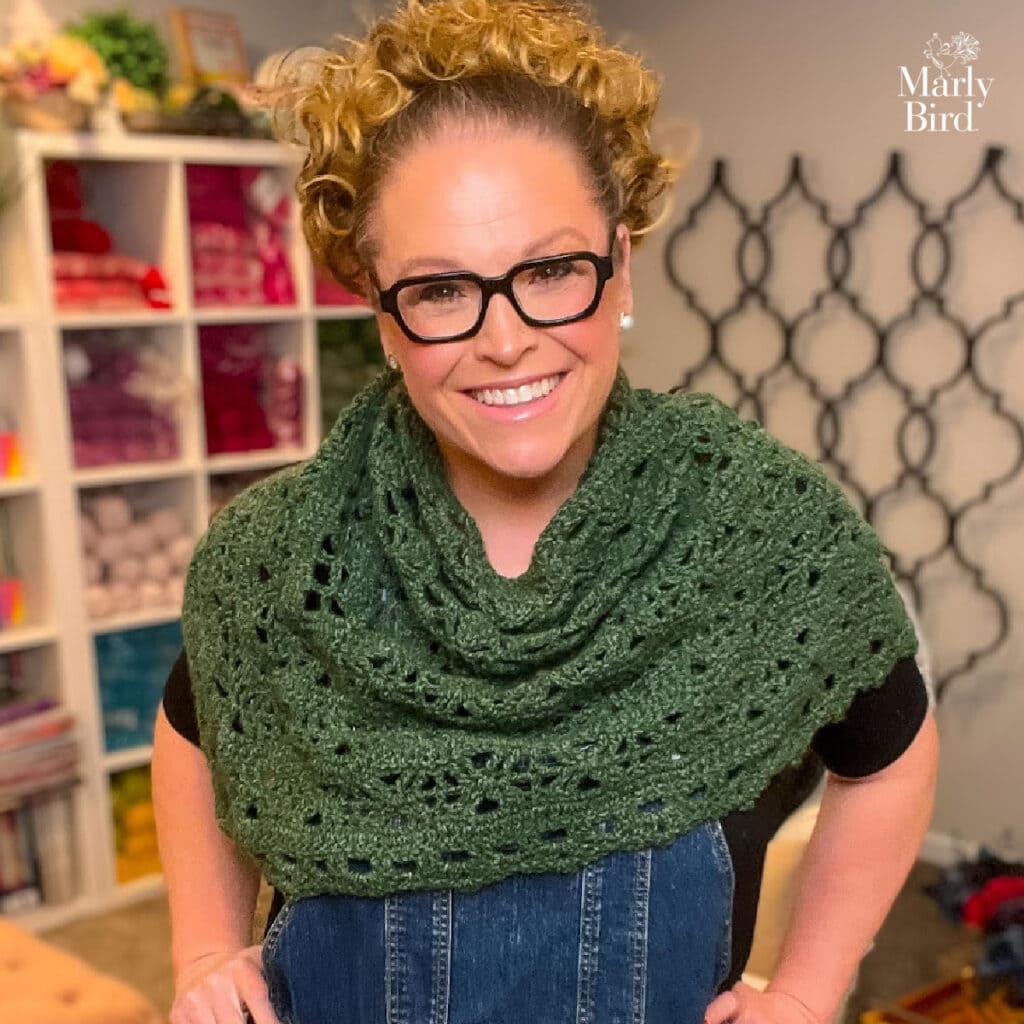
Styling the Sunday Sideline Shawl 💚
This shape is endlessly wearable.
Try it:
- Draped over both shoulders
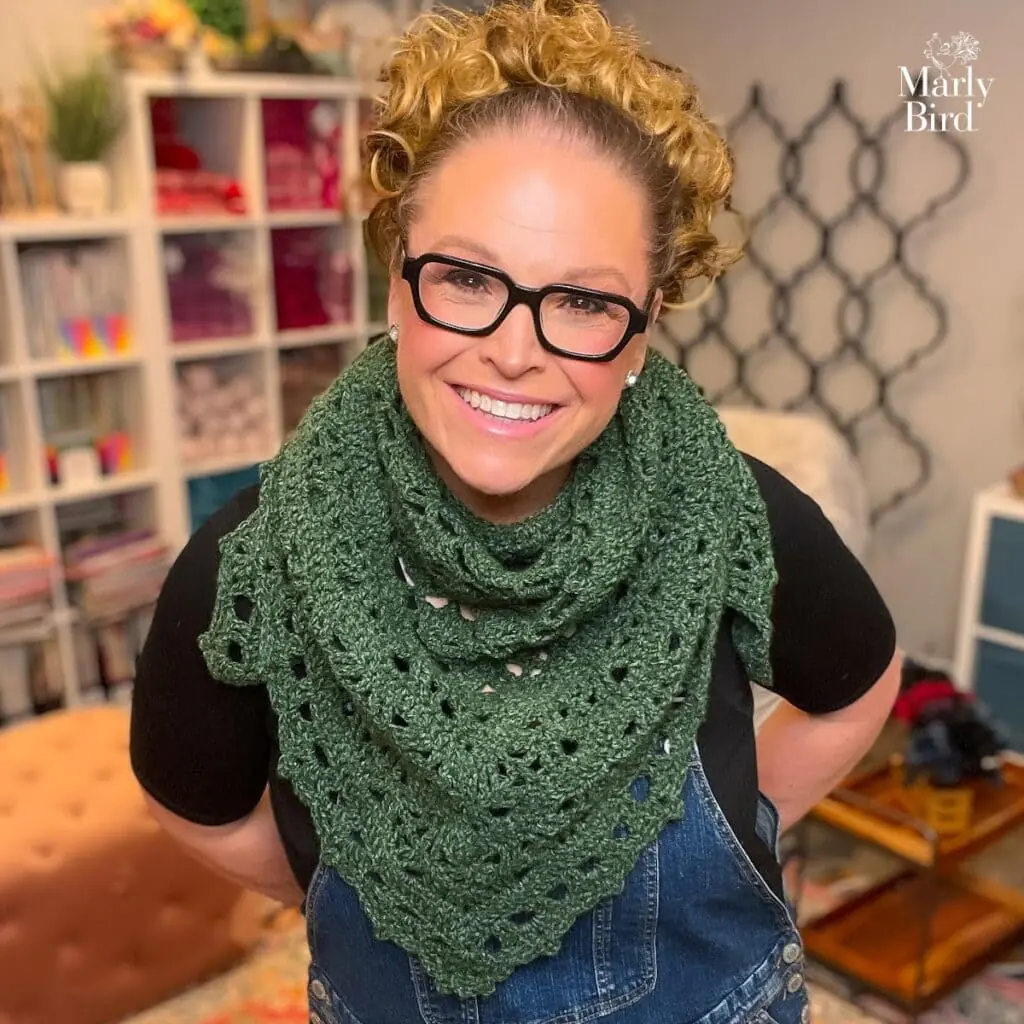
- Wrapped loosely like a scarf
- Styled under a jacket
- Secured with a decorative shawl pin
The open lace makes it breathable enough for indoor wear but cozy enough for cool evenings.
Shawl pins elevate it instantly. A simple triangle becomes a statement piece.
Join our Newsletter
Get Free Pattern Links & Coupons!

✨ Want More Patterns Like This?
If you love easy lace crochet and wearable projects like this one, make sure you’re on my email list.
I share:
- New free patterns
- Exclusive discounts
- Behind-the-scenes design previews
- Video tutorials
- Special subscriber bonuses
You don’t want to miss what’s coming next.
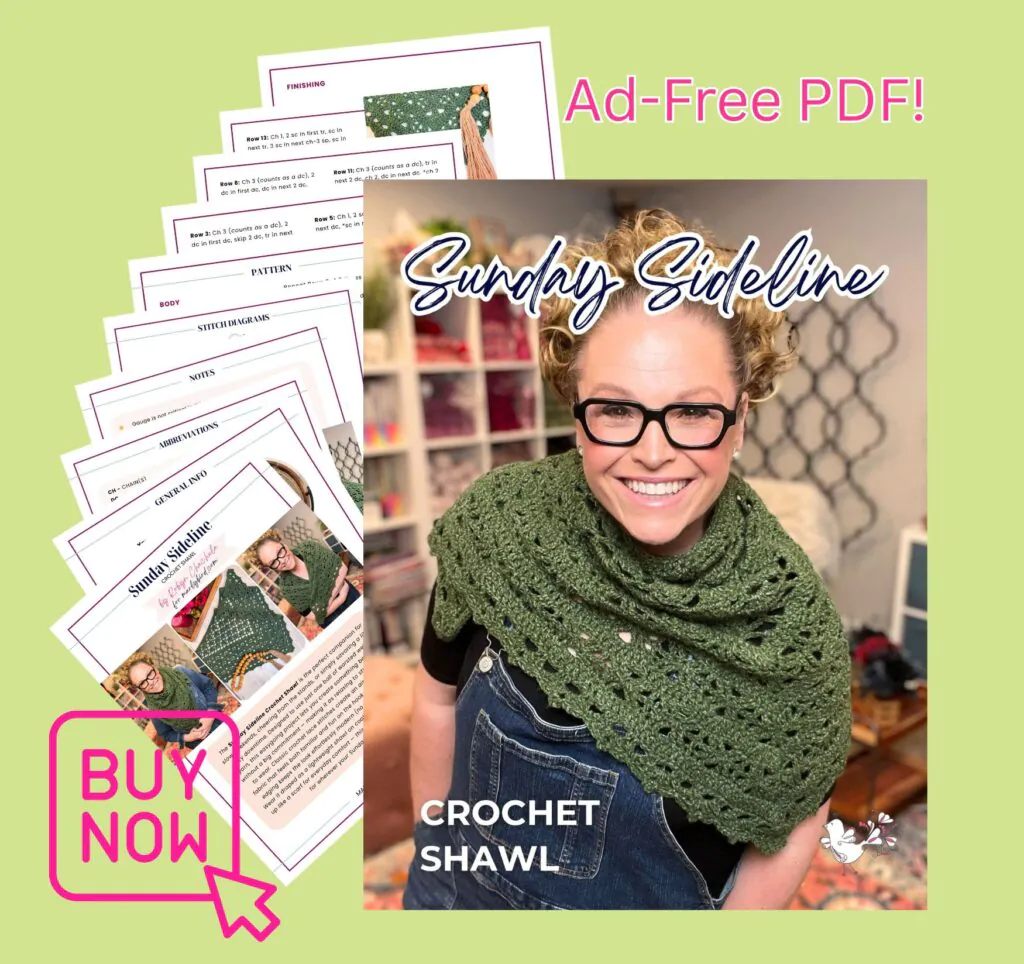
Get the Ad-Free PDF
Prefer a clean, printable, ad-free version of this crochet triangle shawl?
You can grab it on:
Shopify https://shop.marlybird.com/products/products-easy-crochet-shawl-pattern-one-skein
Etsy https://tidd.ly/3Q0GLZG
Ravelry https://www.ravelry.com/patterns/library/sunday-sideline
Free Sunday Sideline Crochet Shawl Pattern Details
Designed by Robyn Chachula for MarlyBird.com
The Sunday Sideline Crochet Shawl is the perfect companion for slow weekends, cheering from the stands, or simply savoring a little cozy downtime. Designed to use just one ball of worsted weight yarn, this easygoing project lets you create something beautiful without a big commitment — making it as relaxing to stitch as it is to wear. Classic crochet lace stitches create an airy, timeless fabric that feels both familiar and fun on the hook, while the clean edging keeps the look effortlessly modern (no picots required!). Wear it draped as a lightweight shawl on cool evenings or wrapped up like a scarf for everyday comfort — this versatile piece is made for wherever your Sunday takes you.
SKILL LEVEL
Adventurous Beginner
MEASUREMENTS
Finished Measurements
Shawl is 55” [139.5 cm] in wingspan by 27.5” [70 cm] deep.
Gauge
2 stitch repeats (3 dc2tog + ch-5 sps) and 8 rows in body stitch pattern = 5.5” [14 cm] x 5” [12.5 cm]
MATERIALS
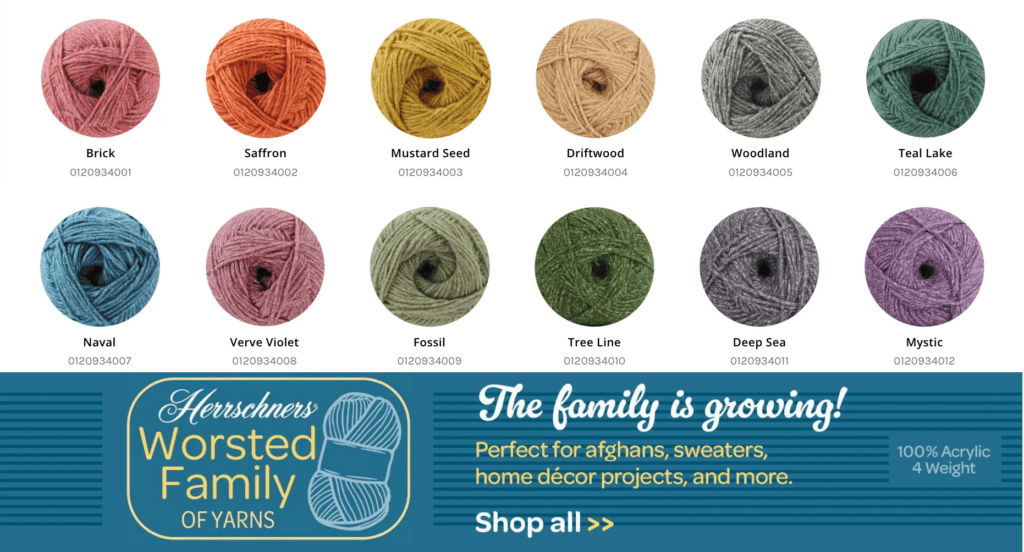
Crochet Yarn
Herrschners, Worsted 8 Heathers (100% acrylic, 489 yds / 448 m, 8 oz/ 2260 g, CYCA# 4 worsted): Color #4010 Tree Line, 1 ball
Crochet Hook
Size J/10 [6.0 mm]
Notions
ABBREVIATIONS
Ch – Chain(s)
Dc – Double Crochet
Hdc – Half Double Crochet
PM – Place Marker
RS – Right Side
Sc – Single Crochet
Sl st – Slip Stitch
Sp(s) – Space(s)
St(s) – Stitch(es)
Tch – Turning Chain
Tr – Treble Crochet
WS – Wrong Side
SPECIAL STITCHES
⭐️ Foundation Single Crochet (fsc):
First fsc: Ch 2, insert hook into 2nd ch from hook, yarn over and pull up a loop, yarn over and draw through 1 loop on hook (forming a chain), yarn over and draw through 2 loops on hook (forming the single crochet)
Next fsc: Insert hook into base of previous stitch (in the “chain” space), yarn over and pull up a loop, yarn over and draw through 1 loop on hook (forming a chain), yarn over and draw through 2 loops on hook (forming the next single crochet). Repeat directions for desired amount of sts.
⭐️Double Crochet 3 Together (Dc3tog): *Yarn over hook, insert hook into indicated st, yarn over and pull up a loop, yarn over and draw through 2 loops on hook; repeat from * in next 2 sts indicated, yarn over and draw through all 4 loops on hook.
⭐️Treble Crochet 2 Together (Tr2tog): *Yarn over hook twice, insert hook into indicated st, yarn over and pull up a loop, [yarn over and draw through 2 loops on hook] twice; skip 3 sts, repeat from * in next st, yarn over and draw through all 3 loops on hook.
NOTES
- Gauge is not critical in this project. Lace crochet easily can grow depending on how you make your chains. If your project measures larger, it will still be a beautiful project; but it will use more yarn than our sample.
- The body of the shawl is worked on its longest side first and each row will shorten the project after, ultimately creating a triangle.
- Optional: If you do not want to start your project with foundation sc, you can chain instead.
VIDEO TUTORIALS
- Crochet Stitch Diagram Basics >> Click Here for Video Help <<
- Foundation Single Crochet >> Click Here for Video Help <<
- How to Bury Ends >> Click Here for Video Help <<
GROW
To Unlock Exclusive Subscriber Content click the Box below and join for free by simply adding your email and creating a password! If you are having troubles, clear your cache or reset your password or login to the Grow Publisher Portal.
>> Learn More About Grow Here <<
I’m thrilled to share this amazing pattern with you, many patterns on my blog are absolutely free! I kindly request that you don’t copy and paste or distribute this pattern. Prefer an ad-free experience? Buy a digital PDF pattern for a small fee from one of my online stores for a seamless crafting journey.
I appreciate your support and readership. You are the reason I can keep doing what I love and sharing it with others. So, thank you from the bottom of my yarn-loving heart! Disclosure: This post contains affiliate links, meaning I get a commission if you decide to make a purchase through my links at no cost to you.
SUNDAY SIDELINES CROCHET SHAWL PATTERN
BODY
Row 1: (WS) 85 fsc, turn.
Row 2: Ch 1, sc in first sc, *ch 5, skip 3 sc, sc in next sc, ch 3, dc3tog over next 3 sts, ch 3, sc in next sc; repeat from * across to last 4 sc, ch 2, skip 3 sc, dc in last sc (counts as a ch-5 sp), turn– 11 ch-5 sps + 10 dc3tog.
Row 3: Ch 1, sc around dc (in space made by dc and ch 2), ch 5, sc in dc3tog, *ch 2, 5 dc in next ch-5 sp, ch 2, sc in next dc3tog; repeat from *across to last ch-5 sp, ch 2, dc in 3rd ch of last ch-5 sp (counts as ch-5 sp), turn- 9 dc groups + 2 ch-5 sps.
Row 4: Ch 1, sc around dc (in space made by dc and ch 2), *ch 5, sc in next ch-2 sp, ch 3, skip next dc, dc3tog over next 3 dc, skip next dc, ch 3, sc in next ch-2 sp; repeat from * across to last ch-5 sp, ch 2, dc in 3rd ch of last ch-5 sp (counts as a ch-5 sp), turn– 10 ch-5 sps + 9 dc3tog.
Repeat Rows 3-4 8 times
Row 21: Ch 1, sc around dc (in space made by dc and ch 2), ch 5, sc in dc3tog, ch 2, dc in 3rd ch of last ch-5 sp (counts as ch-5 sp), turn- 2 ch-5 sps.
Row 22: Ch 1, sc around dc (in space made by dc and ch 2), ch 5, sc in 3rd ch of last ch-5 sp, fasten off– 1 ch-5 sp.
EDGING
Row 1: (WS) Join yarn with sc to first st of foundation sc (Row 1 of Body), sc in same space, 3 sc around each ch-sp (working up the diagonal edge of row ends) up to ch-5 sp, 7 sc in ch-5 sp, place marker in center sc, 3 sc around each ch-sp down to foundation, 2 sc in foundation, turn- 131 sc.
Row 2: Ch 3 (counts as dc), 2 dc in first sc, dc in each sc to marker, 5 dc in marked sc, move marker to center dc, dc in each sc to last sc, 3 dc in last sc, turn- 139 dc.
Row 3: Ch 3 (counts as a dc), 2 dc in first dc, skip 2 dc, tr in next 2 dc, ch 2, dc in next dc, *ch 2, tr in next dc, tr2tog over next dc and 4th dc away (skip 3 dc between the 2 legs), tr in next dc, ch 2, dc in next dc*; repeat from * across ending in marked stitch, 4 more dc in same marked dc (5 total in corner), move marker to center dc, repeat from * to * across to last 5 sts, ch 2, tr in next 2 dc, skip 2 dc, 3 dc in top of tch, turn- 16 tr2tog + 36 tr + 34 ch-2 sps + 1 corner 5 dc group + 2 groups of 3 dc each end.
Row 4: Ch 3 (counts as a dc), dc in first dc, skip next dc, tr in next dc, (tr, ch 3, tr) in next tr, tr in next tr, skip ch-2 sp, dc in next dc, *skip next ch-2 sp, tr in next tr, (tr, ch 3, tr) in next tr2tog, tr in next tr, skip next ch-2 sp, dc in next dc*; repeat from * across to corner, ch 2, 3 dc in marked dc, move marker to center dc, ch 2, dc in next dc, repeat from * to * ending in dc before last ch-2 sp, tr in next tr, (tr, ch 3, tr) in next tr, tr in next dc, skip next dc, 2 dc in top of tch, turn- 18 ch-3 sps + 2 ch-2 sps.
Row 5: Ch 1, 2 sc in first dc, sc in next dc, *sc in next 2 tr, 3 sc in next ch-3 sp, sc in next 2 tr, sc in next dc*; repeat from * across to ch-2 sp before marker, 2 sc in next ch-2 sp, sc in next dc, 3 sc in marked dc, move marker to center sc, sc in next dc, 2 sc in next ch-2 sp, sc in next dc; repeat from * to * ending at tch, 2 sc in top of tch, turn – 159 sc.
Row 6: Ch 3 (counts as dc), 2 dc in first sc, dc in each sc to marker, 5 dc in marked sc, move marker to center dc, dc in each sc to last sc, 3 dc in last sc, turn- 167 dc.
Row 7: Ch 3 (counts as a dc), 2 dc in first dc, *ch 2, tr in next dc, tr2tog over next dc and 4th dc away (skip 3 dc between the 2 legs), tr in next dc, ch 2, dc in next dc*; repeat from * across leaving 2 sts before marked stitch unworked, ch 2, tr in next 5 dc, move marker to center tr, ch 2, dc in next dc, repeat from * to * across to t-ch, 2 more dc in top of tch (3 dc total), turn- 20 tr2tog + 45 tr + 42 ch-2 sps + 2 groups of 3 dc each end.
Row 8: Ch 3 (counts as a dc), 2 dc in first dc, dc in next 2 dc, *skip next ch-2 sp, tr in next tr, (tr, ch 3, tr) in next tr2tog, tr in next tr, skip next ch-2 sp, dc in next dc*; repeat from * across to ch-2 sp before marked st, skip next ch-2 sp, tr in next 2 tr, ch 3, 3 dc in marked tr, move marker to center dc, ch 3, tr in next 2 tr, skip next ch-2 sp, dc in next dc, repeat from * to * ending with 2 sts left, dc in next dc, 3 dc in top of tch, turn- 22 ch-3 sps.
Row 9: Ch 1, 2 sc in first dc, sc in next 4 dc, *sc in next 2 tr, 3 sc in next ch-3 sp, sc in next 2 tr, sc in next dc*; repeat from * across to 2 tr before marker, sc in next 2 tr, 3 sc in next ch-3 sp, sc in next dc, 3 sc in marked dc, move marker to center sc, sc in next dc, 3 sc in next ch-3 sp, sc in next 2 tr, sc in next dc; repeat from * to * across to last 4 sts, sc in next 3 dc, 2 sc in top of tch, turn – 187 sc.
Row 10: Ch 3 (counts as dc), 2 dc in first sc, dc in each sc to marker, 5 dc in marked sc, move marker to center dc, dc in each sc to last sc, 3 dc in last sc, turn- 195 dc.
Row 11: Ch 3 (counts as a dc), tr in next 2 dc, ch 2, dc in next dc, *ch 2, tr in next dc, tr2tog over next dc and 4th dc away (skip 3 dc between the 2 legs), tr in next dc, ch 2, dc in next dc*; repeat from * across leaving 5 sts before marked stitch unworked, ch 2, tr in next dc, tr2tog over next dc and marked dc, (tr, ch 2, dc, ch 2, tr) in marked dc, move marker to center dc, tr2tog over marked dc and 4th dc away, tr in next dc, ch 2, dc in next dc, repeat from * to * across to last 3 sts, ch 2, tr in next 2 dc, tr in top of tch, turn- 24 tr2tog + 53 tr + 50 ch-2 sps.
Row 12: Ch 3 (counts as a dc), skip first tr, (tr, ch 3, tr) in next tr, tr in next tr, skip next ch-2 sp, dc in next dc, *skip next ch-2 sp, tr in next tr, (tr, ch 3, tr) in next tr2tog, tr in next tr, skip next ch-2 sp, dc in next dc*; repeat from * across to 2 ch-2 sp before marked st, skip next ch-2 sp, tr in next tr, (tr, ch 3, tr) in next tr2tog, tr in next tr, skip next ch-2 sp, 5 dc in marked dc, move marker to center dc, repeat from * to * ending at last ch-2 sp, skip next ch-2 sp, tr in next tr, (tr, ch 3, tr) in next tr, tr in top of tch, turn- 26 ch-3 sps.
Row 13: Ch 1, 2 sc in first tr, sc in next tr, 3 sc in next ch-3 sp, sc in next 2 tr, sc in next dc, *sc in next 2 tr, 3 sc in next ch-3 sp, sc in next 2 tr, sc in next dc*; repeat from * across to 1 sc before marker, sc in next dc, 3 sc in marked dc, move marker to center sc, sc in next 2 dc; repeat from * to * across to last 4 tr, sc in next 2 tr, 3 sc in next ch-3 sp, sc in next tr, 2 sc in top of tch, turn – 215 sc.
Row 14: Ch 3 (counts as dc), 2 dc in first sc, dc in each sc to marker, 5 dc in marked sc, move marker to center dc, dc in each sc to last sc, 3 dc in last sc, turn- 223 dc.
Row 15: Ch 3 (counts as dc), 2 dc in first dc, *ch 2, skip 2 dc, dc in next 2 dc*; repeat from * across to 2 sts before marked st, ch 2, skip next 2 dc, 5 dc in marked dc, move marker to center dc, repeat from * to * across to last 3 sts, ch 2, skip next 2 dc, 3 dc in top of tch, turn – 56 ch-2 sps.
Round 16: Ch 1, sc in first dc, *ch 1, (2 dc, ch 1, 2 dc) in next ch-2 sp (shell made), ch 1, sc in next ch-2 sp*; repeat from * across to marked dc, ch 1, ([2 dc, ch 1] twice, 2 dc) in marked dc, move marker to center group of 2 dc, ch 1, sc in next ch-2 sp, repeat from * to * across to last ch-2 sp, ch 1, (2 dc, ch 1, 2 dc) in last ch-2 sp, ch 1, sc in top of tch, rotate shawl to work along edge, sc evenly across edge of shawl to first sc, sl st to first sc, DO NOT TURN- 28 shells + 1 corner shell.
Row 17: *Ch 3, skip 2 dc, (sl st, ch 3, sl st) in next ch-1 sp, ch 3, sl st in next sc*; repeat from * across to corner shell, [ch 3, skip 2 dc, (sl st, ch 3, sl st) in next ch-1 sp] twice, ch 3, sl st in next sc, repeat from * to * ending at edge of shawl. Fasten off and weave in ends.
FINISHING
The easiest and fastest way to block when you are in a time crunch is to grab out your iron or steamer. If you want to use a different method to block, go for it.
Pin project to finished size. Using steam setting on iron (or a steamer), hold iron about an inch above your project and let the steam do its work. Allow to dry.
Blocking Makes It Bloom 🌿
Blocking transforms lace.
For this shawl, steam blocking is quick and effective.
To steam block:
- Pin the shawl to finished size.
- Use a steamer or steam setting on your iron.
- Hold steam about an inch above the fabric.
- Let it cool completely before unpinning.
Steam:
- Opens the lace
- Defines shell stitches
- Softens fabric
- Improves drape
Especially with acrylic, steam blocking makes a huge difference.

Frequently Asked Questions
Is this truly a one skein crochet shawl?
Yes. It was intentionally designed to maximize yardage within a single skein.
Is this good for advanced beginners?
Absolutely. If you’ve made a scarf or blanket and want to try lace, this is a fantastic next step.
What if I run out of yarn before the edging?
Skip the final body row and move straight to edging. You’ll have a slightly smaller shawl, but it will still be beautiful and wearable.
Can I use cotton yarn?
You can, but it will feel heavier and less elastic. Choose a soft cotton with good drape.
Does gauge matter in lace?
Yes. It affects size and yardage more than fit.
Is this a good gift project?
Yes. One skein projects are wonderful handmade gifts.
Can I make it larger?
This pattern is designed around specific yardage. Increasing would require additional yarn.
Final Thoughts 💚
The Sunday Sideline Top Down Crochet Shawl is relaxed, wearable, and practical without being boring.
It’s a free one skein crochet triangle shawl pattern that works up beautifully, teaches you lace confidence, and fits into everyday life.
And honestly?
Those are my favorite kinds of projects. 🧶✨
❤️ Your BiCrafty Bestie,
Marly Bird

Categories: Crochet, Free Patterns, Marly Bird Premium Patterns, Our Free Patterns, Pattern