
My Favorite Knit Sweater Pattern
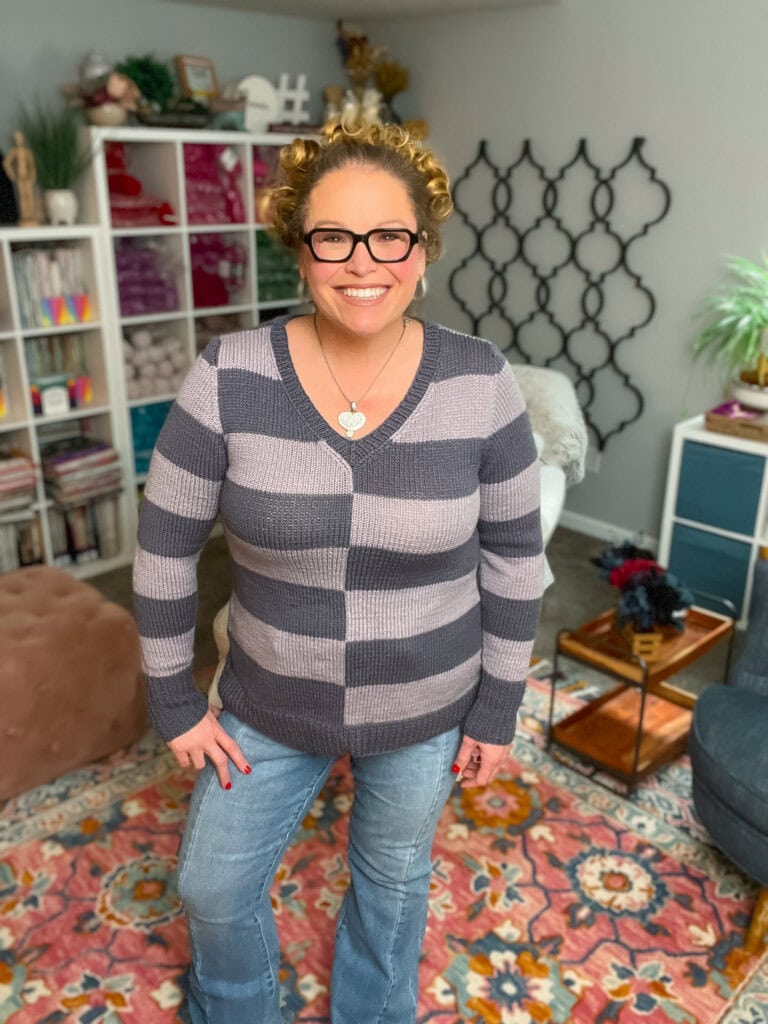
Years ago, I bought a Lane Bryant sweater that I loved and loved and loved. As a designer, many things inspire me, including clothes I love to wear. So, taking what I loved most about that sweater and tweaking it, I have a new sweater design for you. This is my favorite knit sweater pattern ever! It’s a two-color striped knit sweater. You work it flat in stockinette, so it’s super easy for beginners. But I designed it with extra-flattering A-line shaping enhanced by the offset design of the striped colors. Eeeeee. I love it. I hope you do too.
Affiliate Disclosure: This post contains affiliate links. To learn more please visit my privacy policy here💖
8 Reasons This Is My Favorite Knit Sweater Pattern
Of course, it’s easy to love a new design when fresh from the needles. But a favorite sweater inspired me, so I love this design for longer-lasting reasons. And there are certain things I’m really proud of that make it My Favorite Knit Sweater Pattern. Here they are:
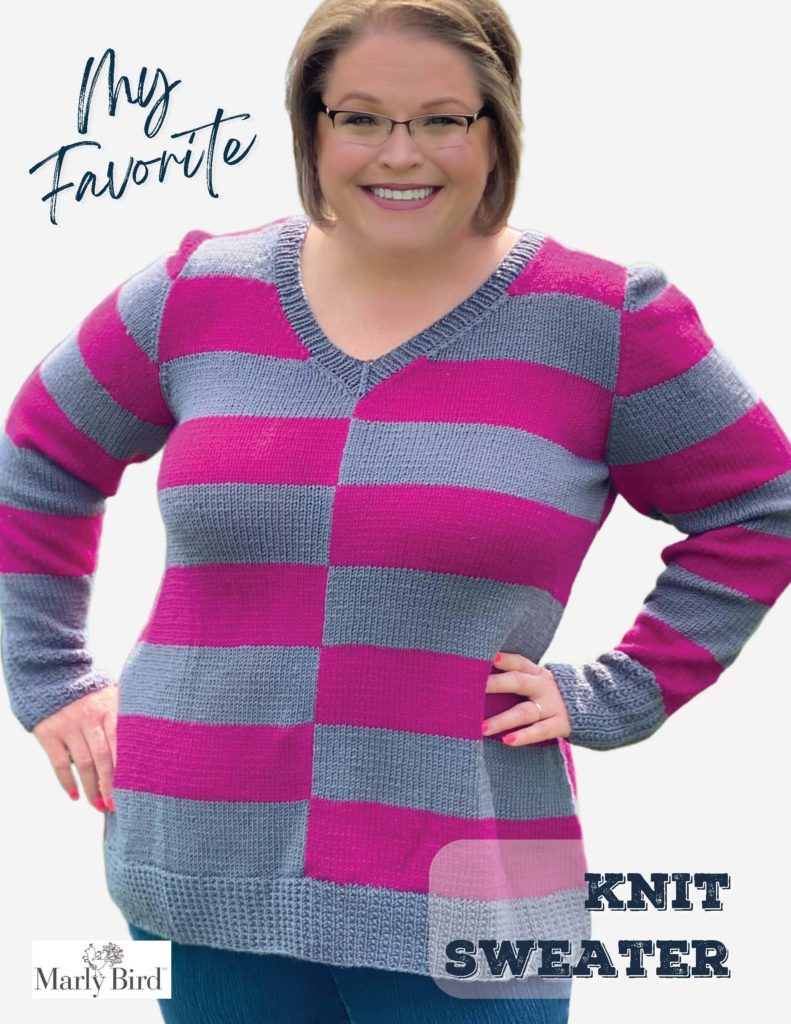
1. Offset Stripes Are Slimming and Attractive
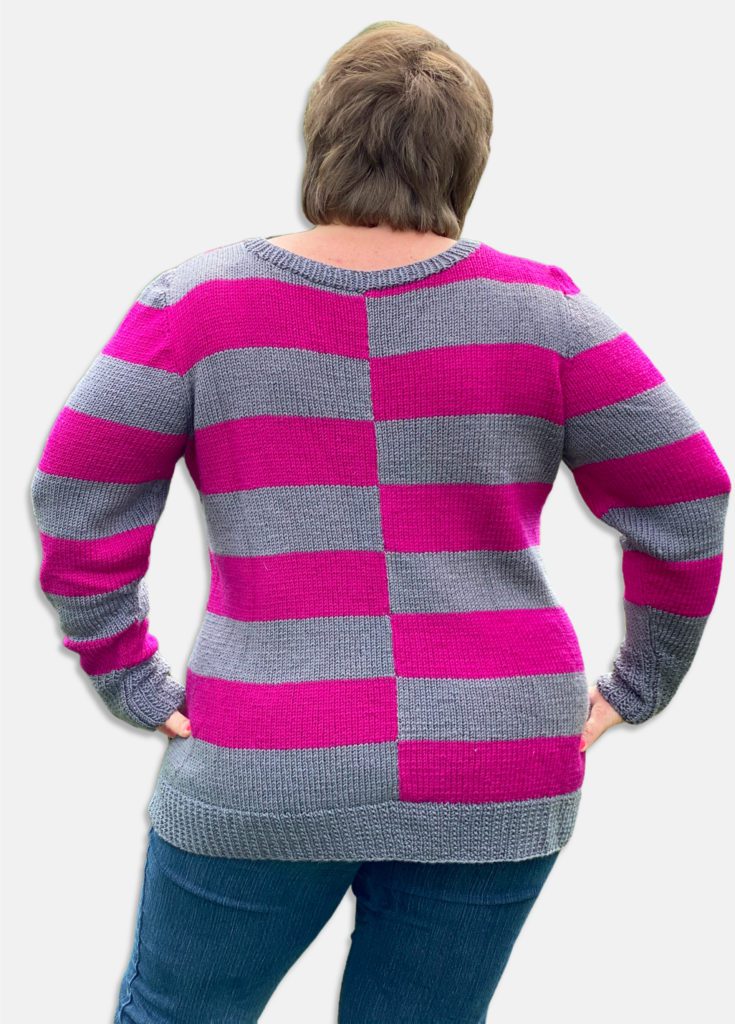
Yes, my favorite knit sweater has horizontal stripes, but I offset them. As you can see in the images, Color A is on the left, and Color B is on the right, and then in the next row, it’s the opposite. The result is super flattering for all body types. The eye doesn’t get stuck in one place but instead roams with the movement of the colors. It creates a very slimming effect, which you don’t always get with horizontal stripes.
2. There Are So Many Options for Your Two Colors
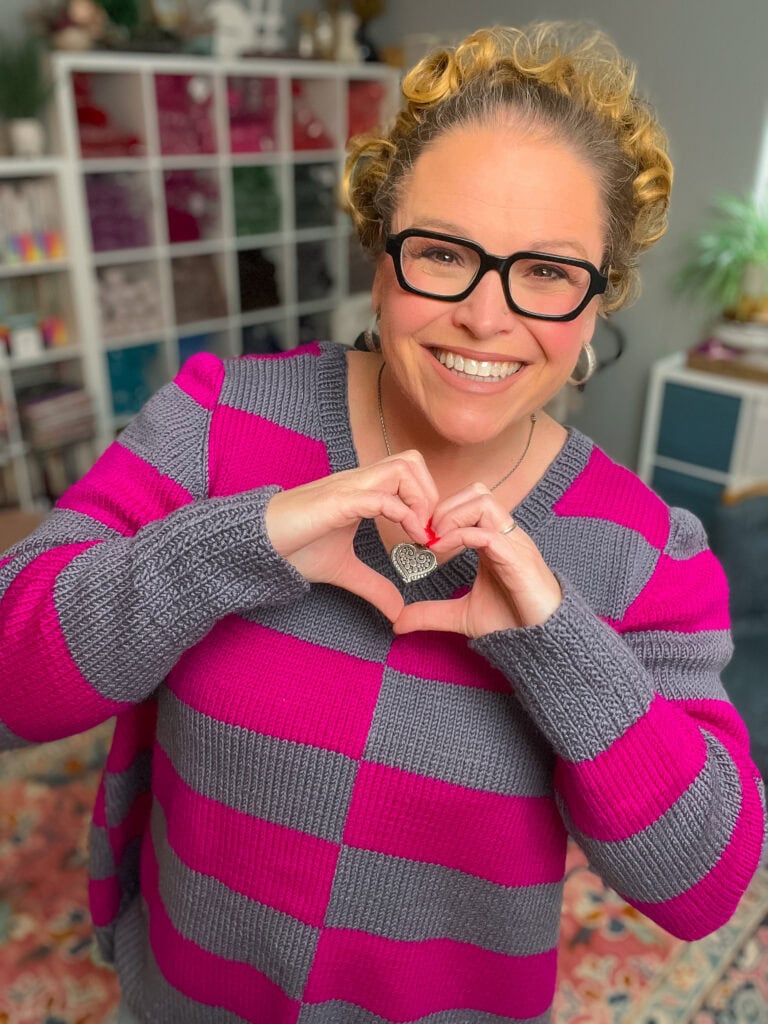
Go bold like mine for a design that really pops. I love this! However, you can use any two colors that you love together to create a style that works well for you. This is the kind of pattern that works as well in neutrals (a tan and olive, for example, or black and gray stripes) as it does in bold colors.
3. Knit Flat So It’s Beginner Friendly
You knit this sweater flat rather than in the round. And you knit it in pieces then seam together with mattress stitch. This is really perfect for those offset stripes because it allows you to make sure you’re matching the stripes up perfectly as you work. This creates a really beginner-friendly design.
4. Stockinette Stitch With Smart Shaping
Knit My Favorite Knit Sweater Pattern in stockinette stitch. This is also beginner-friendly. Or great for relaxing, meditative stitching. And yet, I’ve incorporated smart shaping into the design. The shaping happens along the side edges. It is negative ease at the upper body and positive ease at the lower body. The result is a very flattering A-line shape that works with many different body types.
5. V-Neck Is Also Flattering
I’ve designed my Favorite Knit Sweater with a V-neck. I love how that looks on me. Plus, I think it’s really flattering for lots of people. It’s not just that it’s a V-shape but, more specifically, that it’s a really flattering depth of the V. And it works well geometrically and visually with the offset striping.
6. Super Versatile Yarn Options
In addition to different color options for your yarn, you can actually play with different fiber types for making this sweater. Knit the sweater in pieces and seam it together. The seaming helps hold the weight of the yarn. Therefore, you get the drape and shape you want regardless of the yarn type.
While there might be some exceptions, you can use pretty much any worsted weight yarn that holds the weight. So, if you want to make this sweater in cotton, linen, acrylic, wool, or some blend, go for it. The sweater will work!
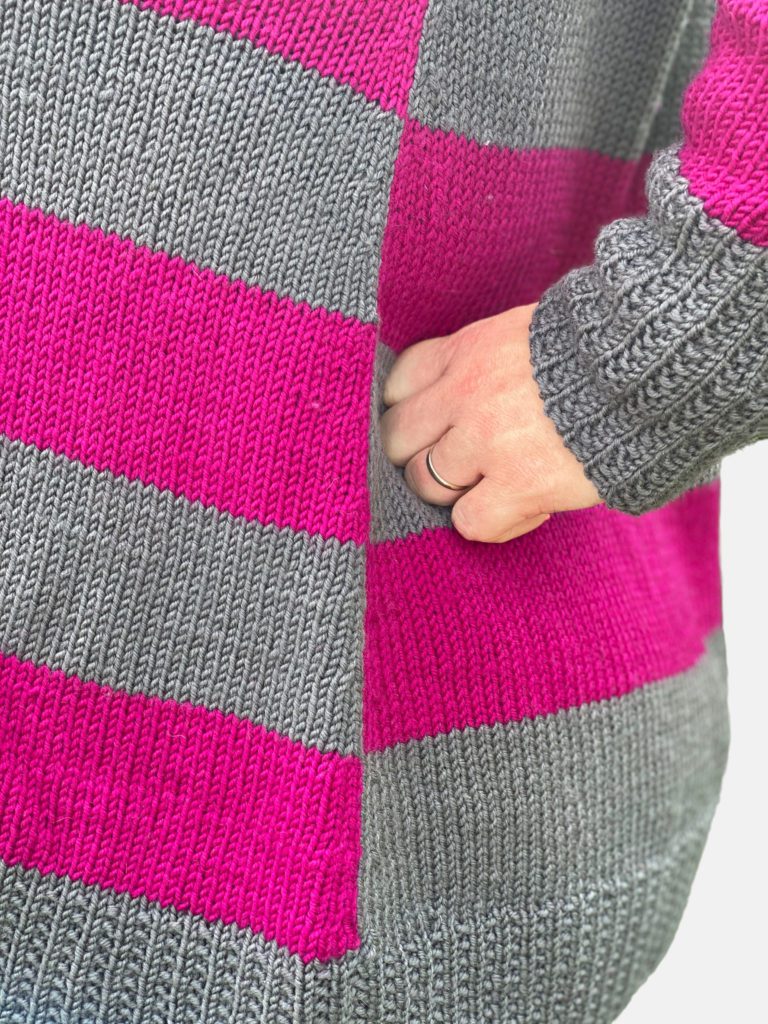
7. Broken Ribbing For Even Better Fit
Sometimes a whole sweater is almost perfect … except that the ribbing around the hem and cuffs isn’t quite right. Sadly, you pinch in at those places and end up looking like a balloon. Not so with My Favorite Sweater Pattern. The broken ribbing around the hem and the cuffs don’t pull in, so this piece won’t make you look like a balloon!

8. Great For Gifting!
You can make it for others since this sweater is flattering for all types of people. Plus I wrote the pattern for seven sizes. It’s especially great for beginner knitters ready to start gifting handmades to people!
Get My Favorite Knit Sweater Pattern Ad-Free PDF
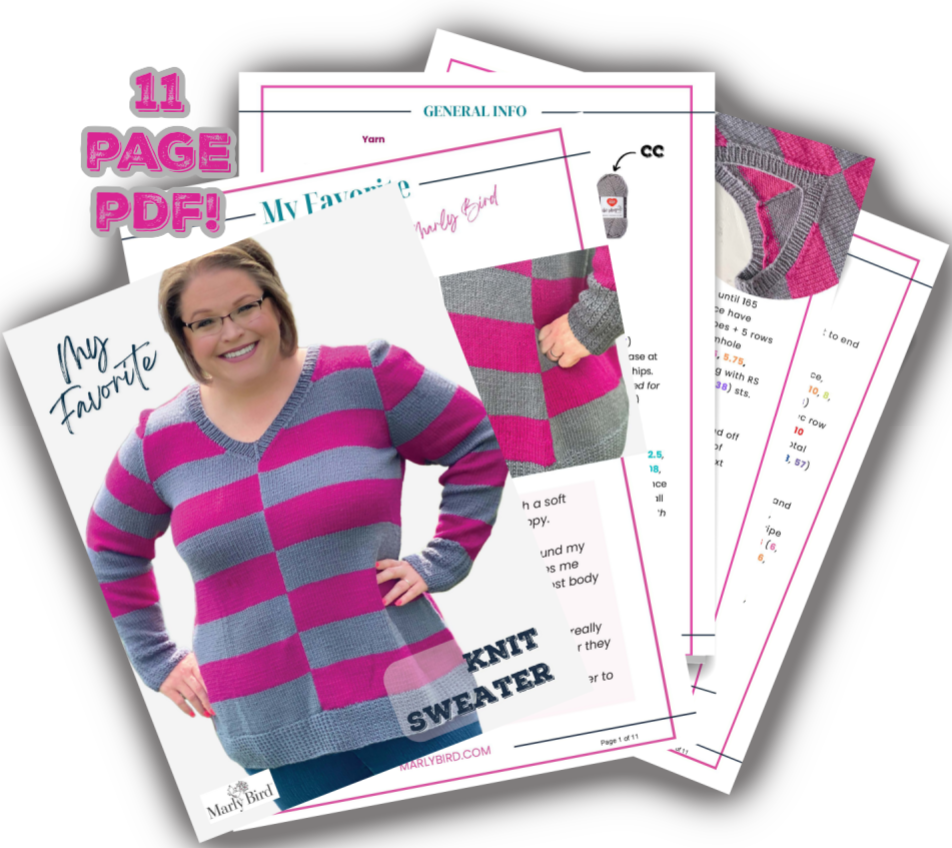
Ready to go? Get My Favorite Knit Sweater Pattern over on Ravelry!
🎉 Now Free on the Blog: Enjoy One of Our Most Popular Patterns!
We’re thrilled to share that one of our community’s favorite patterns is now available completely free right here on the blog. 🌟 This pattern has been a top pick in its ad-free PDF format, and we’ve decided it’s time to let everyone enjoy it without any barriers.
Below, you’ll find all the pattern details you need to get started, plus a step-by-step guide to make the process smooth. And if you’re a fan of using Grow, don’t forget to sign up to unlock even more patterns and goodies. We can’t wait to see what you create!
My Favorite Sweater Pattern Details
By Marly Bird
Sizes
XS (S, M, L, 1X, 2X, 3X)
Gallery of pictures below show 48″ bust wearing the pink sweater shown in 3xl, or the gray is size L


*Designed to be 2” negative ease at bust and positive ease at hips.
Finished Measurements
Bust: 26.5 (30, 33.75, 39, 42.5, 46, 49.75)”
Length: 28.75” (all sizes; to lengthen, add depth to the hem of each body piece)
Gauge
18 sts = 4″ (10 cm); 27 rows = 4″ in stockinette stitch AFTER BLOCKING!
Yarn
Red Heart Chic Sheep by Marly Bird™, Art. R170 100% Merino Wool
available 3.5 oz (100 g), 186 yd (170 m) balls
MC: Dragonfruit 3 (3, 4, 5, 5, 6, 6)
CC: Sterling 3 (3, 3, 4, 4, 6, 6)
Needle
Size 8 (5mm) 24” (61 cm) circulars, or any size to achieve gauge.
ABBREVIATIONS
approx – approximate(ly)
dec – decrease
K – Knit
k2tog – knit 2 togther
P – Purl
patt – pattern
pm – place marker
rem – remain(ing)
RS – Right Side
sl – slip
ssk – slip, slip, knit
ssp – slip, slip, purl
St(s) – Stitch(es)
WS – Wrong Side
SPECIAL STITCHES
M1 (Make 1 Increase): With tip of left-hand needle, pick up the horizontal strand between sts from front to back. Knit this strand through the back leg, twisting it into a loop in the process. (see https://youtu.be/nT1e-WgynUc for a Video Tutorial)
CDD (center double decrease): Slip 2 stitches together knitwise, knit one stitch, pass the slipped stitches over [2 stitches decreased] (see https://youtu.be/0NobbFd__LE for a Video Tutorial)
Join our Newsletter
Get Free Pattern Links & Coupons!

STITCH GUIDE
Broken Ribbing (odd number of sts)
Row 1 (RS): Knit.
Row 2 (WS): P1, *k1, p1; repeat from * to end.
repeat Rows 1-2 for patt.
Stripe Sequence (any number of sts)
Working in stockinette stitch, alternate MC and CC every 20 rows as indicated in pattern. Cut yarn after each Stripe.
Sloped Bind-Off: On the row before the bind-off, slip the last stitch of the row purlwise without working it. On the bind-off row: slip the first 2 stitches purlwise, pass the first slipped stitch over the second slipped stitch (1 st bound-off), bind off rem sts as usual.
SCHEMATIC

MY FAVORITE KNIT SWEATER PATTERN
Left Front
Hem
With MC, cast on 45 (49, 53, 59, 63, 67, 71) sts. repeat Rows 1 & 2 of Broken Ribbing patt, 10 times.
Note: If you wish to add length to the sweater, work more Hem rows.
Main Front
Note: Switch to CC and begin Stripe Sequence. Cont in Stripe Sequence throughout the remainder of the piece. Not including the hem, there will be a total of 9 stripes throughout.
Row 1 (RS): Knit.
Row 2 (WS): Purl.
Dec row (RS): K2, k2tog, knit to end — 1 st dec’d. Continuing in Stripe Sequence, repeat Dec row every 10 (10, 10, 8, 8, 8, 8) rows, 3 (1, 1, 11, 10, 9, 8) more time(s), then repeat Dec row every 8 (8, 8, 6, 6, 6, 6) rows, 10 (12, 12, 2, 3, 4, 5) times — 14 total sts dec’d, 31 (35, 39, 45, 49, 53, 57) sts rem.
Work even in Stripe Sequence and stockinette stitch until 132 (130, 126, 122, 120, 118, 116) rows in Stripe Sequence have been worked (6 (6, 6, 6, 6, 5, 5) full Stripes + 12 (10, 6, 2, 0, 18, 16) rows from the next Stripe. Piece measures approx 22.75 (22.25, 21.75, 21.25, 21, 20.5, 20.25)”.
Shape Left Front Armhole
Note: Read through remainder of Left Front before proceeding. Neck Shaping is introduced for some sizes before Armhole Shaping is complete.
Bind off 2 (3, 4, 5, 6, 7, 8) sts at beg of next RS row — 29 (32, 35, 40, 43, 46, 49) sts rem. Work a WS row even.
– (-, -, L, 1X, 2X, 3X) Sizes only:
Dec row (RS): K2, k2tog, knit to end — 1 st dec’d.
Dec row (WS): Purl to last 4 sts, p2tog, p2 — 1 st dec’d.
Cont to work a Dec row every row, for – (-, -, 0, 0, 0, 2) more rows.
All Sizes:
Dec row (RS): K2, k2tog, knit to end — 1 st dec’d.
Next row (WS): Purl.
Cont to work a Dec row every RS row, 0 (0, 1, 2, 4, 6, 6) more times.
At the same time, when Armhole measures .5 (.5, .75, 1, 1, 1, 1)”, begin Neck Shaping:
Neck Dec row (RS): Work as est’d to last 4 sts, ssk, k2 — 1 st dec’d at Neck Edge. repeat Neck Dec row every RS row, 14 (14, 15, 15, 13, 14, 13) more times, then repeat Neck Dec row every other RS row, 2 (3, 3, 3, 5, 5, 6) times.
After all Armhole and Neck decs are complete, 11 (13, 14, 16, 17, 17, 18) sts rem for Shoulder. Work even in Stripe Sequence until 8 full Stripes + 14 rows of a ninth stripe have been worked. Armhole meas approx 6.25 (6.5, 7, 7.5, 8, 8.25, 8.5)”.
Shape Shoulder
Using the sloped method, bind off 3 (4, 4, 5, 5, 5, 6) sts at beg of next RS row, 4 (4, 5, 5, 6, 6, 6) sts at beg of next RS row, and rem 4 (5, 5, 6, 6, 6, 6) sts at beg of next RS row.
GROW
To Unlock Exclusive Subscriber Content click the Box below and join for free by simply adding your email and creating a password! If you are having troubles, clear your cache or reset your password or login to the Grow Publisher Portal.
>> Learn More About Grow Here <<
I’m thrilled to share this amazing pattern with you, many patterns on my blog are absolutely free! I kindly request that you don’t copy and paste or distribute this pattern. Prefer an ad-free experience? Buy a digital PDF pattern for a small fee from one of my online stores for a seamless crafting journey.
I appreciate your support and readership. You are the reason I can keep doing what I love and sharing it with others. So, thank you from the bottom of my yarn-loving heart! Disclosure: This post contains affiliate links, meaning I get a commission if you decide to make a purchase through my links at no cost to you.
Right Front
Hem
With MC, cast on 45 (49, 53, 59, 63, 67, 71) sts. repeat Rows 1 & 2 of Broken Ribbing patt, 10 times.
Note: If you wish to add length to the sweater, work more Hem rows.
Main Front
Note: Begin Stripe Sequence, continuing with MC and then switching to CC after 20 rows. Cont in Stripe Sequence throughout remainder of piece. Not including the hem, there will be a total of 9 stripes throughout.
Row 1 (RS): Knit.
Row 2 (WS): Purl.
Dec row (RS): Knit to last 4 sts, ssk, k2 — 1 st dec’d. Continuing in Stripe Sequence, repeat Dec row every 10 (10, 10, 8, 8, 8, 8) rows, 3 (1, 1, 11, 10, 9, 8) more time(s), then repeat Dec row every 8 (8, 8, 6, 6, 6, 6) rows, 10 (12, 12, 2, 3, 4, 5) times — 14 total sts dec’d, 31 (35, 39, 45, 49, 53, 57) sts rem.
Work even in Stripe Sequence and stockinette stitch until 133 (131, 127, 123, 121, 119, 117) rows in Stripe Sequence have been worked (6 (6, 6, 6, 6, 5, 5) full Stripes + 13 (11, 7, 3, 1, 19, 17) rows from the next Stripe. Piece meas approx 22.75 (22.25, 21.75, 21.25, 21, 20.5, 20.25)”.
Shape Left Front Armhole
Note: Read through remainder of Left Front before proceeding. Neck Shaping is introduced for some sizes before Armhole Shaping is complete.
Bind off 2 (3, 4, 5, 6, 7, 8) sts at beg of next WS row — 29 (32, 35, 40, 43, 46, 49) sts rem.
– (-, -, L, 1X, 2X, 3X) Sizes only:
Dec row (RS): Knit to last 4 sts, ssk, k2 — 1 st dec’d.
Dec row (WS): P2, ssp, purl to end — 1 st dec’d.
Cont to work a Dec row every row, for – (-, -, 0, 0, 0, 2) more rows.
All Sizes:
Dec row (RS): Knit to last 4 sts, ssk, k2 — 1 st dec’d.
Next row (WS): Purl.
Cont to work a Dec row every RS row, 0 (0, 1, 2, 4, 6, 6) more times.
At the same time, when Armhole meas .5 (.5, .75, 1, 1, 1, 1)”, begin Neck Shaping:
Neck Dec row (RS): K2, k2tog, work as est’d to end — 1 st dec’d at Neck Edge. repeat Neck Dec row every RS row, 14 (14, 15, 15, 13, 14, 13) more times, then repeat Neck Dec row every other RS row, 2 (3, 3, 3, 5, 5, 6) times.
After all Armhole and Neck decs are complete, 11 (13, 14, 16, 17, 17, 18) sts rem for a Shoulder. If necessary, work even in Stripe Sequence until 8 full Stripes + 15 rows of a ninth Stripe have been worked. Armhole measures approx 6.25 (6.5, 7, 7.5, 8, 8.25, 8.5)”.
Shape Shoulder
Using the sloped method, bind off 3 (4, 4, 5, 5, 5, 6) sts at beg of next WS row, 4 (4, 5, 5, 6, 6, 6) sts at beg of next WS row, and rem 4 (5, 5, 6, 6, 6, 6) sts at beg of next WS row.
Right Back
Work as for Left Front until 165 rows in Stripe Sequence have been worked 8 full Stripes + 5 rows from the next stripe. Armhole measures approx 5 (5.25, 5.75, 6.25, 6.75, 7, 7.25)”
, ending with RS row—28 (31, 33, 35, 36, 37, 38) sts.
Shape Neck
Using the sloped method, bind off 7 (8, 9, 9, 9, 10, 10) sts at beg of next WS row, 5 sts at beg of next WS row, 3 sts at beg of next WS row, and 1 st at beg of next 2 WS rows — 11 (13, 14, 16, 17, 17, 18) sts rem for Shoulder.
If necessary, work even in Stripe Sequence until 8 full Stripes + 14 rows of a ninth Stripe have been worked. Armhole measures approx 6.25 (6.5, 7, 7.5, 8, 8.25, 8.5)”.
Shape Shoulder
Work as for Left Front.
Left Back
Work as for Right Front until 166 rows in Stripe Sequence have been worked 8 full Stripes + 6 rows from the next stripe. Armhole measures approx 5 (5.25, 5.75, 6.25, 6.75, 7, 7.25)”, ending with WS row—28 (31, 33, 35, 36, 37, 38) sts.
Shape Neck
Using the sloped method, bind off 7 (8, 9, 9, 9, 10, 10) sts at beg of next RS row, 5 sts at beg of next RS row, 3 sts at beg of next RS row, and 1 st at beg of next 2 RS rows — 11 (13, 14, 16, 17, 17, 18) sts rem for Shoulder.
If necessary, work even in Stripe Sequence until 8 full Stripes + 15 rows of a ninth Stripe have been worked. Armhole measures approx 6.25 (6.5, 7, 7.5, 8, 8.25, 8.5)”.
Shape Shoulder
Work as for Right Front
Sleeve (make 2)
With MC, cast on 37 (39, 39, 41, 41, 43, 43) sts.
Cuff
Work in Broken Ribbing patt until piece measures 5” from cast-on edge, ending with WS row.
Main Sleeve
Note: Switch to CC and begin Stripe Sequence on left sleeve, continue in MC on right sleeve. Cont in Stripe Sequence throughout the remainder of pieces. See photos for help with color placement
Row 1 (RS): Knit.
Row 2 (WS): Purl.
Inc row (RS): K2, m1, knit to last 2 sts, m1, k2 — 2 sts inc’d. repeat Inc row every 8 (8, 6, 6, 4, 4, 4) rows, 5 (9, 7, 9, 4, 6, 12) more times, then repeat Inc row every 10 (-, 8, 8, 6, 6, 6) rows, 3 (-, 4, 3, 11, 10, 6) times — 55 (59, 63, 67, 73, 77, 81) sts. Work even in stockinette stitch and Stripe Sequence until piece measures 18.5 (19, 19, 19.5, 19.5, 20, 20)” from cast-on edge, ending with WS row.
Shape Cap
Bind off 2 (3, 4, 5, 6, 7, 8) sts at beg of next 2 rows — 51 (53, 55, 57, 61, 63, 65) sts rem.
Work 0 (0, 2, 4, 2, 2, 2) rows even.
Dec row (RS): K2, k2tog, knit to last 4 sts, ssk, k2 — 2 sts dec’d. repeat Dec row every RS row, 18 (19, 20, 21, 23, 23, 23) more times—15 (15, 15, 15, 15, 17, 19) sts rem. Bind off rem sts.
Finishing
Weave in ends. Block pieces to finished measurements. Sew center front seam, aligning Stripes from Right and Left Front pieces. Sew center back seam, aligning Stripes from Right and Left Back pieces. Sew Shoulder seams. Sew Sleeve Caps into armholes. Sew Sleeve and side seams.
Neck Edging
With circular needle, beg at Right Shoulder seam, pick up and knit 45 (47, 51, 51, 53, 55, 55) sts along Back Neck, 37 (39, 41, 43, 45, 47, 47) sts along Left Front Neck, 1 st in center seam (place removable marker on this st), and 37 (39, 41, 43, 45, 47, 47) sts along Right Front Neck — 120 (126, 134, 138, 144, 150, 150) sts. PM and join to work in the rnd.
Set-up Rnd: * K1, p1; repeat from * to end.
Dec Rnd: Work in est’d rib to 1 st before marked center st, cdd (marked center st will be in the middle of this decrease), work in est’d rib to end — 2 sts dec’d.
repeat Dec rnd every rnd, 3 more times—112 (118, 126, 130, 136, 142, 142) sts rem. Bind off all sts in patt.
❤️ Your BiCrafty Bestie,
Marly Bird


I am excited to learn 🤗!!