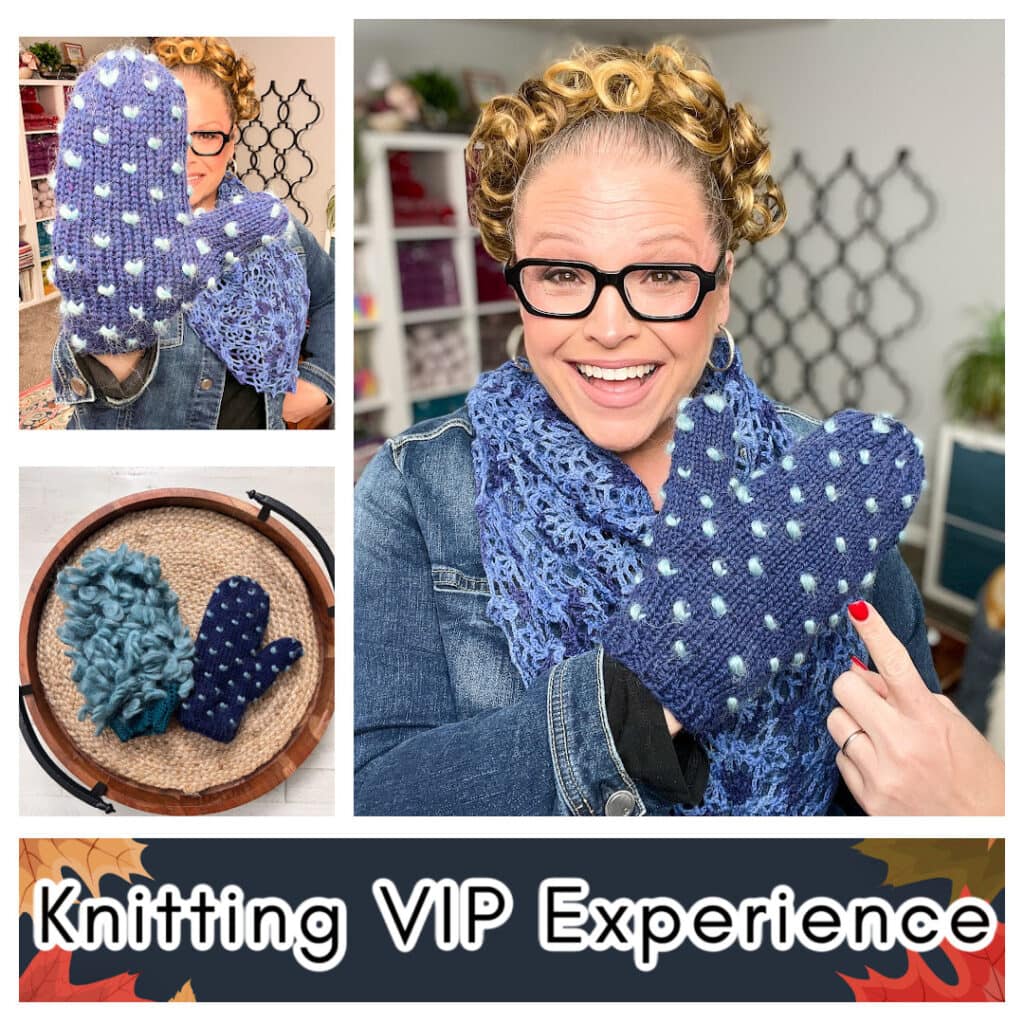
Andes Thrummed Knit Mittens – Free Knitting Pattern from the First Fall 2025 Make-Along
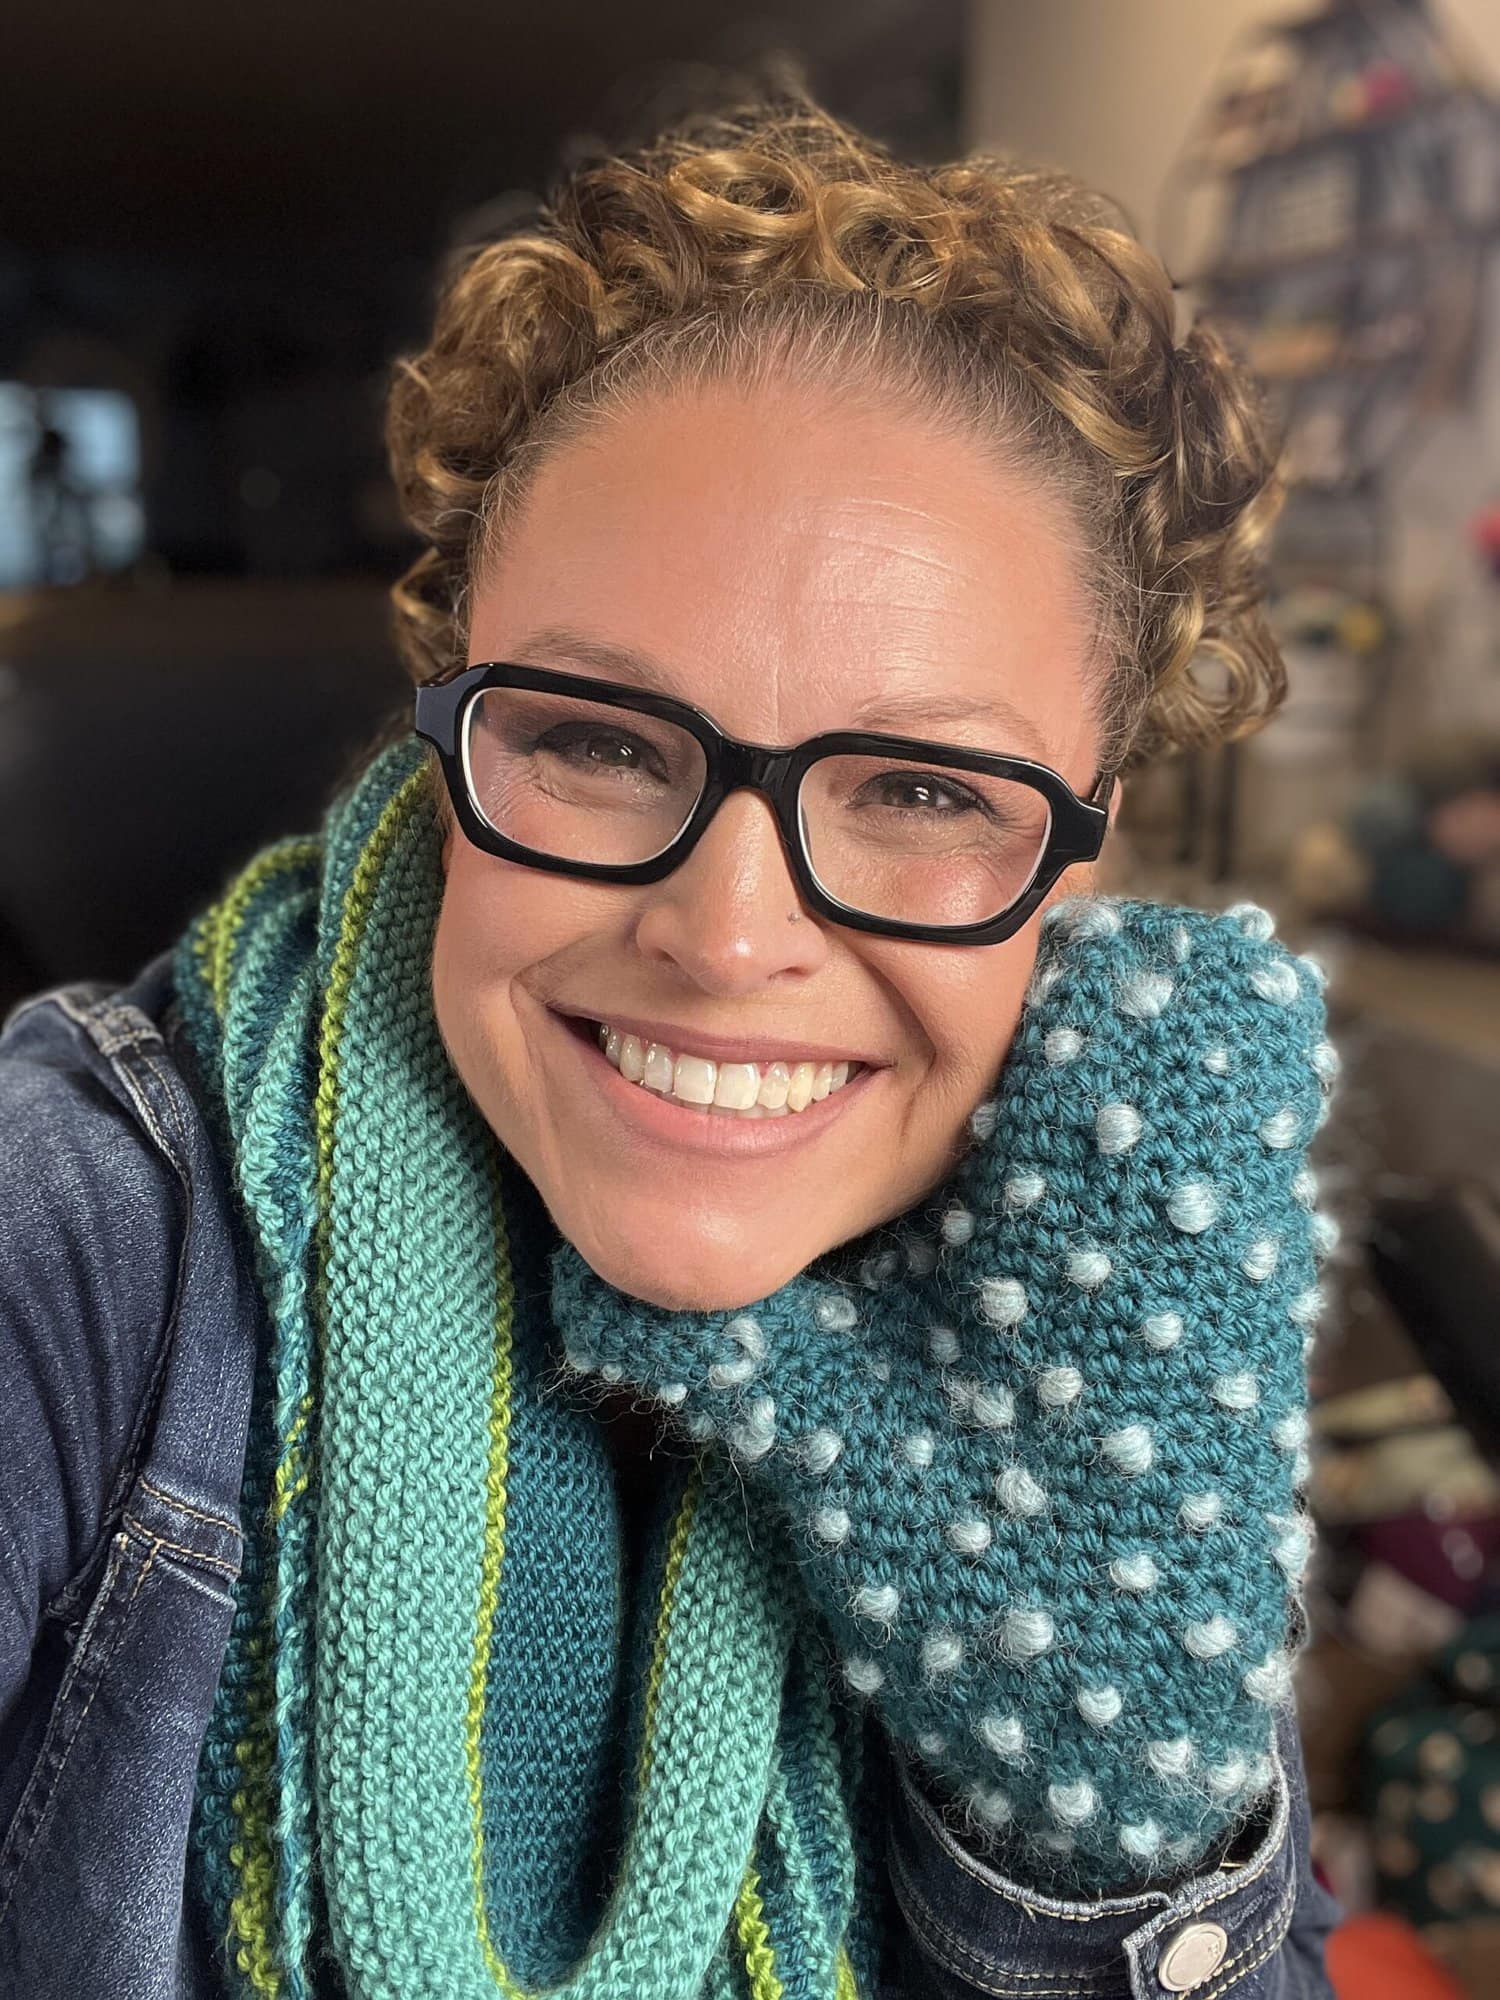
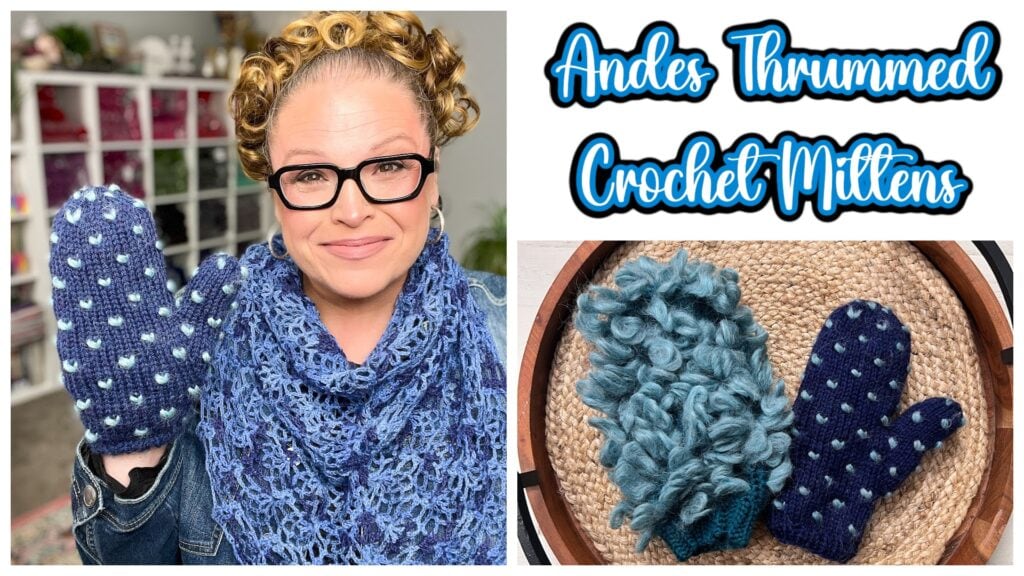
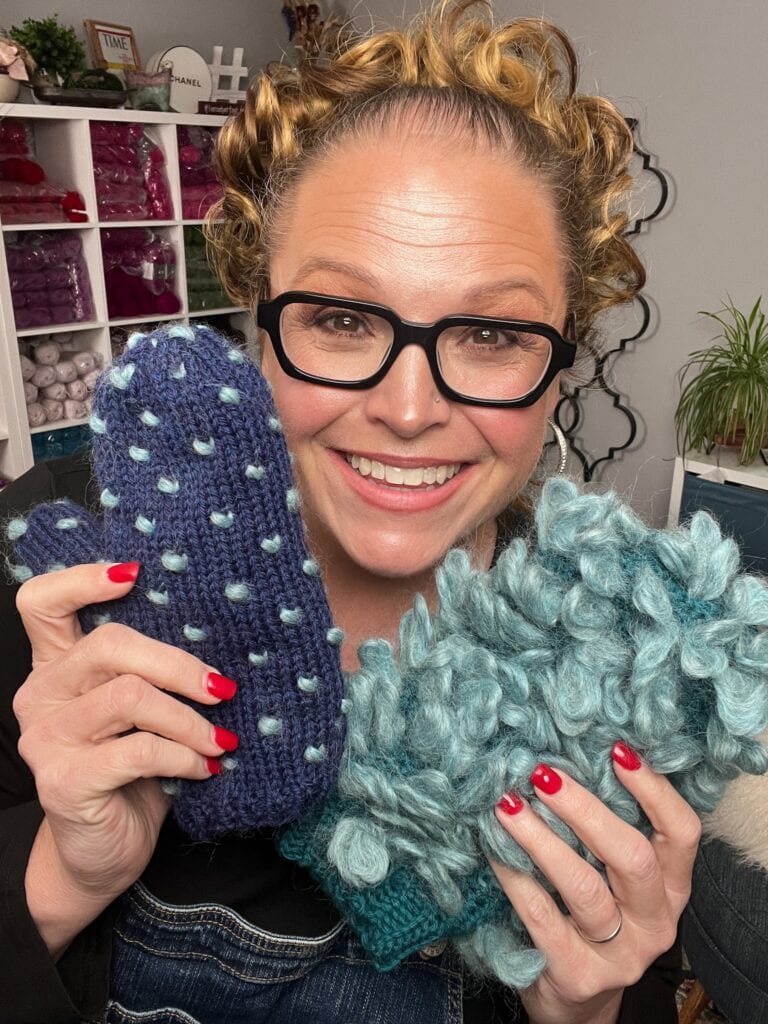
If you’ve never tried a thrummed mitten, you’re in for a treat. These fleece-lined wonders are like little hand hugs — soft, fluffy, and incredibly warm!
The Andes Mittens are part of my First Fall 2025 Knit and Crochet Make-Along, and they’re a perfect way to add a new skill to your knitting toolbox. This free knit thrummed mitten pattern walks you through every stitch to create mittens you’ll actually wear (and everyone will want).
Prefer an ad-free, printable version? The PDF and video tutorial are available in the First Fall VIP Experience, along with three bonus hand warmer patterns and coupons you’ll love.
Affiliate Disclosure: This post contains affiliate links. To learn more please visit my privacy policy here💖
🧤 What Are Thrummed Mittens?
Thrummed mittens originated in Newfoundland and Labrador, Canada — a region famous for brutal winters and cozy knitwear. Instead of regular insulation, thrummed mittens use small tufts of unspun roving (“thrums”) that are knitted into the fabric.
Those fluffy thrums create a soft, felted interior that keeps your hands warm even on the coldest days. Once you wear them, there’s no going back to plain mittens!
If you’re new to thrums, check out my quick tutorial before starting:
👉 https://youtu.be/_AhqavVJ1f4
💖 Why You’ll Love This Free Knit Thrummed Mitten Pattern
- Ultimate Warmth: The roving thrums create a fleece-like lining that traps heat.
- Fun to Knit: Watching the texture grow is strangely addictive!
- Great Stash Buster: Use leftover wool roving or play with color.
- Gift-Ready: These mittens always wow recipients — they look complicated but aren’t!
- Confidence Builder: Perfect for adventurous beginners ready to try something new.
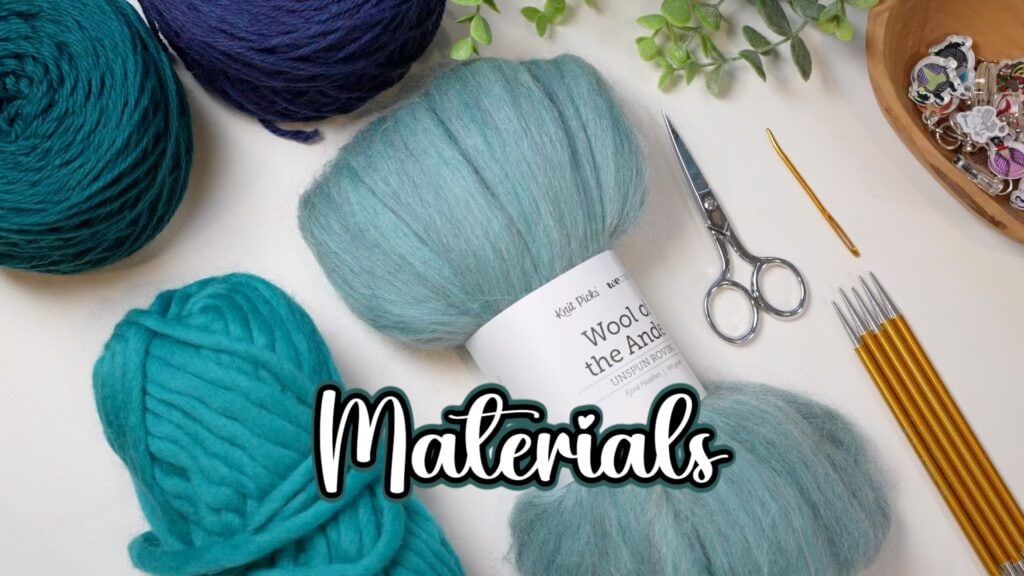
🧶 Yarn + Materials for Thrummed Knit Mittens
For the sample shown, I used Wool of the Andes Bulky from WeCrochet — it’s soft, sturdy, and absolutely perfect for thrummed mittens.
🧵 Yarn Used:
Wool of the Andes Bulky – Get it here
Wool of the Andes Roving – Get it here
🧶 Yarn Alternatives:
- Wool of the Andes Superwash Bulky – Get it here
- Swish Bulky Yarn – Get it here
- Semilla Grosso GOTS – Get it here
All of these bulky-weight wools will make your mittens plush, warm, and long-lasting.
Needles: US Size 8 (5 mm) set of 5 double pointed needles or size to obtain gauge
🪡 Pattern Details & Skill Level
Skill Level: Advanced Beginner to Intermediate
Techniques Used: Knitting in the round, increases/decreases, adding thrums
Sizes: Multiple sizes available in pattern
Gauge: See pattern below
💌 Get the Ad-Free PDF + VIP Experience
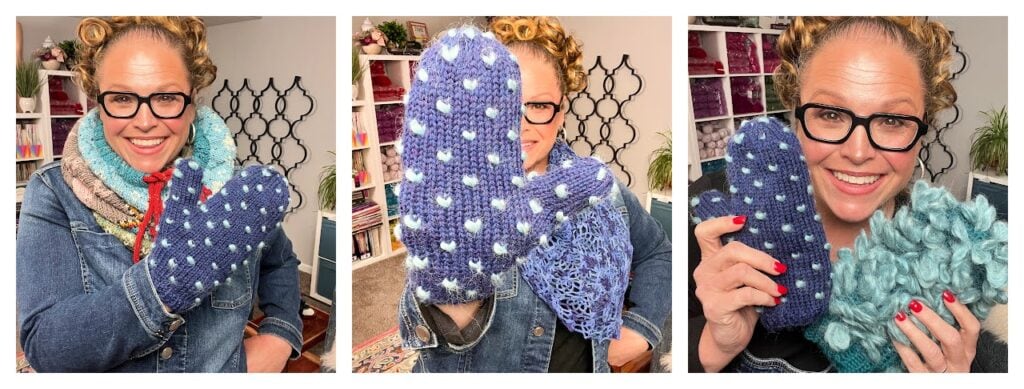
This free knit thrummed mitten pattern is available right here on the blog, but if you’d like to skip the ads and have everything in one tidy package, grab the ad-free PDF + video tutorial inside the First Fall VIP Experience.
When you join VIP, you’ll receive:
✅ Ad-free printable PDF for both Andes Knit + Rockies Crochet Mittens
✅ Exclusive ad-free video tutorials
✅ 3 bonus hand warmer patterns (instant access!)
✅ $5 Ravelry coupon + $5 Jolly Holiday coupon
✅ Unlimited access inside the Marly Bird House
👉 Learn more and join here:
https://marlybird.com/blog/first-fall-2025-knit-and-crochet-make-along-with-marly-bird/
🧤 Free Knit Thrummed Mitten Pattern — Andes Thrummed Knit Mittens — First Fall 2025
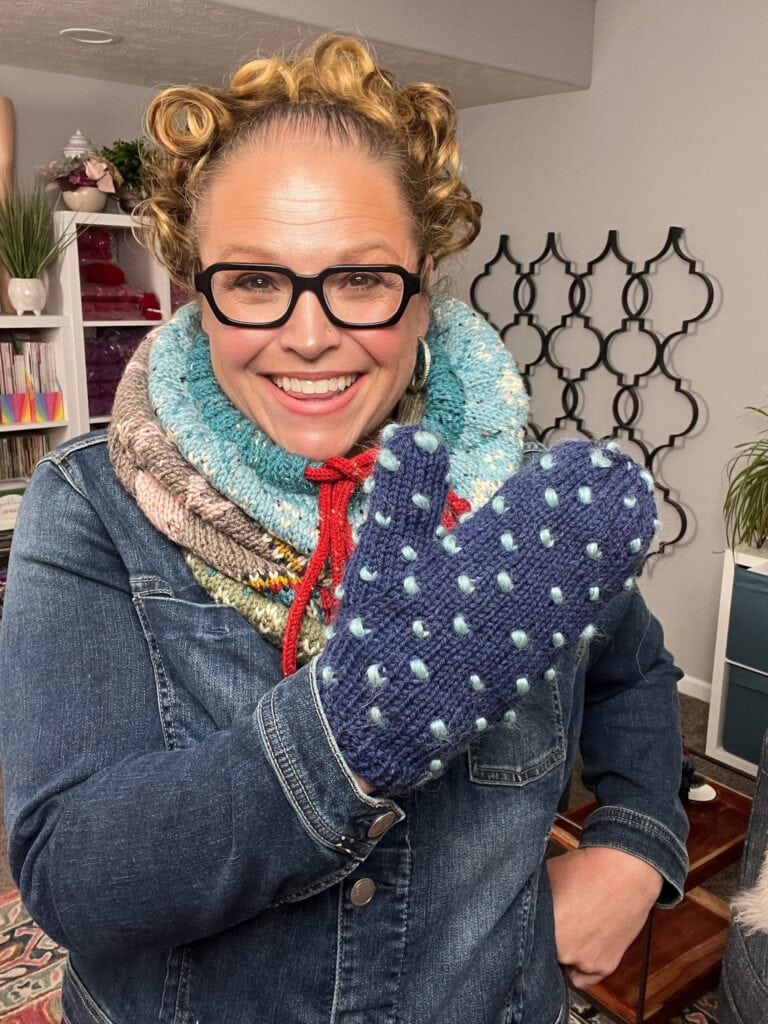
The air’s getting crisp, the PSLs are flowing, and it’s time to stitch up the for the coziest project of the season — the Andes Knit Thrummed Mittens. The easy-to-follow stitch pattern and step-by-step video tutorial make it simple to stay on track, even if you’ve never made thrums before. Once you see those little thrums fluff up inside, you’ll understand why these mittens are pure magic. They’re warm, squishy, and look like something straight out of a snowy mountain lodge. Fair warning — you won’t want to stop after just one pair
SKILL LEVEL Intermediate
MEASUREMENTS
To Fit Sizes
Child (Small Adult, Medium Adult, Large Adult)
To Fit Hand Circumference:
5-6 (6-7, 7-8¼, 8¼-9¾)” [12.5-15 (15-18, 18-21, 21-25) cm]
Finished Measurements
Mitten Circumference: 5½ (6¾, 8, 9¼)” [14 (17, 20.5, 23.5) cm]
Note: The outside fabric of the Mitten will stretch to fit, while the extra fluff of the thrums will take up some of the room inside the Mitten.
Mitten Length: 5½ (6¾, 8, 9¼)” [14 (17, 20.5, 23.5) cm] not including ribbed cuff.
Gauge
18 sts = 4″ [10 cm] in Stockinette st with thrums
MATERIALS
Yarn
Knit Picks, Wool of the Andes Bulky (100% Peruvian Highland wool, 137 yds / 125 m, 3½ oz / 100 g, CYCA #5 bulky)
1 (1, 1, 2) skeins: 28225 Winter Night
Knit Picks, Wool of the Andes Roving (100% Peruvian Highland wool, 3½ oz / 100 g)
1 skein: c28171 Fjord Heather
Note: For best results, choose colors that contrast. This will make it so you can see the thrums on the outside of the Mitten.
Needles
U.S. 8 [5mm] set of 5 double pointed needles, or size needed for gauge
Notions
- Removable stitch markers: https://erinlanebags.com/collections/stitch-markers
- Tapestry needle: https://amzn.to/42LkAui
- Chenille type needle: https://amzn.to/4qfRBbZ
- Quality project bag: https://erinlanebags.com/collections/view-bags
- Stitch saver cord (optional): https://amzn.to/3IOH07j
- Leather tag (optional): https://tidd.ly/47hQAaW
- Leather rivets (optional) https://amzn.to/4eSByem
ABBREVIATIONS
K – Knit
K2tog – Knit 2 Together
P – Purl
Pm – Place Marker
RS – Right Side
Sl – Slip
Slm – Slip Marker
St(s) – Stitches
Tbl – Through the Back Leg
WS – Wrong Side
Yo – Yarn Over
SPECIAL STITCHES
⭐️ Knit Thrum: Holding twisted thrum over forefinger, insert needle into next st.
Slip thrum over right needle so ends are to the inside. Wrap yarn around needle and draw thrum and wrapped yarn through st, keeping working yarn to the left hand side of thrum on the needle.
⭐️ M1L (Make 1 Left): With tip of left needle, pick up the horizontal strand between stitches from front to back. Knit (or purl, as indicated) this strand through the back leg, twisting it into a loop in the process – 1 stitch increased.
⭐️ M1R (Make 1 Right): With tip of left needle, pick up the horizontal strand between stitches from back to front. Knit (or purl, as indicated) this strand, twisting it into a loop in the process – 1 stitch increased.
⭐️ Ssk (Slip, Slip, Knit): Slip 2 stitches, one at a time, as if to knit. Insert left hand needle into the front of these two stitches and knit them together from this position – 1 stitch decreased.
SPECIAL TECHNIQUES
⭐️Backwards e (a.k.a. Backwards Loop) Cast-on Method: * Wrap yarn around left thumb from front to back and secure in palm with other fingers. Insert needle upward through strand on thumb. Slip loop from thumb onto needle, pulling yarn to tighten. Repeat from * for desired number of sts.
PATTERN STITCHES
Stockinette Stitch: Worked circularly over any number of sts.
Every Round: Knit.
1 x 1 Rib: Worked circularly over a multiple of 2 sts.
Every round: * K1, p1; repeat from * around.
Thrummed Pattern (circular): Worked in the round over a multiple of 6 sts.
Rounds 1 and 2: Knit.
Round 3: * K1, Knit Thrum (see Special Stitches), k4; repeat from * around.
Round 4: * K1, knit thrummed st tbl (working through both yarn and thrum strands), k4; repeat from * around.
Rounds 5 and 6: Knit.
Round 7: * K4, Knit Thrum, k1; repeat from * around.
Round 8: * K4, knit thrummed st tbl (working through both yarn and thrum strands), k1; repeat from * around.
Repeat Rounds 1-8 for circular Thrummed pattern.
Thrummed pattern (circular) chart: https://www.stitchfiddle.com/c/sgsswt-5v8nk1
Thrummed Pattern (flat): Worked back and forth in rows over a multiple of 6 sts.
Row 1 (RS): Knit.
Row 2: Purl.
Row 3: * K1, Knit Thrum (see Special Stitches), k4; repeat from * to end.
Row 4: * P4, purl thrummed st tbl (working through both yarn and thrum strands), p1; repeat from * to end.
Row 5: Knit.
Row 6: Purl.
Row 7: * K4, Knit Thrum, k1; repeat from * to end.
Row 8: * P1, purl thrummed st tbl (working through both yarn and thrum strands), p4; repeat from * to end.
Repeat Rows 1-8 for flat Thrummed pattern.
Thrummed pattern (flat) chart: https://www.stitchfiddle.com/en/c/sgrvk1-f5yxep
Note: Mittens are worked entirely in the round. The flat version of Thrummed pattern is given for the purpose of measuring gauge.
ALL CHARTS
Thrummed pattern (circular) chart: https://www.stitchfiddle.com/c/sgsswt-5v8nk1
Thrummed pattern (flat) chart: https://www.stitchfiddle.com/en/c/sgrvk1-f5yxep
Note: Mittens are worked entirely in the round. The flat version of Thrummed pattern is given for the purpose of measuring gauge.
Child Thumb Gusset chart: https://www.stitchfiddle.com/en/c/sgs1sv-7g4jy3
Adult S Thumb Gusset chart: https://www.stitchfiddle.com/en/c/sgs1sk-b2s2pr
Adult M Thumb Gusset chart: https://www.stitchfiddle.com/c/sh34at-9hs92c
Adult L Thumb Gusset chart: https://www.stitchfiddle.com/en/c/sgs1t1-fargfv
Top of Hand shaping chart: https://www.stitchfiddle.com/c/sgst0f-82qup4
NOTES
⭐️ Directions are for the smallest size; changes for all other sizes are in parentheses. When only one number is given then that number applies to all sizes.
⭐️ A thrum is a lock of fleece about 4″ [10 cm] long with both ends folded to the middle, then twisted/rubbed together. Center of thrum should be approximately the same thickness as the yarn being used for the mitten.
⭐️ The end of the thrums (I call them the butterfly) will tuck into the wrong side of the mitten.
⭐️ Prepare thrums prior to beginning the mitten.
⭐️ Mittens are worked entirely in the round from cuff to tops of fingers.
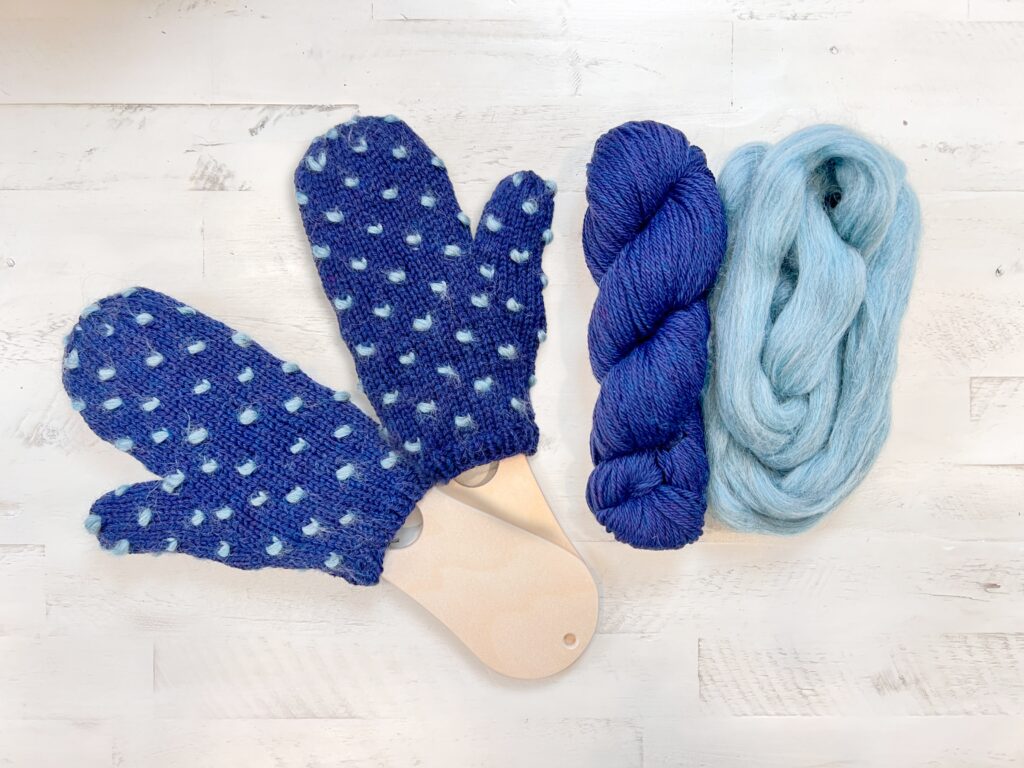
⭐️ Thrums are arranged in a polka-dot pattern; every 6th stitch, and every 4th round.
⭐️ If the thrum is getting sucked in on one side after the knit together through the back leg, just use your needle to pull the sucked in section out (I show how to do this in the video).
VIDEO TUTORIALS
- No cuss cast on with double pointed needles >> https://youtu.be/0d6i5bRL52A <<
- Long-Tail Cast-On >> https://www.youtube.com/watch?v=vEGwt4cedLM <<
- Knit Stitch (continental style) >> https://www.youtube.com/watch?v=M3brKFKg5Yc <<
- Purl Stitch (continental style) >> https://www.youtube.com/watch?v=LuDt-8jqh4g <<
- How to Tink >> https://youtu.be/c7Gud7k4Y8k <<
- How to Bury Ends >> https://youtu.be/8_NBGUKjO-E <<
- Perfect Ribbing >> https://youtu.be/ByLQC3s36mc
- How to add a lifeline to knitting >> https://youtu.be/FiqYUE_aHAw <<
- How to Make a Thrum >> Click Here for Video Help <<
- How to knit the Andes Thrummed Knit Mittens >> Click Here for YouTube Video >> <<

GROW
To Unlock Exclusive Subscriber Content click the Box below and join for free by simply adding your email and creating a password! If you are having troubles, clear your cache or reset your password or login to the Grow Publisher Portal.
>> Learn More About Grow Here <<
I’m thrilled to share this amazing pattern with you, many patterns on my blog are absolutely free! I kindly request that you don’t copy and paste or distribute this pattern. Prefer an ad-free experience? Buy a digital PDF pattern for a small fee from one of my online stores for a seamless crafting journey.
I appreciate your support and readership. You are the reason I can keep doing what I love and sharing it with others. So, thank you from the bottom of my yarn-loving heart! Disclosure: This post contains affiliate links, meaning I get a commission if you decide to make a purchase through my links at no cost to you.
ANDES THRUMMED KNIT MITTENS PATTERN
HAND
Begin working in Thrummed pattern as follows:
Rounds 1 and 2: Knit.
Round 3: * K1, insert right needle in next st, wrap both Thrum and working yarn around right needle and pull both through the st, being sure that the yarn end up on the left of the Thrum on the right needle, k4; repeat from * around.
Round 4: * K1, knit thummed st tbl (working through both yarn and thrum strands), which locks the thrummed st in place and puts the Thrum on top of the working yarn (visible on outside of Mitten), k4; repeat from * around.
Rounds 5 and 6: Knit.
Round 7: * K , insert right needle in next st, wrap both Thrum and working yarn around right needle and pull both through the st, being sure that the yarn end up on the left of the Thrum on the right needle, k1; repeat from * around.
Round 8: * K4, knit thummed st tbl (working through both yarn and thrum strands), which locks the thrummed st in place and puts the Thrum on top of the working yarn (visible on outside of Mitten), k1; repeat from * around.
Work 0 (0, 4, 4) more rounds in established Thrummed pattern.
Thrummed pattern chart: https://www.stitchfiddle.com/c/sgsswt-5v8nk1
Thumb Gusset
Next 7 (11, 13, 17) Rounds:
Round 1 (gusset setup and increase round): Work 6 (6, 3, 3) sts in established Thrummed pattern, pm to mark beginning of Gusset, M1R, k3, M1L, pm to mark end of gusset, work in established Thrummed pattern to end of round.
Count: 5 sts between Gusset markers.
Rounds 2-6 (10, 12, 16): Work in established Thrummed pattern to first Gusset marker, slm, work next round Gusset chart to next Gusset marker, slm, work in established Thrummed pattern to end of round.
Count: 9 (13, 15, 19) sts between Gusset markers.
Round 7 (11, 13, 17): Work in established Thrummed pattern to first Gusset marker, remove marker, place all Gusset sts on Stitch Saver tubing or a holder, remove second Gusset marker, cast on 3 stitches using the Backwards e cast-on method, Work in established Thrummed pattern to end of round.
Count: 24 (30, 36, 42) sts around Hand.
Continue Hand
Work evenly in established Thrummed pattern across all sts for 2½ (3, 3½, 4)” [6.5 (7.5, 9, 10) cm] more, ending after a pattern Round #4 or #8.
Shape Top of Hand
Next 5 Rounds:
Round 1 (decrease round): * Ssk, k2, k2tog; repeat from * around.
Count: 16 (20, 24, 28) sts.
Round 2: Knit.
Round 3 (decrease round): * K2tog, k1, Knit Thrum; repeat from * around.
Count: 12 (15, 18, 21) sts.
Round 4: * K2, knit thrummed st tbl (working through both yarn and thrum strands); repeat from * around.
Round 5 (decrease round): * K2tog, k1; repeat from * around.
Count: 8 (10, 12, 14) sts.
Top shaping chart: https://www.stitchfiddle.com/c/sgst0f-82qup4
FIRST FINISHING
Cut yarn, and thread yarn tail into tapestry needle.
Use tapestry needle to slip each remaining st knitwise off the knitting needle.
Pull tight like a drawstring, closing the top.
Secure yarn tail to wrong side of Mitten.
THUMB
Round 1: With RS facing, pick up the horizontal strand just after the Thumb cast on edge and before the held Thumb sts (this created an extra st on the needle), slip all held Thumb sts purlwise back onto double-pointed needles, pick up the horizontal strand just after the held Thumb sts and before the cast-on edge (this creates another extra st on the needle), then with new working yarn, pick up and k 4 sts from cast-on edge.
Count: 15 (19, 21, 25) sts
Pm to mark beginning of round.
Round 2: Twist first st on left needle (this is the picked up horizontal strand), k2tog, k7 (11, 13, 17), slip 1 purlwise, twist next st on left needle (this is the other picked up horizontal strand), slip first st on right needle back onto the left needle and k2tog, k4.
Count: 13 (17, 19, 23) sts
Note: There will be either 1 extra st or 1 missing st from Thrummed pattern at inner Thumb. This can be remedied by doing a discreet increase or decrease, though this will affect the circumference of the Thumb. We recommend just ignoring the st, see the video tutorial for tips.
Work evenly in Thrummed pattern until Thumb measures 1¾ (1¾, 2, 2¼)” [4.5 (4.5, 5, 5.5) cm] from picked up sts, ending after a pattern Round #2 or #6.
Next Round: K1, * k2tog; repeat from * around.
Count: 7 (9, 10, 12) sts.
Optional Round: *k2tog; repeat from * around.
FINAL FINISHING
Cut yarn, and thread yarn tail into tapestry needle.
Use tapestry needle to slip each remaining st knitwise off the knitting needle.
Pull tight like a drawstring, closing the top.
Secure yarn tail to wrong side of Mitten.
Weave in all loose ends.
Add leather tag with leather rivets (optional).

🔗 Helpful Resources + Related Posts
- How to Make Thrums for Mittens (Knit & Crochet) –
- First Fall 2025 Knit and Crochet Make-Along with Marly Bird – https://marlybird.com/blog/first-fall-2025-knit-and-crochet-make-along-with-marly-bird/
- Free Crochet Mitten Patterns – https://marlybird.com/blog/free-crochet-mitten-patterns/
- Free Knit and Crochet Holiday Patterns – https://marlybird.com/blog/free-knit-and-crochet-holiday-patterns/
- How to Make a Gauge Swatch in Crochet (great for fiber comparisons) – https://marlybird.com/blog/how-to-make-a-gauge-swatch-in-crochet-free-worksheet-step/
❓ FAQs
What makes thrummed mittens special?
Each mitten is lined with soft wool roving that felts slightly as you wear it, creating a warm, cushioned interior.
Can beginners knit thrummed mittens?
Yes! If you can knit in the round and follow increases/decreases, you can handle this pattern — the video tutorial helps too.
What yarn works best for thrummed mittens?
A slightly “sticky” wool like Wool of the Andes Bulky works best because it holds the thrums securely.
Where can I buy the ad-free PDF?
You can grab it inside the First Fall 2025 VIP Experience for easy printing and bonus extras.
Do I need special tools?
Just your regular knitting needles, roving, and a bit of patience while making all those thrums!
💭 Final Thoughts
There’s something magical about knitting a project that’s as practical as it is cozy. These thrummed knit mittens aren’t just another pattern — they’re a comfort project. Every little tuft of roving you add turns ordinary stitches into something extraordinary, wrapping your hands in warmth (and love) all winter long.
Whether you’re joining me for the First Fall 2025 Make-Along or working through this free knit thrummed mitten pattern on your own time, I hope the Andes Mittens remind you that simple stitches can make something truly special.
If you loved this pattern, be sure to check out the VIP Experience for ad-free PDFs, bonus tutorials, and three bonus hand warmer patterns that coordinate perfectly with your mittens.
Now grab your yarn, make a lot of thrums, and knit yourself a little piece of warmth you’ll reach for year after year. 💕
Your BiCrafty Bestie,
Marly Bird 🧶
#MarlyBird #FreeKnitThrummedMittenPattern #AndesMittens #ThrummedMittens #FreeKnitPattern #KnitMittens #WeCrochet #FirstFallMakeAlong #FiberArts #YarnLove #BiCraftyBestie
Categories: Uncategorized

