
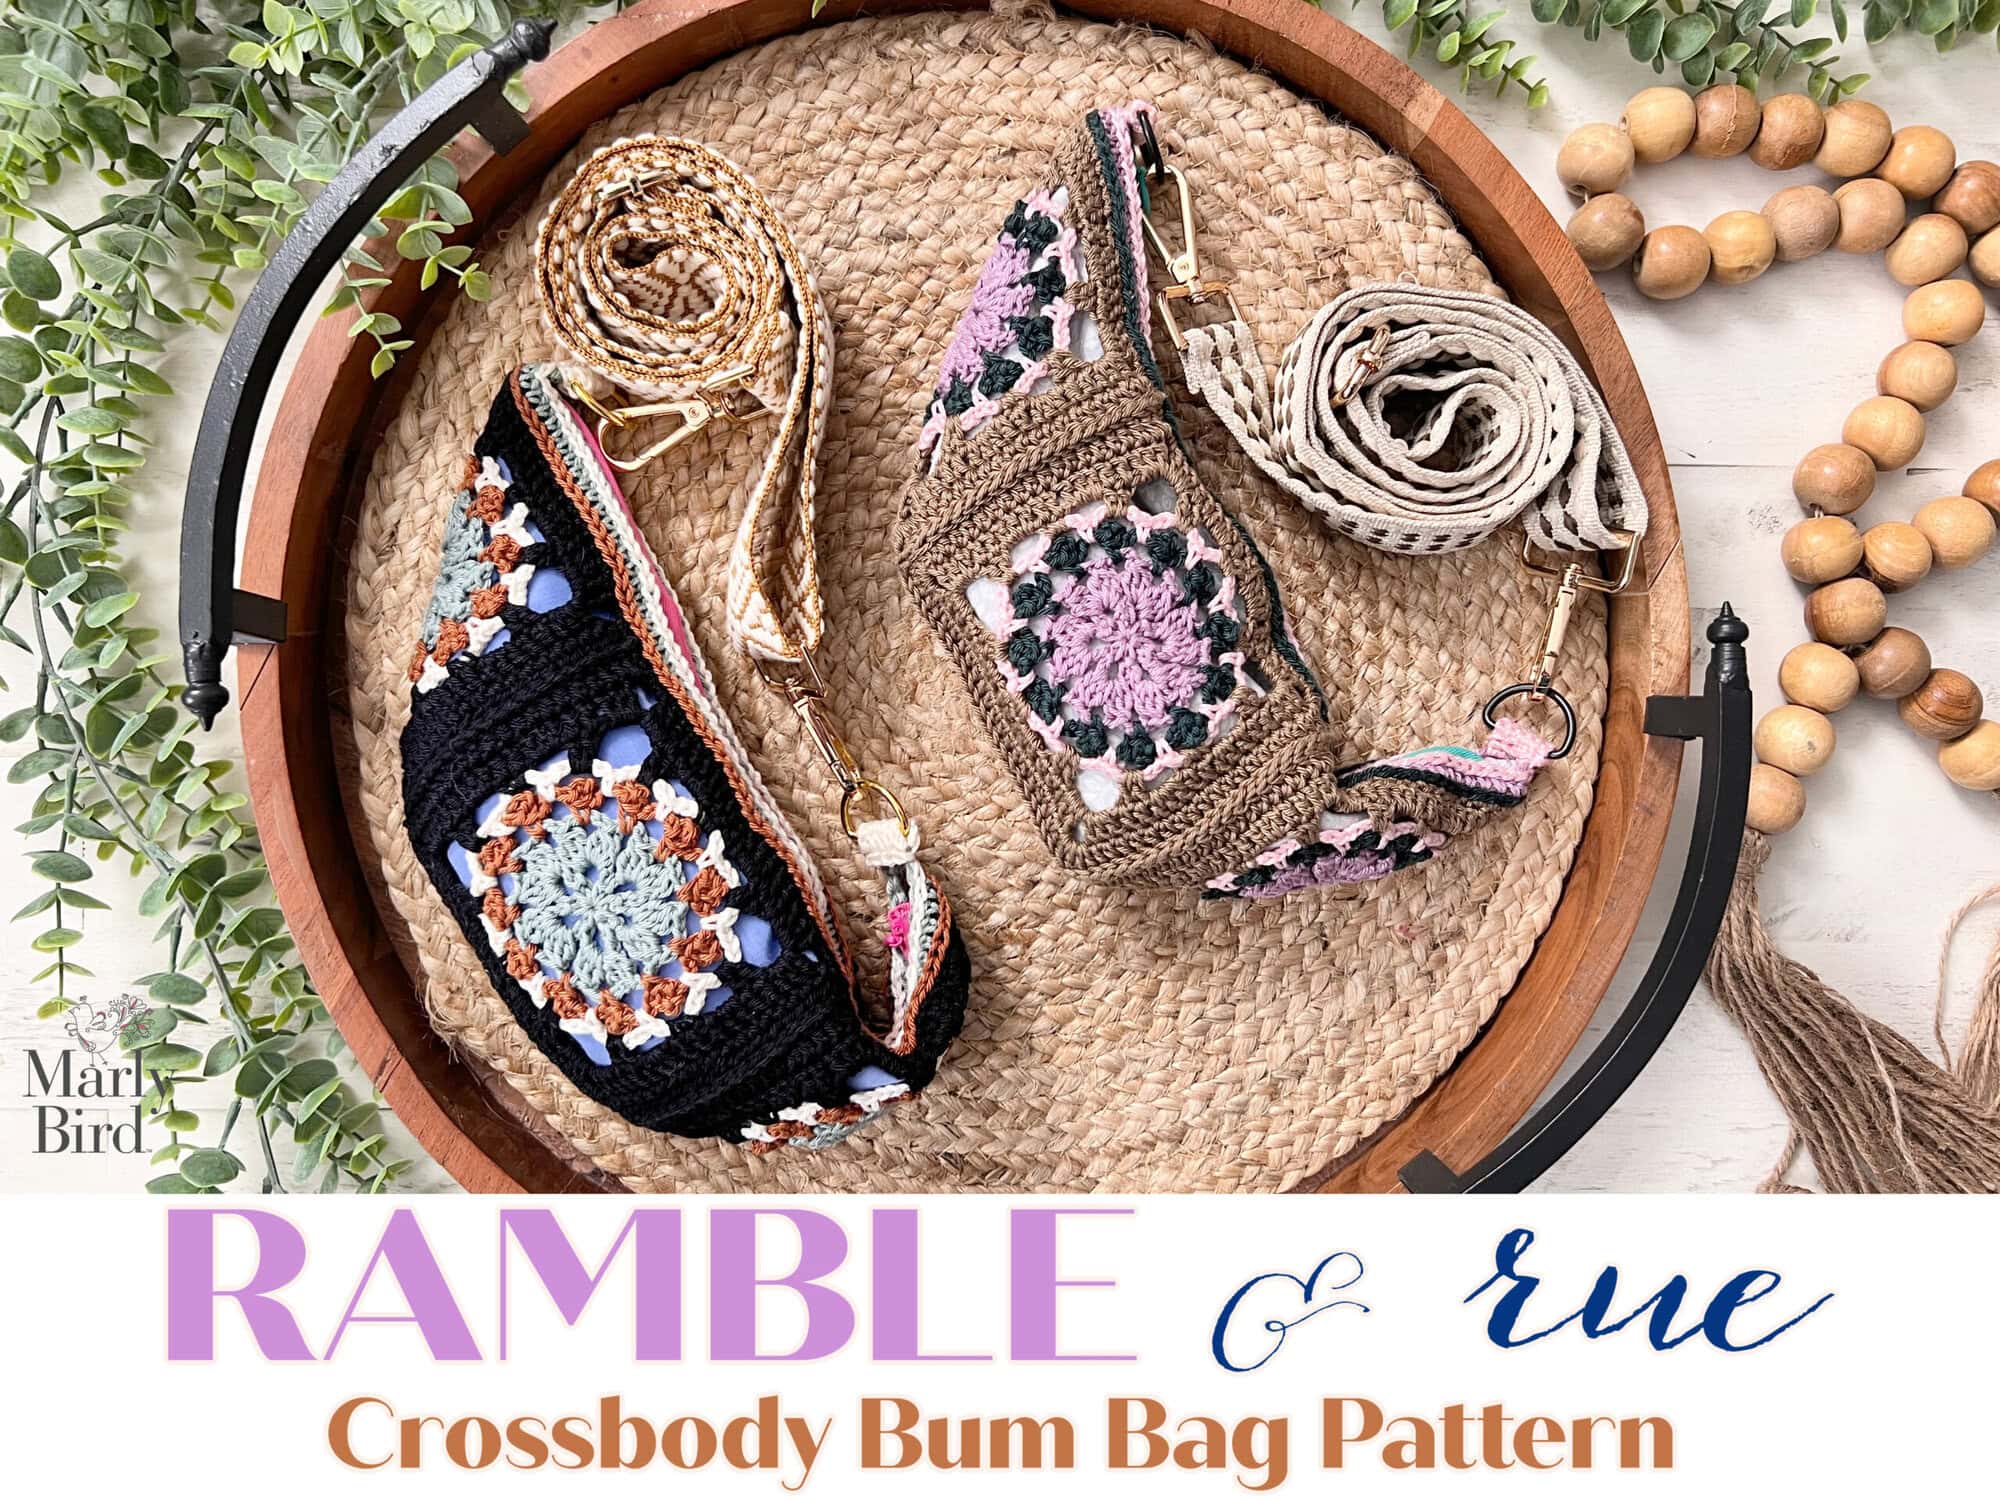
Free Crochet Crossbody Bag Pattern – Ramble and Rue Belt Bag
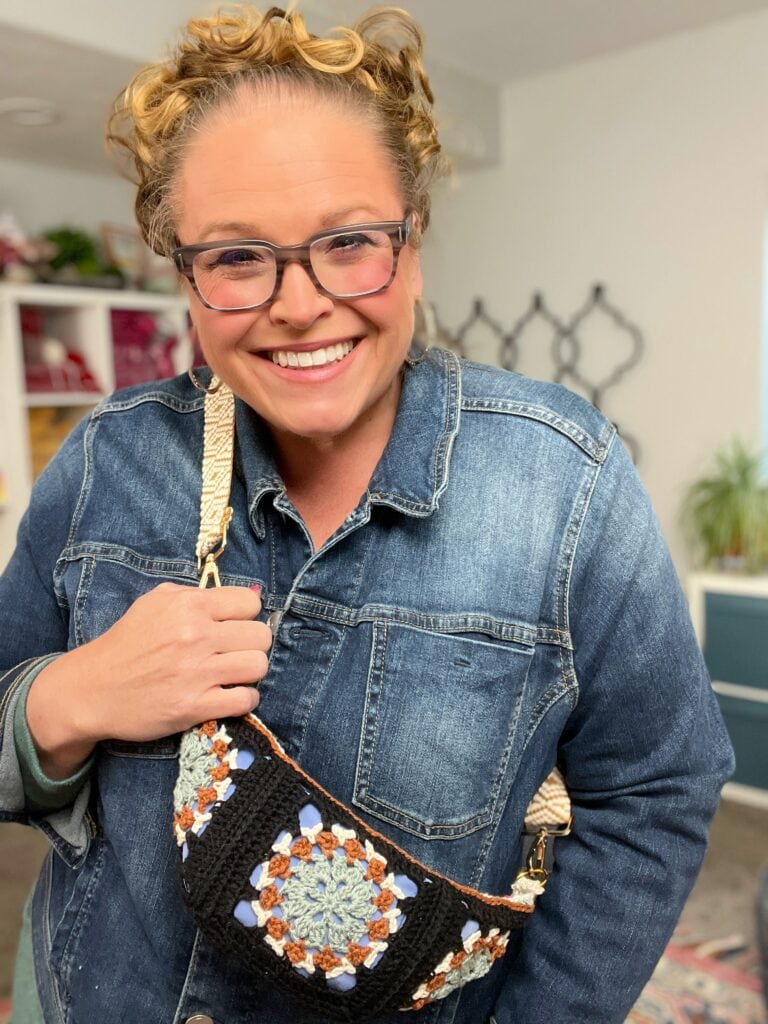
Looking for the perfect hands-free, stylish, and practical crochet project? The Ramble and Rue Crochet Bag is your new favorite accessory! This boho style bag (also called a crossbody bag, bum bag, fanny pack, or belt bag) combines vintage granny square charm with modern function. With a sturdy zipper, a fabric lining, and a detachable strap, it’s as functional as it is fun to make.
And yes—this is a free crochet crossbody bag pattern, available right here on the blog. If you’d like a printable version, you can also grab the ad-free PDF in my shops.
Affiliate Disclosure: This post contains affiliate links. To learn more please visit my privacy policy here💖
Why You’ll Love the Ramble and Rue Crochet Bag
The best crochet projects are the ones you’ll actually use every day, and this one checks all the boxes:
- Hands-Free Convenience – Wear it crossbody, around your waist, or even slung over the shoulder.
- Stash-Busting Friendly – Perfect for mixing and matching yarn colors from your collection.
- Beginner Friendly with a Twist – Uses classic granny squares but adds shaping, joining, and bag construction for a fun challenge.
- Practical Details – The lining keeps your essentials secure, while the zipper ensures nothing slips out.
💡 Pro tip: This bag makes a fantastic handmade gift. Just pick your recipient’s favorite colors and customize the strap length to fit their style.
Crochet Bag Terminology: Crossbody, Bum Bag, Fanny Pack, or Belt Bag?
If you’re searching online, you’ll find a lot of different names for this style of bag. Here’s the quick breakdown:
- Fanny Pack – Common in the U.S., typically worn around the waist.
- Bum Bag – Popular in the U.K., essentially the same as a fanny pack.
- Belt Bag – Fashion-forward term, often referring to sleeker designs.
- Crossbody Bag – The most versatile, worn across the chest or back.
The Ramble and Rue Crochet Bag works beautifully in all these styles. Thanks to the adjustable strap, you can wear it however you like.
Supplies You’ll Need for Crossbody Bag
Yarn
Choose a worsted weight yarn for a sturdy, structured bag. Cotton yarns are ideal since they hold shape well, but acrylic also works beautifully. Great options include:
- Comfy (budget-friendly & durable)
- Lion Brand 24/7 Cotton (smooth and sturdy)
- Dishie (vibrant colors and strong stitch definition)
Hook
Use the hook size that gives you gauge and produces a dense fabric. A smaller hook than usual may help prevent gaps.
Notions & Hardware
- Tapestry needle for weaving in ends
- Scissors
- Stitch markers
- Zipper (7–9 inches)
- Swivel hooks or D-rings
- Optional adjustable strap or make your own crochet strap
Bag Lining & Zipper
Adding a fabric lining will prevent stretching and give your bag a professional look. Choose a lightweight cotton fabric in a fun print or neutral shade. The zipper should match your chosen length and can be installed by hand or machine.
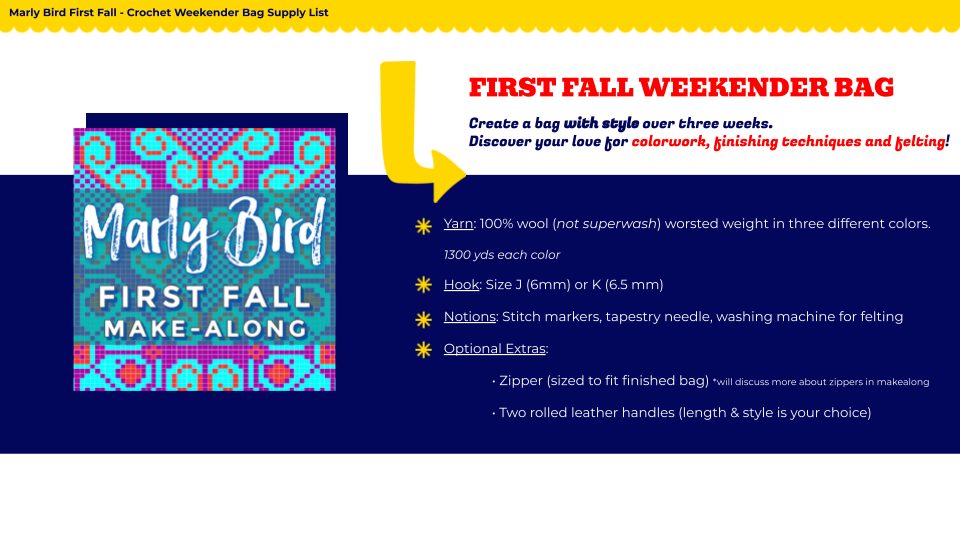
👉 Need help with bag lining? Check out my How to Add a Lining to a Crochet Bag tutorial with ErinLane Bags — This video is exclusive to the First Fall Weekender Bag VIP available here.
Special Construction Features of the Crochet Crossbody Bag
Granny Squares with a Twist
At its heart, this is a granny square crochet bag pattern, but instead of a blanket or tote, we’re transforming those squares into a practical crossbody design. The squares are joined with a solid base, giving structure while showing off the retro motif.
Adding the Lining
While optional, lining your crochet belt bag ensures that small items (like lip balm, earbuds, or keys) don’t slip through the stitches. It also helps the bag hold its shape over time. If you’re new to linings, don’t worry—I’ve included step-by-step instructions that even a sewing beginner can follow.
Installing the Zipper
A zipper might feel intimidating, but it’s easier than you think. With some simple pinning and stitching, you’ll have a secure closure that looks store-bought. Plus, you can choose a zipper color that blends in or contrasts for extra flair.
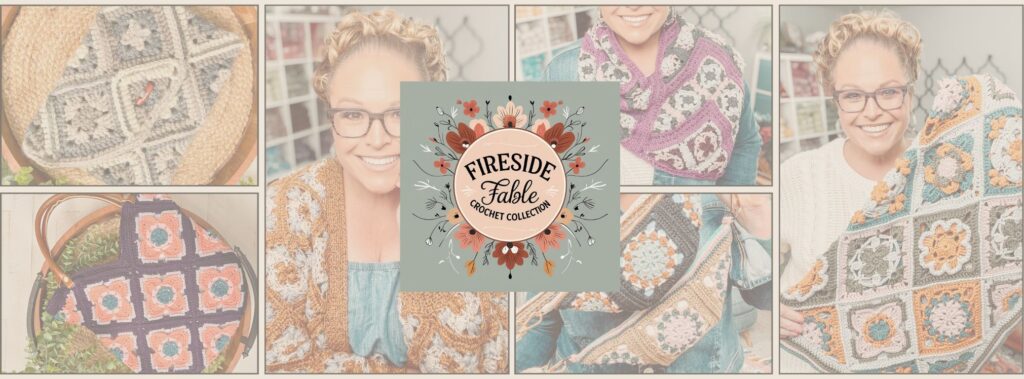
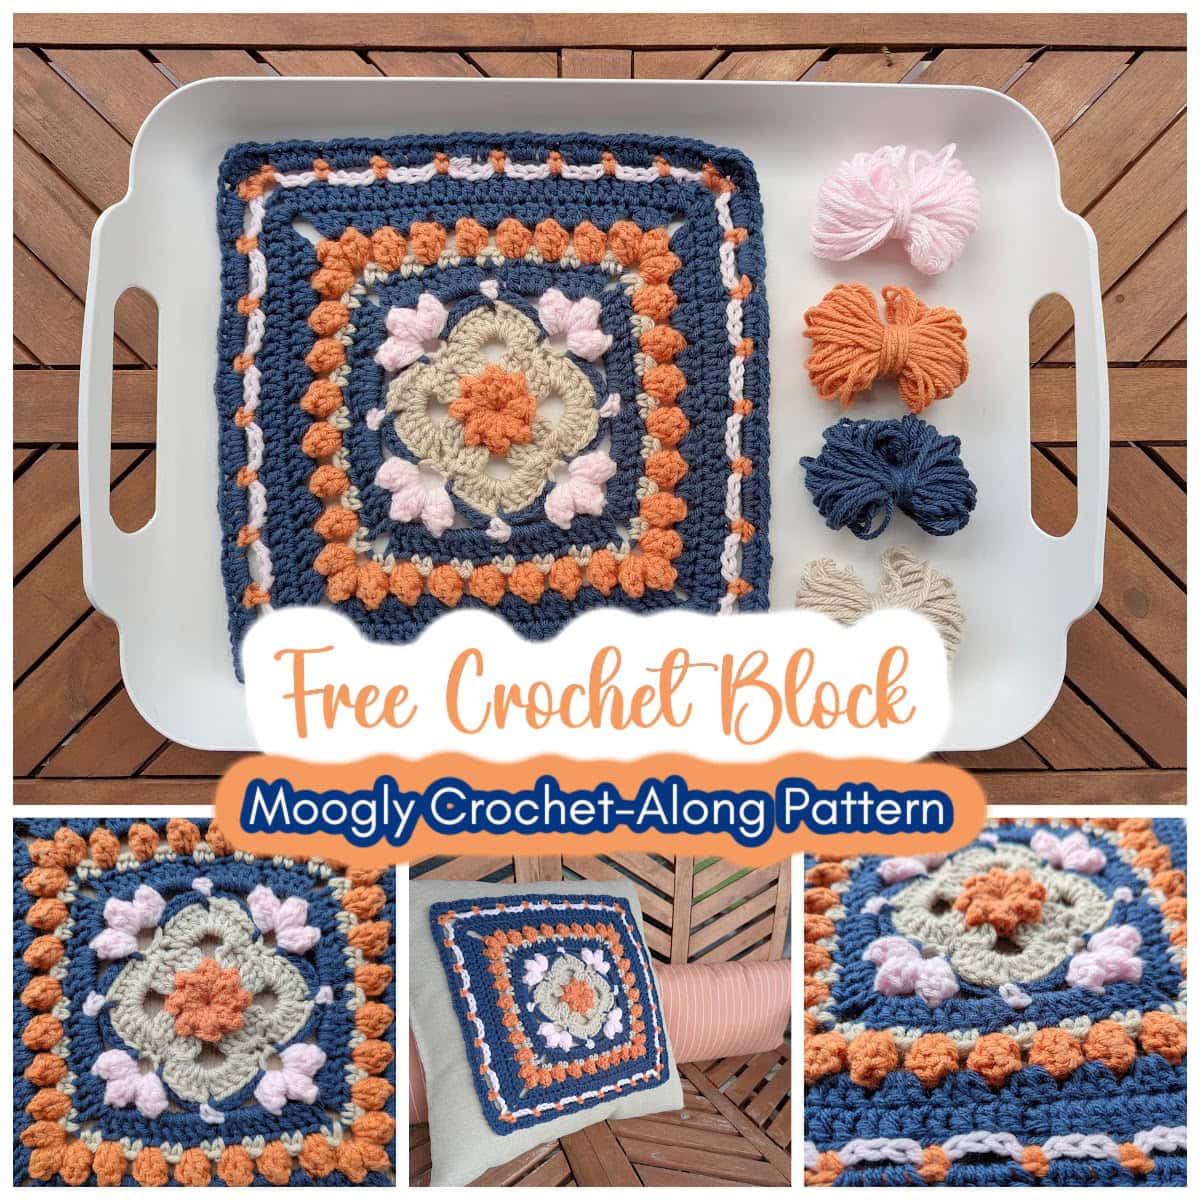
Get More Crochet You’ll Love: The Fireside Fable Crochet Collection
If you’re in the mood for even more cozy makes, you won’t want to miss the Fireside Fable Crochet Collection. This special collection features six motif-based projects designed by me and Robyn Chachula, blending texture, warmth, and modern style.
Inside the collection, you’ll find:
- 🧶 Rosewood Cowl – an elegant motif accessory for layering
- 🧶 Marigold Morning Cardigan – puff sleeves + vintage romance in sizes XS–5X
- 🧶 Hazel & Honey Baby Blanket – heirloom-worthy with popcorns, lace, and texture
- 🧶 Cover Story Cozy – part iPad cover, part clutch, all charm
- 🧶 Ramble & Rue Bum Bag – yes, this bag is part of the collection!
- 🧶 Lilac & Leather Bag – chic and versatile for everyday wear
The Fireside Fable collection is available as a bundle so you can grab all six patterns at once and stitch your way through projects that are as fun to make as they are to gift.
👉 Click here to explore the Fireside Fable Crochet Collection.
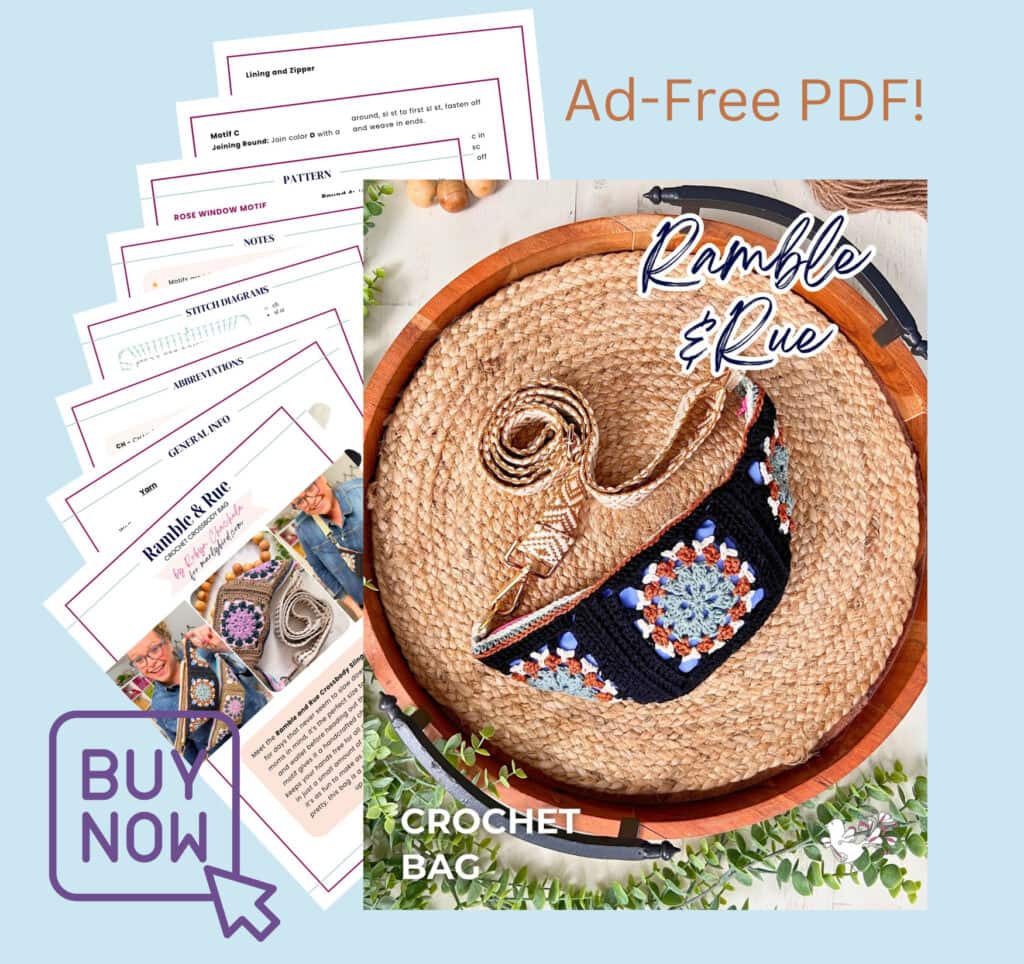
🎁 Upgrade to just the Ad-Free PDF Pattern
Want to skip the other patterns and all the ads on the free pattern here…you can enjoy a beautifully formatted pattern? The ad-free PDF includes:
- Instructions in easy-to-read layout
- Easy-to-follow written instructions
- Exclusive Access to stitch diagram
📌 Get the Ramble and Rue Crossbody Bum Bag Ad Free PDF
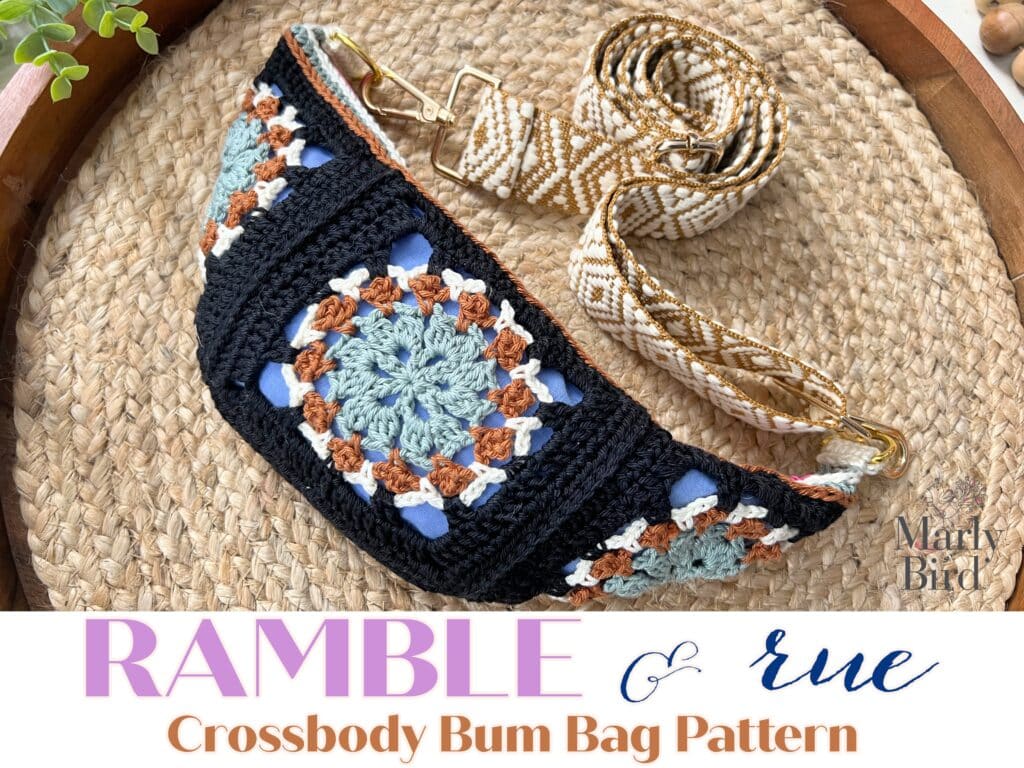
Free Ramble and Rue Crochet Bag Pattern
CROCHET MOTIF SLING/ BUM BAG/ CROSSBODY Designed by Robyn Chachula for MarlyBird.com
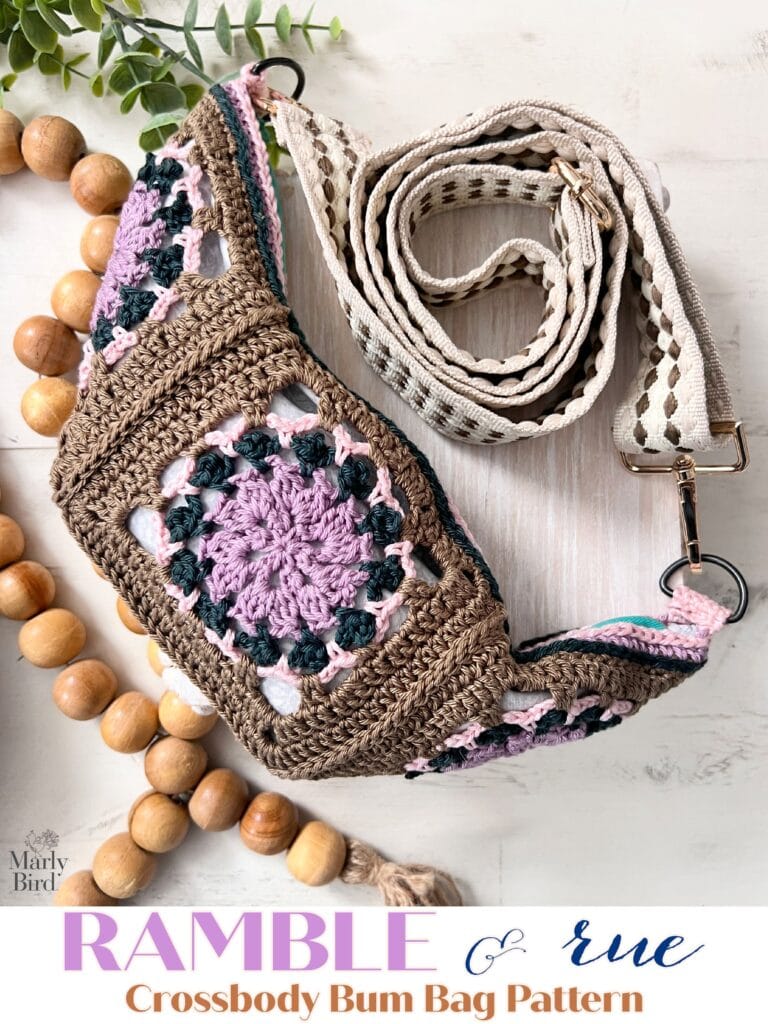
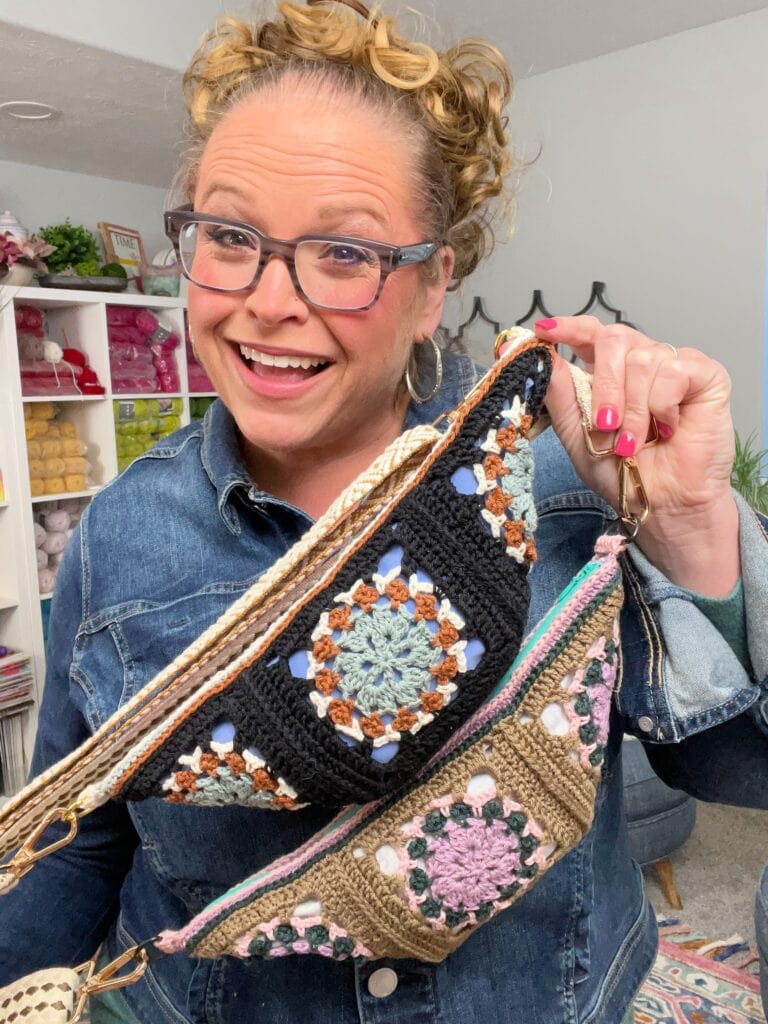
Meet the Ramble and Rue Crossbody Sling Bag, your new go-to for days that never seem to slow down. Designed with busy moms in mind, it’s the perfect size to toss in your phone, keys, and wallet before heading out the door. The playful crochet motif gives it a handcrafted charm, while the crossbody sling keeps your hands free for all of life’s little adventures. Worked up in just a small amount of cotton yarn and four cheerful colors, it’s as fun to make as it is to wear. Equal parts practical and pretty, this bag is a stylish reminder that handmade can keep up with even the busiest of days.
SKILL LEVEL
Intermediate
MEASUREMENTS
Finished Measurements
Bag is 13” [33 cm] wide by 5” [12.5 cm] deep.
Gauge
1 motif = 4” [10 cm] by 4” [10 cm]; use any size hook to obtain the gauge.
MATERIALS
Crochet Yarn
WeCrochet, Animation (100% Mercerized Cotton, 139 yds / 127 m, 1.75 oz/ 50 g, CYCA# 3 DK)
Colorway #1, 1 ball each:
Color A: #2688 Inlet
Color B: #2699 Sunbaked
Color C: #2700 Swan
Color D: #2675 Black
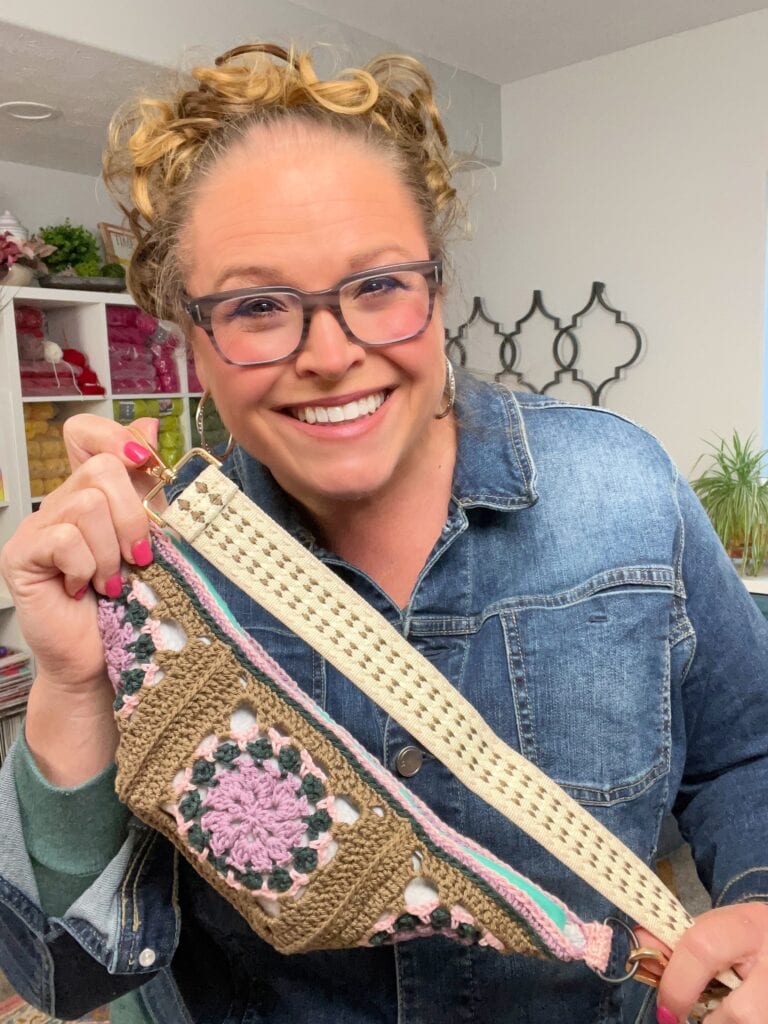
Colorway #2, 1 ball each:
Color A: #2692 Lilac Mist
Color B: #2685 Douglas Fir
Color C: #2677 Blush
Color D: #2695 Mushroom
Crochet Hook
Size E/4 [3.5 mm]
Notions
- Tapestry Needle
- Scissors
- Tape Measure
- (2) 1” [25.5 cm] wide D rings
- Purse Strap
- 16” x 16” [40.5 x 40.5 cm] coordinating fabric for lining
- 14” [35.5 cm] long Invisible Zipper
- Sewing thread and needle
ABBREVIATIONS
Ch – Chain(s)
Dc – Double Crochet
Hdc – Half Double Crochet
RS – Right Side
Sc – Single Crochet
Sl st – Slip Stitch
Sp(s) – Space(s)
St(s) – Stitch(es)
Stacked Dc – Stacked Double Crochet
Tch – Turning Chain
WS – Wrong Side
SPECIAL STITCHES
⭐️2 Double Crochet Cluster (2dc-cl): *Yarn over hook, insert hook into indicated st, yarn over and pull up a loop, yarn over and draw through 2 loops on hook; repeat from * once more in same st, yarn over and draw through all 3 loops on hook.
⭐️3 Double Crochet Cluster (3dc-cl): *Yarn over hook, insert hook into indicated st, yarn over and pull up a loop, yarn over and draw through 2 loops on hook; repeat from * twice more in same st, yarn over and draw through all 4 loops on hook.
⭐️ Stacked Double Crochet (Stacked Dc): (Do not ch 1 prior to making the first sc) Sc in first stitch, insert hook in between two legs of the base, yarn over and pull up a loop, yarn over and draw through 2 loops on hook.
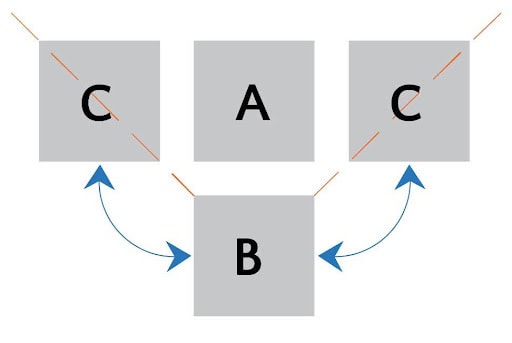
LAYOUT
STITCH DIAGRAM
Stitch diagram for joining round is only available in the ad-free PDF.
NOTES
- Motifs are joined as you crochet the joining row. You can use any method to join the motifs using the placement in the layout.
- There are multiple options for the lining. If you want a more professional look, make two linings to have the seams hidden from the inside and outside of the bag. If you choose to do that, you will need more fabric.
VIDEO TUTORIALS
- How to Bury Ends >> Click Here for Video Help <<
- Stacked Double Crochet >> Click Here for Video Help <<
- Standing Double Crochet >> Click Here for Video Help <<
- Lining and Inserting Zipper >> COMING SOON <<
RAMBLE AND RUE CROCHET MOTIF SLING BAG PATTERN
Make 4.
Make an adjustable ring with color A.
Round 1 (RS): Ch 1, [sc in ring, ch 6] 5 times, sc in ring, ch 3, dc in first sc (counts as ch-6 sp), close ring, do not turn – 6 ch-6 sps.
Round 2: Ch 2, 2 dc-cl around post of dc, *ch 3, (3 dc-cl, ch 3, 3 dc-cl) in next ch-6 sp; repeat from * around, ch 3, 3 dc-cl in first ch-sp, ch 3, sl st to first dc-cl, fasten off color A, do not turn – 12 dc-cl + 12 ch-3 sps.
Round 3: Join color B with a sc in any ch-3 sp, ch 4, sl st to prev sc (counts as picot), *ch 4, sc in next ch-3 sp, ch 4, sl st to prev sc; repeat from * around, ch 4, sl st to first sc, fasten off color B, do not turn – 12 picots + 12 ch-4 sps.
GROW
To Unlock Exclusive Subscriber Content click the Box below and join for free by simply adding your email and creating a password! If you are having troubles, clear your cache or reset your password or login to the Grow Publisher Portal.
>> Learn More About Grow Here <<
I’m thrilled to share this amazing pattern with you, many patterns on my blog are absolutely free! I kindly request that you don’t copy and paste or distribute this pattern. Prefer an ad-free experience? Buy a digital PDF pattern for a small fee from one of my online stores for a seamless crafting journey.
I appreciate your support and readership. You are the reason I can keep doing what I love and sharing it with others. So, thank you from the bottom of my yarn-loving heart! Disclosure: This post contains affiliate links, meaning I get a commission if you decide to make a purchase through my links at no cost to you.
JOINING
Stitch diagram for joining round is only available in the ad-free PDF.
📌 Get the Ramble and Rue Crossbody Bum Bag Ad Free PDF
See layout for assistance on placement of motifs.
Motif A
Joining Round: Join color D with a standing dc in any ch-3 sp corner, dc in same ch-3 sp, [dc in each dc to next ch-3 sp, 5 dc in next ch-3 sp, place marker in middle dc] twice, dc in each dc to last ch-3 sp, 2 dc in last ch-3 sp, fasten off.
Motif B
Joining Round: Join color D with a standing dc in any ch-3 sp corner, dc in same ch-3 sp, dc in each dc to next ch-3 sp, 2 dc in next ch-3 sp, dc join to marked dc on Motif A in same ch-3 sp on Motif B, place marker, hdc join to next 2 sts on Motif A in same ch-3 sp on Motif B, [hdc join to next st on Motif A in next dc on Motif B] repeat across until next ch-3 sp on Motif B, hdc join to next 2 sts on Motif A in next ch-3 sp on Motif B, dc join to next st (marked stitch) on Motif A in same ch-3 sp on Motif B, place marker, 2 dc in same ch-3 sp, dc in each dc to last ch-3 sp, 2 dc in last ch-3 sp, fasten off.
Motif C
Joining Round: Join color D with a hdc join to first st on adjoining motif in any ch-3 sp corner, hdc join to next st on adjoining motif in same ch-3 sp, [hdc join to next st on adjoining motif in next dc on Motif C] repeat across until next ch-3 sp on Motif C, hdc join to next 2 sts on adjoining motif in next ch-3 sp on Motif C, dc join to next st (marked stitch) on adjoining motif in same ch-3 sp on Motif C, hdc join to next 2 sts on adjoining motif in same ch-3 sp on Motif C, [hdc join to next st on adjoining motif in next dc on Motif C] repeat across until next ch-3 sp on Motif C, hdc join to next 2 sts on adjoining motif in next ch-3 sp on Motif C, fasten off.
FINISHING
Edging
Round 1: Join color D with a sc in any st along the top edge, sc evenly around top edge of bag, sl st to first sc, fasten off and weave in ends.
Round 2: Join color B with sl st in any sc of Round 1, sl st in each sc around, sl st to first sl st, fasten off and weave in ends.
Round 3: Join color A with a hdc in any sc of Round 1, hdc in each sc around, sl st to first hdc, fasten off and weave in ends.
Round 4: Join color C with a sl st in any hdc of Round 3, sl st in each hdc around, sl st to first st, fasten off and weave in ends.
Tabs
Note: Tabs are located on each long edge to attach D-rings and the purse handle. Locate the center stitch of the bag along the long edge (will be above the corner of the motif), mark off 2 sts from the center stitch.
Row 1: Join color C with a sc in the marked stitch, sc in next 4 sts, turn- 5 sc.
Rows 2-5: Ch 1, sc in each sc, turn.
Fasten off with long tail for seaming. Thread on a D ring. Fold tab over and with tail, seam last row to first row.
Lining and Zipper
- Fold fabric in half with right side on the inside.
- Trace outline of bag onto fabric with washable or disappearing fabric marker (or make the outline with painters tape, if you do not have a fabric marker).
- Mark off ⅜” [1 cm] side and bottom edges.
- Mark off 1” [2.5 cm] top edge.
- Cut out fabric on Marked edges.
- Using sewing needle and thread backstitch a ⅜” [1 cm] seam on the sides and bottom edge.
- Iron side and bottom seam open.
- (optional): Fold seam over again and iron, seam to lining or using fusible webbing iron in place.
- Fold and iron top edge ½” [1.3 cm] down.
- Fold and iron top edge down again.
- (optional) Make a second lining and place seams on the inside.
- Place lining in the crochet bag, pin in place.
- Using sewing needle and thread, whip stitch lining to bag.
- Pin one side of the zipper into the bag.
- Backstitch zipper with sewing needle and thread through the top edging.
- Open the zipper and pin other side of zipper into bag.
- Backstitch zipper with sewing needle and thread through the top edging.
- Tack the top and bottom of the zipper in place to the lining.
Tips for Customizing Your Bag
The beauty of handmade accessories is making them your own!
- Color Combos – Try earth tones for a neutral everyday bag, or bold brights for a playful statement piece.
- Strap Length – Adjust the strap to make it a crossbody, waist bag, or even a shoulder bag.
- Zipper Contrast – A brightly colored zipper can add a fun design element.
- Personal Touches – Add a tassel, patch, or even embroidery to make your bag unique.
For more ways to use your leftover yarn, check out my Stash-Busting Crochet Patterns.
FAQ About Crochet Crossbody Bags
Can I make this bag bigger?
Yes! Add more granny squares or use a larger hook and thicker yarn to increase the size.
Do I have to add a lining?
Technically no, but without a lining the bag may stretch and smaller items could poke through. For durability, lining is highly recommended.
Can I use chunky yarn instead of worsted?
Yes, but keep in mind the finished bag will be larger and may require a longer zipper.
Can beginners make this?
If you’re comfortable with basic crochet stitches and joining granny squares, you can definitely tackle this project. The zipper and lining are broken down step by step.
More Crochet Bag Patterns You’ll Love
Looking for more trendy crochet bag ideas? Try these:
Get the Ad-Free PDF
Want to crochet without scrolling past ads? Grab the beautifully formatted, easy-to-print ad-free PDF pattern of the Ramble and Rue Crochet Bag.
📌 Get the Ramble and Rue Crossbody Bum Bag Ad Free PDF
Final Thoughts
The Ramble and Rue Crochet Bag is the perfect blend of style and function—an accessory you’ll use every day. Whether you call it a fanny pack, bum bag, or belt bag, this crochet crossbody bag pattern is sure to become one of your favorites.
Be sure to share your finished bags with me on social media using #MarlyBird and #MMMDI (Marly Made Me Do It)—I can’t wait to see your creations!
❤️ Your BiCrafty Bestie,
Marly Bird

Categories: Crochet, Free Patterns, Marly Bird Premium Patterns, Our Free Patterns, Pattern, Uncategorized


How do I get the free pattern?
The free pattern is right here on the blog. You will need to create a FREE Grow account (there is a large image describing what that is and why I use it) and the pattern will appear on screen.
Nice clear pattern—thanks for sharing! Quick question: do you have any tips for choosing a sturdy zipper length that still looks proportional on a small granny-square bag? Also, would a lighter cotton yarn change the bag’s shape much?
I always choose a zipper that works with the motifs I am using. I did link to a zipper in the pattern that you can checkout. As for the lighter cotton, if would most likely get you a smaller square and thus a smaller bag. You would need to adjust accordingly.