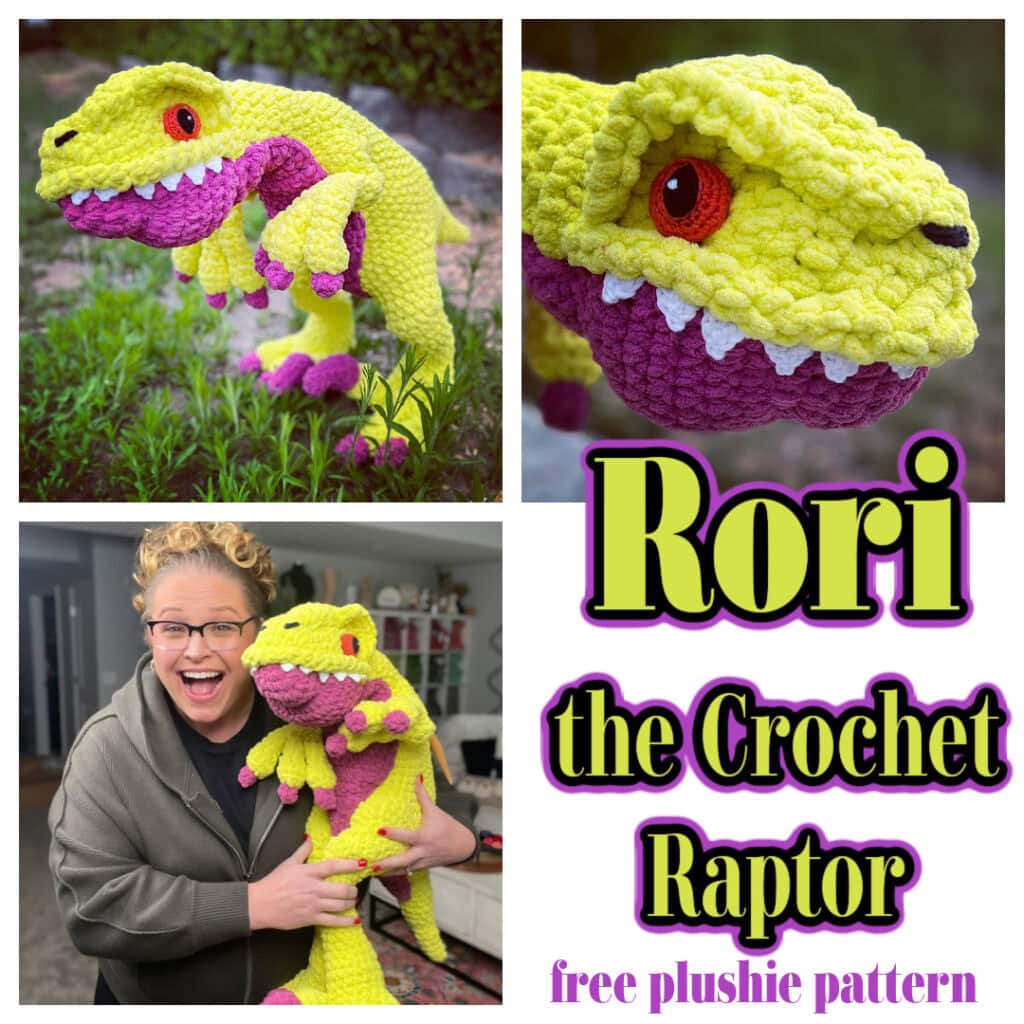
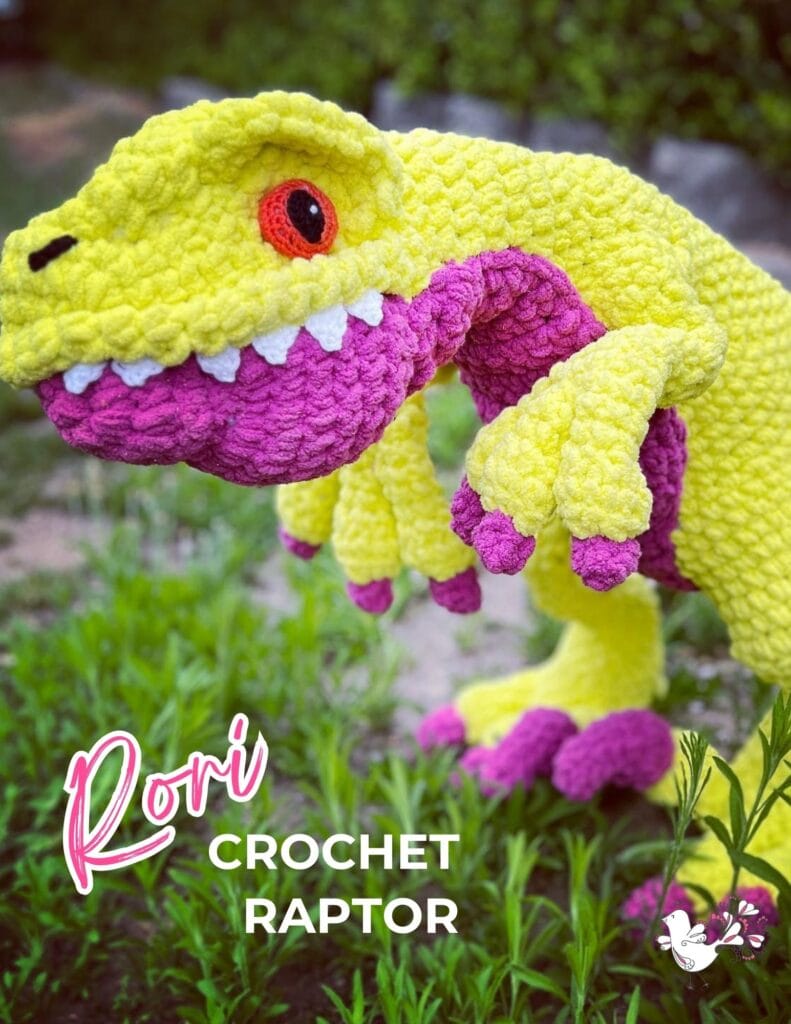
Dinosaur Plush Crochet Pattern: Create Your Very Own Rori the Raptor
Ever wanted to create a lovable dinosaur plushie like Rori the Raptor? You’re in the right spot! In this guide, I’ll walk you through the dinosaur plush crochet pattern, list the materials you’ll need, and provide step-by-step instructions to bring Rori to life.
Whether you’re a fan of a free crochet pattern or exploring amigurumi popularity, this project is perfect for all skill levels. Let’s get stitching and make your very own Rori the Raptor!
Affiliate Disclosure: This post contains affiliate links. To learn more please visit my privacy policy here💖
Key Takeaways
- Rori the Raptor is a new amigurumi project for all skill levels
- use soft blanket yarn for a cuddly and adorable plushie
- customize Rori with different colors and unique accessories
- join our crafting community to share tips and celebrate progress
- access free resources and patterns to start your crochet project
- Ad-free pdf available from Etsy, Shopify or Ravelry
Introduction to Rori the Raptor as a Dinosaur Plush Crochet Pattern
Hey there! I’m so excited to introduce you to Rori the Raptor by Megan Kreiner for MarlyBird.com, our newest easy amigurumi project, for those who have tried making stuffies before. Whether you’re a seasoned crocheter or just an adventurous beginner, this dinosaur plushie is perfect for honing your skills. With the rising amigurumi popularity, projects like Rori are gaining more attention. Be sure to check out our free crochet unicorn pattern for more creative ideas.
Creating Rori is a fun way to explore different techniques, similar to the crochet menorah pattern or a free crochet unicorn pattern. With the rising amigurumi popularity, you’ll find the pattern clearly written and straightforward, making the process enjoyable from start to finish with easy amigurumi. You will not find yourself lost in unrecognizable abbreviations like many other crochet stuffie patterns available by others.
Using soft blanket yarn, Rori turns out cuddly and adorable, perfect for kids and adults alike. Plus, if you love unique designs, you’ll appreciate how this easy amigurumi stands out, much like a holiday armadillo amigurumi pattern or a free crochet unicorn pattern adds charm to your collection.

Join our crafting community and bring Rori the Raptor to life with others, sharing tips on easy amigurumi and celebrating each other’s progress along the way while discussing amigurumi popularity!
Materials Needed for Your Dino Crochet Stuffie
To create Rori the Raptor, you’ll need specific materials. I’ll outline the recommended yarn types for your dino toy, essential tools for crocheting a crochet boy stuffed animal using easy amigurumi techniques, and additional supplies like optional large safety eyes for crochet to customize your stuffed animal. Whether you’re inspired by “how to train your dragon” or just love dinos, these materials will ensure your plush turns out great. You might also explore other patterns like the free crochet unicorn pattern or the frog crochet pattern to expand your collection.
Recommended Yarn Types
When selecting yarn for your Rori the Raptor plushie, I always recommend going for a soft blanket yarn. It gives your crochet dinosaur that perfect cuddly feel, making it an ideal large stuffed animal for both kids and adults. Plus, the texture works wonderfully for adding those charming details to your raptor’s features.
If you’re aiming to create a vibrant crochet dino, consider using yarns in varying colors. This approach not only brings your plushie to life but also makes the crochet dinosaur stand out in any collection. Trust me, experimenting with different shades can make your Rori truly unique and eye-catching!
Yarn used on the sample is Bernat, Baby Blanket Sparkle (100% polyester, 220 yds / 201 m, 10.5 oz/ 300 g, CYCA# 6 super bulky), Color A: #71011 Limeade Sparkle, 3 balls; Color B: #71009 Freesia Sparkle, 1 ball. Herrschners, Worsted 8 Yarn (100% acrylic, 489 yds / 448 m, 8 ox/ 226g, CYCA #4 worsted); Color C: White, small amount. Patons, Kroy Socks Yarn (75% washable wool/ 25% nylon, 166 yds / 152 m, 1.75 oz / 50 g, CYCA# 1 super fine); Color D: Red, small amount Color E: Coal, small amount.
Other yarns that would be a great substitute include Skwishy from Herrschners.

Essential Crochet Tools for Amigurumi
Having the right crochet tools makes crafting your Rori the Raptor stuffie an large amigurumi stuffed animal a breeze. A comfy crochet hook suitable for your chosen yarn is essential, as it ensures your stitches are even and your tail turns out just right. I am a fan of hooks with large handles like those from TooShay Crochet.
I always keep a set of stitch markers handy to keep track of your rounds and shape your dinosaur accurately. Additionally, the crochet menorah pattern is a great option for festive projects. I like having markers in many colors like these, but I also love to make my own markers and have a fun video tutorial for that as well.
In addition to hooks and markers, a good pair of scissors and a yarn needle are must-haves for any amigurumi project. Whether you’re working on an amigurumi or a free crochet sweater pattern, these tools are essential:
| Tool | Purpose |
|---|---|
| Crochet Hooks | Creating consistent stitches for a smooth finish |
| Stitch Markers | Tracking rounds and shaping the dinosaur’s tail |
| Yarn Needle | Weaving in ends and assembling your plushie |
| Scissors | Cutting yarn cleanly without fraying |
Additional Supplies for Custom Features
To give Rori the Raptor some personality, you’ll want to include custom features like large safety eyes for crochet or embroidered details. Choosing the right safety eyes not only makes your amigurumi stuffed toy safer for kids but also adds that adorable, lifelike expression that makes Rori stand out.
Here is a useful tool if you like to use safety eyes.
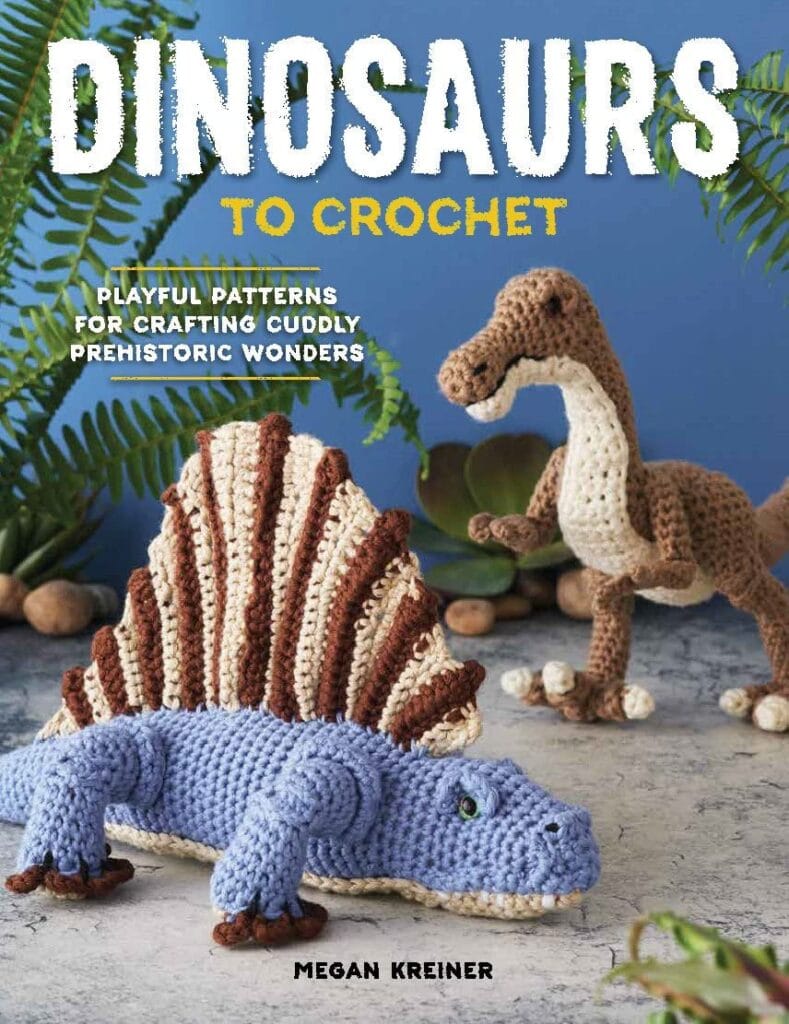
The eyes on Rori are very expressive and are made using yarn and a crochet hook. But I do love selecting eyes that capture the playful spirit of a triceratops or the fierce look of a tyrannosaurus to give each plushie its unique charm. You can make even more dinosaur crochet animals with Megan Kreiner’s book, Dinosaur to Crochet: Playful Patterns for Crafting Cuddly Prehistoric Wonders.
Another essential item you’ll need for your Rori the Raptor crochet project is fiberfill. This soft and lightweight stuffing material is perfect for giving your plushie its shape and a cuddly texture. Polyester fiberfill stuffing is easy to work with and helps ensure that Rori’s body, limbs, and tail hold their structure while remaining soft and huggable. Be sure to stuff evenly and firmly, especially in the head and tail, to maintain a balanced shape. You can find fiberfill at most craft stores or online, and a small bag typically goes a long way for amigurumi projects like this one.
Step-by-Step Instructions for Crocheting Rori the Raptor
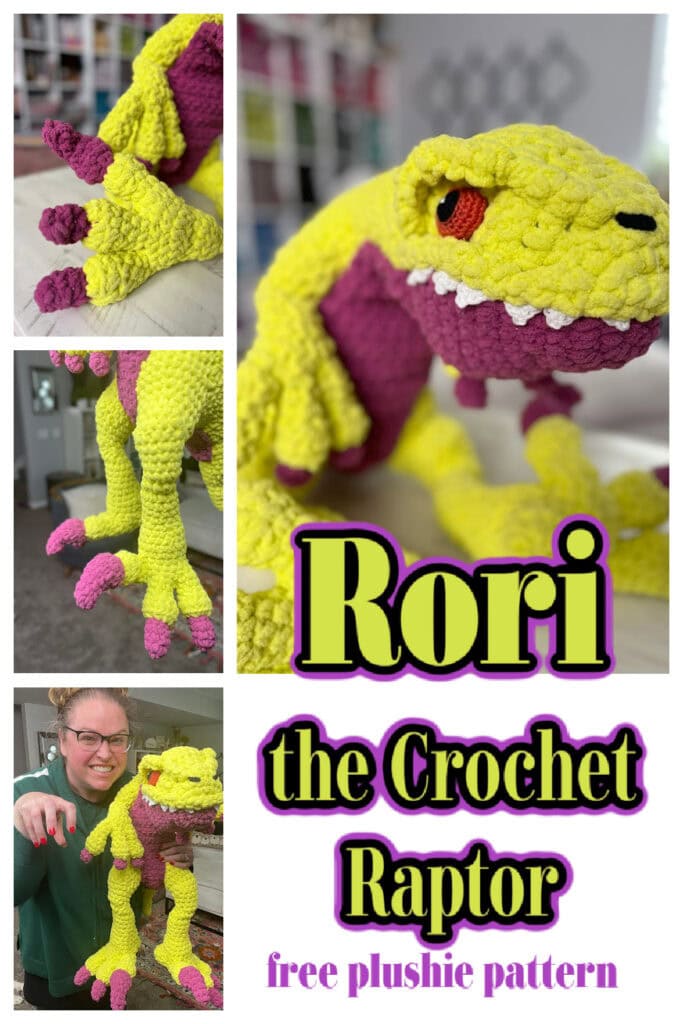
In this section, you will find the full written instructions for crocheting Rori the Raptor. Let’s dive in and bring Rori to life step by step
SKILL LEVEL
Adventurous Beginner
MEASUREMENTS
Finished Measurements
Gauge
7 sc x 8 rounds = 4” [10 cm] x 4” [10 cm]; use any size hook to obtain the gauge.
MATERIALS
Yarn
🧶 Bernat, Baby Blanket Sparkle (100% polyester, 220 yds / 201 m, 10.5 oz/ 300 g, CYCA# 6 super bulky)
Color A: #71011 Limeade Sparkle, 3 balls
Color B: #71009 Freesia Sparkle, 1 ball
🧶 Herrschners, Worsted 8 Yarn (100% acrylic, 489 yds / 448 m, 8 ox/ 226g, CYCA #4 worsted)
Color C: White, small amount
🧶 Patons, Kroy Socks Yarn (75% washable wool/ 25% nylon, 166 yds / 152 m, 1.75 oz / 50 g, CYCA# 1 super fine)
Color D: Red, small amount
Color E: Coal, small amount
Crochet Hook
N/13 [9.0 mm] use with super bulky yarn or hook needed for gauge
G/6 [4.0 mm] use with worsted weight yarn
F/5 [3.75 mm] use with sock weight yarn
Notions
Dinosaur is 25” [63.5 cm] body circumference by 34” [86.5 cm] long (nose to tail)
Fiberfill
Stitch Markers
Tapestry Needle
CROCHET ABBREVIATIONS
Blo – Back loop only
Ch – Chain(s)
Dc – Double Crochet
Hdc – Half Double Crochet
PM – Place Marker
RS – Right Side
Sc – Single Crochet (with yarn over not yarn under)
Sl st – Slip Stitch
Sp(s) – Space(s)
St(s) – Stitch(es)
WS – Wrong Side
SPECIAL STITCHES
⭐️ Single Crochet 2 Together (sc2tog): *Insert hook into indicated stitch, yarn over and pull up a loop; repeat from * in next stitch indicated, yarn over and draw through all 3 loops on hook. (1 decrease)
⭐️ Front Post Single Crochet (fpsc) : Insert hook from front to back to front around the post of the stitch indicated, yarn over and pull up a loop, yarn over and draw through the loops on hook.
⭐️ Running Stitch: Insert needle from front to back, *bring the needle up again from back to front one stitch length away, insert needle from front to back one stitch length away; repeat from * across work as indicated in pattern.
NOTES
- Dinosaur is worked in pieces and seamed together. Details are added last.
- Body parts are worked in continuous spiral rounds that are not joined at the end of the round.
- Use a stitch marker to mark the first stitch of each new round throughout the project.
- Change colors when 2 loops are left on the last stitch of the old color. Fold in the new color to complete the stitch and start using the new color.
VIDEO TUTORIAL
- Weaving in ends >> Click Here for Video Help <<

GROW
To Unlock Exclusive Subscriber Content click the Box below and join for free by simply adding your email and creating a password! If you are having troubles, clear your cache or reset your password or login to the Grow Publisher Portal.
>> Learn More About Grow Here <<
I’m thrilled to share this amazing pattern with you, many patterns on my blog are absolutely free! I kindly request that you don’t copy and paste or distribute this pattern. Prefer an ad-free experience? Buy a digital PDF pattern for a small fee from one of my online stores for a seamless crafting journey.
I appreciate your support and readership. You are the reason I can keep doing what I love and sharing it with others. So, thank you from the bottom of my yarn-loving heart! Disclosure: This post contains affiliate links, meaning I get a commission if you decide to make a purchase through my links at no cost to you.
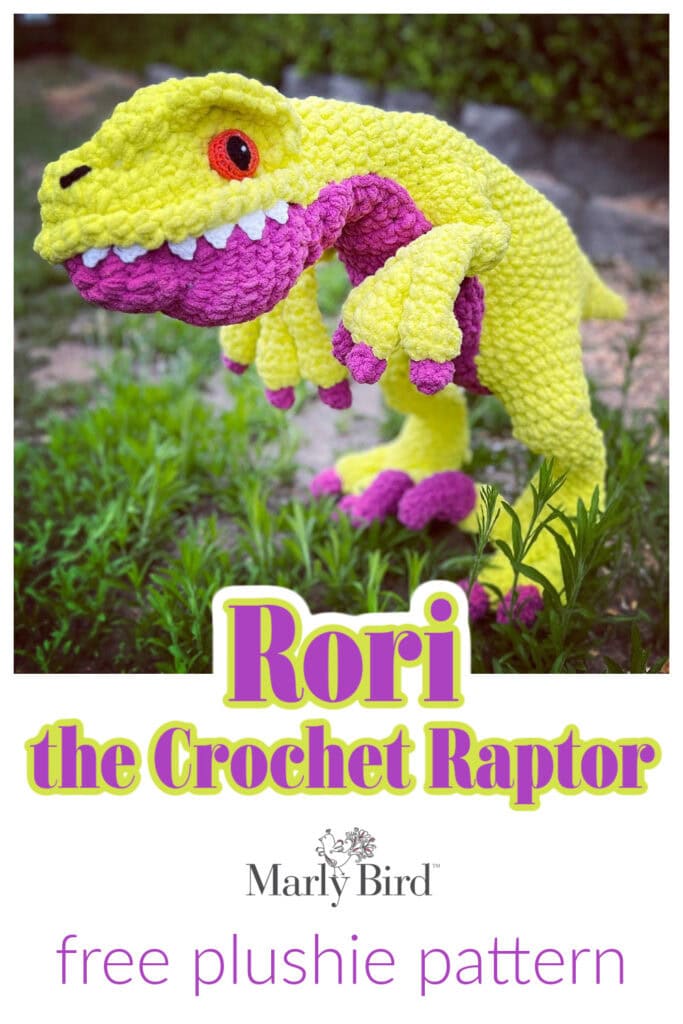
RORI THE RAPTOR FULL WRITTEN FREE PATTERN
By Megan Kreiner for MarlyBird.com
FINGER
Make 4
With color B, make an adjustable ring.
Round 1: Ch 1, 4 sc in ring, place marker in first st (see notes), pull ring closed, do not join or turn (see notes)–4 sc.
Round 2: *Sc in next sc, 2 sc in next sc; repeat from * around–6 sc.
Round 3: Sc in each sc around, change to color A. fasten off color B.
Round 4: 2 Fpsc around each sc- 12 sc.
Round 5: Sc blo in each sc around.
Round 6: *Sc2tog over next 2 sc; repeat from * around–6 sc.
Round 7-8: Sc in each sc around.
Fasten off color A, leaving long tail for seaming.
STARTING FINGER
Make 2
Work Finger to Round 7.
Round 8: Sc in next 3 sc, leaving remaining 3 sts unworked. Do not cut yarn. Continue to Hand and Arm
HAND and ARM
Make 2
{Note from Marly: Round 1 joins the starting finger to 2 more fingers and creates a new larger round that begins the hand. We know this round sounds unusual, but trust us; go step by step and it will work out.}
Round 1 Continue with the starting finger’s yarn still attached, sc into the first st of any finger (this will become the center finger), sc in next 2 sts of same finger (leave remaining 3 sts unworked), sc into the first st of a second finger, sc in next 5 sts of second finger, sc in unworked 3 sts from center finger, sc in unworked 3 sts from starting finger – 18 sc (includes sts on starting finger’s last round).
Round 2: *Sc in next 4 sts, sc2tog over next 2 sc; repeat from * around–15 sc.
Round 3: *Sc in next 3 sts, sc2tog over next 2 sc; repeat from * around–12 sc.
Round 4: Sc in each sc around.
Stuff hand and fingers 25% full.
Round 5: *Sc in next st, sc2tog over next 2 sc; repeat from * around–8 sc.
Rounds 6-8: Sc in each sc around.
Round 9: *Sc in next 2 sts, sc2tog over next 2 sc; repeat from * around–6 sc.
Round 10: *Sc in next st, 2 sc in next st: repeat from * around – 9 sc.
Round 11: *Sc in next 2 sts, 2 sc in next st: repeat from * around – 12 sc.
Round 12: Sc in each sc around.
Fasten off yarn and set arm aside.
Repeat for 2nd Arm.
Utilize the yarn tails between the fingers to patch up any holes in your work.
TOE
Make 3 (two for the left foot, 1 for the right foot)
With color B, make an adjustable ring.
Round 1: Ch 1, 4 sc in ring, place marker in first st (see notes), pull ring closed, do not join or turn (see notes)–4 sc.
Round 2: *Sc in next sc, 2 sc in next sc; repeat from * around–6 sc.
Round 3: Sc in each sc around.
Round 4: *Sc in next 2 sc, 2 sc in next sc; repeat from * around–8 sc.
Round 5: Sc in each sc around, change to color A. fasten off color B.
Round 6: 2 Fpsc around each sc- 16 sc.
Round 7: *Sc blo in next 2 sc, sc2tog blo over next 2 sc; repeat from * around – 12 sc.
Round 8: *Sc in next sc, sc2tog over next 2 sc; repeat from * around–8 sc.
Round 9-10: Sc in each sc around.
Fasten off color A, leaving long tail for seaming.
RIGHT LEG TOE
Work toe to Round 9.
Round 10: Sc in next 4 sc, leaving the remaining 4 sts unworked. Do not cut yarn, Continue to Right Foot directions after making the Right Big Claw Toe.
BIG CLAW TOE
Make 2 (one for the left and one for the right foot)
With color B, make an adjustable ring.
Round 1: Ch 1, 4 sc in ring, place marker in first st (see notes), pull ring closed, do not join or turn (see notes)–4 sc.
Round 2: *Sc in next sc, 2 sc in next sc; repeat from * around–6 sc.
Round 3: Sc in each sc around.
Round 4: *Sc in next 2 sc, 2 sc in next sc; repeat from * around–8 sc.
Round 5: Sc in each sc around.
Round 6: *Sc in next sc, 2 sc in next sc; repeat from * around–12 sc.
Round 7-8: Sc in each sc around.
Round 9: *Sc in next sc, sc2tog over next 2 sc; repeat from * around, change to color A. fasten off color B – 8 sc.
Round 10: 2 Fpsc around each sc- 16 sc.
Round 11: *Sc blo in next 2 sc, sc2tog blo over next 2 sc; repeat from * around – 12 sc.
Round 12: *Sc in next sc, sc2tog over next 2 sc; repeat from * around–8 sc.
Round 13-14: Sc in each sc around.
RIGHT LEG BIG CLAW TOE
Fasten off Big Claw Toe and set aside
LEFT LEG BIG CLAW TOE
Round 14: Sc in next 4 st, leaving remaining 4 sts unworked. Do not cut yarn. Continue to Left Foot.
FOOT
Make 2 (1 left foot and 1 right foot)
{Note: Round 1 joins the big claw to 2 more toes and creates a new larger round that begins the foot.}
FOR LEFT FOOT:
Round 1: Continue with the left big claw toe’s yarn still attached, sc into the first st of any toe (this will become the center toe), sc in next 3 sts of same toe (leave remaining 4 sts unworked), sc into the first st of a second toe, sc in next 7 sts of second toe, sc in unworked 4 sts from center toe, sc in unworked 4 sts from left big claw toe – 24 sc (includes sts on left big claw toe’s last round).
FOR RIGHT FOOT:
Round 1: Continue with the right foot toe’s yarn still attached, sc into the first st of the last toe (this will become the center toe), sc in next 3 sts of same toe (leave remaining 4 sts unworked), sc into the first st of the right big claw toe, sc in next 7 sts of big claw toe, sc in unworked 4 sts from center toe, sc in unworked 4 sts from right foot toe – 24 sc (includes sts on right foot toe’s last round).
Round 2: *Sc in next 2 sc, sc2tog over next 2 sc; repeat from * around–18 sc.
Round 3: Sc in each sc around.
Round 4: Sc in next 10 sc, ch 8, skip remaining sts (chain and unworked sts form the opening for the leg)
Round 5: [Sc in next sc, sc2tog over next 2 sc] 3 times, sc in next sc, [sc2tog in back ridge of next 2 ch, sc in back ridge of next ch] twice, sc2tog in back ridge of last 2 ch- 12 sc.
Rounds 6-7: Sc in each sc around.
Round 8: *Sc2tog over next 2 sc; repeat from * around – 6 sc.
Fasten off yarn and close the hole in the back of the foot with the tail. Stuff toes and foot firmly. Utilize the yarn tails between the toes to patch up any holes in your work.
LEG
Make 2
Round 1: With the ch-8 leg opening facing up and the toes pointed towards you, join color A with sl st into the right corner of the leg opening, ch 1, sc in each st around (both the unworked sts from the foot and unworked loops on the chain) – 16 sc.
Round 2: *2 sc in next sc, sc in next 7 sc; repeat from * around- 18 sc.
Round 3: Sc in each sc around.
Round 4: *Sc in next 4 sc, sc2tog over next 2 sc; repeat from * around – 15 sc.
Round 5: Sc in each sc around.
Round 6: *Sc in next 3 sc, sc2tog over next 2 sc; repeat from * around – 12 sc.
Rounds 7-10: Sc in each sc around.
Shaping Note:
Because stitches twist when worked in the round, check the location of your last stitch in Rnd 10 before cont to work the shaping in rounds 11-16. If this last stitch isn’t centered over the back heel of the foot, either add or pull back a stitch or two from the end of Rnd 10 to reset the placement of this last stitch. This will help keep the knee shaping centered over the foot.
Rounds 11-12: [Sc2tog in next 2 sts] twice, 2 hdc in next 4 sts, [sc2tog in next 2 sts] twice- 12 sts. (Note: Hdc should line up directly above the toes)
Round 13: Sc in each sc around.
Round 14: *Sc in next 2 sts, 2 sc in next st; repeat from * around – 16 sc.
Round 15: Sc in next 12 sc, ch 1 and turn. In front loop only, sc in next 6 sc, ch 1 and turn. Sc in next 6 sc. Insert hook into side edge of 6-st short row, yarn over and pull up a loop, insert hook into next st of Round 14, yarn over and pull up a loop, yarn over and draw through all loops on hook (counts as 1 sc), sc in last 3 sc- 16 sts.
Round 16: 2 sc in next 2 sts, sc in next 3 sc. Insert hook into next st, yarn over and pull up a loop, insert hook into side edge of 6-st short rows, yarn over and pull up a loop, yarn over and draw through all loops on hook (counts as 1 sc), sc in each remaining st around – 18 sts.
(Note: the 6-st short rows should line up directly above the toes.)
Round 17: Sc in each sc around.
Round 18: *Sc in next 8 sc, 2 sc in next st; repeat from * around – 20 sc.
Round 19: *Sc in next 4 sc, 2 sc in next st; repeat from * around – 24 sc.
Round 20: *Sc in next 5 sc, 2 sc in next st; repeat from * around – 28 sc.
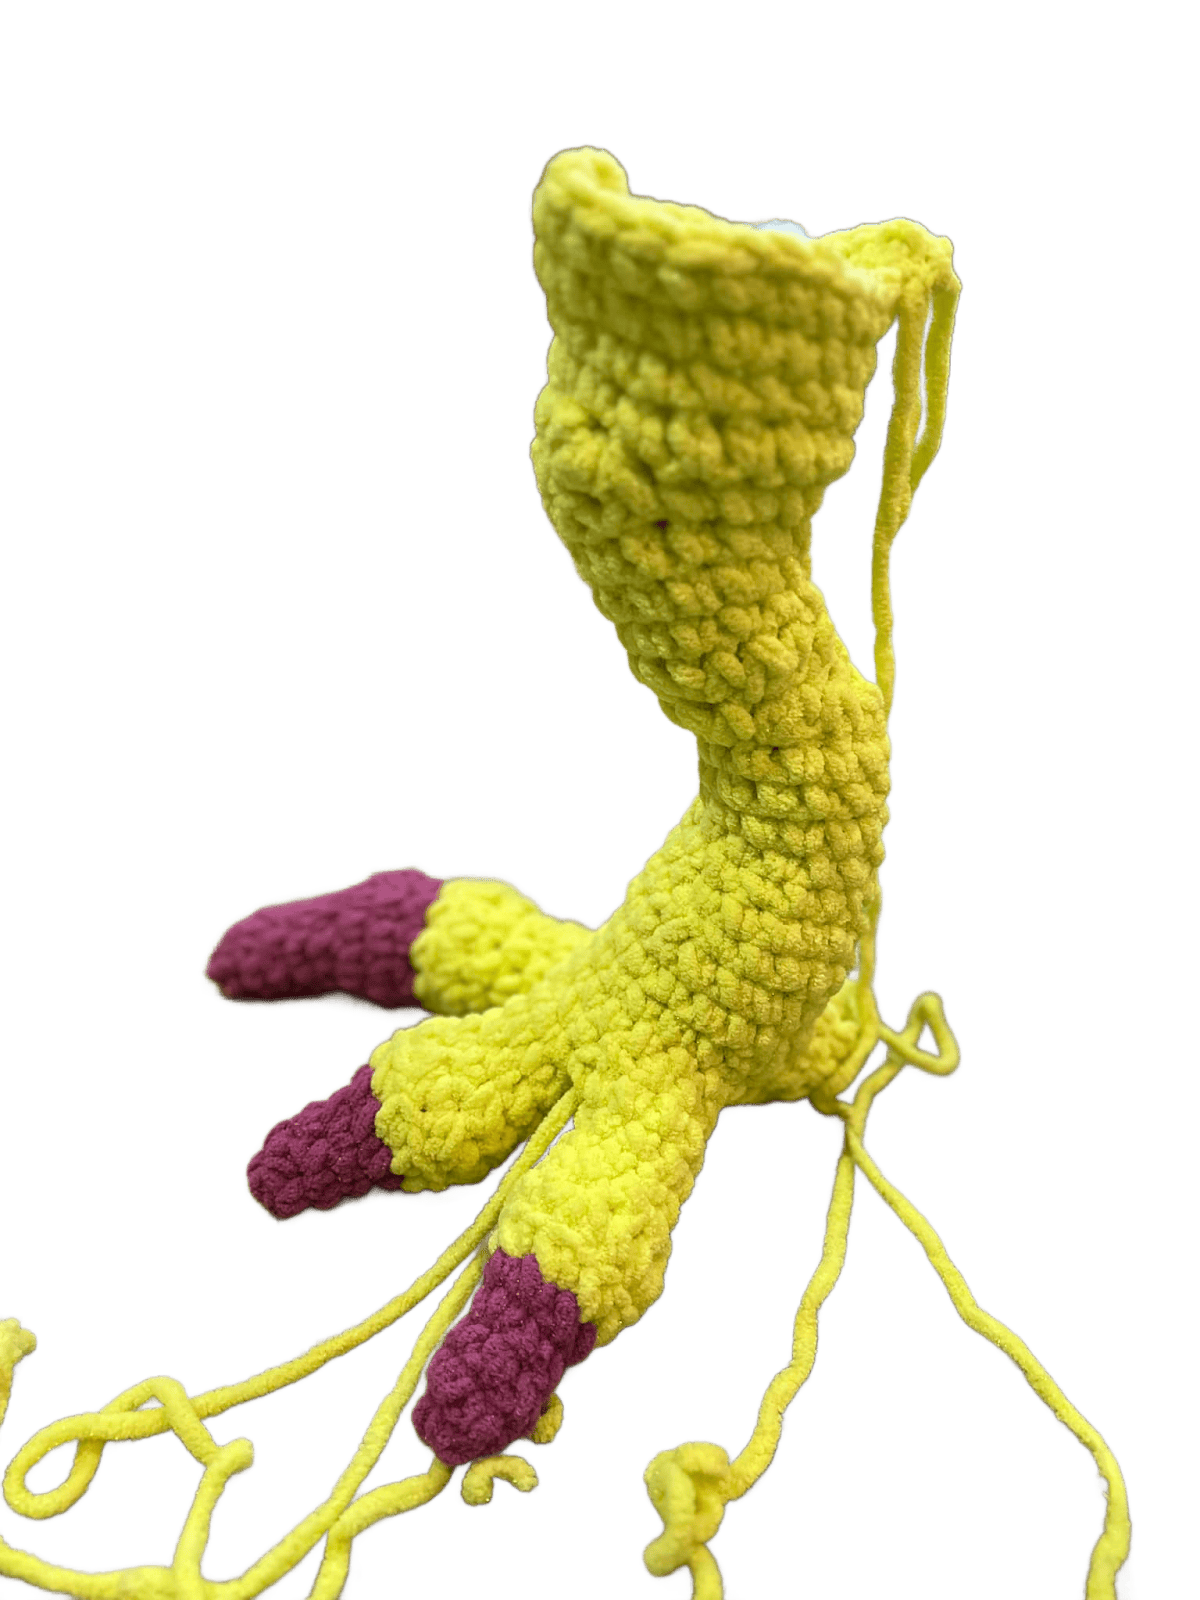
Fasten off. Stuff legs firmly. They should be able to stand up on their own.
Join the Legs
Place the left and right leg next to each other with the toes facing forward (the big claw toes should be next to each other). Match up 4 sts along the inside edges of Round 20 of the left and right legs. Holding the edges together and working from front to back, rejoin yarn and sc through these 4 sts along both edges at the same time to hold them together, leaving the remaining 24 sts on each leg unworked. Starting from the fasten-off point of these 4 sts, count 12 sts along each leg edge opening and place marker. Set aside.
TAIL & BODY
With color A, make an adjustable ring.
Round 1: Ch 1, 4 sc in ring, place marker in first st (see notes), pull ring closed, do not join or turn (see notes)–4 sc.
Round 2: *Sc in next sc, 2 sc in next sc; repeat from * around – 6 sc.
Rounds 3-4: Sc in each sc around.
Round 5: *Sc in next 2 sc, 2 sc in next sc; repeat from * around – 8 sc.
Rounds 6-7: Sc in each sc around.
Round 8: *Sc in next 3 sc, 2 sc in next sc; repeat from * around – 10 sc.
Round 9: Sc in each sc around.
Round 10: *Sc in next 4 sc, 2 sc in next sc; repeat from * around – 12 sc.
Round 11: Sc in each sc around.
Round 12: *Sc in next 5 sc, 2 sc in next sc; repeat from * around – 14 sc.
Round 13: Sc in each sc around.
Round 14: *Sc in next 6 sc, 2 sc in next sc; repeat from * around – 16 sc.
Rounds 15-16: Sc in each sc around.
Round 17:*Sc in next 3 sc, 2 sc in next sc; repeat from * around – 20 sc.
Rounds 18-19: Sc in each sc around.
Round 20: *Sc in next 4 sc, 2 sc in next sc; repeat from * around – 24 sc.
Rounds 21-22: Sc in each sc around.
Round 23: *Sc in next 3 sc, 2 sc in next sc; repeat from * around- 30 sc.
Round 24: *Sc in next 4 sc, 2 sc in next sc; repeat from * around- 36 sc.
Round 25: *Sc in next 5 sc, 2 sc in next sc; repeat from * around- 42 sc.
Round 26: *Sc in next 6 sc, 2 sc in next sc; repeat from * around- 48 sc.
Fasten off.
Attach Legs:
Take the joined legs and position them upright with the toes facing you. Locate the marked stitches along the edge of each leg. With the Round 26 of the Body and Tail facing up, position the body and tail behind the joined legs so the front edge of Round 26 lines up along the back edge of the joined legs between the two markers. With color A, starting at the marker on the right side and working through the body and leg edges at the same time, sc the edges together along the 24 sts between the two leg edge markers. Fasten off leaving the remaining 24 sts on the body and tail and the remaining 12 sts along each leg edge unworked. Stuff Tail firmly.
Rejoin yarn to body and tail edge and continue working along the remaining sts along the body and leg edges;
Rounds 27-28: Sc in each sc around – 48 sc.
Round 29: *Sc in next 4 sc, sc2tog in next 2 sc; repeat from * around- 40 sc.
Rounds 30-38: Sc in each sc around
Fasten off. Stuff body firmly.
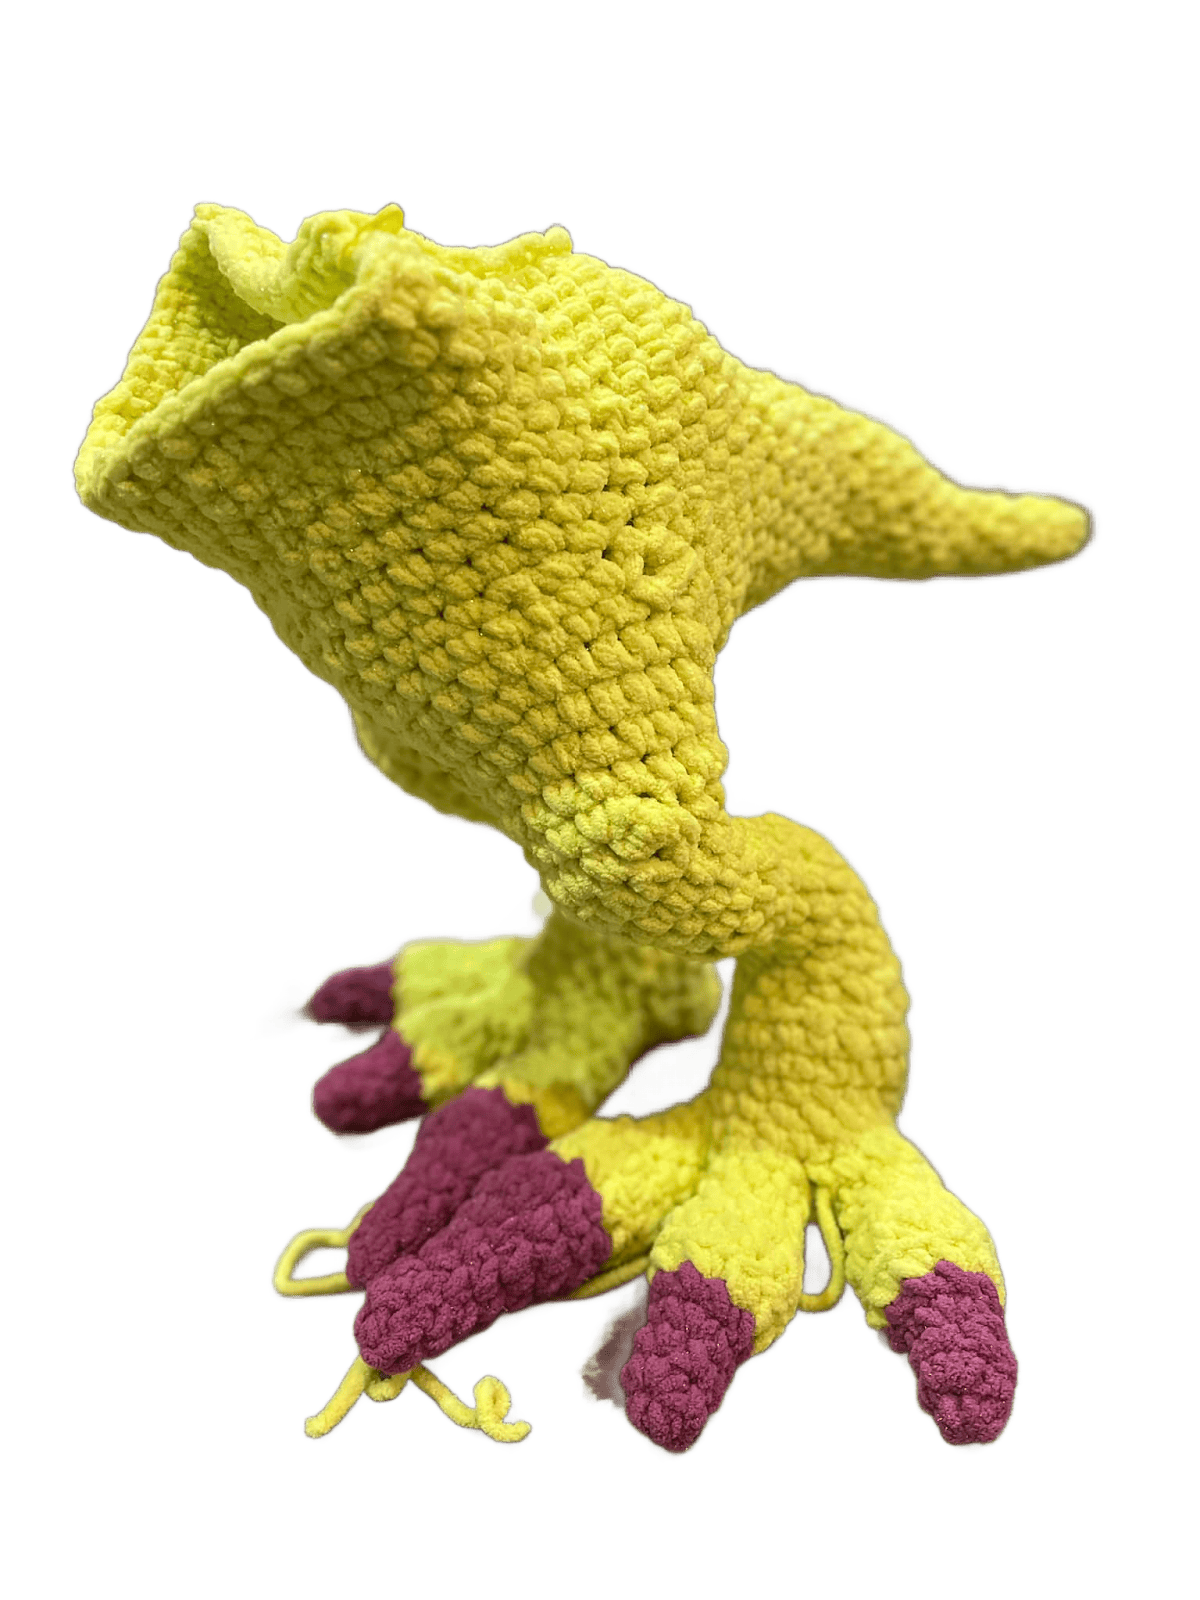
Attach Arms:
Note: The Raptor’s left arm is attached first, then the right arm.
Round 39: Join color A with sc into the center stitch at the back of the body opening. Working clockwise, sc in next 5 sts. Pick up an arm and orient it so the palm of the hand is facing towards the back of the body. Line up the side edge of the arm opening against the edge of the body opening. Holding the edges together, sc in next 6 sts through both arm and body edges at the same time (leaving the remaining 6 sts of the arm unworked). [Sc2tog in next 2 sc] 8 times across the front edge of the Raptor’s chest. Pick up the 2nd arm and turn it so the palm of the hand is facing towards the back of the body. Line up the side edge of the 2nd arm opening against the edge of the body. Holding edges together, sc in next 6 sts through both edges at the same time (leaving remaining 6 sts of arm unworked). Sc in next 6 sts- 32 sts.
Round 40: Sc in next 6 sts, sc in next 6 unworked sts of the arm, sc in next 8 sts, sc in next 6 unworked sts of 2nd arm, sc in next 6 sts- 32 sc.
Stuff arms 25% full.
Round 41: *Sc in next 2 sc, sc2tog in next 2 sc; repeat from * around- 24 sc.
Round 42: Sc in each sc around.
Round 43: *Sc in next 4 sc, sc2tog in next 2 sc; repeat from * around- 20 sc.
Round 44-49: Sc in each sc around.
Round 50: *Sc in next sc, 2 sc in next sc; repeat from * around- 30 sc.
Round 51: *Sc in next 2 sc, 2 sc in next sc; repeat from * around- 40 sc.
Fasten off yarn, leaving a long tail for seaming.
Stuff body firmly.
Curl the Arms:
Bend the arm back at round 9 (the 6-st round) so the top of the forearm touches the front of the upper arm. Attach yarn at the back of the upper arm (between rounds 10-11). With a tapestry or doll needle, draw yarn through both the upper arm and forearm, catching the front of the forearm with a stitch before going back through the forearm and upper arm to the starting point. Pull the yarn to tighten up the shaping and tie the yarn tails together to secure. Repeat on other arm.
If you would like the arms to stay closer to the body, sew the inside edges of the elbows to the sides of the body.
Shape the Toenails and Fingernails:
Attach an 18” piece of color B to the underside of a nail at its base. Apply a running stitch along the rnd where the nail transitions to the finger/toe. Once you have reached the starting point, pull gently to cinch in the edge of the nail, then apply a 2nd set of running stitches to the same rnd (catching the stitches you missed the first time around). Pull again to cinch the shaping, secure yarn tails. Weave in ends.
Curl and Pose the toenails and big claw toes:
Attach an 18” piece of color B to the underside of a toenail at its base. Apply a running stitch along the surface of the toenail in a straight line from base to tip. Once you reach the tip, pull the yarn gently to curl the nail. Secure the yarn and weave in ends. Bend the big claw toes back at their base so toe points nearly straight up. When you are happy with the pose, use color A to sew the top surface of the toe to where it makes contact with the leg to hold the shaping in place.
HEAD
With color A, make an adjustable ring.
Round 1: Ch 1, 6 sc in ring, place marker in first st (see notes), pull ring closed, do not join or turn (see notes)–6 sc.
Round 2: 2 sc in each around – 12 sc.
Round 3: Sc in next sc, *3 sc in next sc, sc in next 2 sc; repeat from * around to last 2 sc, 3 sc in next sc, sc in last sc – 20 sc.
Round 4: Sc in next 2 sc, *3 sc in next sc, sc in next 4 sc; repeat from * around to last 3 sc, 3 sc in next sc, sc in last 2 sc – 28 sc.
Rounds 5-6: Sc in each around.
Round 7: *Sc in next sc, 2 sc in next sc; repeat from * around – 42 sc.
Rounds 8-10: Sc in each around.
Round 11: *Sc in next 5 st, sc2tog in next 2 sts; repeat from * around- 36 sts.
Rounds 12-13: Sc in each sc around.
Round 14: *Sc in next 4 sts, sc2tog in next 2 sts; repeat from * around – 30 sts.
Round 15: Sc in each sc around.
Round 16: *Sc in next st, sc2tog in next 2 sts; repeat from * around – 20 sts.
Round 17: *Sc2tog in next 2 sts; repeat from * around – 10 sts.
Cut yarn and fasten off. Stuff head 20% full. Leave a hole open to adjust the stuffing level if needed.
JAW
With color B, make an adjustable ring.
Round 1: Ch 1, 6 sc in ring, place marker in first st (see notes), pull ring closed, do not join or turn (see notes)–6 sc.
Round 2: 2 sc in each around – 12 sc.
Round 3: Sc in next sc, *3 sc in next sc, sc in next 2 sc; repeat from * around to last 2 sc, 3 sc in next sc, sc in last sc – 20 sc.
Round 4: Sc in next 2 sc, *3 sc in next sc, sc in next 4 sc; repeat from * around to last 3 sc, 3 sc in next sc, sc in last 2 sc – 28 sc.
Rounds 5-6: Sc in each around.
Round 7: *Sc in next 3 sts, 2 sc in next st; repeat from * around – 35 sts.
Rounds 8-10: Sc in each around.
Round 11: *Sc in next 5 sts, sc2tog in next 2 sts; repeat from * around – 30 sts.
Round 12: Sc in each around.
Round 13: *Sc in next st, sc2tog in next 2 sts; repeat from * around – 20 sts.
Round 14: Sc in each around.
Round 15: *Sc2tog in next 2 sts; repeat from * around – 10 sts.
Cut yarn and fasten off. Stuff jaw 75% full. Leave a hole open to adjust the stuffing level if needed.
Attach head top to bottom jaw and shape the upper lip:
Observe that rounds 3 & 4 at the front of the head and jaw are slightly square in their shaping. Try to keep the square shaping level and plumb (instead of tilted) when pinning the head to the jaw.
Line up the back of the head with the back of the jaw so the front of the head sits slightly forward of the front of the jaw.
Press and sink the top half of the jaw into the bottom half of head allowing the sides head to wrap over the sides of the jaw. Pin the folded overlapping edge of the head to the sides of the jaw . With color A and working 1”-1.5” [2.5-4 cm] above the folded-over edge of the head, apply a running stitch through the folded edge, catching the surface of the jaw as you work to shape the upper lip and secure the jaw to the head.
Shape lower jaw:
From the front of the head, count 5 rounds back on the jaw. With color B, attach a 24” [61 cm] piece of yarn to the 5th round of the jaw just under the lip shaping on the right side of the head. Apply a running stitch between the 5th and 6th round of the jaw until you reach the under the lip shaping on the left side of the head. Draw the yarn and needle through the jaw back to the starting point and pull to cinch the jaw shaping. Repeat one more time (switching up which running stitches are over vs under). Pull firmly to shape, fasten off and weave in ends.
Add more stuffing to fill out the head and/or jaw if needed. Close the hole in the back of the head and jaw and weave in ends.
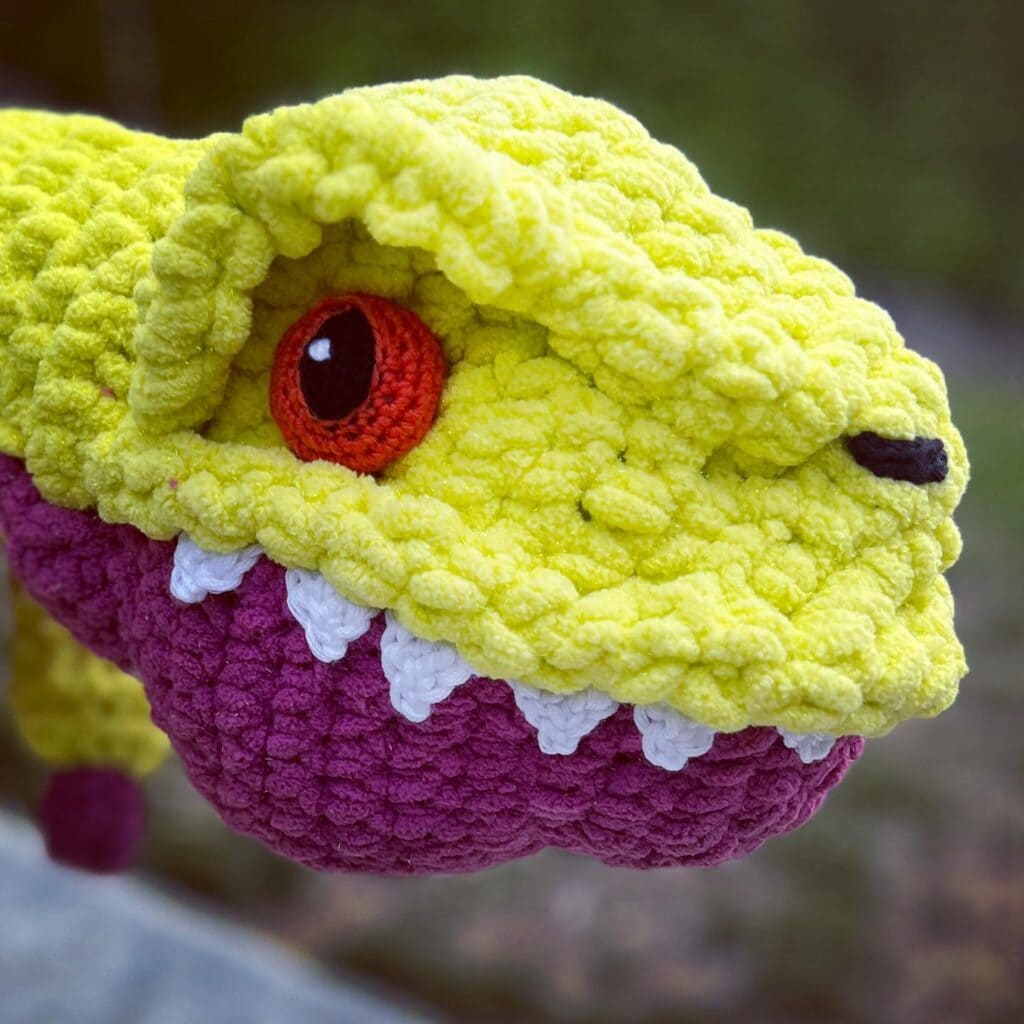
EYES
Make 2
With color E, ch 8 with smallest hook.
Round 1: Starting in 2nd ch from hook and working in back ridge loops, sl st in next ch, sc in next ch, hdc in next 3 ch, sc in next ch, sl st in next ch. Rotate chain so front loops are facing up, sl st in first ch (same ch as previous sl st), sc in next ch, hdc in next 3 ch, sc in next ch, sl st in last ch, change to color D, fasten off color E – 14 sts.
Round 2: Sl st blo of each st around.
Round 3: Sc blo in next 3 sts, 2 sc blo in next st, sc blo in next 6 sts, 2 sc blo in next st, sc blo in next 3 sts – 16 sts.
Round 4: *Sc in next st, 2 sc in next st; repeat from * around – 24 sts.
Round 5: *Sc in next 2 sts, 2 sc in next st; repeat from * around – 32 sts.
Round 6: Sc in each sc around.
Round 7: *Sc in next 2 sts, sc2tog over next 2 sts; repeat from * around – 24 sts.
Round 8: *Sc in next st, sc2tog over next 2 sts; repeat from * around – 16 sts.
Round 9: *Sc2tog over next 2 sts; repeat from * around – 8 sts.
Cut and fasten off yarn. Stuff the eye firmly and close the hole.
Add catch light to eyes:
With color C yarn – apply a small grouping of short stitches to the center part of the eye for a catch light
Attach eyes and sink the eye sockets:
Attach eyes onto the sides head between rounds 11-12.
With color A, draw a series of small stitches back and forth through the head around the edges of the eyes, pulling gently to sink the eyes into the head.
Eye Ridge
Make 2
With color A, ch 10.
Row 1: Starting in 2nd ch from hook and working in back ridge loops, sc in each ch across, turn- 9 sts.
Row 2: Ch 1, sc in each sc across, turn.
Row 3: Fold work the long way to match up Row 2 with the Ch-10 row to form a skinny tube. Ch 1, working through both rows at the same time, sc in each st across, fasten off.
Attach Eye Ridge:
With row 3 of the eye ridge against the head, Position and curve the eye ridge around the top, side and bottom corner of the eye and pin in place. Whip stitch the bottom edge of the eye ridge to the head.
NOSTRILS
Make 2
With color E yarn, ch 7.
Starting in 2nd ch from hook and working in back ridge loops, sc in each ch across, fasten off.
Attach nostrils:
Pin the nostrils between rounds 3-4 of the head top with about 2 sts of space between them. Sew down and weave in yarn ends.
Add nose ridge details
Pinch the surface of your work to make a ridge of material between the front corner of the right eye brow ridge and just behind the right nostril. With color A, sew back and forth through the base of the ridge with a running stitch to hold the shaping. Repeat on the left side of the head.
TEETH
Make 2
With color C yarn and medium size hook, Ch 2, [(sc, hdc, dc, ch 2, sl st) in back ridge loop of 2nd ch from hook, ch 4] 4 times, (sc, hdc, dc, ch 2, sl st) in back ridge loop of 2nd ch from hook, fasten off.
Attach teeth:
Tuck the ch edge of the teeth under the lip ridge on right side head. Line up the first tooth under the right nostril and the last tooth just behind the right eye and sew ch edge in place. Repeat on the left side of the head with the other teeth strip.
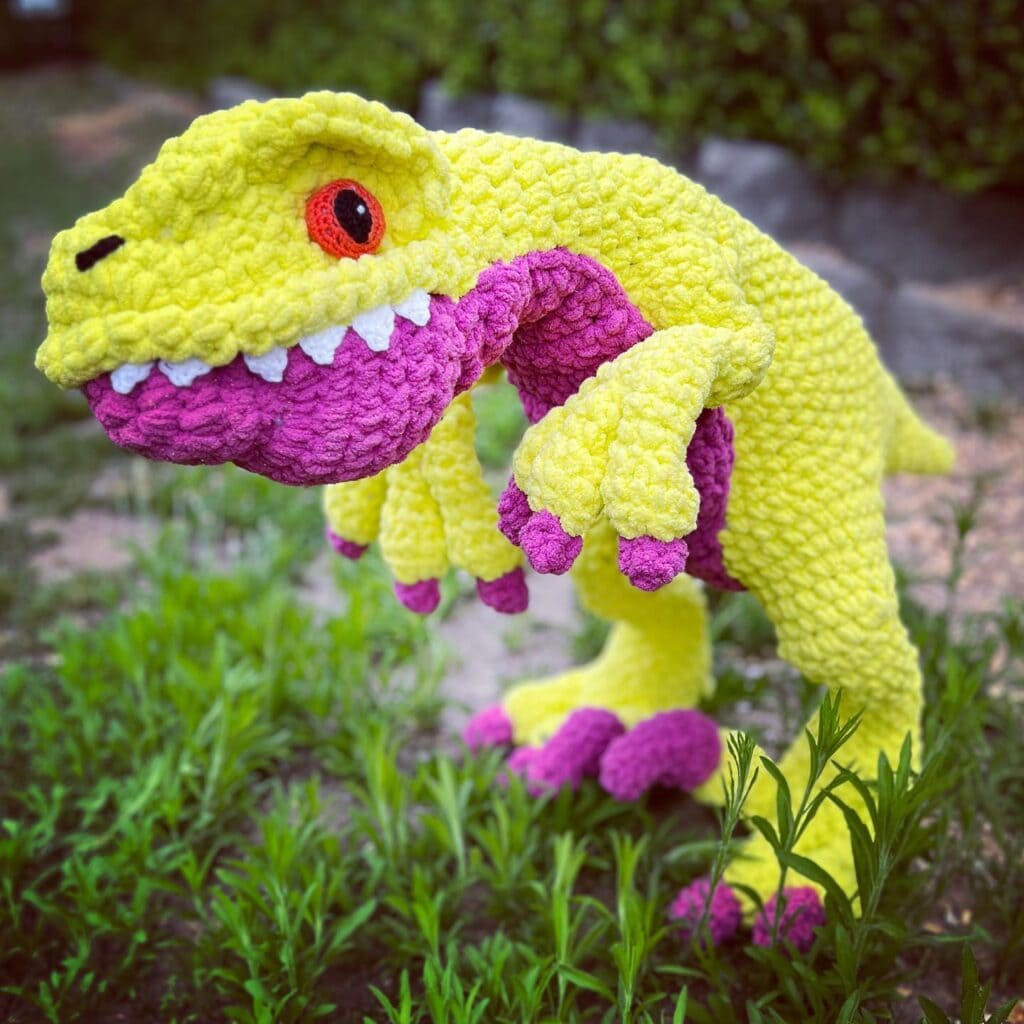
Attach head to body:
Stretch and pin the open edges of the neck over the end of the head and jaw. With color A and a mattress stitch, sew the head to the body, adding more stuffing to neck as needed before closing seam.
BELLY
With color B, loosely ch 9.
Row 1: Starting in 2nd ch from hook and working in back ridge loops, sc in each ch across, ch 1 and turn- 8 sc.
Row 2: Sc in each sc across, ch 1 and turn.
Row 3: Sc2tog over first 2 sc, sc in next 4 sc, sc2tog over last 2 sc, ch 1 and turn – 6 sts.
Rows 4-9: Sc in each sc across, ch 1 and turn.
Row 10: 2 sc in next st, sc in next 4 sts, 2 sc in next st, ch 1 and turn – 8 sts.
Rows 11-12: Sc in each sc across, ch 1 and turn.
Row 13: 2 sc in next st, sc in next 6 sts, 2 sc in next st, ch 1 and turn – 10 sts.
Row 14: Sc in each sc across, ch 1 and turn.
Row 15: 2 sc 2 in next st, sc in next 8 sts, 2 sc in next st, ch 1 and turn – 12 sts.
Rows 16-19: Sc in each sc across, ch 1 and turn.
Row 20: Sc2tog in first 2 sc, sc in next 8 sc, sc2tog in last 2 sc, ch 1 and turn – 10 sts.
Row 21: Sc2tog in first 2 sc, sc in next 6 sc, sc2tog in last 2 sc, ch 1 and turn – 8 sts.
Row 22: Sc2tog in first 2 sc, sc in next 4 sc, sc2tog in last 2 sc, ch 1 and turn – 6 sts.
Row 23: Sc2tog in first 2 sc, sc in next 2 sc, sc2tog in last 2 sc, ch 1 and turn – 4 sts.
Rows 24-28: Sc in each sc across, ch 1 and turn.
Row 29: 2 sc in first st, sc in next 2 sc, 2 sc in last st, ch 1 and turn – 6 sts.
Rows 30-31: Sc in each sc across, ch 1 and turn.
Row 32: 2 sc in first st, sc in next 6 sc, 2 sc in last st, ch 1 and turn- 8 sts.
Rows 33-35: Sc in each sc across, ch 1 and turn.
Row 36: Sc2tog in first 2 sc, sc in next 4 sc, sc2tog in last 2 sc, ch 1 and turn – 6 sts.
Rows 37: Sc in each sc across, ch 1 and turn.
Row 38: Sc2tog in first 2 sc, sc in next 2 sc, sc2tog in last 2 sc, ch 1 and turn – 4 sts.
Row 39: Sc in each sc across, ch 1 and turn.
Row 40: Sc in first sc, sc2tog in next 2 sc, sc in last sc, ch 1 and turn – 3 sts.
Row 41: Sc in each sc across, ch 1 and turn.
Row 42: Sc in first sc, skip next sc, sc in last sc, ch 1 and turn – 2 sts.
Row 43: Sc in each sc across, ch 1 and turn.
Row 44: Sc2tog in next 2 sc, ch 1 and turn – 1 st.
Sc around entire edge of belly piece, working 2-3 sts into the ends of row 1 as you turn the corner. Fasten off in first st of Row 44, leaving a long tail for sewing.
Attach Belly Patch:
Position Row 1 of the belly patch against the back edge of the jaw and pin in place. Stretch and flatten out the belly patch against the neck, belly, and lower tail, pinning the edges down as you place down the work. Once you are happy with patch’s location, sew the edges down with a back or running stitch.
Tips for Making Your Easy Crochet Dino Plushie Unique
Want to make your Rori the Raptor truly one-of-a-kind? Experiment with color and fiber choices inspired by Jurassic World, adjust the size and shape to accommodate different stuffing levels, and add unique embellishments such as a free crochet unicorn pattern. Whether you’re crafting a special baby shower gift, or expanding your dino collection with easy amigurumi, these tips will help your plushie stand out!
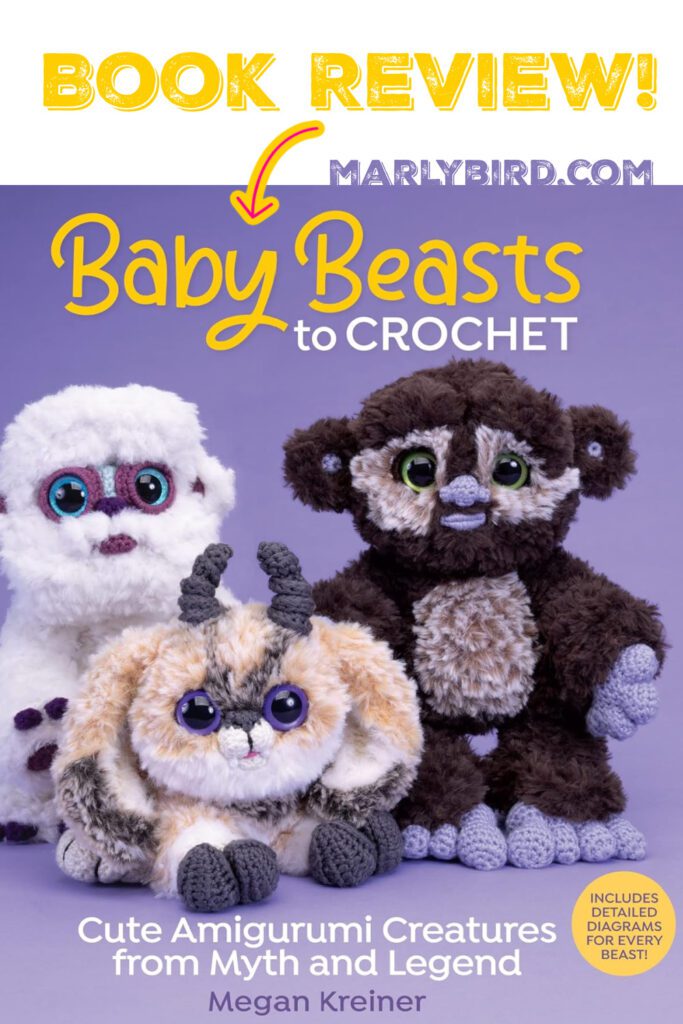
Want to try your hand and more fun plushie designs? Check out these little beasties.
Color and Yarn Choice Variations
Choosing the right color and yarn can make your Rori the Raptor plushie truly stand out. I love using vibrant greens and earthy browns inspired by dinosaurs like the brontosaurus and pachycephalosaurus to bring Rori’s features to life.
Ideas for Embellishments
One fun way to embellish your Rori the Raptor is by adding a tiny crochet bag for it to carry. This not only enhances Rori’s charm but also adds an extra layer of creativity to your project, reflecting the crochet stuffed animal popularity and making it stand out among other dinosaur plushies.
Troubleshooting Common Crochet Issues
Sometimes, yarn tension can get tricky, or you might make a mistake while assembling your project. Whether you’re creating Rori the Raptor, a granny square, a free crochet unicorn pattern, or a crochet menorah, these issues can pop up.
In the following sections, I’ll share tips on managing yarn tension and fixing common mistakes to keep your crafting smooth and enjoyable.
Managing Yarn Tension
Keeping your yarn tension consistent is key to creating a smooth and evenly shaped Rori the Raptor. First, it is important to restate that this plushie is made using single crochets created with the yarn over NOT the yarn under. If you don’t know the difference you can check out this blog post.
Anyway, I usually start by holding the yarn a with even and consistent tension, then make sure each stitch is the size of my hook as I go to prevent any tight spots. This simple adjustment makes a big difference in the final look of your plushie.
If you find your tension fluctuating, try practicing with a few test swatches before diving into Rori.
Fixing Mistakes During Assembly
When you’re putting Rori the Raptor together, it’s easy to run into a few bumps along the way. Maybe a limb isn’t attaching right or a section isn’t shaping as it should. Here’s how I handle these common assembly hiccups:
- Carefully examine where things went wrong and use a stitch marker to keep track.
- Gently unravel the affected stitches back to the mistake.
- Rework that area with consistent tension to ensure everything fits perfectly.
If a mistake feels too tricky to fix on your own, don’t hesitate to reach out to our crafting community. We’re all here to help each other create the best Rori possible!
The number one thing I’ve learned when it comes to a MK Crochet pattern is to Blindly Follow the instructions. Don’t overthink any of it, just do.
Sharing Your Finished Rori the Raptor
After completing Rori the Raptor, I love taking adorable photos to showcase your work using easy amigurumi projects and frog crochet pattern. It’s a fun way to highlight your creation and inspire others with amigurumi popularity. Joining crochet community groups lets you connect, share your progress with free crochet unicorn pattern and menorah pattern, and celebrate your finished plushies together. Let’s explore how to share Rori with the world!
Taking Adorable Photos
I love capturing Rori the Raptor in different settings to showcase his adorable details. Whether he’s snuggled up on a cozy blanket or placed among your favorite crafting supplies such as a free crochet unicorn pattern, frog crochet pattern, menorah pattern, and easy amigurumi, taking photos of your finished plushie preserves the joy of your creation.
You don’t need fancy equipment—just use your smartphone and some natural light to highlight Rori’s soft textures and vibrant colors. Share your photos in our crafting community or on social media with #RoriTheRaptor to inspire and connect with fellow crochet enthusiasts! If you tag @themarlybird or @mkcrochet we would that.
Frequently Asked Questions
What materials do I need to crochet Rori the Raptor?
To crochet Rori the Raptor, I use:
- Yarn in chosen colors
- Suitable crochet hook
- Polyester stuffing
- Safety eyes or embroidery thread
- Tapestry needle
How long does it take to complete the Rori plushie?
Depending on your familiarity with crochet, a custom crochet stuffed animal like Rori can be made in about 15 to 25 hours making the Rori plushie. It depends on your skill level and how detailed you want it to be. Whether you’re just starting out or have some crafting experience, you’ll find it a fun and rewarding project!
Can I customize the colors of my Rori the Raptor?
Absolutely! You can personalize Rori the Raptor with colors that match your style. Whether you want bright hues or subtle shades, customizing Rori is simple and fun. Let’s create a unique Rori just for you!
Where can I find free dinosaur crochet patterns?
You can find free dinosaur crochet patterns on sites like Ravelry, AllFreeCrochet, and Pinterest. Plus, our Marly’s Minions community regularly shares links to awesome free designs. Happy crocheting with your dino buddies!
Bringing Rori the Raptor to life offers a fun and rewarding way to enhance your crochet skills with a lovable dinosaur plushie. You’ll love experimenting with different colors and custom features to make Rori uniquely yours.
Your BiCrafty Bestie,
Marly Bird

Categories: Crochet, Free Patterns, Our Free Patterns, Pattern, Uncategorized

