
Planned Pooling Crochet: Deciding Where to Create your Offset Shift
Today we have a special guest on the blog. Please welcome back Rockin Lola who is here today to teach us about planned pooling crochet and deciding where to create your offset shift.
When you are starting a planned pooling project and using a new color, it is always best to do a swatch first. I know, I know – we all hate doing a gauge swatch, but trust me, you want to do one for your pooling projects. There are 3 reasons why making a swatch is worth the time in a pooling project.
This blog is the third part in our series on why creating a swatch is so important for your planned pooling project. First we talked about choosing the right hook size for your project. After that we moved on to talking about picking the dominant color and color placement in your planned pooling crochet projects.
Finally we are going to be talking about deciding where to put your offset shift in your planned pooling crochet project.
THREE REASONS WHY TO SWATCH IN PLANNED POOLING CROCHET:
- Choosing the best hook size
- Choosing the color placement
- Deciding where to create your offset
In order to get the best results from your planned pooling project you will want to work through these three reasons in order. Each reason for making a swatch first builds off of the knowledge you learn in the previous reasons.
*This post contains affiliate links. By clicking one of these links and making a purchase part of the purchase price goes to the blog. The price that you pay is not changed. Thank you for your support of the blog*
TUTORIAL MATERIALS:
For this tutorial, I will be using Red Heart Soft Baby Steps in Tickle. Making a swatch for planned pooling isn’t quite the same as making one to check gauge, yet they both have a purpose and provide valuable information before starting a project. Because a planned pooling swatch and a gauge swatch serve two different purposes we came up with three reasons to swatch series to help you understand the purpose.
HOOK: Susan Bates silvalume Crochet Hook size G hook, 4.00mm (this may vary for you depending on tension and yarn dye lot)
STITCHES USED: chain (ch), moss stitch (single crochet, ch1)
Planned Pooling Crochet Tip:
Make a swatch to determine the proper hook size you should use as well as to determine how many stitches per color are in your color sequence. This may take a few times through the entire color sequence. To learn more about how to do this please see the first blog post in this series.
When I started planned pooling, I noticed that the edges of my piece were different. One side of my project was straight and uniform while the other side was loose and inconsistent. I looked for a solution to this problem and found one, which I will explain how to do in this tutorial.
Purpose of this tutorial:
This tutorial will show you how to determine which color in your sequence you will use for your offset shift (rather than counting the chain 2 at the end as a stitch). This will help the edges of your project to be uniform and consistent.
Why won’t the yarn automatically offset (shift over) by one stitch?
Let’s say that you were consistent with your color sequence and always had 18 stitches in your sequence. If you remained with 18 and did one color sequence wide, your colors will stack on top of each other. In order for the colors to shift over by 1 stitch, every other row your moss stitch project needs to have either 1 more or 1 less stitch in the color sequence (17 or 19 stitches in a color sequence every other row). You will need to manipulate the yarn by tightening or loosening your tension in order to get 1 more or less stitch.
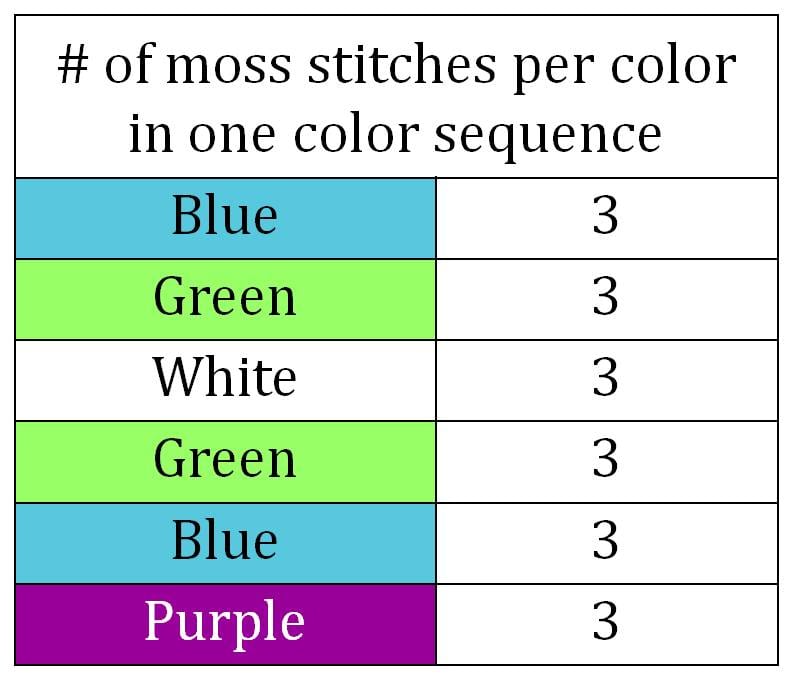
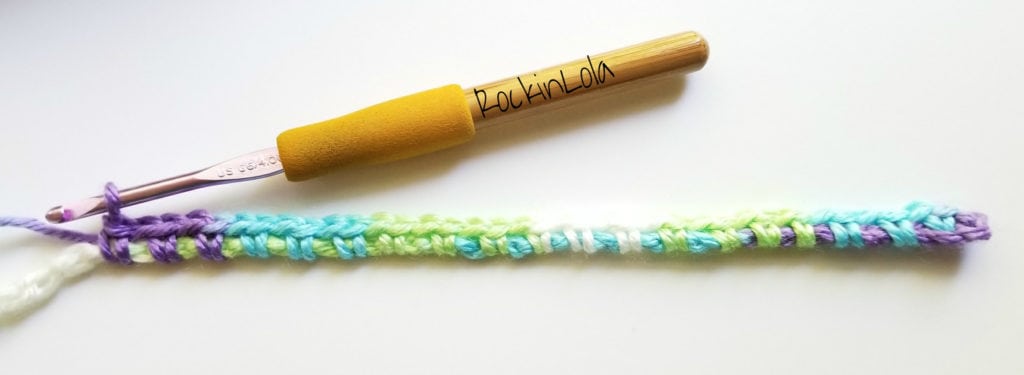
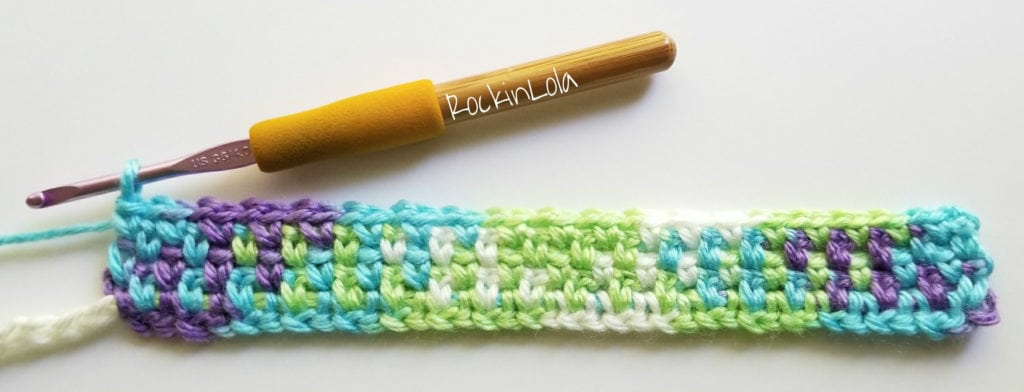
This yarn has 6 sections of color in each color sequence before it repeats. Each section of color is consistent and is approximately the same length as all of the other colors in the sequence. After I made a swatch with a G 4.00mm hook, I was able to get 3 moss stitches out of all 6 colors in the sequence. I decided that this was the appropriate hook size for my project.
For instructions on how to determine your proper hook size, see part one of this series where you will learn about choosing the best hook size for your project.
Choosing the Color Placement:
The way that your project will look depends on where you start in your color sequence. Since it is the most dominant color in the skein, I wanted the Purple to come out of the edges. For instructions on how to determine your color placement, see part two of this series where you will learn about choosing color placement.
Choosing the Offset Shifting Color:
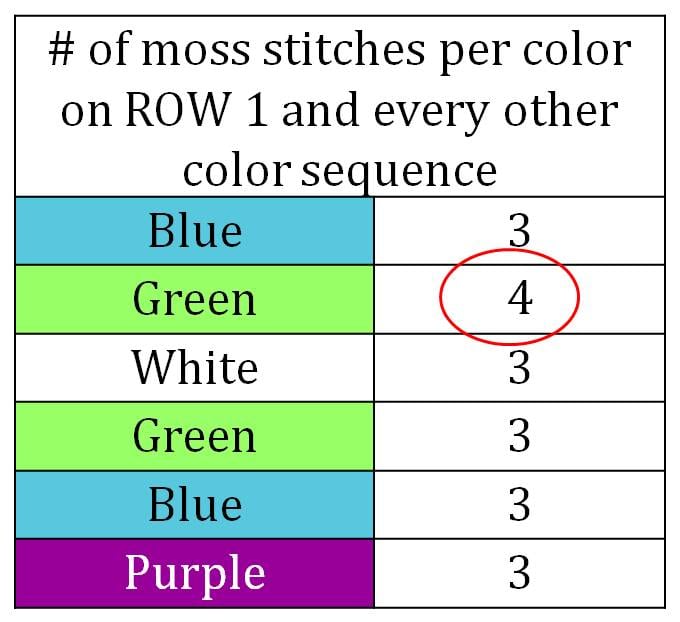
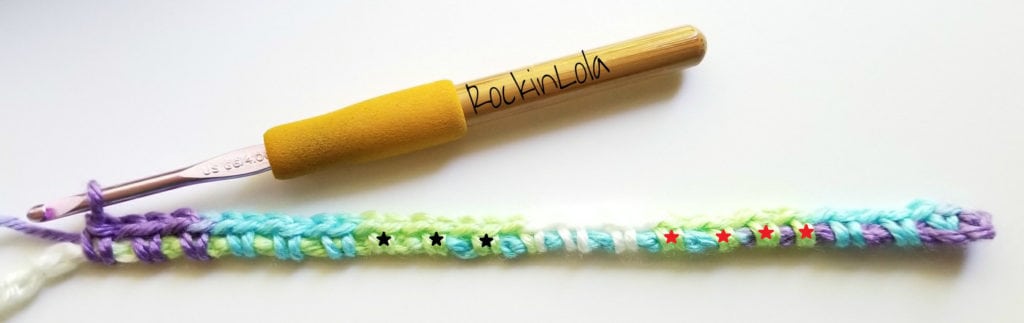
It is important that your offset color (the stitch that you will add or subtract in the same color throughout your project) is a color that does not stand out, otherwise it would be too noticeable. Using the dominant color of the sequence, Purple in this case, would be too distracting and noticeable in the overall project if there were a different number in stitch counts. After I made a swatch, I noticed that my 1st green color was slightly longer than all of the other colors in the sequence. It would be easy to make this the offset color by making this instance of green have 4 moss stitches (as opposed to 3 moss stitches) in every other row of the color sequence.
Therefore, to get a 1 stitch diagonal offset, my FIRST row and every other row will have 19 moss stitches in a color sequence. My SECOND row and every other row will have 18 moss stitches in a color sequence.

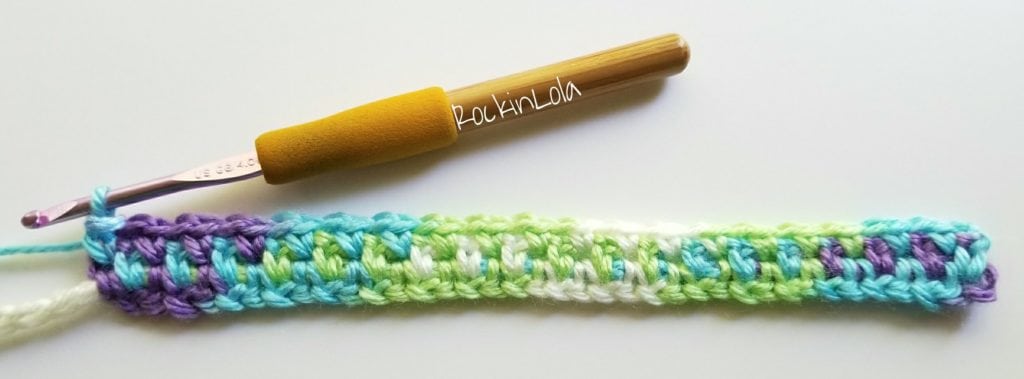
Row 1: I made a chain long enough for 19 moss stitches and started with the Blue. I followed the color sequence according to Chart 1 and made 19 moss stitches across.
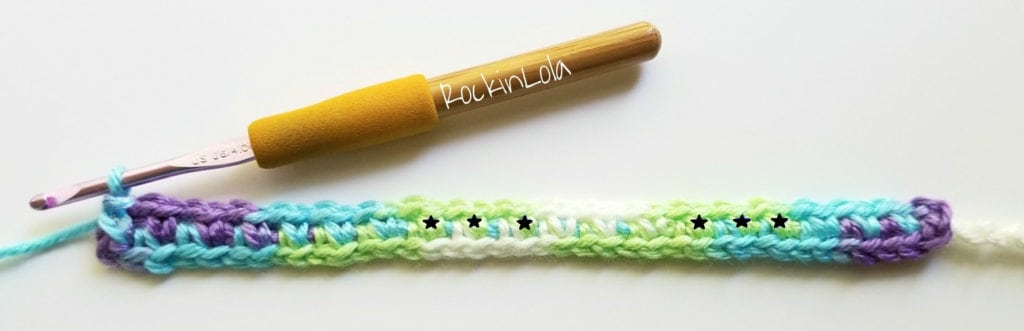
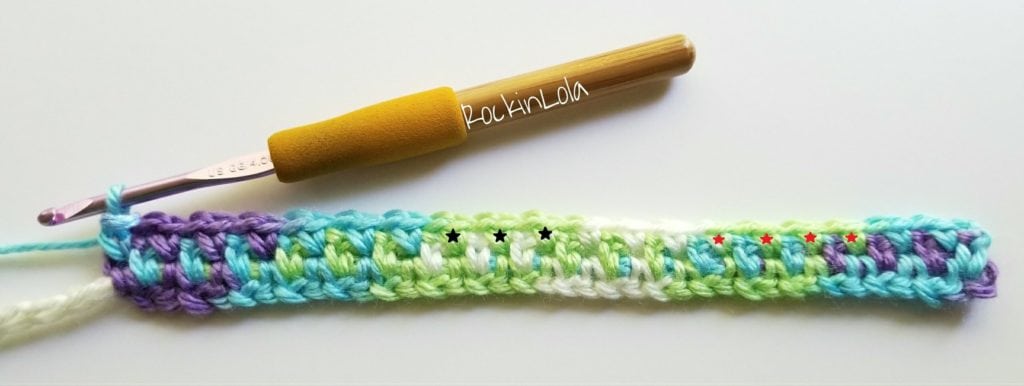
*The Red stars represent 4 Green moss stitches in a color sequence here and throughout this tutorial.
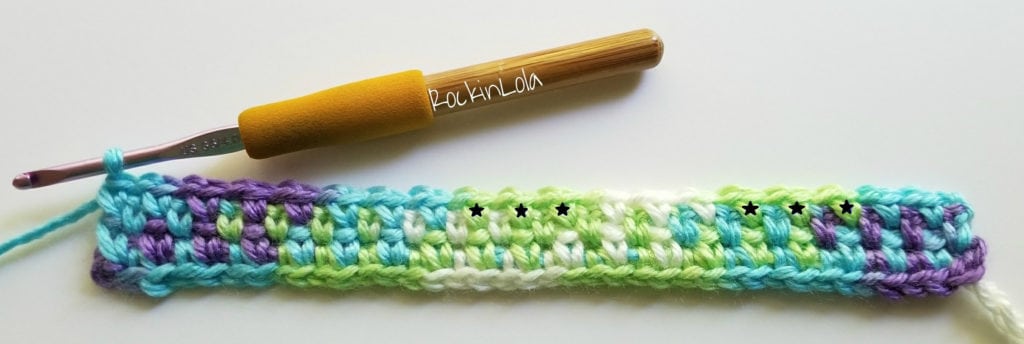
*The Black stars represents 3 Green moss stitches in a color sequence here and throughout this tutorial.
This sequence will only occur EVERY OTHER ROW.
Row 2: Chain 2 (I choose to make a tight ch2) and continue to moss stitch across the row, following the color sequence from Chart 2 (3 moss stitches each). You should end after your 3rd Purple stitch and still have 1 spot remaining for a moss stitch at the end of Row 2. The first color of your new sequence, Blue in this case, (Chart 1) should be on your hook.
Make your final sc to end Row 2.

Row 2 should contain 3 moss stitches in each color and end with the first moss stitch of the new color sequence.
Row 3: Continue to follow Chart 1, finishing the remaining 2 moss stitches in Blue and following the rest of the color sequence. Remember that your first instance of Green will have 4 moss stitches.
Row 4: Continue following where Chart 2 left off, making sure to make 3 moss stitches in each color.
Row 5: Continue following where Chart 1 left off, remembering that your first instance of Green will have 4 moss stitches.

Rows 6 and on: Continue to follow your pattern, alternating between Chart 1 and Chart 2, remembering that you will have 4 Green moss stitches on every other row.
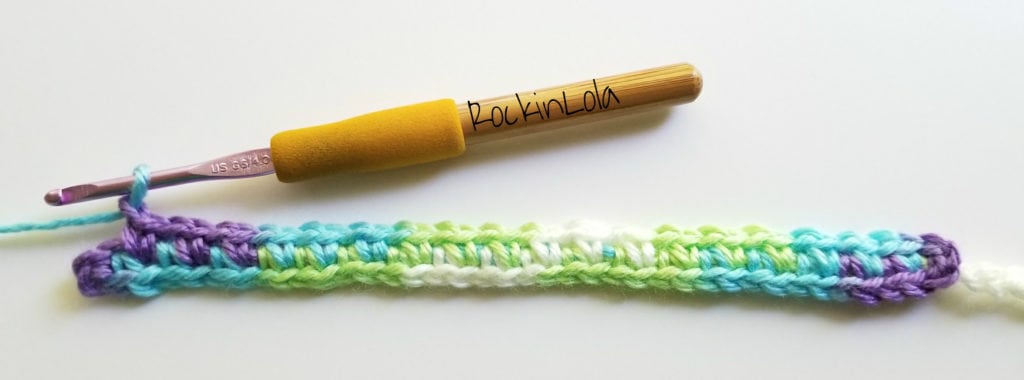
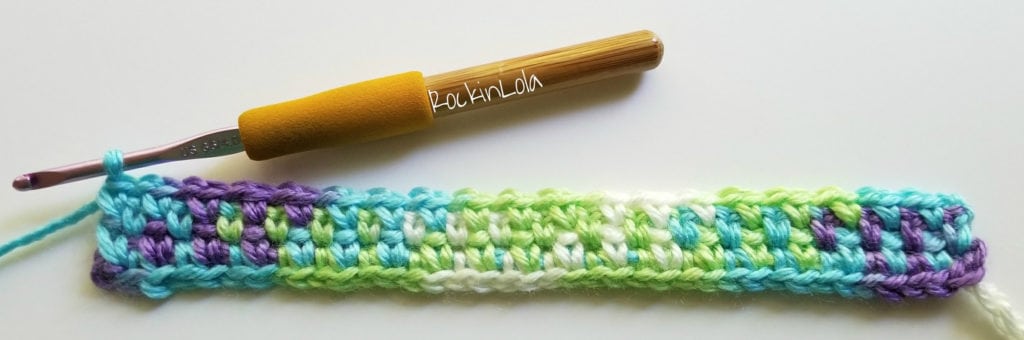
Notice how the difference in stitch numbers is not noticeable as a whole piece. The edges are straight and uniform. There is not one side that is looser than the other.
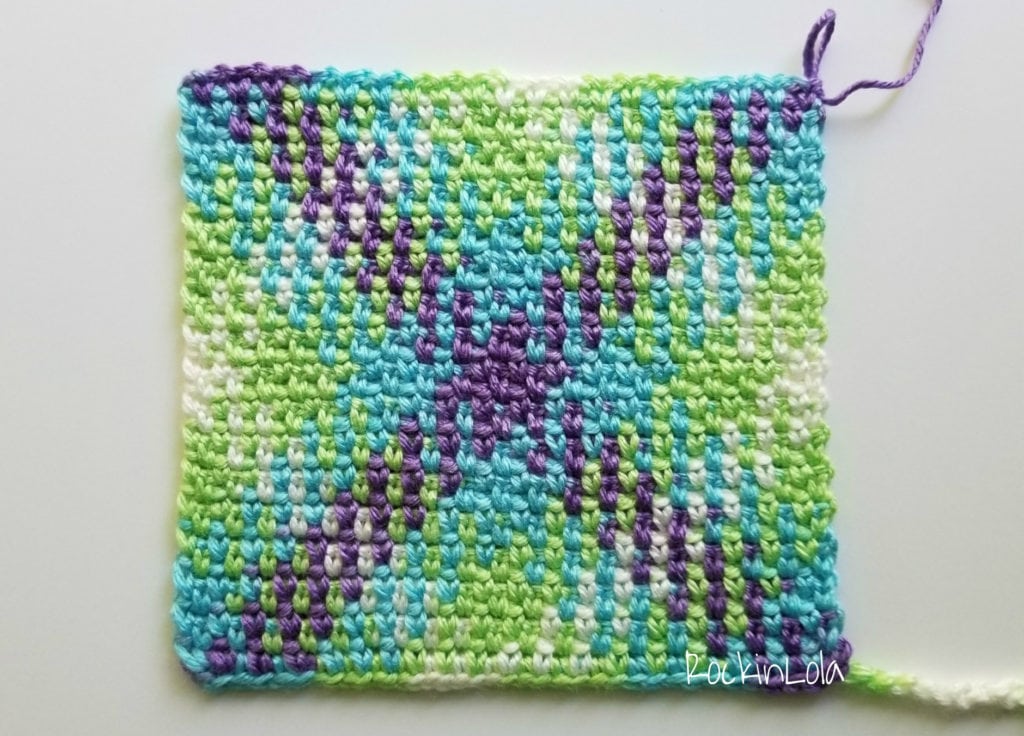
Here is where the offset color is:

Enjoy! And Happy pooling!!
PLANNED POOLING CROCHET BLOG POSTS WITH MARLY BIRD:
Thanks so much to Rockin Lola for sharing with us planned pooling color placement and picking your dominate color. If you want to learn more about Crochet Planned Pooling you can view my other posts on the topic. Prefer learning through video? On the Marly Bird YouTube Channel you will find an entire Planned Pooling Playlist. Be sure to subscribe so you don’t miss a new video.
- The Best Crochet Planned Pooling Argyle Tutorial
- 10 Secrets to Perfect Planned Pooling in Crochet
- Planned Pooling-Finished Starting Chains
- How to create Crochet Planned Pooling Argyle Charts
- Multiple Sequence Planned Pooling Crochet
- Granny Stitch Planned Pooling Crochet
- Planned Pooling Crochet: Choosing the Best Hook Size
- Planned Pooling Crochet: Color Placement

About Rockin Lola:
My name is Rocky and I am owner and designer at RockinLola. In middle school I taught myself how to crochet by reading patterns in magazines and crochet books. I love color and find myself drawn to bright colors and rainbow themes. When friends of mine started to have babies I began to design baby blankets and clothing and I haven’t stopped since. I work in the public school system and am able to incorporate teaching children how to crochet as part of my job. When I get home after a long day of work, I get to play with yarn and design new things. In October 2016, planned pooling became my new obsession which opened a ton of new possibilities and design concepts. I love to be able to share things that I’ve learned along the way and always hope to inspire the creativity of others.
Yarn Pooling Made Easy by Marly Bird:
Did you know that Marly has published a book on Planned Pooling Crochet? In this book, published by Leisure Arts, you will find 10 beautiful designed patterns that you can create using Red Heart yarns.


I find that newbies understand quicker when you substitute the word OFFSET with DIAGONAl.