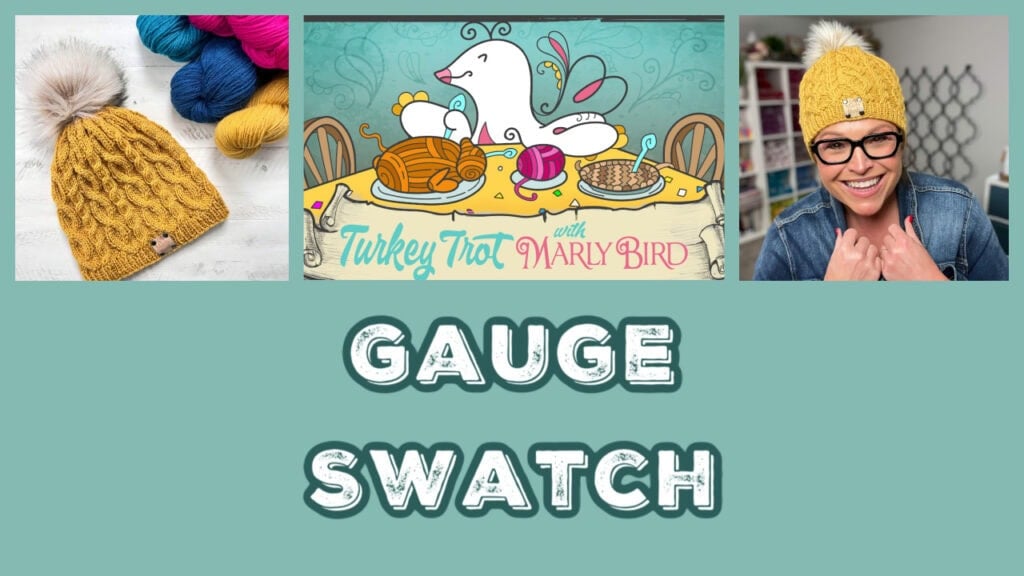
Keystone Cabled Knit Hat Gauge – Free Lesson & Instructions
Welcome to the gauge lesson for the Keystone Cabled Knit Hat, the featured knitting project for the 7th Annual Marly Bird Turkey Trot Make-Along 2025! If you want your hat to fit perfectly and show off those beautiful cables, this step matters more than most knitters realize.
This post will walk you through:
✔ Why gauge matters (especially for cables!)
✔ Why 100% wool behaves differently
✔ Whether to block your swatch (spoiler: don’t for this hat)
✔ Your exact flat and in-the-round cable panel gauge instructions
✔ How to measure accurately
✔ Where to get extra gauge lessons + the ad-free PDF
And we’re doing all of this Marly-style — fun, friendly, and confidence-boosting.
Let’s get stitching, Bestie! 💛
🧶 Why Gauge Matters for a Cabled Hat
Cables are gorgeous — but sneaky.
They:
- Pull the fabric inward
- Compress stitches
- Change row height
- Tighten the circumference more than plain knitting
Because of this, even a small difference in gauge can dramatically change the fit.
For example:
- Too tight of a gauge → hat fits like a toddler size
- Too loose → hat slides over your eyebrows
This hat is knit in the round, so ideally your gauge should mimic in-the-round tension as closely as possible. I provide both flat and in-the-round swatching instructions below so you can choose the method that works best for you.
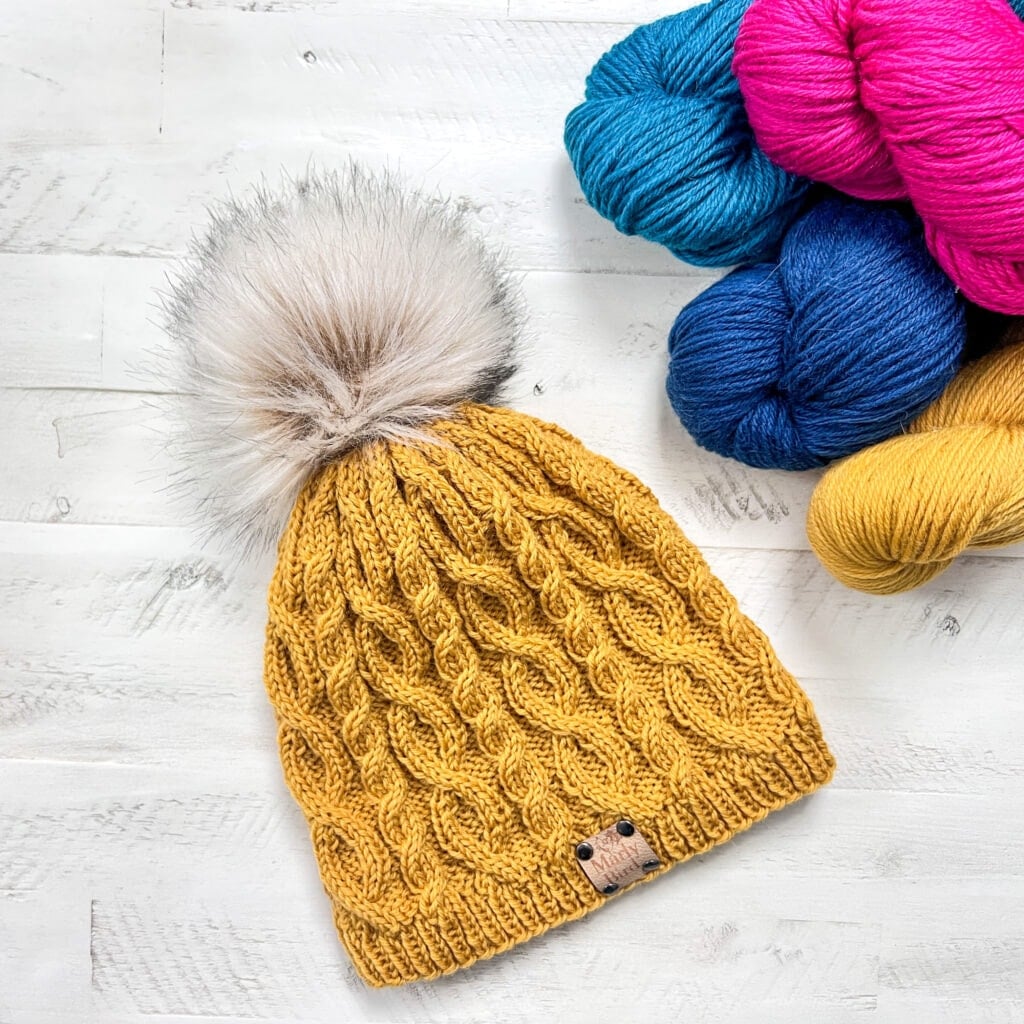
🧵 About the Yarn (and Why It Affects Gauge)
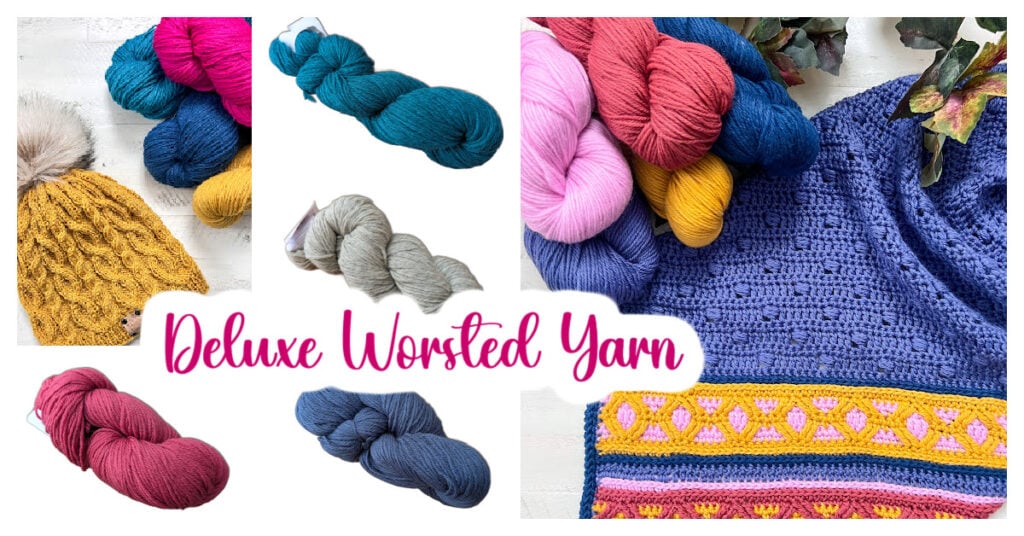
This hat uses 100% non-superwash wool: 👉 Universal Yarn Deluxe Worsted (affiliate link):
https://tidd.ly/3JGXmPK
Why wool matters:
✔ Better cable definition
Cables “pop” beautifully with wool’s natural structure.
✔ Natural elasticity
This helps the hat hug your head.
✔ Memory + bounce
Wool springs back into shape, making your gauge more consistent.
✔ BUT… wool relaxes when wet
Which brings us to…
🚫 Should You Block Your Keystone Hat Swatch?
Nope — not for this hat!
Here’s why:
- Blocking softens and opens wool
- A blocked swatch measures wider
- But the hat itself should NOT be blocked aggressively
- We want that natural “hug” and rib-like pull
So the swatch should be measured:
👉 Unblocked
👉 Right off the needles
👉 No stretching, no smoothing, no steaming
This keeps your gauge honest and ensures your hat fits correctly.
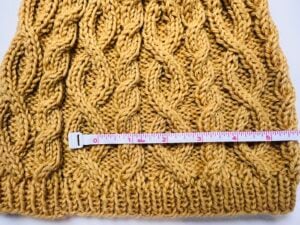
📏 Target Gauge for the Keystone Cable Knit Hat
Using US 8 (5 mm) needles in the Cable Panels Pattern, UNBLOCKED: 28 sts & 26 rounds = 4″ (10 cm)
Remember: measure across the center of the cable panel — not the edges.
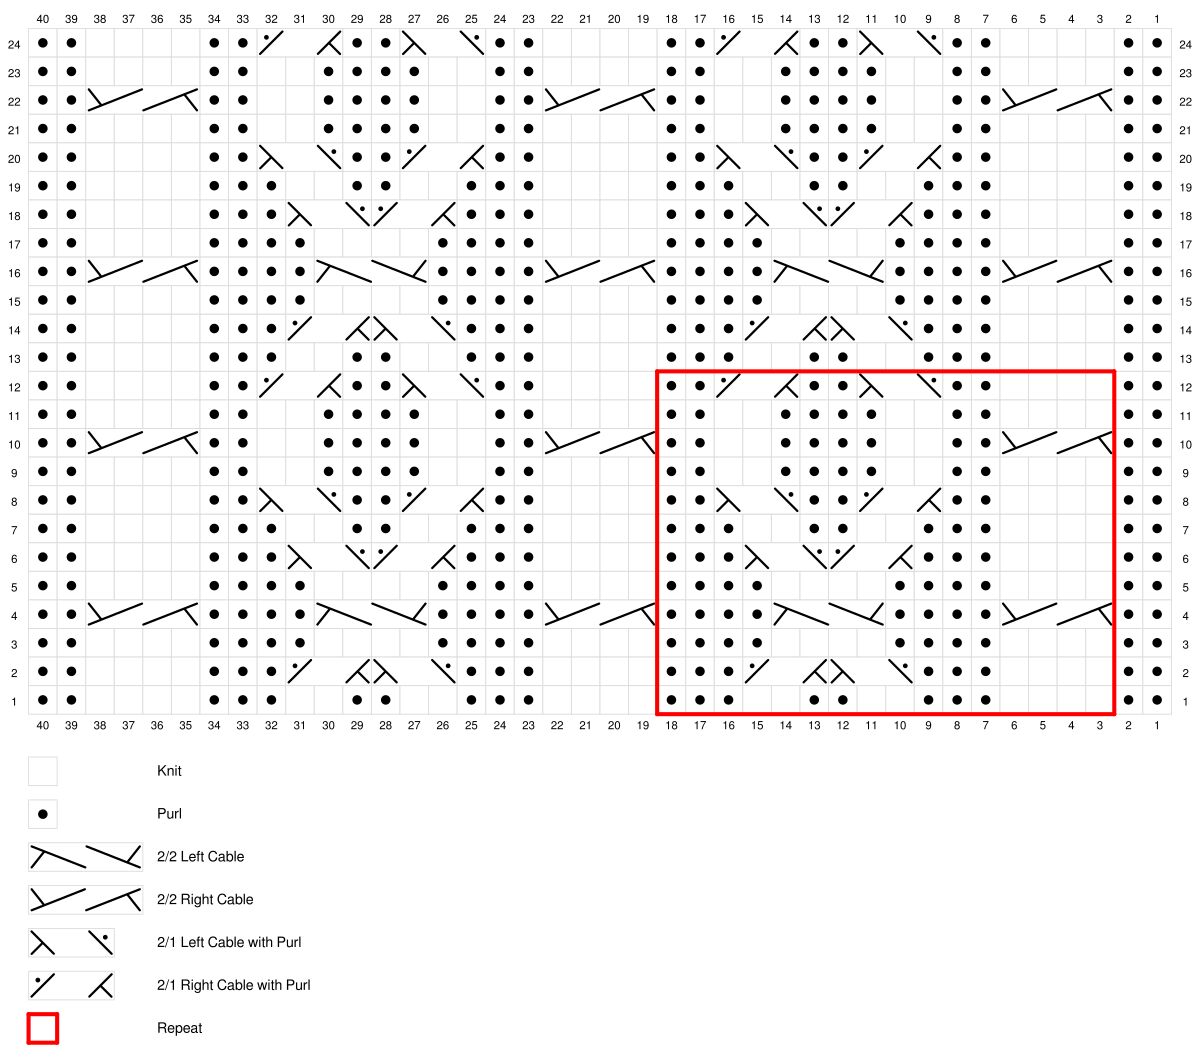
⭐️ Cable Stitch Definitions (Only the Ones Used in This Pattern Collection)
⭐️ 2/2 LC (2/2 Left Cable): Slip 2 sts onto cable needle and hold in front, k2 from left hand needle, k2 from cable needle.
⭐️ 2/2 RC (2/2 Right Cable): Slip 2 sts onto cable needle and hold in back, k2 from left hand needle, k2 from cable needle.
⭐️ 2/1 LPC (2/1 Left Purl Cable): Slip 2 sts onto cable needle and hold in front, p1 from left hand needle, k2 from cable needle.
⭐️ 2/1 RPC (2/1 Right Purl Cable): Slip 1 st onto cable needle and hold in back, k2 from left hand needle, p1 from cable needle.
⭐️ 2/2 PRC (2/2 Purl Right Cable): Slip 2 sts onto cable needle and hold in back, p2 from left hand needle, p2 from cable needle.
(Used in the glove cuffs when the cable twist is worked on the wrong side.)
🧶 Cable Panel Patterns – Flat Swatch Instructions
You can find this cable panel chart on Stitch Fiddle: Link only with VIP
Or follow these written instructions to create your flat swatch
Gauge Swatch – Cable Panel Pattern – Flat
Cast On 40 sts
→ Row 1 [WS]: K2, P4, K3, P2, K2, P2, K3, P4, K3, P2, K2, P2, K3, P4, K2
← Row 2 [RS]: P2, K4, P3, 2/1 LPC, 2/1 RPC, P3, K4, P3, 2/1 LPC, 2/1 RPC, P3, K4, P2
→ Row 3 [WS]: K2, P4, K4, P4, K4, P4, K4, P4, K4, P4, K2
← Row 4 [RS]: P2, 2/2 RC, P4, 2/2 LC, P, P3, 2/2 RC, P4, 2/2 LC, P4, 2/2 RC, P2
→ Row 5 [WS]: K2, P4, K4, P4, K4, P4, K4, P4, K4, P4, K2
← Row 6 [RS]: P2, K4, P3, 2/1 RPC, 2/1 LPC, P3, K4, P3, 2/1 RPC, 2/1 LPC, P3, K4, P2
→ Row 7 [WS]: K2, P4, K3, P2, K2, P2, K3, P4, K3, P2, K2, P2, K3, P4, K2
← Row 8 [RS]: P2, K4, P2, 2/1 RPC, P2, 2/1 LPC, P2, K4, P2, 2/1 RPC, P2, 2/1 LPC, P2, K4, P2
→ Row 9 [WS]: K2, P4, K2, P2, K4, P2, K2, P4, K2, P2, K4, P2, K2, P4, K2
← Row 10 [RS]: P2, 2/2 RC, P2, K2, P4, K, K, P2, 2/2 RC, P2, K2, P4, K2, P2, 2/2 RC, P2
→ Row 11 [WS]: K2, P4, K2, P2, K4, P2, K2, P4, K2, P2, K4, P2, K2, P4, K2
← Row 12 [RS]: P2, K4, P2, 2/1 LPC, P2, 2/1 RPC, P2, K4, P2, 2/1 LPC, P2, 2/1 RPC, P2, K4, P2
→ Row 13 [WS]: K2, P4, K3, P2, K2, P2, K3, P4, K3, P2, K2, P2, K3, P4, K2
← Row 14 [RS]: P2, K4, P3, 2/1 LPC, 2/1 RPC, P3, K4, P3, 2/1 LPC, 2/1 RPC, P3, K4, P2
→ Row 15 [WS]: K2, P4, K4, P4, K4, P4, K4, P4, K4, P4, K2
← Row 16 [RS]: P2, 2/2 RC, P4, 2/2 LC, P4, 2/2 RC, P4, 2/2 LC, P4, 2/2 RC, P2
→ Row 17 [WS]: K2, P4, K4, P4, K4, P4, K4, P4, K4, P4, K2
← Row 18 [RS]: P2, K4, P3, 2/1 RPC, 2/1 LPC, P3, K4, P3, 2/1 RPC, 2/1 LPC, P3, K4, P2
→ Row 19 [WS]: K2, P4, K3, P2, K2, P2, K3, P4, K3, P2, K2, P2, K3, P4, K2
← Row 20 [RS]: P2, K4, P2, 2/1 RPC, P2, 2/1 LPC, P2, K4, P2, 2/1 RPC, P2, 2/1 LPC, P2, K4, P2
→ Row 21 [WS]: K2, P4, K2, P2, K4, P2, K2, P4, K2, P2, K4, P2, K2, P4, K2
← Row 22 [RS]: P2, 2/2 RC, P2, K2, P4, K2, P2, 2/2 RC, P2, K2, P4, K2, P2, 2/2 RC, P2
→ Row 23 [WS]: K2, P4, K2, P2, K4, P2, K2, P4, K2, P2, K4, P2, K2, P4, K2
← Row 24 [RS]: P2, K4, P2, 2/1 LPC, P2, 2/1 RPC, P2, K4, P2, 2/1 LPC, P2, 2/1 RPC, P2, K4, P2
Repeat rows 1-24 as necessary to get large enough gauge swatch to measure.
💡 How to Make a “Fake In-the-Round” Swatch
When knitting in the round, as you are for the Keystone Hat, your tension is often slightly different because you’re always working on the right side of the fabric — no purl rows!
To mimic that tension without knitting a small tube, try this simple trick:
1️⃣ Cast on the number of stitches you’d normally use for your swatch.
2️⃣ Knit across the first row.
3️⃣ Instead of turning your work, slide your stitches back to the other end of the circular needle or double-pointed needle.
4️⃣ Bring your working yarn loosely across the back of the swatch to the right edge again.
5️⃣ Knit the next row, again keeping all your stitches on the right side.
Repeat this process for each row, carrying your yarn loosely across the back every time.
This creates a swatch that looks flat but behaves like it’s knit in the round — giving you a more accurate tension match for circular projects.
✂️ Note: Those loose strands across the back make the swatch unusable for anything else, but it’s worth it for accurate gauge!
🧶 Cable Panel Pattern – Round Swatch Instructions
You can find this cable panel chart on Stitch Fiddle: Link only with VIP
Or follow these written instructions to create your round swatch
Gauge Swatch – Cable Panel Pattern – Round
Cast On 40 sts on a circular needle
Row 1: P2, K4, P3, K2, P2, K2, P3, K4, P3, K2, P2, K2, P3, K4, P2
Row 2: P2, K4, P3, 2/1 LPC, 2/1 RPC, P3, K4, P3, 2/1 LPC, 2/1 RPC, P3, K4, P2
Row 3: P2, K4, P4, K4, P4, K4, P4, K4, P4, K4, P2
Row 4: P2, 2/2 RC, P4, 2/2 LC, P, P3, 2/2 RC, P4, 2/2 LC, P4, 2/2 RC, P2
Row 5: P2, K4, P4, K4, P4, K4, P4, K4, P4, K4, P2
Row 6: P2, K4, P3, 2/1 RPC, 2/1 LPC, P3, K4, P3, 2/1 RPC, 2/1 LPC, P3, K4, P2
Row 7: P2, K4, P3, K2, P2, K2, P3, K4, P3, K2, P2, K2, P3, K4, P2
Row 8: P2, K4, P2, 2/1 RPC, P2, 2/1 LPC, P2, K4, P2, 2/1 RPC, P2, 2/1 LPC, P2, K4, P2
Row 9: P2, K4, P2, K2, P4, K2, P2, K4, P2, K2, P4, K2, P2, K4, P2
Row 10: P2, 2/2 RC, P2, K2, P4, K, K, P2, 2/2 RC, P2, K2, P4, K2, P2, 2/2 RC, P2
Row 11: P2, K4, P2, K2, P4, K2, P2, K4, P2, K2, P4, K2, P2, K4, P2
Row 12: P2, K4, P2, 2/1 LPC, P2, 2/1 RPC, P2, K4, P2, 2/1 LPC, P2, 2/1 RPC, P2, K4, P2
Row 13: P2, K4, P3, K2, P2, K2, P3, K4, P3, K2, P2, K2, P3, K4, P2
Row 14: P2, K4, P3, 2/1 LPC, 2/1 RPC, P3, K4, P3, 2/1 LPC, 2/1 RPC, P3, K4, P2
Row 15: P2, K4, P4, K4, P4, K4, P4, K4, P4, K4, P2
Row 16: P2, 2/2 RC, P4, 2/2 LC, P4, 2/2 RC, P4, 2/2 LC, P4, 2/2 RC, P2
Row 17: P2, K4, P4, K4, P4, K4, P4, K4, P4, K4, P2
Row 18: P2, K4, P3, 2/1 RPC, 2/1 LPC, P3, K4, P3, 2/1 RPC, 2/1 LPC, P3, K4, P2
Row 19: P2, K4, P3, K2, P2, K2, P3, K4, P3, K2, P2, K2, P3, K4, P2
Row 20: P2, K4, P2, 2/1 RPC, P2, 2/1 LPC, P2, K4, P2, 2/1 RPC, P2, 2/1 LPC, P2, K4, P2
Row 21: P2, K4, P2, K2, P4, K2, P2, K4, P2, K2, P4, K2, P2, K4, P2
Row 22: P2, 2/2 RC, P2, K2, P4, K2, P2, 2/2 RC, P2, K2, P4, K2, P2, 2/2 RC, P2
Row 23: P2, K4, P2, K2, P4, K2, P2, K4, P2, K2, P4, K2, P2, K4, P2
Row 24: P2, K4, P2, 2/1 LPC, P2, 2/1 RPC, P2, K4, P2, 2/1 LPC, P2, 2/1 RPC, P2, K4, P2
Repeat rows 1-24 as necessary to get large enough gauge swatch to measure.
🧶 How to Measure Your Gauge Accurately
To check your gauge:
✔ Lay your swatch flat (unblocked)
✔ Measure the center cable section only
✔ Count stitches over 4 inches
✔ Count rounds over 4 inches
✔ Compare to target gauge: 28 sts x 26 rnds
If your swatch does not match:
- Too tight → try a larger needle
- Too loose → try a smaller needle
A small adjustment makes a big difference.
🎁 Want the Full Gauge Lesson + PDF?
The Marly Bird House VIP Experience includes:
✨ Printable gauge worksheets
✨ Video lessons on cable gauge
✨ Extra tutorials on tension, cable structure & sizing
✨ Ad-free pattern PDFs
✨ All lessons in one organized place
Upgrade here:
👉 https://marlybird.thrivecart.com/25-marly-bird-turkey-trot-vip-knit/?ref=gauge-post
🦃 Join the Turkey Trot Make-Along (Free!)
If you haven’t signed up yet — don’t miss out!
The Keystone Hat pattern is released in fun “Thanksgiving Menu” sections throughout the holiday weekend.
✔ Free to join
✔ Free pattern installments
✔ Free video tutorials
✔ Support in Marly’s Minions Community

Sign up here:
👉 https://marlybird.kit.com/a9134b01e2
Your full supply list will be emailed to you immediately after signup.
🧶 Final Thoughts
Gauge isn’t just a formality — it’s your superpower.
It helps your yarn, needles, and tension work together so your hat fits beautifully on the very first try.
You’re learning exactly how your yarn behaves… and that’s where knitting confidence begins.
Can’t wait to see your swatches and your finished Keystone Hats!
💖 — Marly Bird