
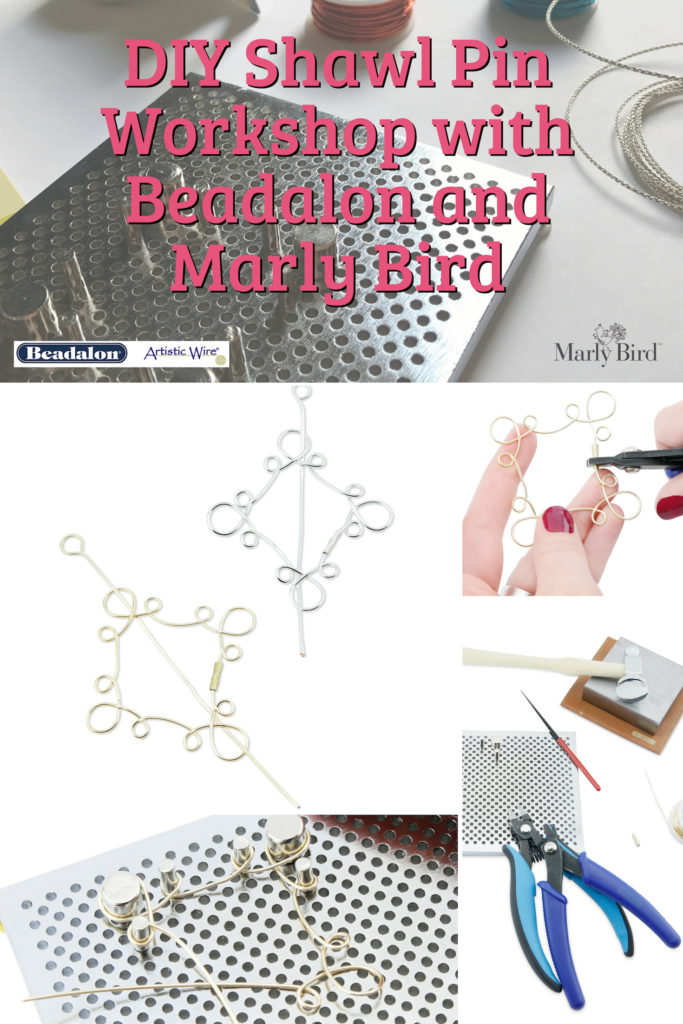
DIY Shawl Pins with Beadalon Wire
Finishing a knit or crochet shawl ins’t complete when you have woven in your last end. To complete a shawl you need the perfect shawl pin. Rather than always searching for the right thing, why not make your own. Not only does it make the piece more special but you can get what you want in shape, color and size when you make it yourself. The team at Beadalon invited Katelyn and I to their office to work on a live demo. Watch below or use the photo tutorial to start creating your own shawl pins for your next shawl project or gift.
Disclosure: This page may contain affiliate links which help me cover the cost of publishing my blog. Should you choose to make a purchase, at no additional cost to you, I may earn a small percentage of the sale
NOTE: Katelyn will be writing the tutorial for this post since she was the one that did the live demonstration. I was along for the ride of making a fun new shawl pin! When it comes to making things with wire I am a total newbie, if I could make this pin I know that you can too!
About the Shawl Pin
One of the exciting things about making your own shawl pins is that you will be able to get some new tools, if you don’t already have them. If you have made my removable stitch markers or my knitting stitch markers you may have some of these tools already.
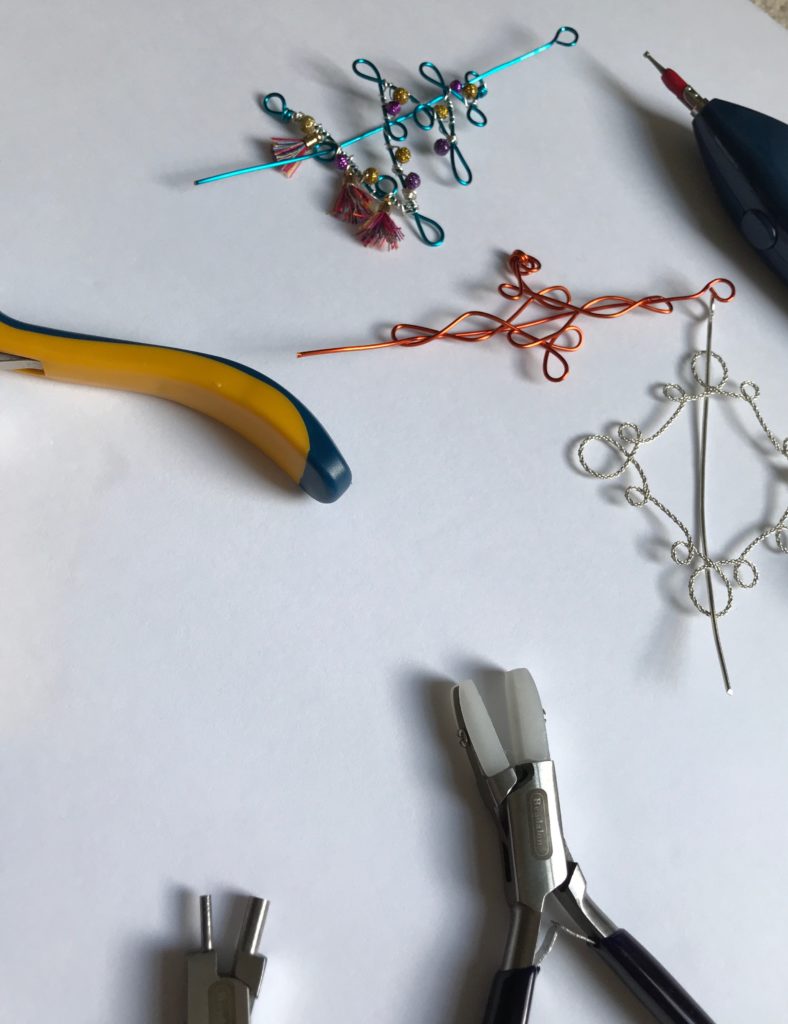
For this tutorial we will be making one style of pin, using a jig. There are many different ways to make a shawl pin and you will see talented designers made them freehand. A jig is great for when you want to make multiple items that look exactly like until you can master working the wire freehand. Although we aren’t going to be mass producing the pin from the tutorial today we are still using a jig as it gives you a based for manipulating the wire.
DIY Shawl Pin Materials
Getting started with our shawl pin will require us to gather the materials that are needed. Before we get started on the project I wanted to talk to you a little bit about your materials. I believe it in important to understand what you are using and why, particularly if you have never worked with the materials before.
We are using 18 gauge wire for the project because it is a sturdy thickness to keep the structure of your piece without being too tough that you can’t bend it with your fingers. When choosing wire the larger the number (ie. 22) when talking about the gauge the thinner the wire is. An 18 gauge wire is on the thicker size but you could go thicker with a 14 or 12 gauge wire as well.
Artistic wire is a great choice for this project because it is slightly softer than some of the other wires you will find in the same gauge on the market and it comes in a variety of colors. This allows you to stick with traditional silver and gold colored wire or do something to match the color of your shawl. When you first unroll your wire from the spool you may notice that there are some slight kinks and that it curves due to being on the spool. We are suggesting the use of nylon jaw pliers or a wire straightener. Neither of these are required for the project, but will help make the yarn more uniform and manageable.
Typically if you are making a project from wire and you want to connect both ends of the wire you would need to solder them together. Rather than breaking out the torch and all of the required tools for that we are using a cold connection. A cold connection is a way of connecting two pieces (typically metal) together without using heat, as you would with torch.
One of the things that we may take for granted, if you have never made jewelry or worked with wire before, is that when we purchase a finished item there are no scratchy ends. By cutting the wire you are going to get a burr end. When you cut the wire you will find that one side is flush, straight, and the other has a pointed end, burr. To remove the bur and make the flush side more rounded we will be using a bead reamer with a bur attachement. While watching the tutorial you will see that we used a battery powered one but you can also get a manual version, it just takes longer to get the desired look and feel.
Okay, now that you know the basics of your materials lets get started.
- Beadalon Deluxe Wire Jig
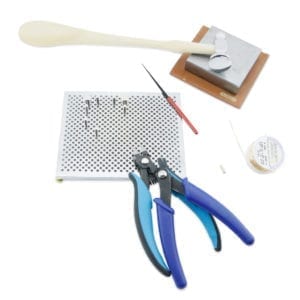
- Beadalon 18 gauge Artistic Wire in any color to match your shawl (in the video we used 20 gauge to get started)
- Beadalon Bail Making Pliers (large)
- Beadalon Wire Nippers
- Beadalon Nylon Jaw Pliers
- Beadalon Wire Straightener (optional)
- Beadalon Chasing Hammer
- Beadalon Rubber Block (optional)
- Beadalon Bench Block
- Beadalon Wire Crimp Connectors
- Beadalon Crimper
- Beadalon Bead Reamer (optional)
- Beadalon Wire Bur Attachment (optional)
Setting up your Shawl Pins
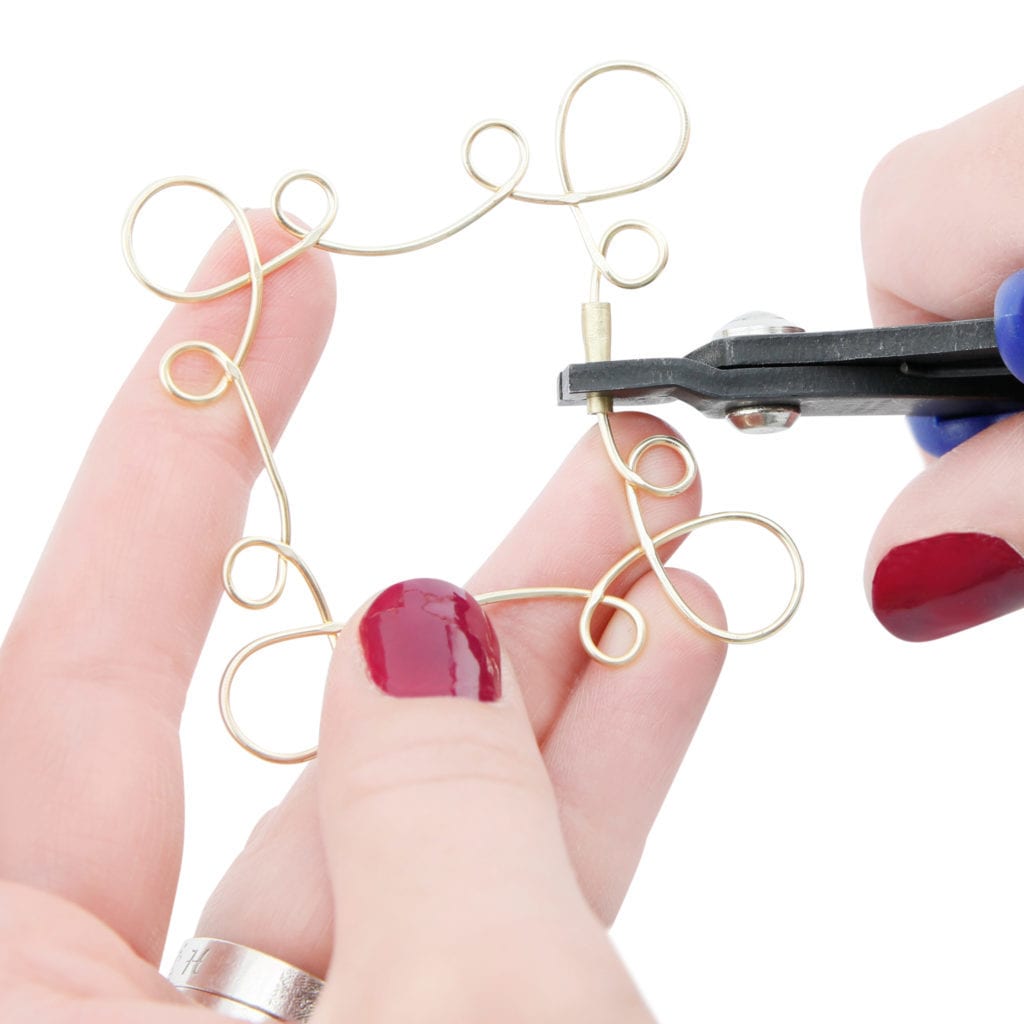
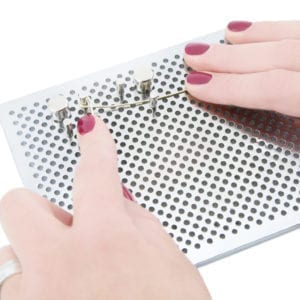 Starting off we will need to set up the jig. In this case we will be making a square shape with loops on each corner. Feel free to search the web or Pinterest to find some other ideas of what you could make with your jig and wire.
Using the jig as it comes you will only be able to have two corners worth of pegs on your board at a time. Beadalon does offer and extra jig pin pack that would allow you to work the whole pin in one movement. You will see that I am using a large pin for the corner and two medium pins on both sides. I left two spots between my pins but you could do more or less if you like. If you choose to do fewer spaces you may find it harder to manipulate your wire as you work.
Once you have your pins in place you will be able to start weaving the wire around the pegs to make your shawl pin shape.
Making Your Shawl Pins
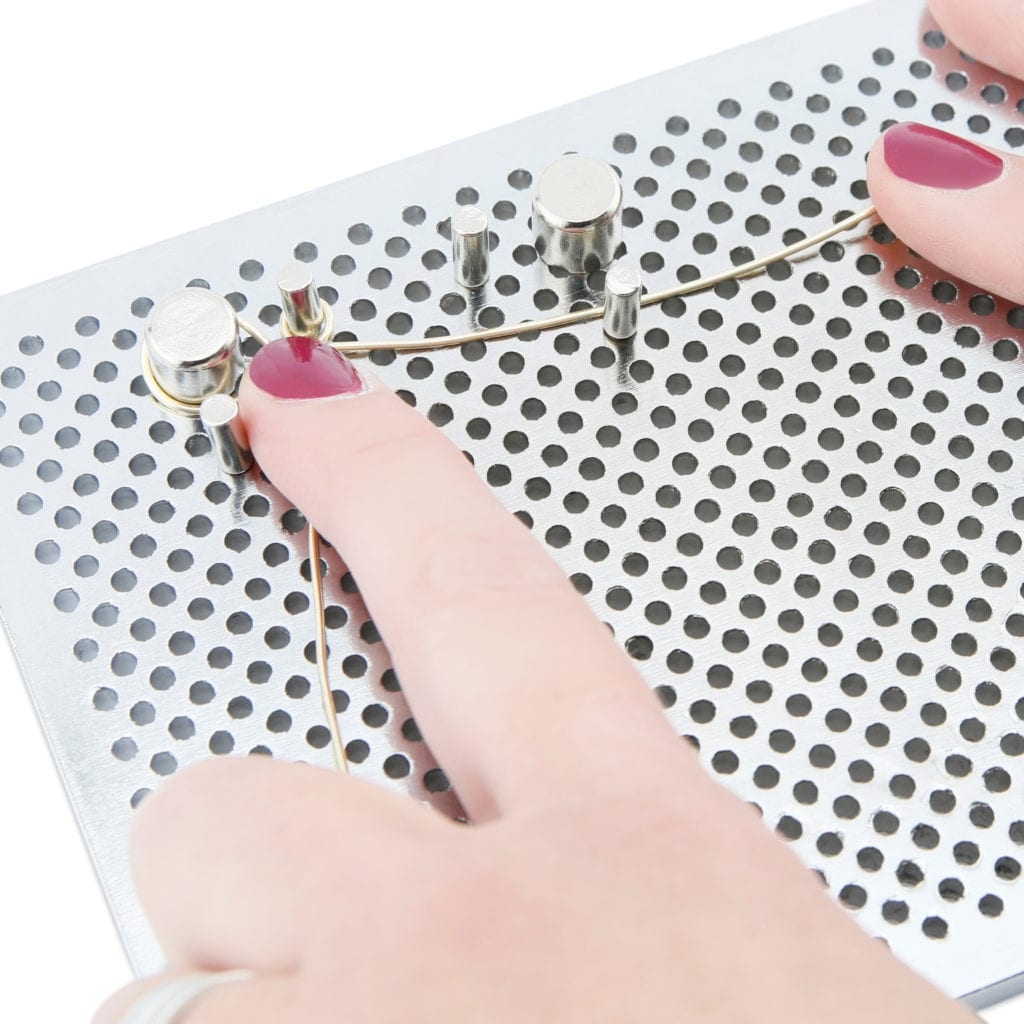
First you will pull a length of wire off of the spool. DO NOT CUT YOUR WIRE AT THIS POINT. Keeping your wire on the spool allows you to work with as much as you need. To start I wrapped my wire around the right medium pin, then around the large pin and then around the left medium pin. This leaves the ‘tail’ of the wire on my right side and the working wire on my left. Since I can only work with two corners at a time the left corner that is set up is going to be my ‘working’ corner and the other will be my ‘holding’ corner.
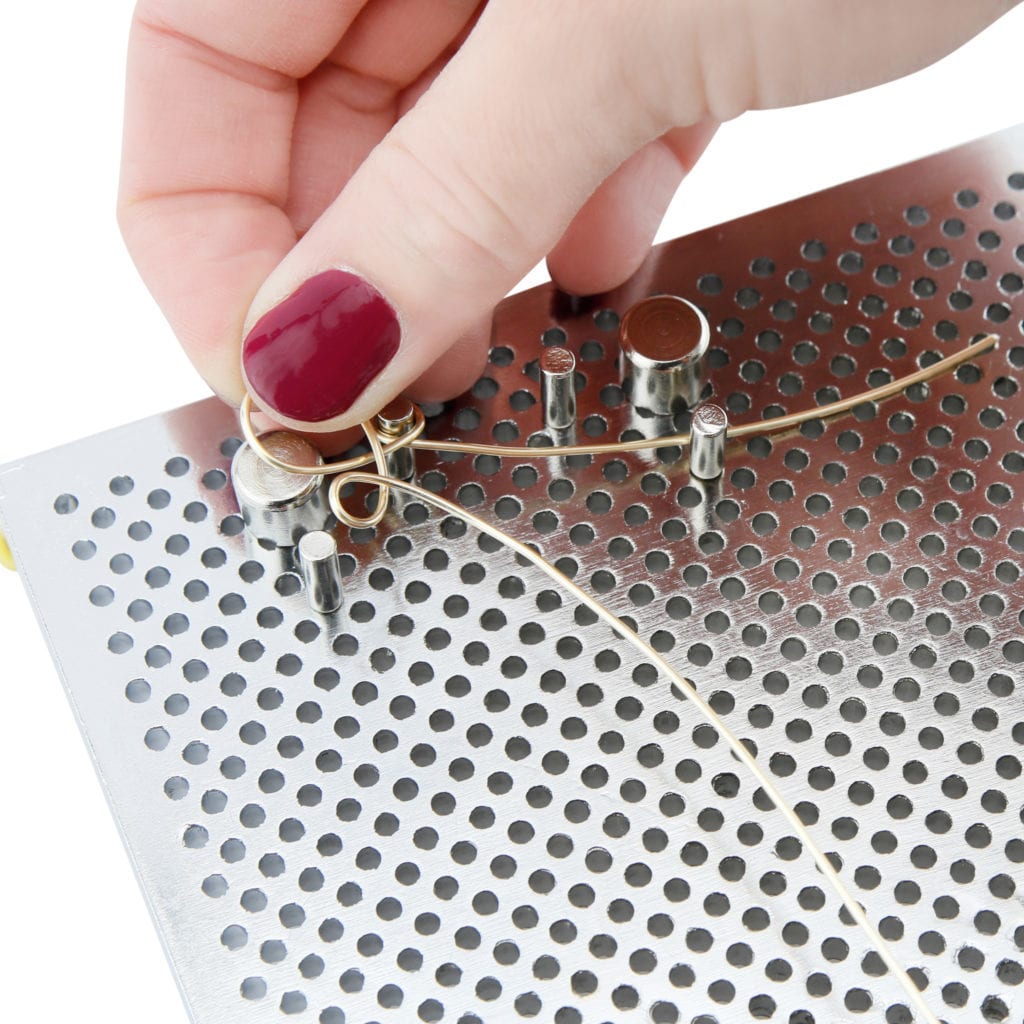
Once the first corner is finished you will remove it from the jig and place it on the holding corner. By doing this you will now have a free set of pegs to work the second corner of your shawl pin. Work this corner in the same fashion that you did the first. Make sure that the path of your wire is the same so that they all look uniform when it is complete.
At the end of the second corner you will still have your working wire on the left side and the tail of the wire on your right. Pick up the second corner and move it over to the holding spot. Make your third corner and then finish off with your fourth. Don’t worry if your piece does not look completely square we will be fixing that in the next step.
As you can see in this photo is is okay that one of your corners is not on the gig as you continue to work.
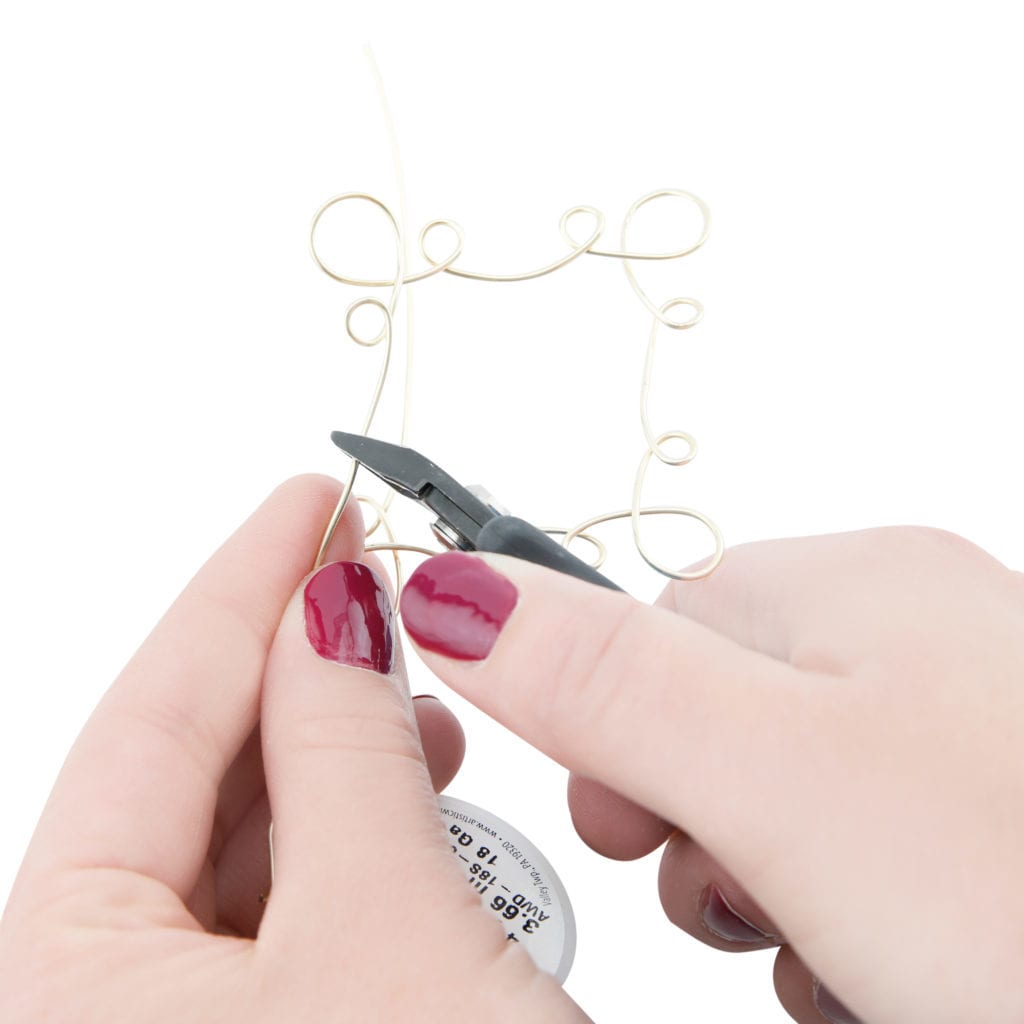
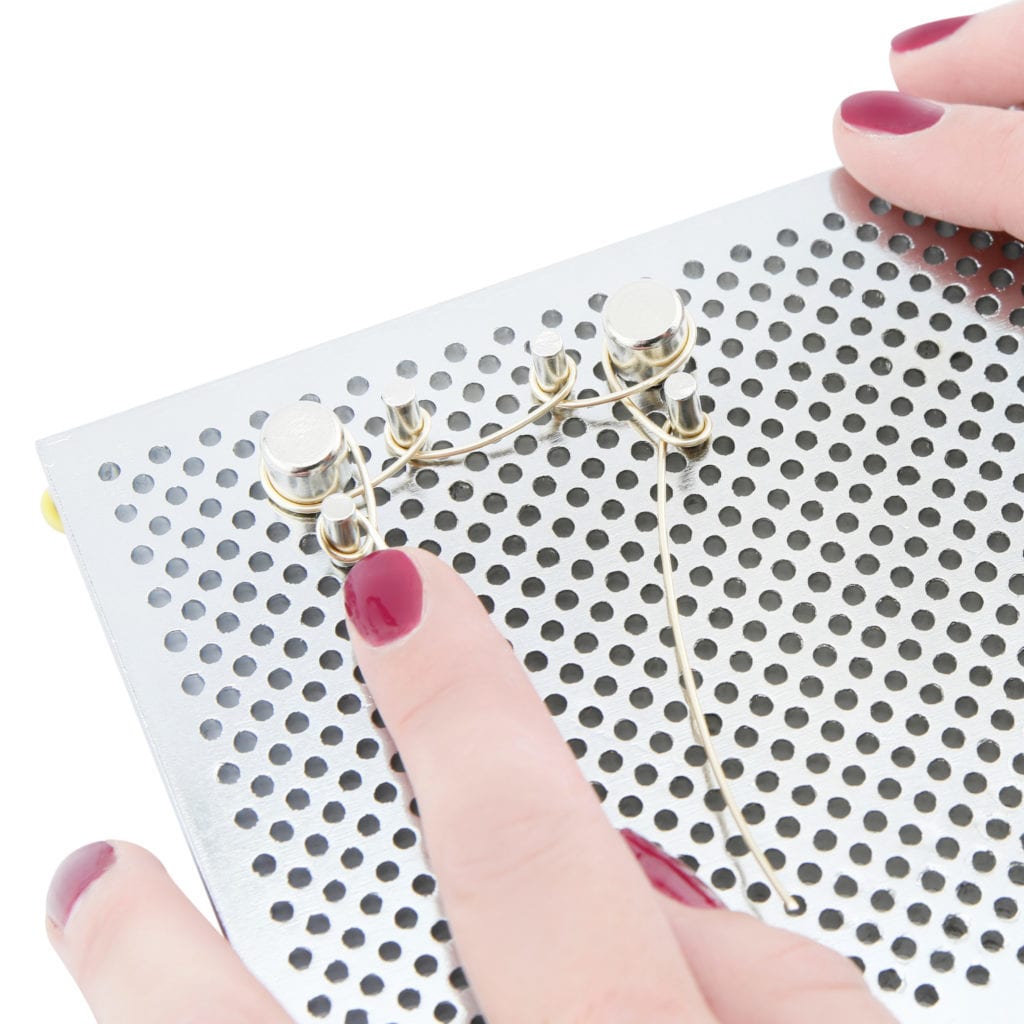
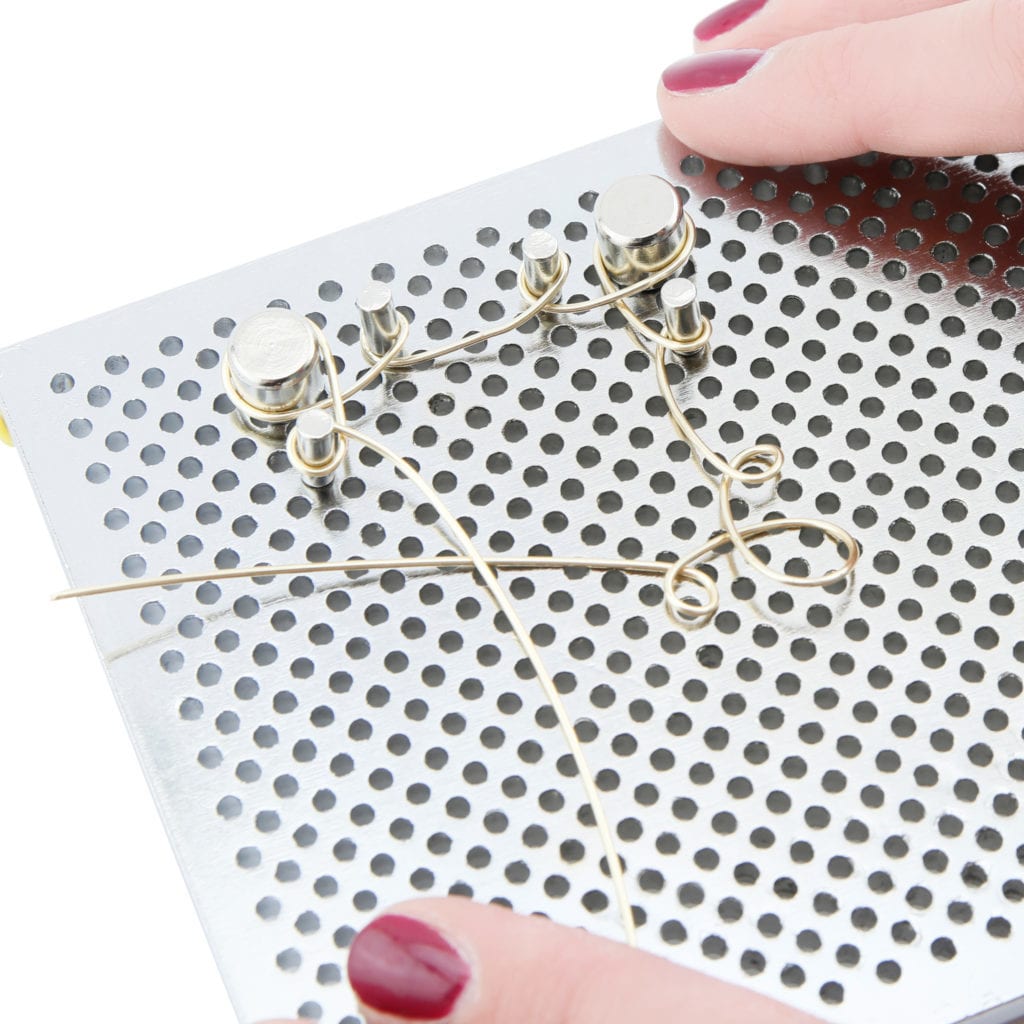
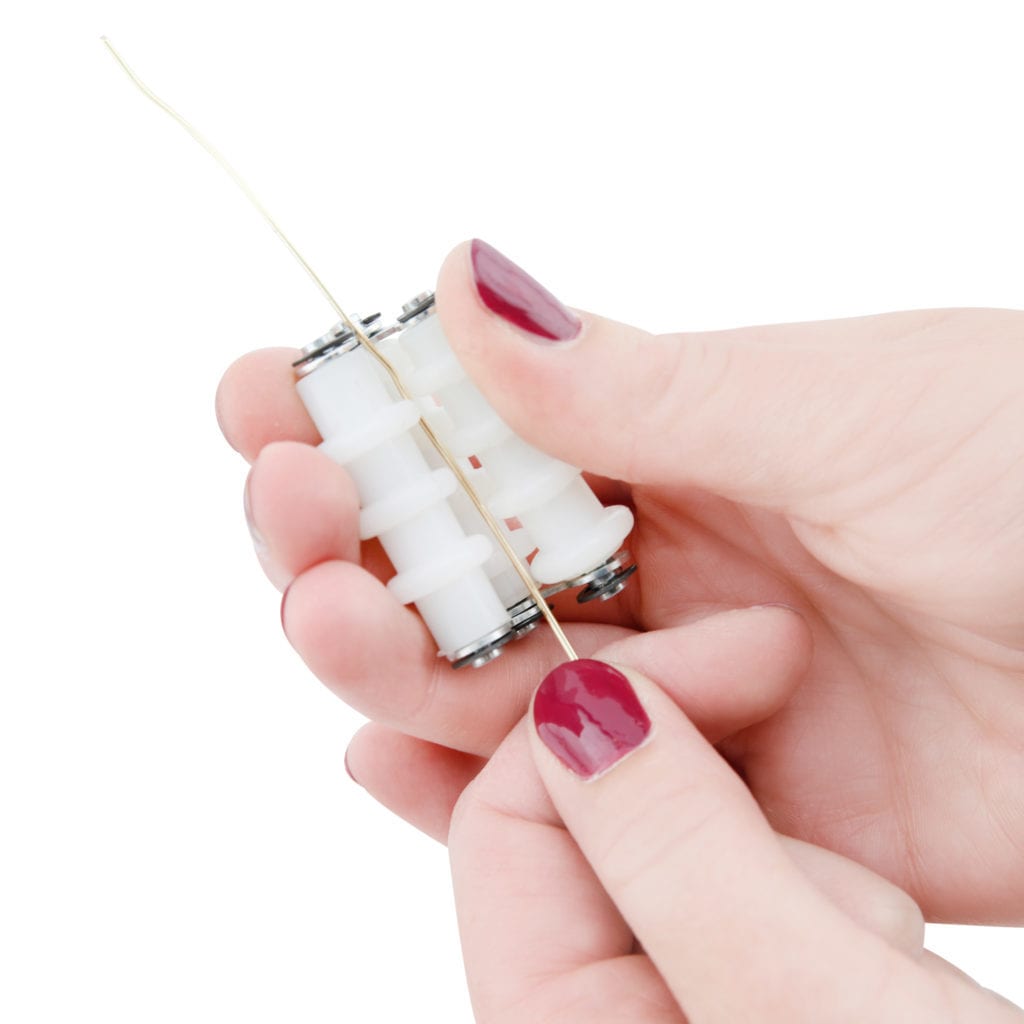
After completing all four corners you will need to cut your wire from the spool. Make sure you leave a tail of about 4 inches. Leaving a longer tail will allow you to play with the center cut for the next step.
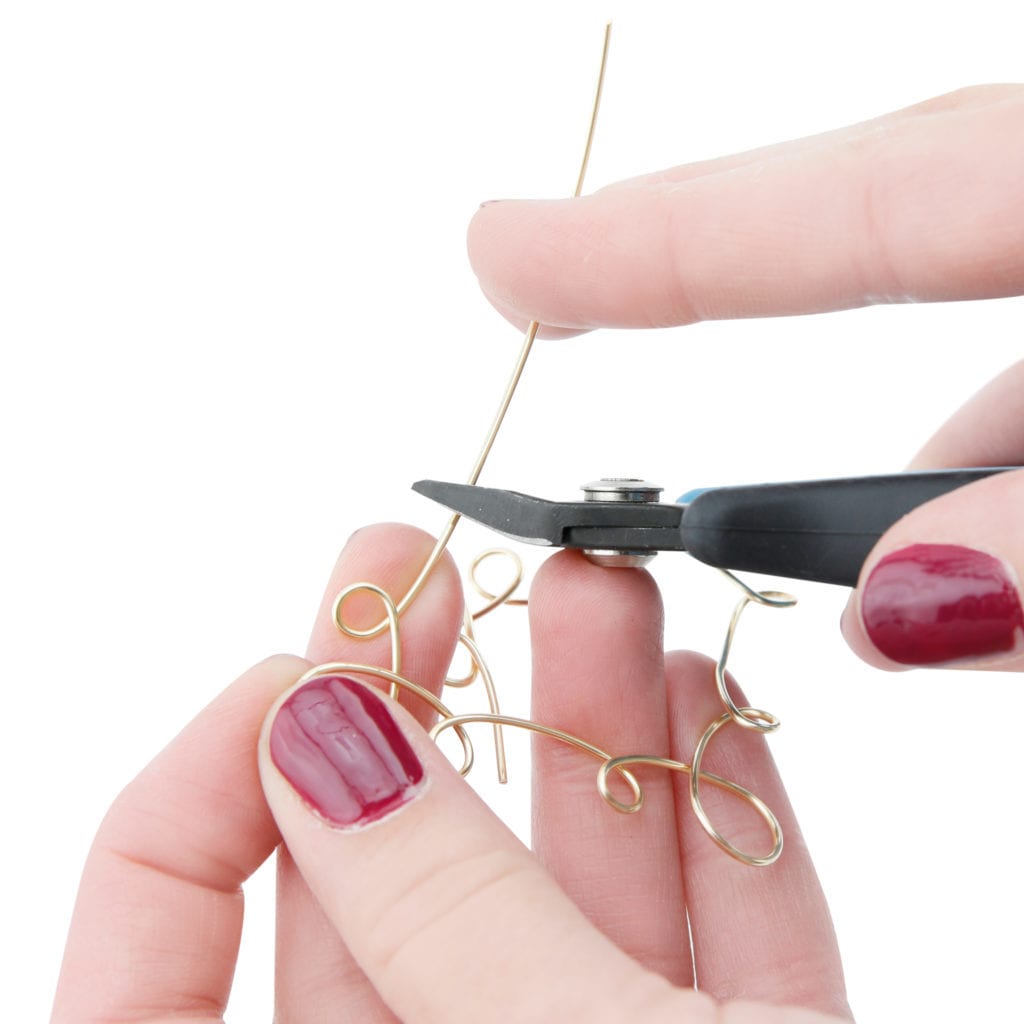
To be able to connect the two wires together we will need them to match in the middle. When you lay your piece down you will want the two tail ends of the wire to meet making the same length on that side as the other three. Your connector will go around these two ends so you don’t need to be as concerned with rough edges. NOTE: Whenever you cut wire that is not attached to the spool you need to hold on to the end. You want to make sure that the loose end does not fly around and hit someone in the eye.
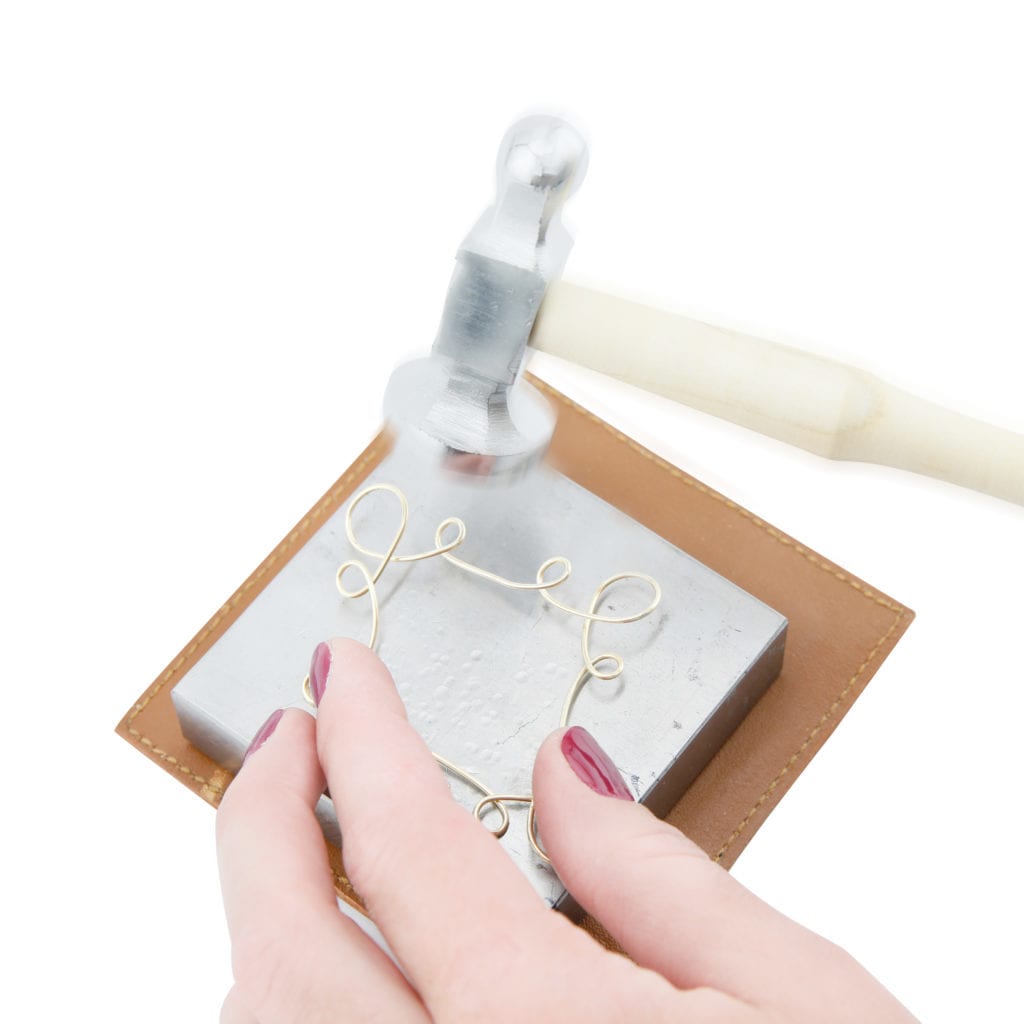
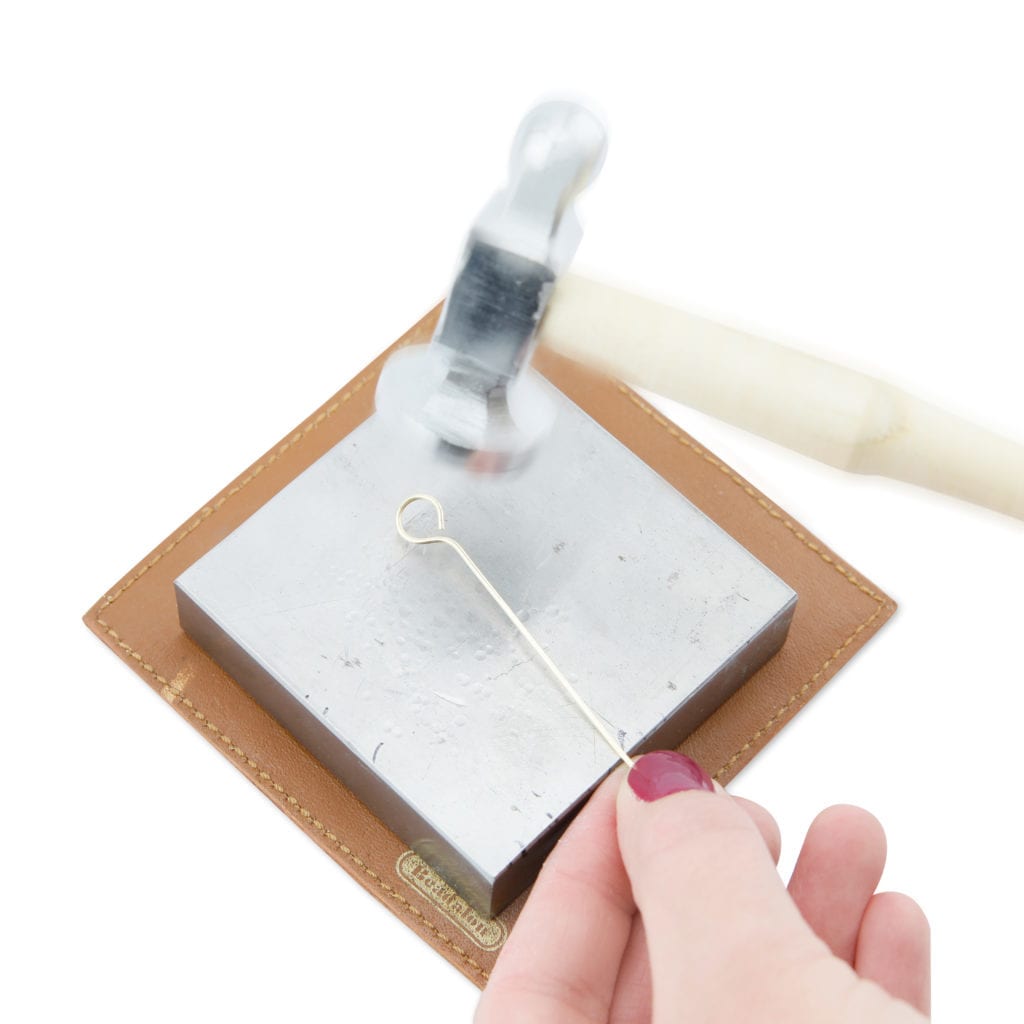
Before we connect the wire together I suggest that you hammer out your piece. Hammering your pin will work harden the pin making it harder to move and bend. It gives the wire more structure and stability. REMEMBER the harder you hit the flatter your piece will become. Either way is fine, it is purely a design element. You can always hammer your piece more but you can’t take away what you have already flattened. If you are going to be using colored Artistic Wire I suggest that you look into getting a nylon mallet vs. the chasing hammer. Nylon mallets are easier on the color plated metals.
As you hammer your piece you will want to hold it in shape so that it stays in that formed shape. I am hammering on a bench block so that there is a hard service for the metal. Under the bench block is a sandbag. A sandbag is used to dampen the noise of the hammer on the block and to help keep it in place and not slide around. Along with a sandbag you could use a rubber block or you could use a kitchen towel folded up.
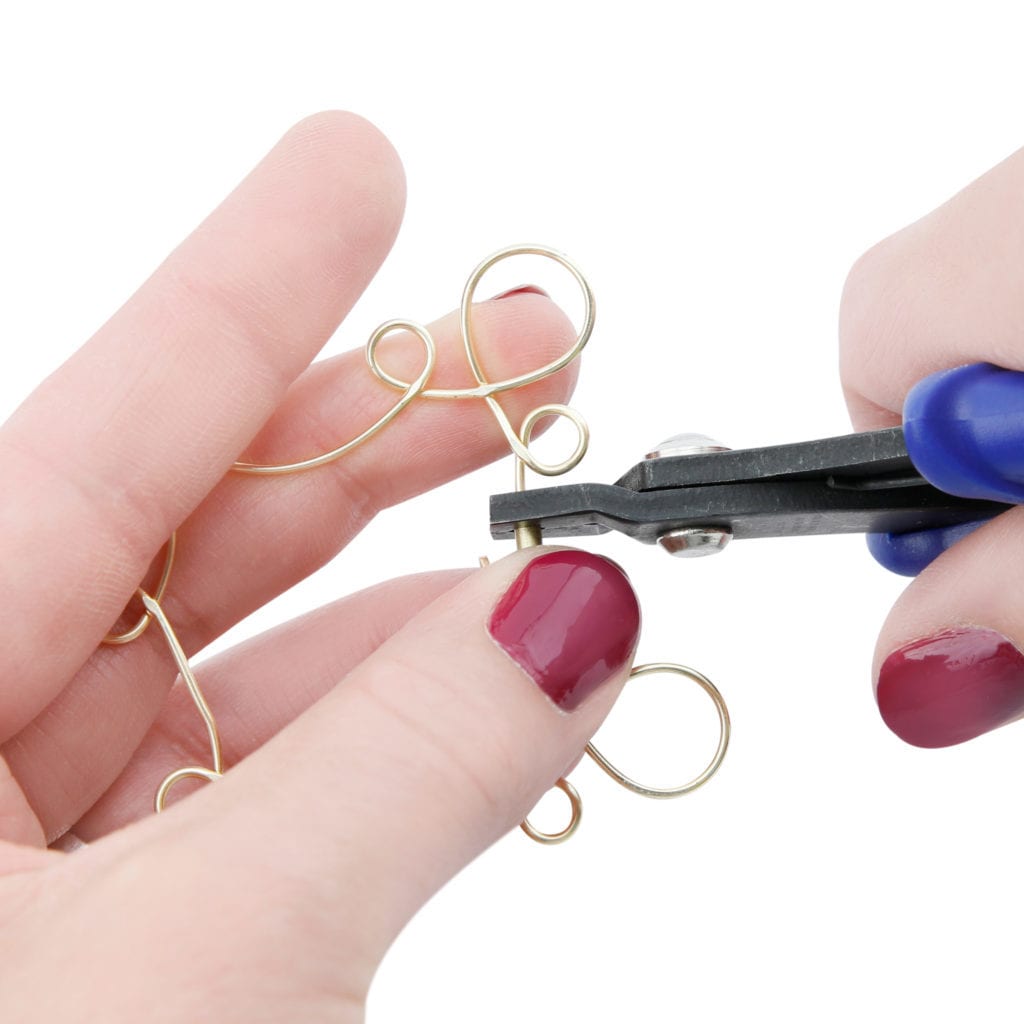
For this project our cold connection to hold the two ends of the wire together will be using a large crimp tube from Beadalon. To get the tube to be secure you will need a crimping pliers. When looking at the pliers you will see that one side is round (crescent) and the other is more like an elbow macaroni shape. Putting the rounded side on top as you crimp both sides of the wire will give you an even look when you are done.
First crimp one half of the tube to one end of the wire. You will want to place the wire about half way into the tube. How do you know when you are half way? Measure this out before you put the wire in the tube. Hold the wire on the top of the tube and mark the half way point with your finger on the tail wire. Then you can slide the wire in until you hit your finger and know you are in the middle of the tube. Crimp the first side and then repeat for the second side.
Once both sides have been crimped you now have a finished shawl pin piece. To connect the shawl pin to your project we just need to finish the pin portion.
Finishing Your Shawl Pins

Cut a length of wire that is about 3-4 inches longer than your shawl pin. In this case I went across the diagonal of the pin because I want the pin to go through the loops.
I prefer to have this wire straight to make my job easier I used the Beadalon wire straightener tool. You could straighten this out with your nylon pliers or your fingers.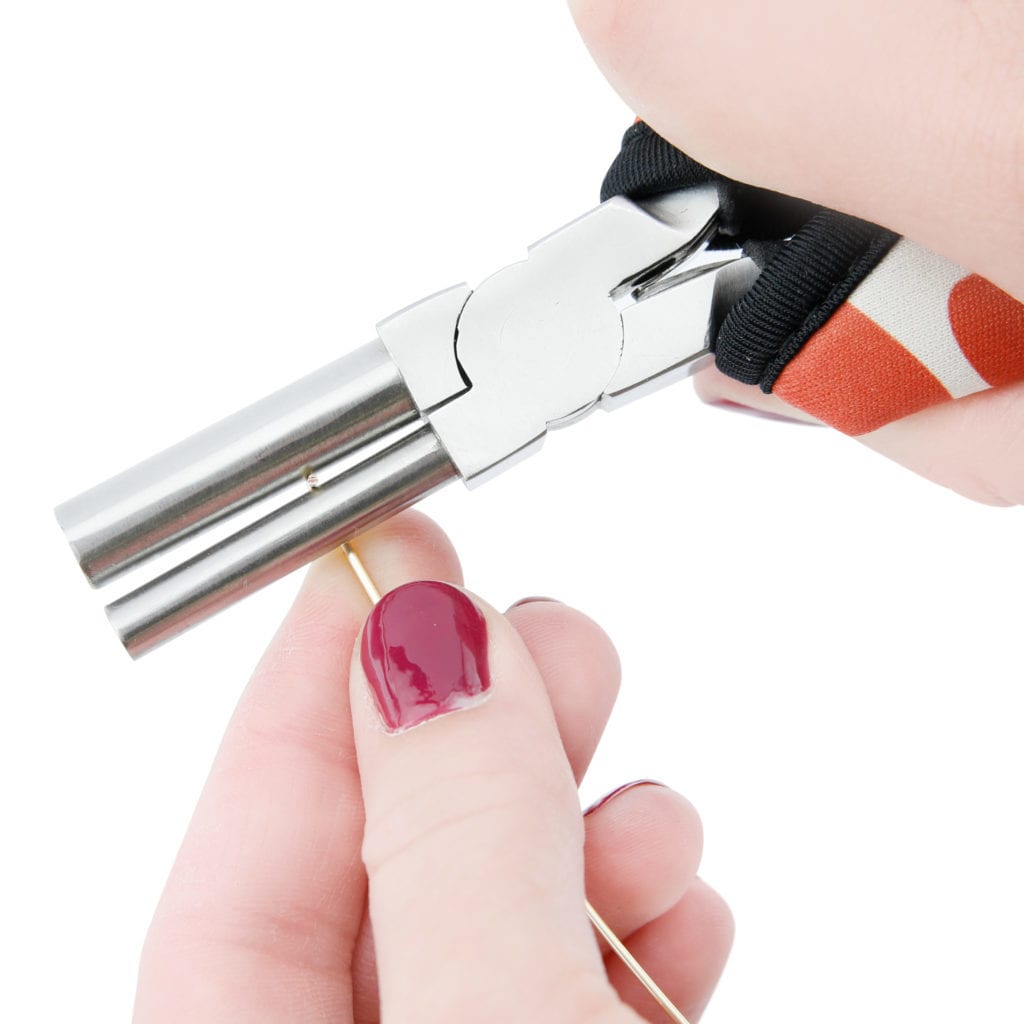
Next we will use the smaller side of the large bail making pliers to make a loop at the top of our pin. By grabbing the wire between the two jaws of the pliers and rolling the wire (I prefer to roll towards me) you will get a loop at the top. You will notice that this loop is not sitting square on the straight piece of wire.
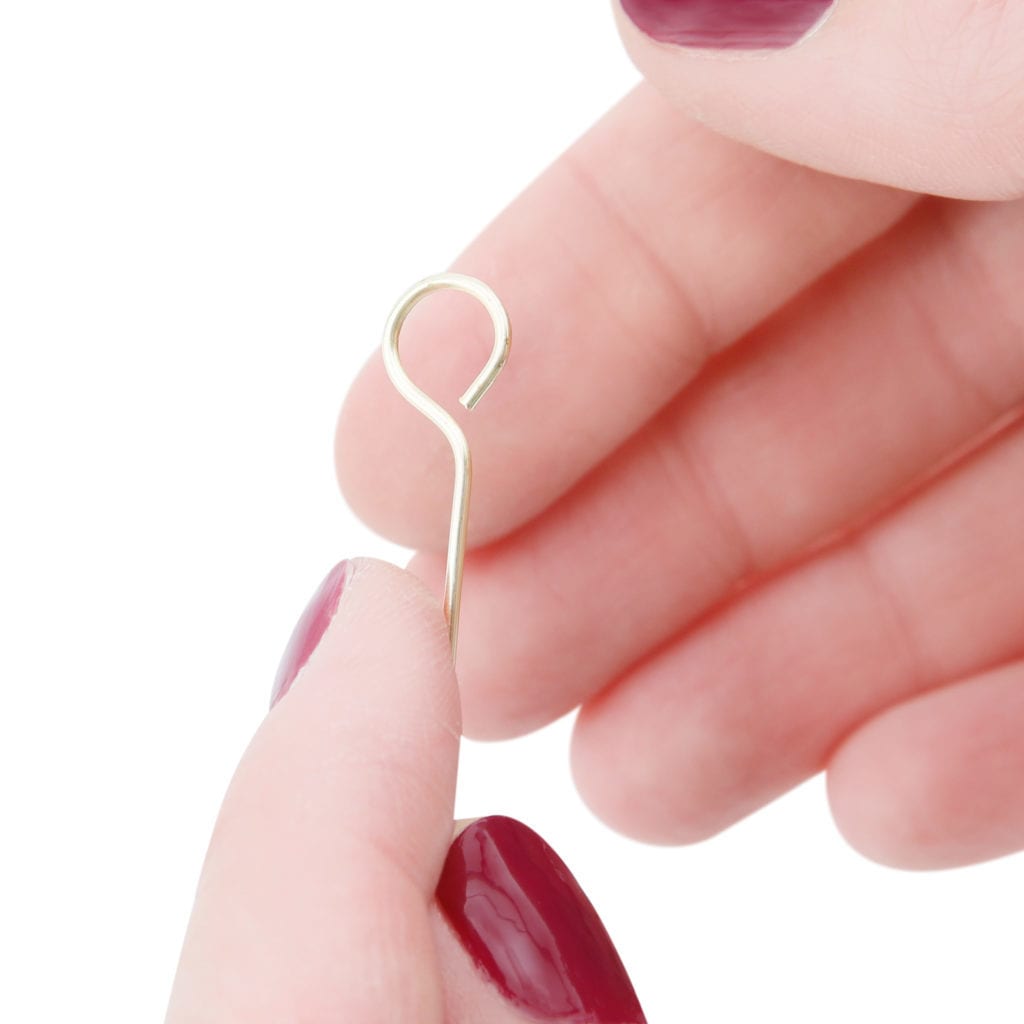
Using your fingers gift the wire a slight bend at the top to get the loop to sit in the middle. Once you have finished making your loop you can then work to round the end of your pin. A rounded end will help keep it from snagging on your work. To do this I used the Beadalon bead reamer with bur attachement. This could your finished point or you could continue for another step and work harden this piece.
Grab your hammer and bench block again and hammer out the pin. I like to hammer this piece a little more than the rest of my pin, giving it a flatter look. After you have finished hammering your piece you could add a dangle to this or leave it as is.
I hope that you enjoyed this tutorial and please use the video below to see how to make it in action. I can’t wait to see what you try to make with your materials.
Facebook Tutorial
Over on the Beadalon Facebook page we had a video tutorial go live. You can watch the replay to see how this shawl pin was made in action.


Hi, Marly, this was a great tutorial. I would like to ask if there is a way you can darken the font of your website/blog—apparently when one approaches the age of 50 one cannot read light fonts as well! 🙁
Thanks for all you do!