
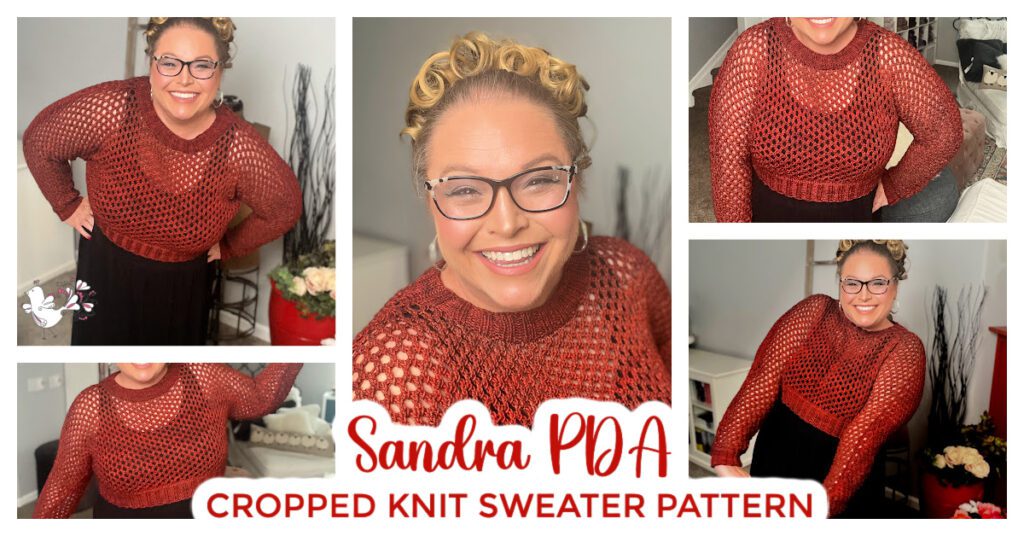
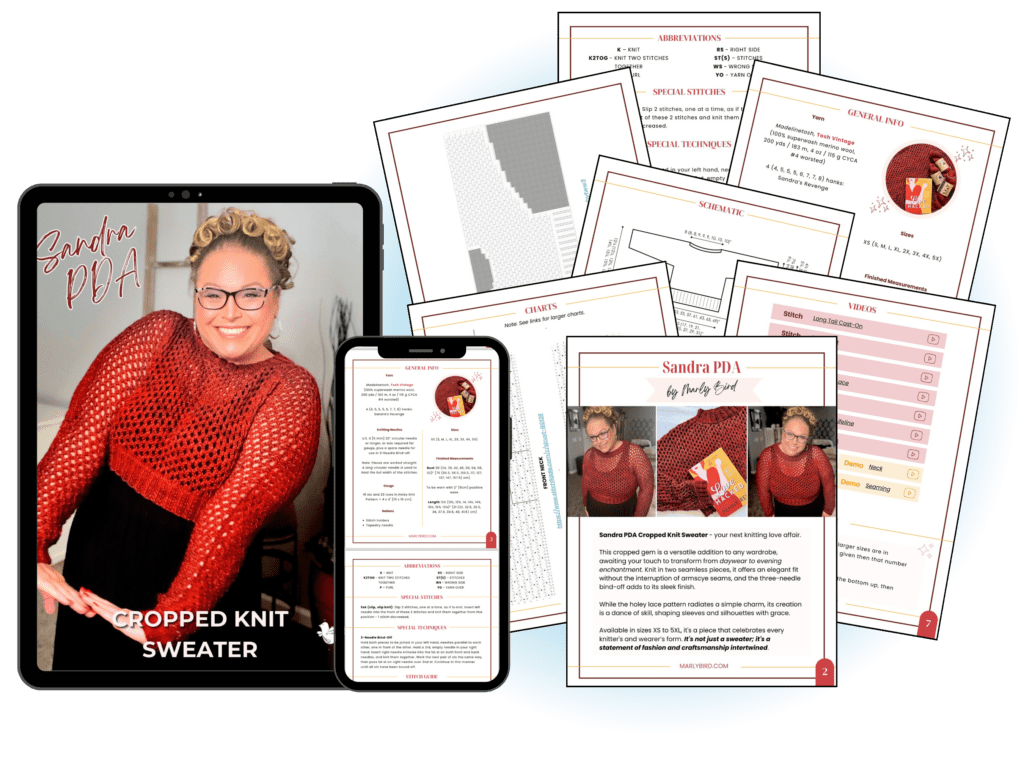
Knit the Chic Sandra PDA Cropped Knit Sweater – A Must-Have in Your Wardrobe
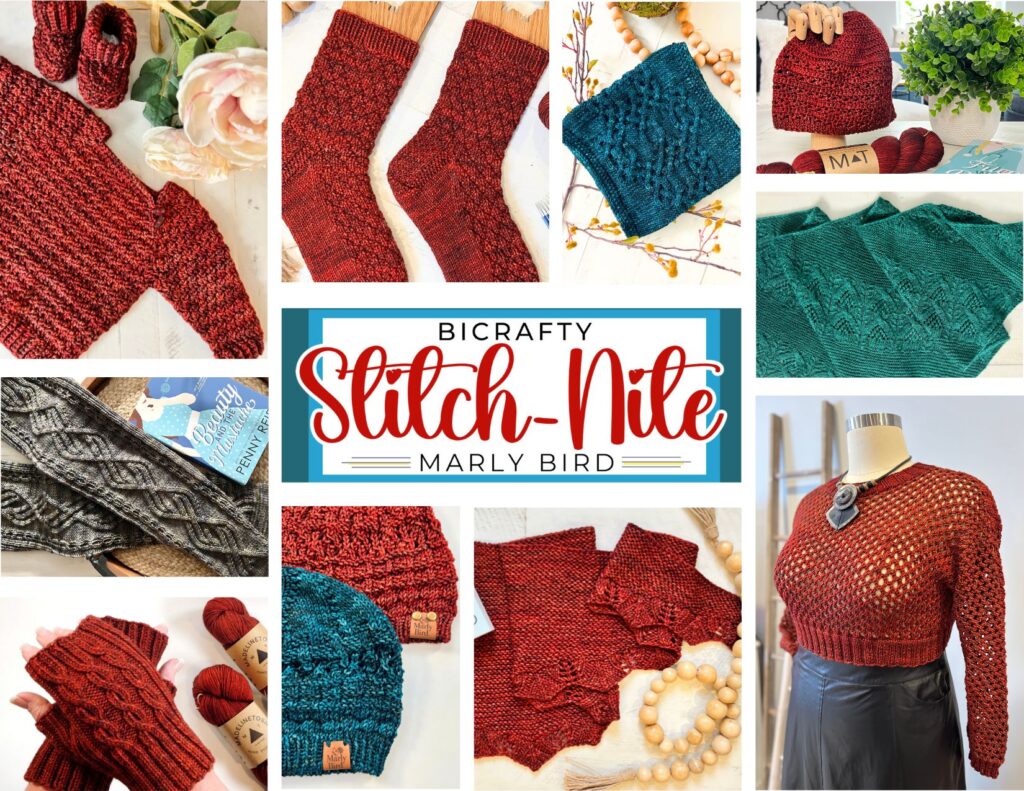
Hey there, knitting friends! Get ready to start a super fun project with our Sandra PDA Cropped Knit Sweater pattern. It’s part of the BiCrafty Stitch-Nite Collection, and trust me, you’re going to love it! (You already love the Appalachian Cozy Up Thigh High Socks) Whether you’re new to knitting or already a pro, this sweater is perfect for adding some pizzazz to your wardrobe.
Affiliate Disclosure: This post contains affiliate links. To learn more please visit my privacy policy here💖
Why You’ll Love This Cropped Knit Sweater
It Fits Everyone! Size Inclusivity: Available in sizes from Extra Small to 5XL, this pattern ensures a flattering fit for every body type.
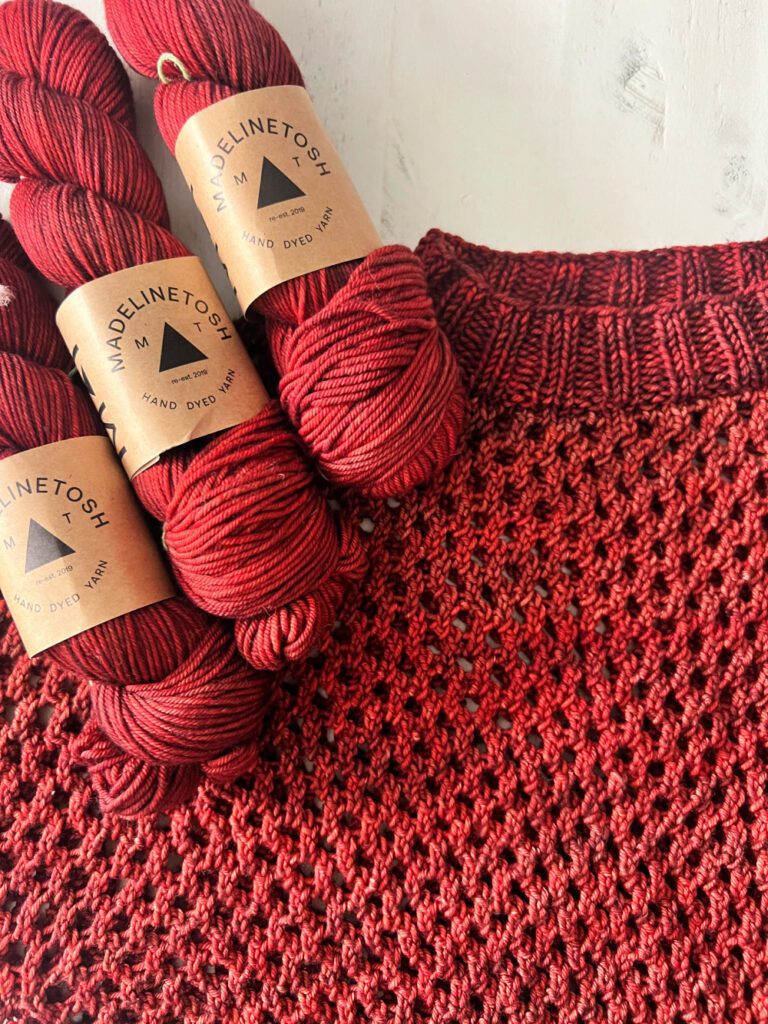
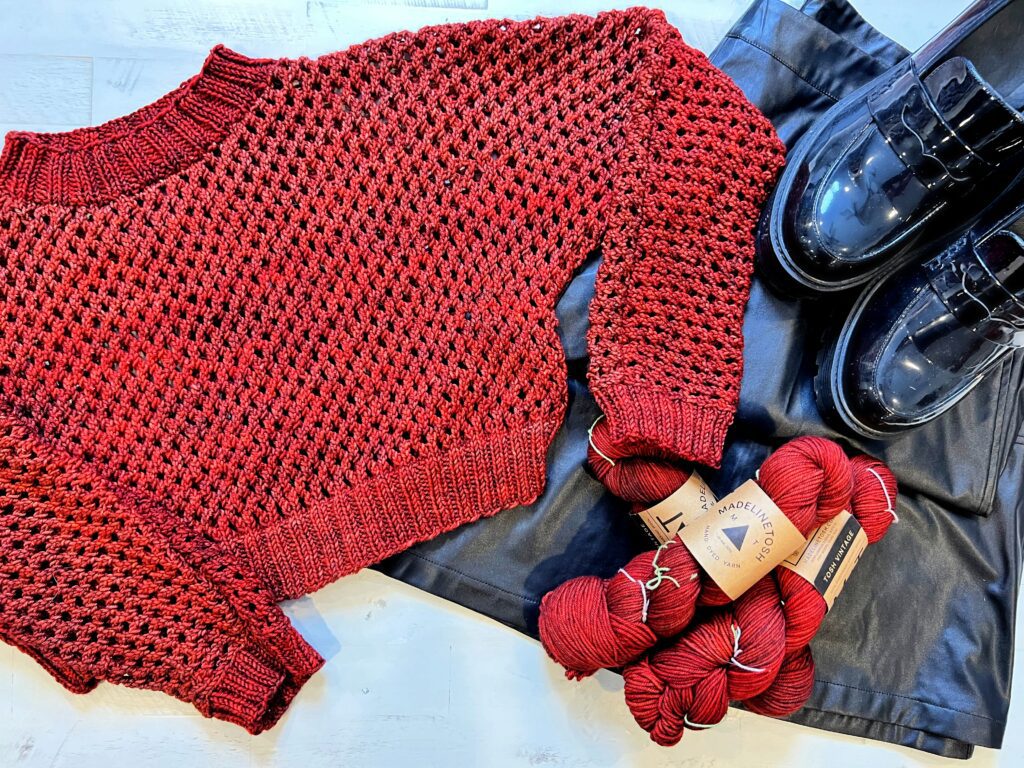
Yarn That Feels Good: We recommend using worsted weight yarn because it’s light but still keeps you warm. It’s perfect for this kind of sweater! Yarn used for the sample is Madelinetosh Vintage but it would look wonderful in Twill or even Capra.
Step-by-Step Guide: Don’t worry if you’re not sure how to start; this pattern has everything you need. There are clear instructions, full pattern charts to help you see what you need to do next, and video tutorials to guide you along the way.

Cool Features of the Sandra PDA Cropped Knit Sweater
- Stylish Cropped Knit Look: This sweater has a trendy cropped style that goes perfectly with high-waisted jeans or skirts. It’s really in style right now!
- Lacy Details: The sweater has a simple lacy pattern that makes it extra special. It adds a touch of charm and fancy to your outfit.
- Neat Edges: We finish the sweater with ribbed cuffs and a collar that make everything look neat and tidy.
- Only Two Pieces: The cropped knit sweater is made in two pieces making the shaping easy as you transition from the body to the sleeves.
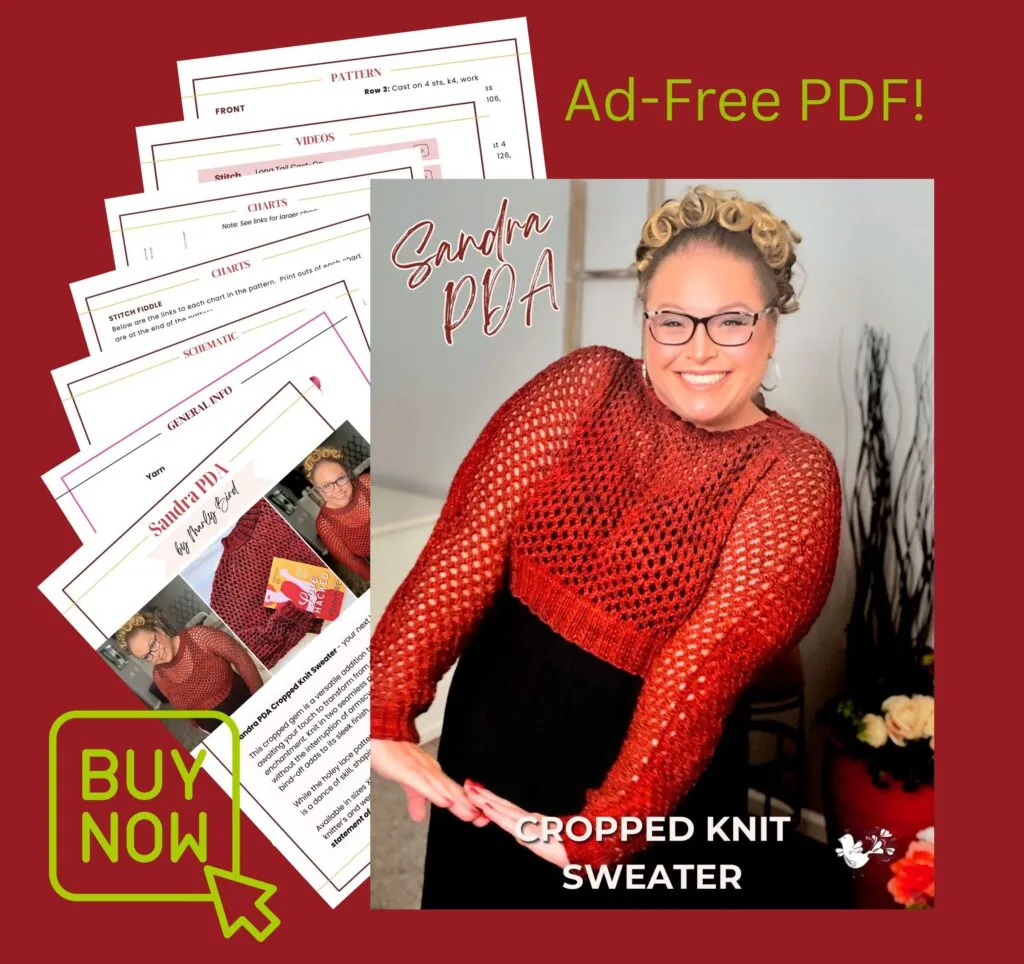
📌 Get the Sandra PDA ad-free PDF!
(Access inside the Marly Bird House with unlimited viewing and bonus material)
👕 Who Is This Pattern Perfect For?
The Sandra PDA Cropped Knit Sweater is a great fit for knitters who are ready to stretch their skills while still enjoying a supportive, well-structured pattern.
This pattern is perfect for you if:
- 🧶 You’re an intermediate knitter (or a confident advanced beginner) comfortable with knit, purl, and following stitch patterns
- 📊 You enjoy working from written instructions and charts
- ✨ You want to try a lace-style sweater without overly complicated shaping
- 👕 You love the look of modern cropped sweaters paired with high-waisted bottoms
- 🎥 You appreciate having video tutorials and guided support available
- 🤝 You enjoy knitting as part of a community experience, like the BiCrafty Stitch-Nite Collection
If you’ve knit accessories or simpler garments and are ready for a sweater that feels exciting—but still achievable—this pattern is a fantastic next step.
Why This Pattern Is Extra Special
This sweater is not just a pattern; it’s a part of the BiCrafty Stitch-Nite collection housed exclusively in the Marly Bird House. This collection features 11 carefully designed patterns that aim to enhance your knitting experience and foster a sense of community among crafters. By choosing this pattern, you’re not just buying a set of instructions; you’re gaining entry into a platform where knowledge, tips, and encouragement flow freely.
Let’s Knit Together!
If you like knitting with friends, this pattern is perfect. You can join others and work on this project together at a knit-along. It’s a blast to see everyone’s sweaters come to life! Or enjoy knitting this cropped sweater on your own. Either way you will love it!
Video Tutorials To Teach
I approached every video tutorial in the BiCrafty Stitch-Nite collection as if I were your personal online teacher. Each video provides a detailed, step-by-step guide to ensure you complete the project with a piece you’ll absolutely adore.
Get Started Today
Ready to cast on? Your purchase includes an instant download of the Sandra PDA Cropped Knit Sweater pattern PDF, complete with ✨32 pages✨ of detailed instructions and high-quality images.
📌 Get the Sandra PDA ad-free PDF!
(Access inside the Marly Bird House with unlimited viewing and bonus material)
Don’t forget to favorite and queue up the cropped sweater on Ravelry!
🧶 How to Style a Cropped Knit Sweater Year-Round
One of the best things about the Sandra PDA Cropped Knit Sweater is how easy it is to wear in every season. Cropped sweaters aren’t just trendy — they’re versatile staples that layer beautifully.
- Pair it with high-waisted jeans or trousers for a casual everyday look
- Layer it over a tank or dress during transitional weather
- Wear it with skirts or wide-leg pants for a modern, polished outfit
Because the lace pattern keeps the fabric light and breathable, this sweater works just as well in spring and fall as it does during cooler summer evenings.

✨ What Makes This Cropped Knit Sweater Beginner-Friendly (Even If It Looks Fancy)
At first glance, lace sweaters can feel intimidating — but the Sandra PDA Cropped Knit Sweater is designed to help knitters succeed.
Here’s why this pattern is more approachable than it looks:
- The lace is predictable and rhythmic, not overly complex
- The sweater is worked in just two main pieces, simplifying construction
- Ribbed edges provide structure and clean finishing
- Charts and row-by-row guidance are included in the ad-free PDF (this is the most amazing aspect of this particular pattern!)
If you’re ready to move beyond basic stockinette but don’t want to feel overwhelmed, this is a fantastic next-step sweater project.
🧵 Yarn Substitution Tips for the Sandra PDA Cropped Knit Sweater
While the sample uses Madelinetosh Vintage (we love this color), this pattern works beautifully with many worsted-weight yarns.
When choosing a substitute, look for yarn that:
- Has good stitch definition to highlight the lace, this means a tight twisted yarn is preferred
- Isn’t overly stiff or overly drapey
- Feels comfortable against the skin
Yarns with smooth plies and moderate elasticity tend to show off the Holey Knit stitch pattern especially well.
I loved using the Madelinetosh Vintage yarn and I highly recommend it if you can splurge on yourself a bit. If you want to go with a more moderate price range yarn, here are some we like:
- Knit Picks Twill Yarn: this yarn is divine. It is a little thicker than the sample yarn but it would make a lovely sweater!
- Cascade 220 Superwash: this is a workhorse yarn and sure to make a lovely sweater.
- Berroco Ultra Wool: the shine on this and the twist make this a wonderful option.
✨ Designer Tip: If you’re unsure, knit a generous swatch and block it. Lace opens up after blocking — and seeing that transformation is half the fun!
Sandra PDA Cropped Knit Sweater Details
Sandra PDA Holey Knit Sweater
Designed by Marly Bird
SKILL LEVEL
Intermediate
MEASUREMENTS
To Fit Size
XS (S, M, L, XL, 2X, 3X, 4X, 5X)
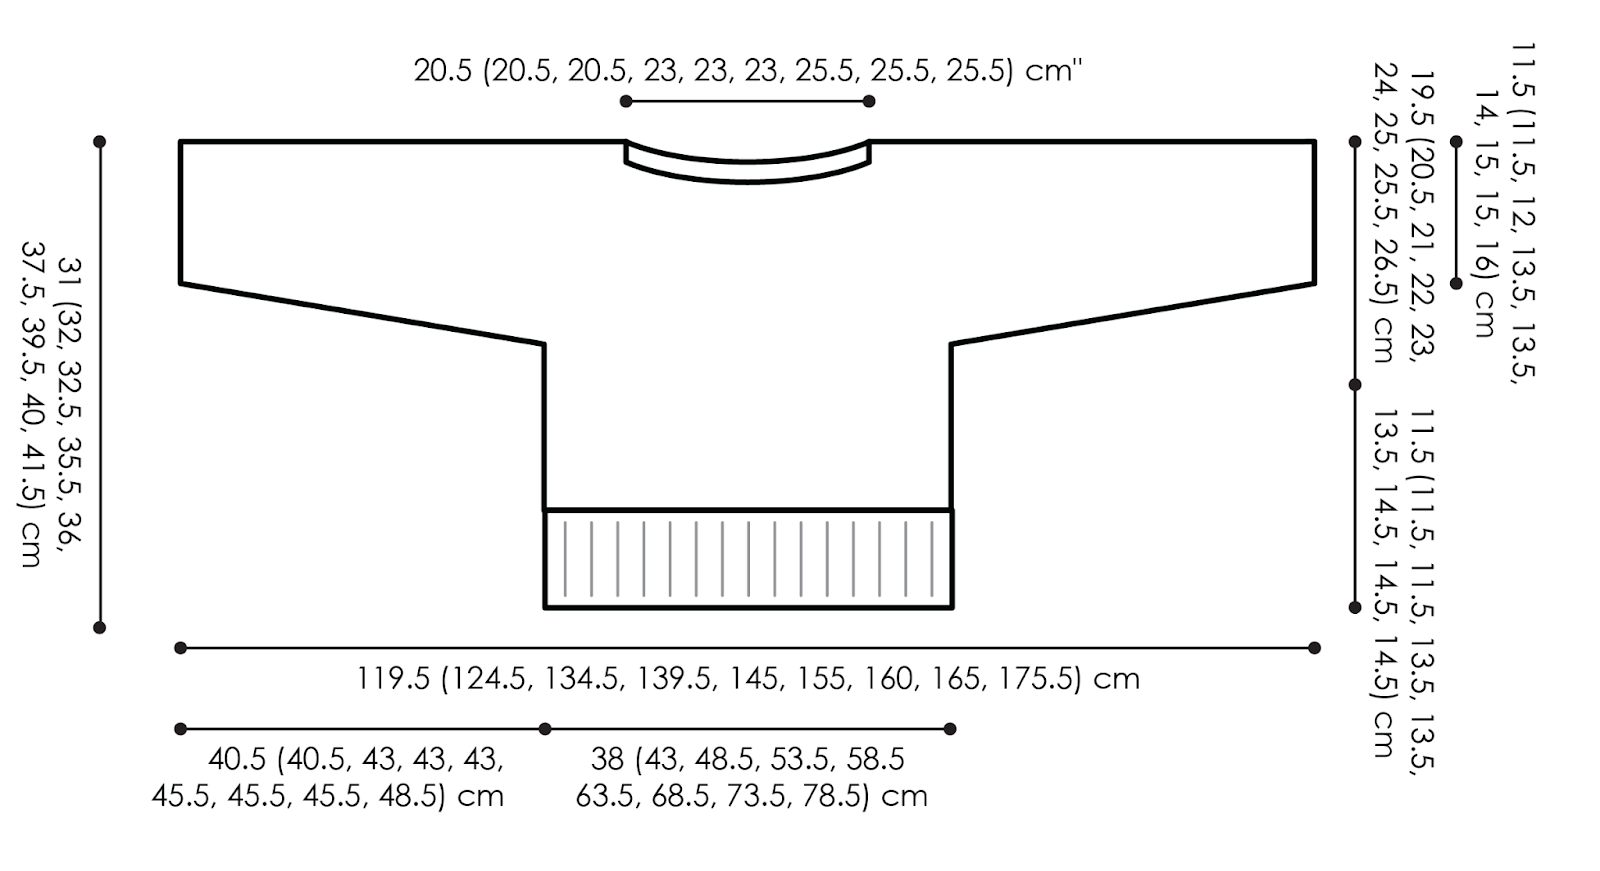
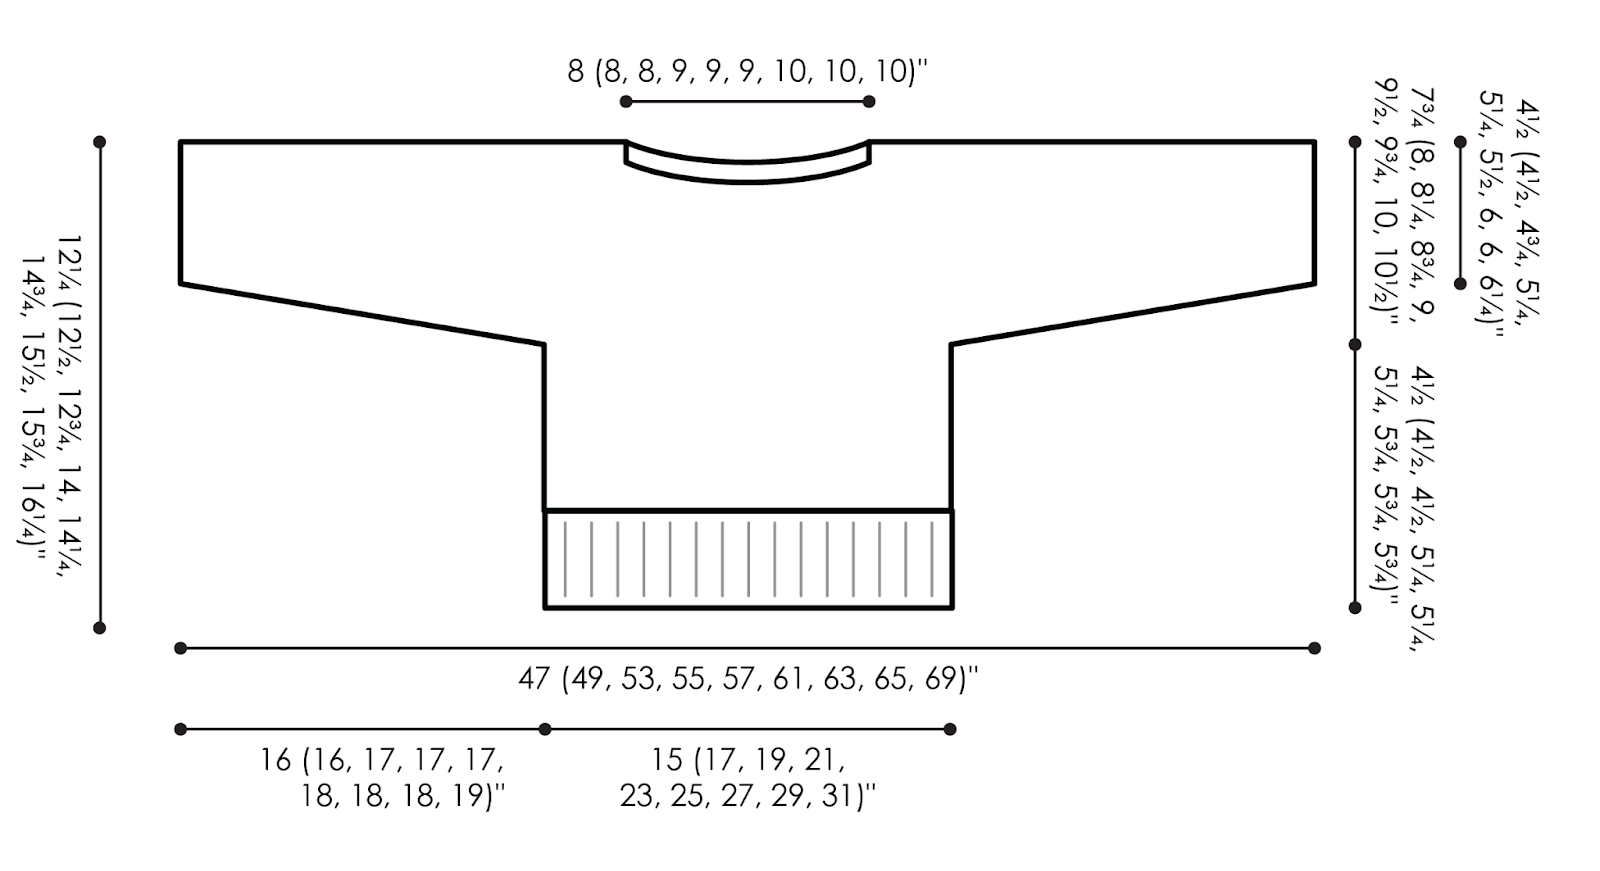
Finished Measurements
Bust 30 (34, 38, 42, 46, 50, 54, 58, 62)” [76 (86.5, 96.5, 106.5, 117, 127, 137, 147, 157.5) cm]
To be worn with 2” [5cm] positive ease.
Length 12¼ (12½, 12¾, 14, 14¼, 14¾, 15½, 15¾, 16¼)” [31 (32, 32.5, 35.5, 36, 37.5, 39.5, 40, 41.5) cm]
Gauge
16 sts and 23 rows in Holey Knit Pattern = 4 x 4″ [10 x 10 cm].
MATERIALS
Yarn
Madelinetosh, Tosh Vintage (100% superwash merino wool, 200 yds / 183 m, 4 oz / 115 g CYCA #4 worsted)
4 (4, 5, 5, 5, 6, 7, 7, 8) skeins: Sandra’s Revenge
Needle
U.S. 8 [5 mm] 32” circular needle or longer, or size required for gauge, plus a spare needle for use in 3-Needle Bind-off.
Note: Pieces are worked straight. A long circular needle is used to hold the full width of the stitches.
Notions
ABBREVIATIONS
- K – Knit
- K2tog – Knit Two Stitches Together
- P – Purl
- RS – Right Side
- St(s) – Stitches
- WS – Wrong Side
- Yo – Yarn Over
SPECIAL STITCHES
Ssk (slip, slip knit): Slip 2 stitches, one at a time, as if to knit. Insert left needle into the front of these 2 stitches and knit them together from this position – 1 stitch decreased.
SPECIAL TECHNIQUES
⭐️ 3-Needle Bind-Off
Hold both pieces to be joined in your left hand, needles parallel to each other, one in front of the other. Hold a 3rd, empty needle in your right hand. Insert right needle knitwise into the 1st st on both front and back needles, and knit them together. Work the next pair of sts the same way, then pass 1st st on right needle over 2nd st. Continue in this manner until all sts have been bound off.
⭐️ HOLEY KNIT STITCH PATTERN
Row 1 (RS): Knit.
Row 2: Purl.
Row 3: K3, * ssk, yo twice, k2tog; repeat from * to last 3 sts, k3.
Row 4: P4, * k1, p3; repeat from * to last 6 sts, k1, p5.
Row 5: K1, * ssk, yo twice, k2tog; repeat from * to last st, k1.
Row 6: P2, * k1, p3; repeat from * to end.
Repeat Rows 3-6 only for Holey Knit Pattern.
CHARTS and ROW BY ROW CHECKLIST
FULL CHARTS FOR EVERY SIZE ARE EXCLUSIVE IN THE AD-FREE PDF! As well as Row-by-Row Checklists! These make this project so much easier!
📌 Get the Sandra PDA ad-free PDF!
(Access inside the Marly Bird House with unlimited viewing and bonus material)
SCHEMATIC
NOTES
- Directions are for size XS; changes for larger sizes are in parentheses. When only one number is given then that number applies to all sizes.
- Sweater is worked in only 2 pieces from the bottom up, then seamed at the sides and shoulders.
VIDEO TUTORIALS
- Long Tail Cast-On >> Click Here for Video Help <<
- Knit Stitch (continental style) >> Click Here for Video Help <<
- Purl Stitch (continental style) >> Click Here for Video Help <<
- How to Knit Lace >> Click Here for Video Help <<
- How to Tink >> Click Here for Video Help <<
- How to Add Lifeline >> Click Here for Video Help <<
- How to Bury Ends >> Click Here for Video Help <<
GROW
To Unlock Exclusive Subscriber Content click the Box below and join for free by simply adding your email and creating a password! If you are having troubles, clear your cache or reset your password or login to the Grow Publisher Portal.
>> Learn More About Grow Here <<
I’m thrilled to share this amazing pattern with you, many patterns on my blog are absolutely free! I kindly request that you don’t copy and paste or distribute this pattern. Prefer an ad-free experience? Buy a digital PDF pattern for a small fee from one of my online stores for a seamless crafting journey.
I appreciate your support and readership. You are the reason I can keep doing what I love and sharing it with others. So, thank you from the bottom of my yarn-loving heart! Disclosure: This post contains affiliate links, meaning I get a commission if you decide to make a purchase through my links at no cost to you.
HOLEY KNIT SWEATER PATTERN INSTRUCTIONS
FRONT
Cast on 62 (70, 78, 86, 94, 102, 110, 118, 126) sts.
Row 1 (RS): K2, * p2, k2; repeat from * to end.
Row 2: P2, * k2, p2; repeat from * to end.
Repeat Rows 1 and 2 until ribbing measures 2” [5 cm].
Work in Holey Knit Pattern for 14 (14, 14, 18, 18, 18, 22, 22, 22) rows, ending after a pattern Row 6.
Add Width For Sleeves
Next 4 Rows:
Row 1 (RS): Cast on 4 sts, k4, work Holey Knit Pattern Row 3 across remaining sts – 66 (74, 82, 90, 98, 106, 114, 122, 130) sts.
Row 2: Cast on 4 sts, p4, work Holey Knit Pattern Row 4 to last 4 sts, p4 – 70 (78, 86, 94, 102, 110, 118, 126, 134) sts.
Row 3: Cast on 4 sts, k4, work Holey Knit Pattern Row 5 across remaining sts – 74 (82, 90, 98, 106, 114, 122, 130, 138) sts.
Row 4: Cast on 4 sts, p4, work Holey Knit Pattern Row 6 to last 4 sts, p4 – 78 (86, 94, 102, 110, 118, 126, 134, 142) sts.
Repeat Rows 1-4 2 (2, 2, 2, 2, 3, 3, 3, 3) more times – 110 (118, 126, 134, 142, 166, 174, 182, 190) sts.
Repeat Rows 1 and 2 only 0 (0, 1, 1, 1, 0, 0, 0, 1) more times – 110 (118, 134, 142, 150, 166, 174, 182, 198) sts.
Next 8 Rows:
Row 1: Cast on 8 sts, k8, work Holey Knit Pattern Row 3 (3, 5, 5, 5, 3, 3, 3, 5) across remaining sts – 118 (126, 142, 150, 158, 174, 182, 190, 206) sts.
Row 2: Cast on 8 sts, p8, work Holey Knit Pattern Row 4 (4, 6, 6, 6, 4, 4, 4, 6) to last 8 sts, p8 -126 (134, 150, 158, 166, 182, 190, 198, 214) sts.
Row 3: Cast on 8 sts, k8, work Holey Knit Pattern Row 5 (5, 3, 3, 3, 5, 5, 5, 3) across remaining sts – 134 (142, 158, 166, 174, 190, 198, 206, 222) sts.
Row 4: Cast on 8 sts, p8, work Holey Knit Pattern Row 6 (6, 4, 4, 4, 6, 6, 6, 4) to last 8 sts, p8 – 142 (150, 166, 174, 182, 198, 206, 214, 230) sts.
Row 5: Cast on 12 sts, k12, work Holey Knit Pattern Row 3 (3, 5, 5, 5, 3, 3, 3, 5) across remaining sts – 154 (162, 178, 186, 194, 210, 218, 226, 242) sts.
Row 6: Cast on 12 sts, p12, work Holey Knit Pattern Row 4 (4, 6, 6, 6, 4, 4, 4, 6) to last 12 sts, p12 – 166 (174, 190, 198, 206, 222, 230, 238, 254) sts.
Row 7: Cast on 12 sts, k12, work Holey Knit Pattern Row 5 (5, 3, 3, 3, 5, 5, 5, 3) across remaining sts – 178 (186, 202, 210, 218, 234, 242, 250, 266) sts.
Row 8: Cast on 12 sts, p12, work Holey Knit Pattern Row 6 (6, 4, 4, 4, 6, 6, 6, 4) to last 12 sts, p12 – 190 (198, 214, 222, 230, 246, 254, 262, 278) sts.
Work evenly in established Holey Knit Pattern for 12 (12, 14, 16, 16, 18, 20, 20, 22) rows, beginning with a pattern Row 3 (3, 5, 5, 5, 3, 3, 3, 5) and ending with a pattern Row 6 (6, 6, 4, 4, 4, 6, 6, 6).
Bind Off for Front Neck
Next 2 Rows:
Row 1 (RS): Work 87 (91, 99, 101, 105, 113, 115, 119, 127) sts in established Holey Knit Pattern, k16 (16, 16, 20, 20, 20, 24, 24, 24), work remaining 87 (91, 99, 101, 105, 113, 115, 119, 127) sts in established Holey Knit Pattern.
Row 2: Work 87 (91, 99, 101, 105, 113, 115, 119, 127) sts in established Holey Knit Pattern, Bind off center 16 (16, 16, 20, 20, 20, 24, 24, 24) sts, work remaining 87 (91, 99, 101, 105, 113, 115, 119, 127) sts in established Holey Knit Pattern.
Shape Left Front Shoulder
Next 6 Rows:
Row 1 (RS): Work in established Holey Knit Pattern to last 4 sts, k4.
Row 2: Bind off 4 sts, work in established Holey Knit Pattern to end – 83 (87, 95, 97, 101, 109, 111, 115, 123) sts.
Row 3: Work in established Holey Knit Pattern to last 4 sts, k4.
Row 4: Bind off 4 sts, work in established Holey Knit Pattern to end – 79 (83, 91, 93, 97, 105, 107, 111, 119) sts.
Row 5: Work in established Holey Knit Pattern to last 2 sts, k2.
Row 6: P2, work in established Holey Knit Pattern to end.
Repeat Rows 5 and 6 only 3 more times, then place all sts on a holder or spare circular needle.
Shape Right Front Shoulder
With RS facing, join yarn to 87 (91, 99, 101, 105, 113, 115, 119, 127) still on the needle.
Next 6 Rows:
Row 1 (RS): Bind off 4 sts, k2, work in established Holey Knit Pattern to end – 83 (87, 95, 97, 101, 109, 111, 115, 123) sts.
Row 2: Work in established Holey Knit Pattern to last 2 sts, p2.
Row 3: Bind off 4 sts, k2, work in established Holey Knit Pattern to end – 79 (83, 91, 93, 97, 105, 107, 111, 119) sts.
Row 4: Work in established Holey Knit Pattern to last 2 sts, p2.
Row 5: K2, work in established Holey Knit Pattern to end.
Row 6: Work in established Holey Knit Pattern to last 2 sts, p2.
Repeat Rows 5 and 6 only 3 more times, then place all sts on a holder or spare circular needle.
BACK
Work same as for Front until the casting on for the Sleeves is complete – 190 (198, 214, 222, 230, 246, 254, 262, 278) sts.
Work evenly in established Holey Knit Pattern for 20 (20, 22, 24, 24, 26, 28, 28, 30) rows, beginning with a pattern Row 3 (3, 5, 5, 5, 3, 3, 3, 5) and ending with a pattern Row 6 (6, 6, 4, 4, 4, 6, 6, 6).
Bind Off for Back Neck
Next 2 Rows:
Row 1 (RS): Work 87 (91, 99, 101, 105, 113, 115, 119, 127) sts in established Holey Knit Pattern, k16 (16, 16, 20, 20, 20, 24, 24, 24), work remaining 87 (91, 99, 101, 105, 113, 115, 119, 127) sts in established Holey Knit Pattern.
Row 2: Work 87 (91, 99, 101, 105, 113, 115, 119, 127) sts in established Holey Knit Pattern, Bind off center 16 (16, 16, 20, 20, 20, 24, 24, 24) sts, work remaining 87 (91, 99, 101, 105, 113, 115, 119, 127) sts in established Holey Knit Pattern.
Shape Right Back Shoulder
Next 4 Rows:
Row 1 (RS): Work in established Holey Knit Pattern to last 4 sts, k4.
Row 2: Bind off 4 sts, work in established Holey Knit Pattern to end – 83 (87, 95, 97, 101, 109, 111, 115, 123) sts.
Row 3: Work in established Holey Knit Pattern to last 4 sts, k4.
Row 4: Bind off 4 sts, work in established Holey Knit Pattern to end – 79 (83, 91, 93, 97, 105, 107, 111, 119) sts.
Place all sts on a holder or spare circular needle.
Shape Left Back Shoulder
With RS facing, join yarn to 87 (91, 99, 101, 105, 113, 115, 119, 127) still on the needle.
Next 4 Rows:
Row 1 (RS): Bind off 4 sts, k2, work in established Holey Knit Pattern to end – 83 (87, 95, 97, 101, 109, 111, 115, 123) sts.
Row 2: Work in established Holey Knit Pattern to last 2 sts, p2.
Row 3: Bind off 4 sts, k2, work in established Holey Knit Pattern to end – 79 (83, 91, 93, 97, 105, 107, 111, 119) sts.
Row 4: Work in established Holey Knit Pattern to last 2 sts, p2.
Place all sts on a holder or spare circular needle.
FINISHING
Join long Shoulder seams using 3-Needle Bind off.
Cuff Ribbing
With RS facing, pick up and knit 38 (38, 42, 46, 46, 46, 50, 50, 54) sts evenly across Cuff edge.
Row 1 (WS): P2, * k2, p2; repeat from * to end.
Row 2: K2, * p2, k2; repeat from * to end.
Repeat Rows 1 and 2 until ribbing measures 1½” [4 cm].
Bind off all sts loosely in rib pattern.
Work other Cuff the same.
Sew side and bottom Sleeve seams.
Neck Ribbing
With RS facing and beginning at right Shoulder seam, pick up and knit 33 (33, 33, 37, 37, 37, 41, 41, 41) sts sts evenly across Back Neck edge, then 41 (41, 41, 45, 45, 45, 49, 49, 49) sts evenly across Front Neck edge – 74 (74, 74, 82, 82, 82, 90, 90, 90) sts.
Row 1 (WS): P2, * k2, p2; repeat from * to end.
Row 2: K2, * p2, k2; repeat from * to end.
Repeat Rows 1 and 2 until ribbing measures 1½” [4 cm].
Bind off all sts loosely in rib pattern.
Sew Neck Ribbing seam at right Shoulder.
Weave in all loose ends.
Don’t miss this opportunity to create a piece that’s sure to turn heads and warm hearts. Click here to add the Sandra PDA Cropped Knit Sweater pattern to your cart and begin a journey filled with stitches, style, and stories.
📌 Get the Sandra PDA ad-free PDF!
(Access inside the Marly Bird House with unlimited viewing and bonus material)
❓ Frequently Asked Questions About the Sandra PDA Cropped Knit Sweater
Is the Sandra PDA Cropped Knit Sweater a free pattern?
Yes! The pattern instructions are available for free on the blog. An ad-free PDF with charts, checklists, and bonus materials is available through Etsy, Shopify, Ravelry, and inside the Marly Bird House.
What skill level is this cropped knit sweater?
This pattern is best suited for intermediate knitters, or confident advanced beginners who are comfortable with knit, purl, yarn overs, and following a lace pattern.
Can I make this sweater longer?
Absolutely. While the cropped length is part of the design, you can add length to the body before beginning sleeve shaping if you prefer a longer fit. Just be mindful that additional length may require extra yarn.
Is this sweater knit in the round?
No. The sweater is worked in two flat pieces, then seamed. A long circular needle is used to comfortably hold the stitches.
Does this pattern include charts?
Yes. Full charts for every size, along with row-by-row checklists, are included in the ad-free PDF.
💛 Why Knitters Love the BiCrafty Stitch-Nite Collection
The Sandra PDA Cropped Knit Sweater is part of the BiCrafty Stitch-Nite Collection, a curated set of patterns designed to help knitters build skills while feeling supported and inspired.
Inside the Marly Bird House, you’ll find:
- Guided projects
- Community encouragement
- Video instruction
- Unlimited access to learning materials
It’s not just about finishing a sweater — it’s about enjoying the process and knitting with confidence.
🧶 Final Thoughts
The Sandra PDA Cropped Knit Sweater is one of those projects that looks impressive, feels satisfying to knit, and becomes a go-to piece in your handmade wardrobe. Whether you’re stretching your skills with lace, exploring cropped sweater styles, or knitting alongside the BiCrafty community, this pattern delivers on both style and substance.
Take your time, enjoy the rhythm of the stitches, and don’t forget — knitting is meant to be fun 💕
Happy knitting,
❤️ Your BiCrafty Bestie,
Marly Bird

Happy knitting!
Categories: Free Patterns, Knitting, Marly Bird Premium Patterns, Our Free Patterns, Pattern, Uncategorized


Saw this on a YT short, had to cast on because it looked amazing on you!
I once loved knitting but for some reason haven’t picked up a needle in a while. Looks like this maybe new start . Thanks Feilda