Planned Pooling Crochet Throw Free Pattern
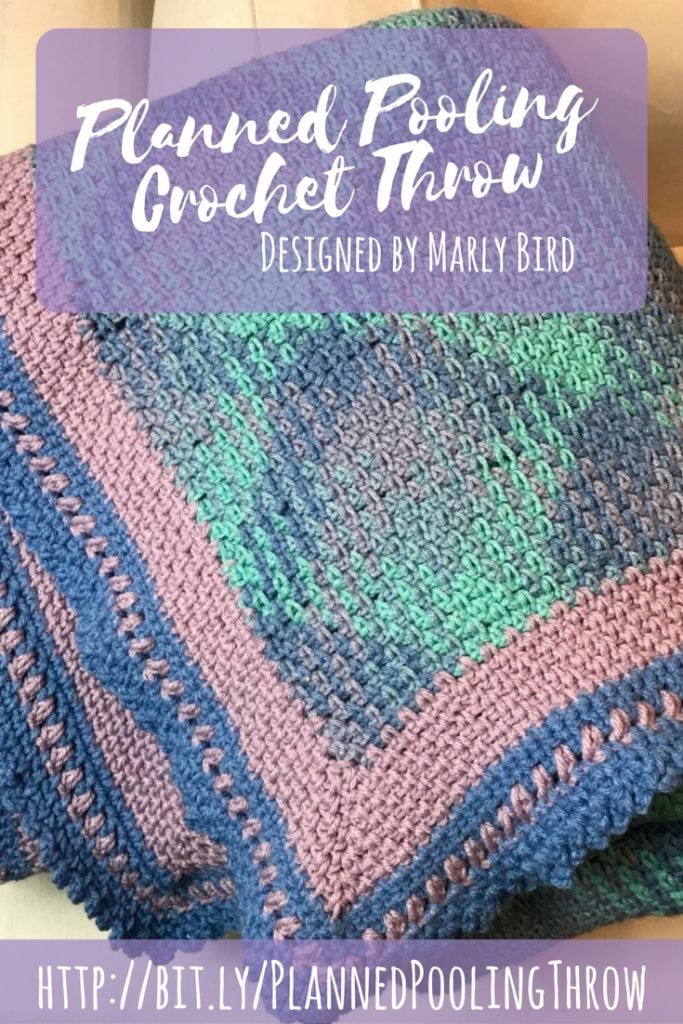
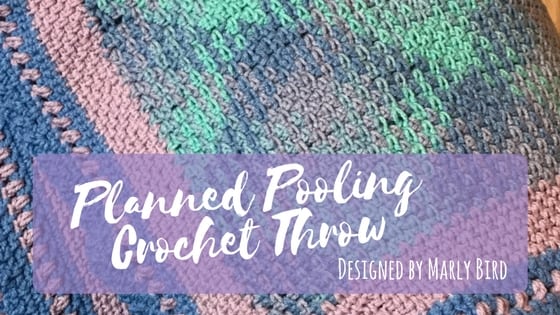 As I continue with the 10 Day Planned Pooling Party over on YouTube I added an extra pattern that didn’t make it into the book. Since I am sharing it with you for the Planned Pooling Party I wanted to give you the free pattern here. Join me in making the Planned Pooling Crochet Throw for your own home.
This is a large throw afghan that is made using the multi-sequence pooling technique then a beautiful solid color border is added to really frame the beautiful argyle look of the throw. I love the soft shades of this super saver colorway combined with the matching solids. Once you get the hang of pooling and set up the number of color sequence repeats you want for the throw this blanket works up rather quickly.
*This post contains affiliate links. By clicking one of these links a portion of the purchase will go to support the blog. The price that you pay will not change. Thank you for your support of the blog.*
Planned Pooling Crochet Throw Materials:
- RED HEART® Super Saver®: 12 skeins in 995 Ocean A and 1 skein each in 358 Lavender B and 381 Light Blue C
- Susan Bates® Crochet Hook: 6 mm [US J-10]
- Extra hooks in neighboring sizes (see notes)
- Susan Bates® Split lock stitch markers
- Yarn needle
Throw measures 64 x 80″ (162.5 x 203 cm) not including edging, or 68 x 84″ (173 x 213 cm) including edging.
Pattern Gauge:
13 sts (including ch sts) = 4″ (10 cm); 13 rows = 4″ (10 cm) in Moss Stitch. CHECK YOUR GAUGE. Use any size hook to obtain the gauge given.
Notes:
- It is highly recommended that you watch Marly Bird’s tutorial videos on planned color pooling before beginning this project: https://bit.ly/2hoslgr_CrochetPlannedPoolingPlaylist
- You may have to tighten or loosen some stitches as you go in order to keep the color pooling intact. Keep a variety of hook sizes on hand to help resize your stitches.
- Different dye lots of the same colorway may change the number of stitches obtained in any given color. Count the number of stitches YOU get to work through one full sequence, as well as in each color section, and maintain that throughout the pattern.
Special Stitches:
Puff st = [Yarn over, insert hook in indicated st and pull up a loop] 3 times, yarn over and draw through all 7 loops on hook.
Abbreviations:
A, B, C = Color A, Color B, Color C; ch = chain; sc = single crochet; st(s) = stitch(es); [ ] = work directions in brackets the number of times specified; * or ** = repeat whatever follows the * or ** as indicated.
Moss Stitch:
Ch an even number of sts.
Row 1: Sk 3 ch, sc in next ch, * ch 1, sk 1 foundation ch, sc in next ch; repeat from * to end, turn.
Row 2: Ch 2 (counts as a stitch now and throughout), sc in next ch-1 space, * ch 1, sc in next ch-1 space; repeat from * to end finishing with a sc in last ch-3 space, turn.
Row 3: Ch 2 (counts as a stitch now and throughout), sc in next ch-1 space, * ch 1, sc in next ch-1 space; repeat from * to end finishing with a sc in last ch-2 space, turn.
Repeat Row 3 only for Moss st.
Like this pattern on Ravelry!
Ocean Waves Planned Pooling Crochet Throw Pattern:
With A, ch for at least 70″ (178 cm), with the last loop on hook being the first loop of a new color just after a color change in the yarn.
Row 1 (right side): Sk 3 ch (counts as a st), sc in the 4th ch from hook, * ch 1, sc around the foundation ch (instead of going into a ch st); repeat from * until 1 full color sequences has been completed. Count the number of sc made in each individual color in the colorway and note it down. Work 7 more full color sequences, maintaining the same number of sc made in each individual color. Leave remaining ch sts unworked. Undo one st repeat (sc, ch 1), turn.
Row 2 (wrong side): Ch 2 (counts as a st now and throughout), sc in next ch-1 space, * ch 1, sc in next ch-1 space; repeat from * to end finishing with a sc in last ch-3 space, turn.
Note: As you work this row and all remaining rows, you MUST get the correct number of sc in each color in order to maintain the planned color pooling. Change hook sizes, or actual st used, to get the correct color in place. If you use the same number of sts per color that you counted on Row 1, it will work out.
Row 3 (right side): Ch 2 (counts as a st now and throughout), sc in next ch-1 space, * ch 1, sc in the next ch-1 space; repeat from * to end, finishing with a sc in last ch-2 space, turn.
Note: The color of the sts on this row will shift to the left or right by 1 st from the previous right side row depending on the colorway and if you are right or left handed. It doesn’t matter which direction the stitch shifts as long as it is off-set by 1.
Row 4 (wrong side): Ch 2 (counts as a st now and throughout), sc in next ch-1 space, * ch 1, sc in the next ch-1 space; repeat from * to end, finishing with a sc in last ch-2 space, turn.
Note: The color of the sts on this row will shift to the left or right by 1 st from the previous wrong side row depending on the colorway and if you are right or left handed. It doesn’t matter which direction the stitch shifts as long as it is off-set by 1.
Repeat Rows 3 and 4 until 10 full color repeats have been completed lengthwise, ending on a Row 4 (wrong side row).
Fasten off.
Finishing:
Squish or stretch the sts on foundation chain to match the width of the rest of the Blanket. You can slide the sts around along the foundation chain, as with an adjustable ring. Unravel unused foundation ch sts and weave in yarn tail to secure foundation.
Edging
With right side facing and working across foundation edge, join B with slip st in foundation ch st under last sc of Row 1.
Round 1 (right side): Ch 2 (counts as a st now and throughout), sc once more in same ch, * ch 1, sc in next space between sc of Row 1; repeat from * to ch-3 corner space, (ch 1, sc) 3 times in corner space, rotate Cover to work along long side edge, (ch 1, sc) in each ch space at edge of every other row to corner sc, (ch 1, sc) twice around corner sc, rotate Cover to work along top edge, (ch 1, sc) in each ch-1 space to corner ch-2 space, (ch 1, sc) 3 times in corner space, rotate Cover to work along long side edge, (ch 1, sc) in each ch space at edge of every other row to corner sc, (ch 1, sc) twice around corner sc, ch 1, join with sl st in beginning ch 2.
Rounds 2-8: Ch 2 (counts as a st now and throughout), * (sc, ch 1) in each space to corner space, [sc, ch 1] twice in corner space; repeat from * 3 more times, (sc, ch 1) in each space to end, join with slip st in beginning ch-2.
Puff Border
With right side facing, join C with slip st in sc to the left of any corner space.
Round 1: Ch 1, * sc in each sc and ch-1 space to corner space, 3 sc in corner space; repeat from * 3 times, join with slip st in first sc.
Note: there should now be an odd number of sts along each edge, not including corner sts.
Round 2: Ch 1, sc in first sc, * [ch 1, skip next st, sc in next st] to 1 st before corner st, ch 1, (sc, ch 1, sc) in corner st; repeat from * 3 more times, join with sc in first sc.
Change to B.
Round 3: Ch 1, puff st in space formed by joining sc, * (ch 1, puff st) in each ch-1 space to corner space, [ch 1, puff st] twice in corner space; repeat from * 3 more times, join with sc in first puff st.
Change to C.
Round 4: Ch 1, sc in space formed by joining sc, * (ch 1, sc) in each ch-1 space to corner space, [ch 1, sc] twice in corner space, repeat from * 3 more times, join with sc in first sc.
Change to B.
Round 5: Repeat Round 3.
Change to C.
Round 6: Ch 1, (sc, ch 3, sc) in space formed by joining sc and in each space around, join with slip st in first sc.
Fasten off.
Also on the Blog:
Categories: Crochet, Our Free Patterns, Pattern, Planned Pooling Crochet





13 sts (including ch sts) =4″ (10cm), 13 rows = 4″ (10cm) in moss stitch.
13 sts including chainsts = 4 in. 13 rows in moss st = 4 ins.