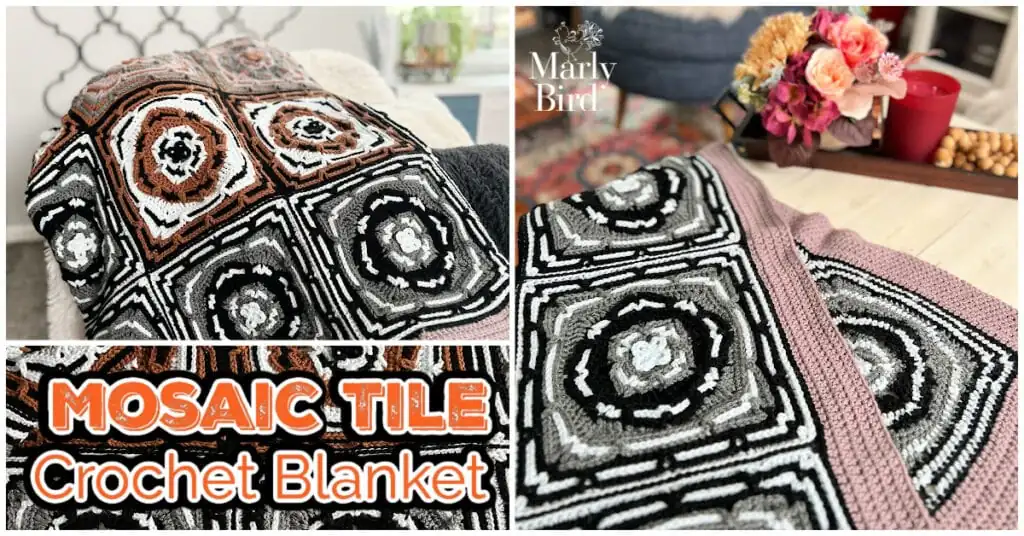
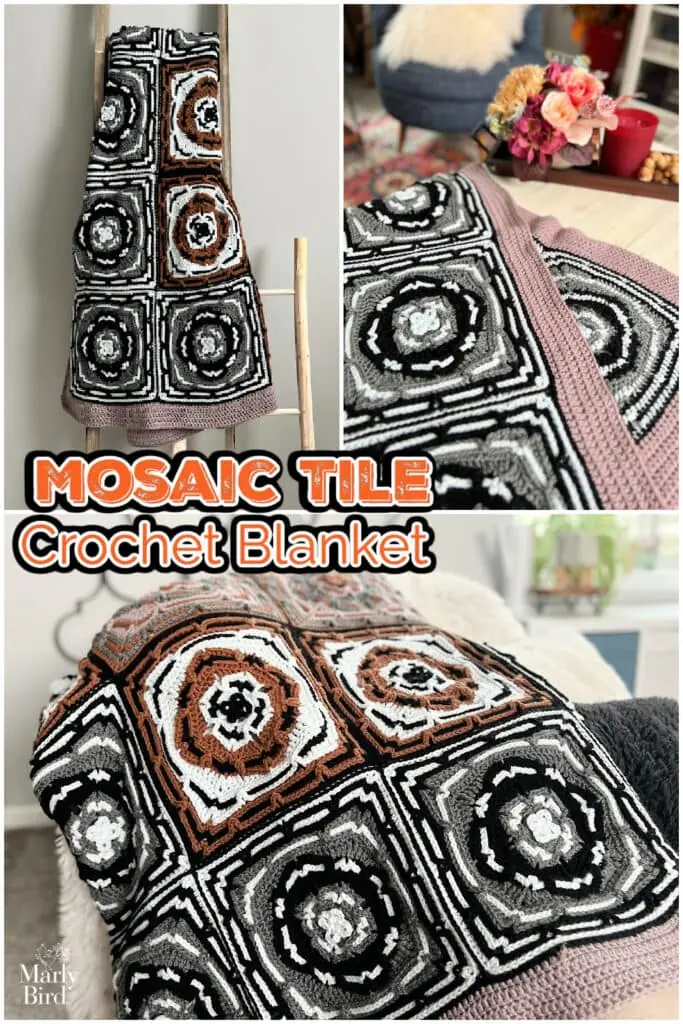
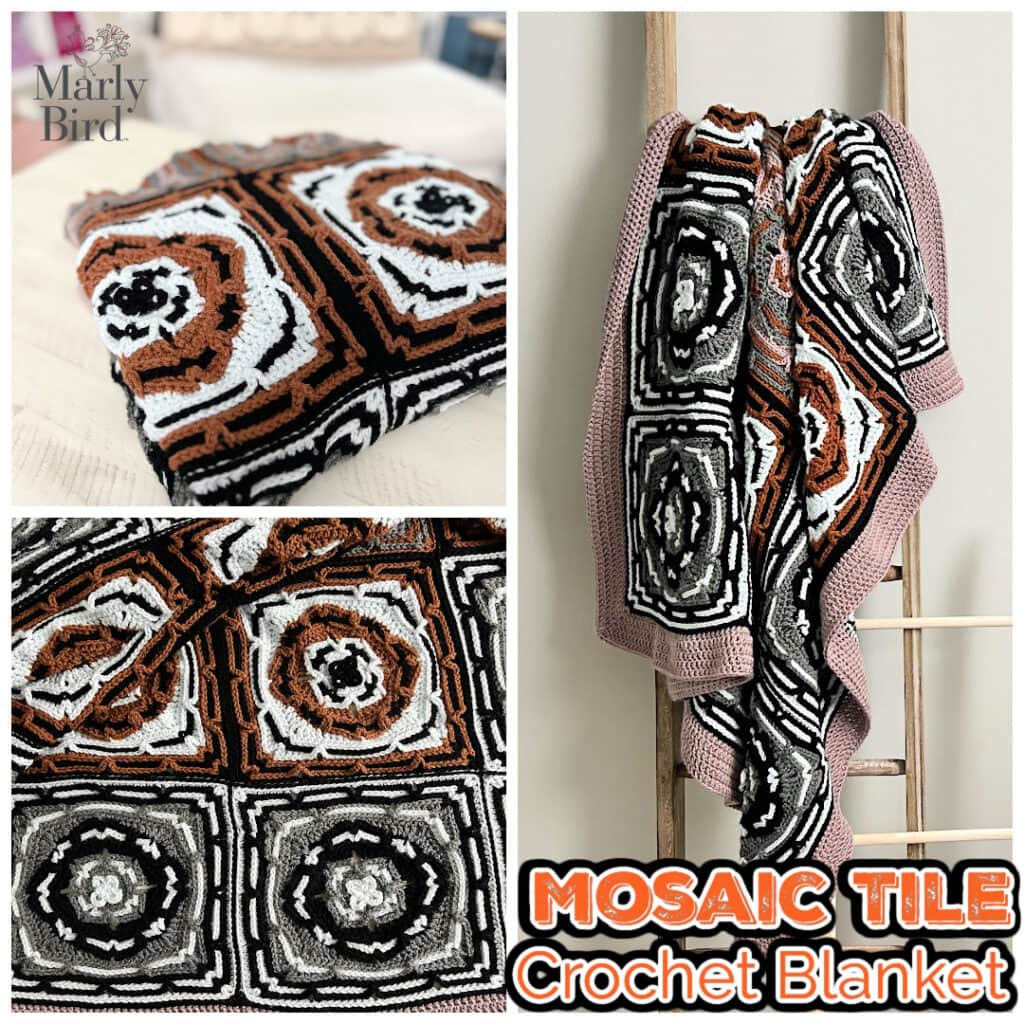
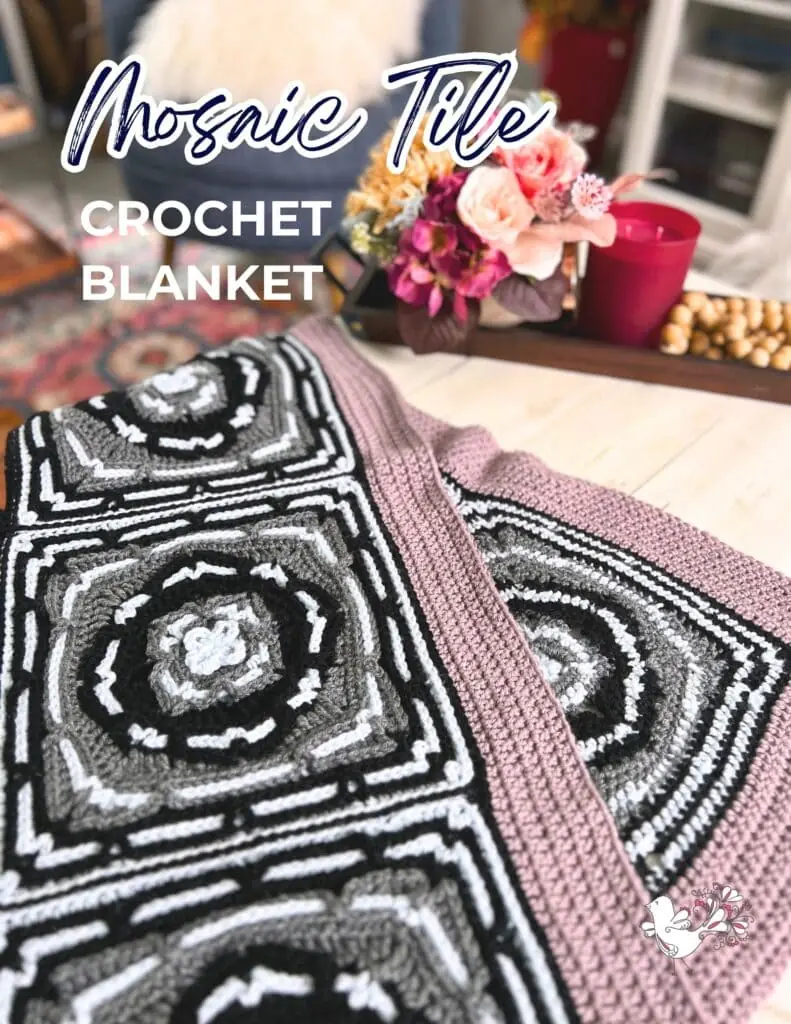
Mosaic Tile Crochet Blanket Pattern – Learn Mosaic Crochet with Bold Color 🧶🧩
If you love bold stitches, strong geometry, and colorwork that looks complicated (but totally isn’t), this Mosaic Tile Crochet Blanket is about to become one of your favorite projects.
Affiliate Disclosure: This post contains affiliate links. To learn more please visit my privacy policy here💖
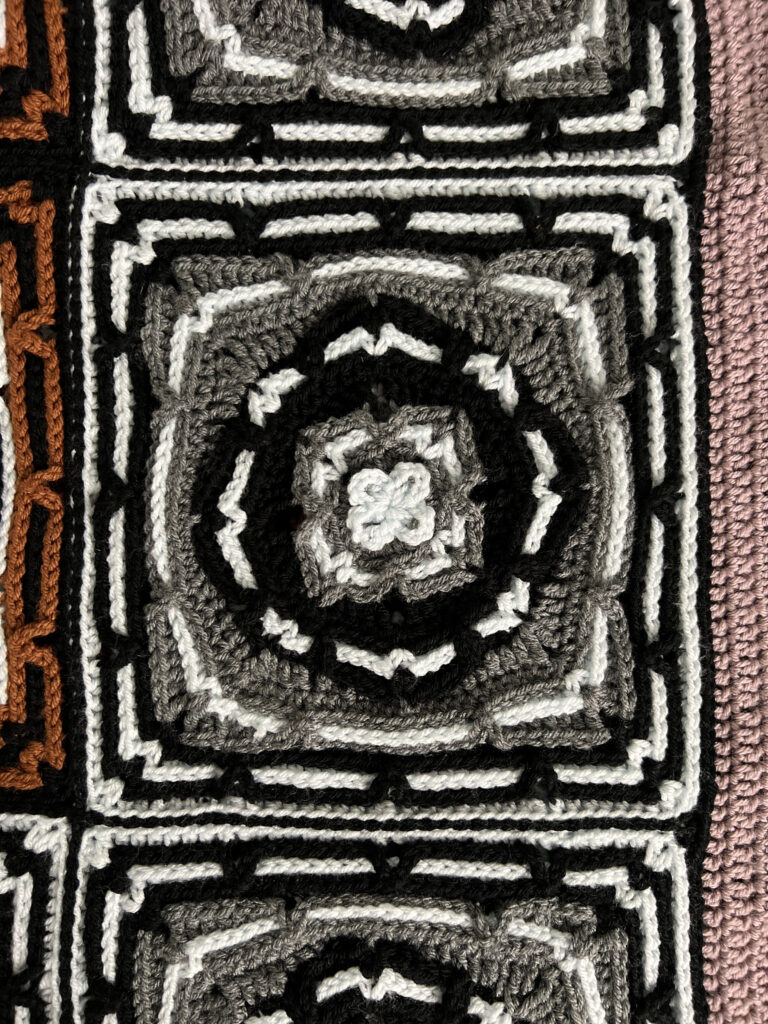
This pattern is all about mosaic crochet stitches — clean lines, graphic shapes, and eye-catching contrast — all worked using a method that keeps things organized and approachable. One color at a time, no tangled mess, just beautiful results.
Whether you’re brand new to mosaic crochet or ready to sharpen your skills, this blanket is a fantastic way to learn while creating something truly striking.
What You Will Love About This Mosaic Crochet Blanket 💙
- A bold mosaic crochet blanket pattern with strong geometric design
- Eye-catching mosaic crochet stitches worked one color at a time
- No carrying yarn across rows
- Clean, modern look with endless color options
- A satisfying project that builds confidence as you go
✨ Designer Tip: Mosaic crochet is one of those techniques that looks advanced, but once it clicks, it feels incredibly logical and fun.
What Is Mosaic Crochet? (And Why Makers Love It)
Mosaic crochet is a colorwork technique that creates dramatic patterns using simple stitches and strategic placement, rather than juggling multiple yarns at once.
Instead of carrying floats or switching colors constantly, mosaic crochet typically uses:
- One color per row or round
- Basic stitches like single crochet and double crochet
- Color changes that happen because of where stitches are worked, not how many colors you hold
The result? High-impact crochet colorwork that feels manageable and methodical.
Mosaic Crochet Stitches You’ll Practice 🧶
This mosaic tile blanket introduces you to classic mosaic crochet stitch techniques, including:
- Overlay-style mosaic stitches
- Structured stitch placement that creates crisp lines
- Repeating motifs that build visual rhythm
Because the pattern relies on repetition, it’s a great way to let your hands learn the technique while your confidence grows with every section.
✨ Designer Tip: Mosaic crochet rewards consistency. Once your tension settles in, the stitches practically guide you.
Want to Learn Mosaic Crochet Even Faster? 🎓
This blanket teaches you how mosaic crochet works — but if you want to truly understand the why behind the stitches, I highly recommend my Camp Colorwork course.
Inside Camp Colorwork, you’ll learn:
- Mosaic crochet fundamentals step by step
- How to read and follow mosaic charts
- How to choose colors that pop
- Tips to avoid common colorwork mistakes
You can get 25% off Camp Colorwork using this link:
https://marlybird.thrivecart.com/camp-colorwork/?coupon=HEART
Choosing Colors for a Mosaic Crochet Blanket 🎨
Color choice is where mosaic crochet really shines. Because the stitch pattern relies on contrast, your colors play a huge role in the final look.
How Color Contrast Affects Mosaic Crochet
High contrast = bold, graphic results
Low contrast = softer, more subtle designs
For best results, pair:
- One lighter color with one darker color
- Avoid mid-tone pairs that blend together
- Let one color “lead” while the other supports
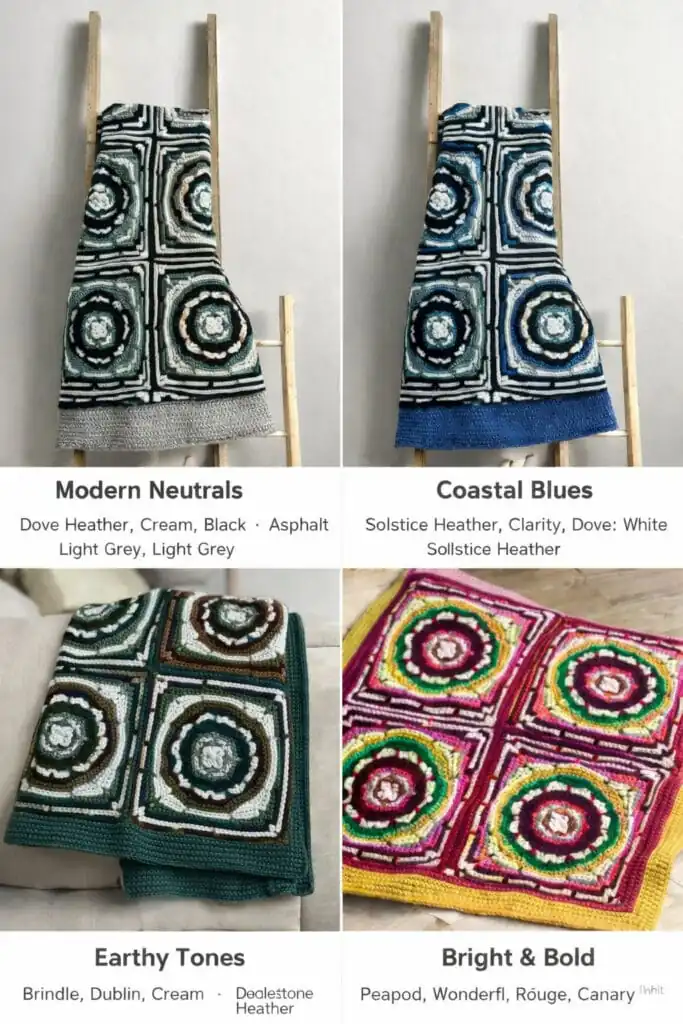
Color Palette Ideas to Inspire You 🌈
Here are a few color themes that work beautifully for mosaic crochet blankets:
Modern Neutrals
Black, cream, charcoal, soft gray
Perfect for minimalist homes and timeless décor
Coastal Blues
Navy, denim, soft white, slate
Fresh, calming, and great for living spaces
Earthy Tones
Deep green, warm brown, oatmeal, stone
Grounded and cozy with an organic feel
Bright & Bold
Golden yellow, berry, teal, poppy red
Playful, energetic, and perfect for statement blankets
(Insert colorway mockup images here)
✨ Designer Tip: If you’re unsure, start with high contrast. You can always soften future versions once you’re comfortable with the technique.
Join our Newsletter
Get Free Pattern Links & Coupons!

Mosaic Crochet Blanket Size & Layout Notes 📏
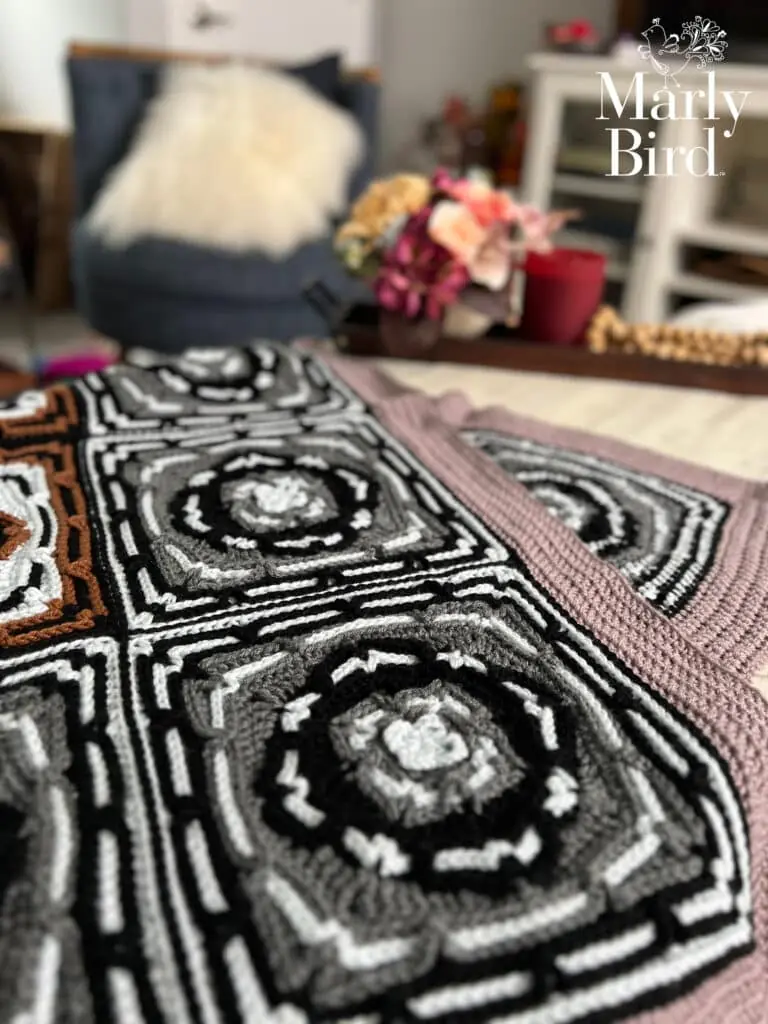
This mosaic tile crochet blanket is built from full square motifs, creating a clean, balanced layout with no half-squares needed.
That means:
- Strong symmetry
- Easy planning
- A polished, finished look
Because mosaic crochet is very structured, planning your layout and colors before you begin will help everything come together smoothly.
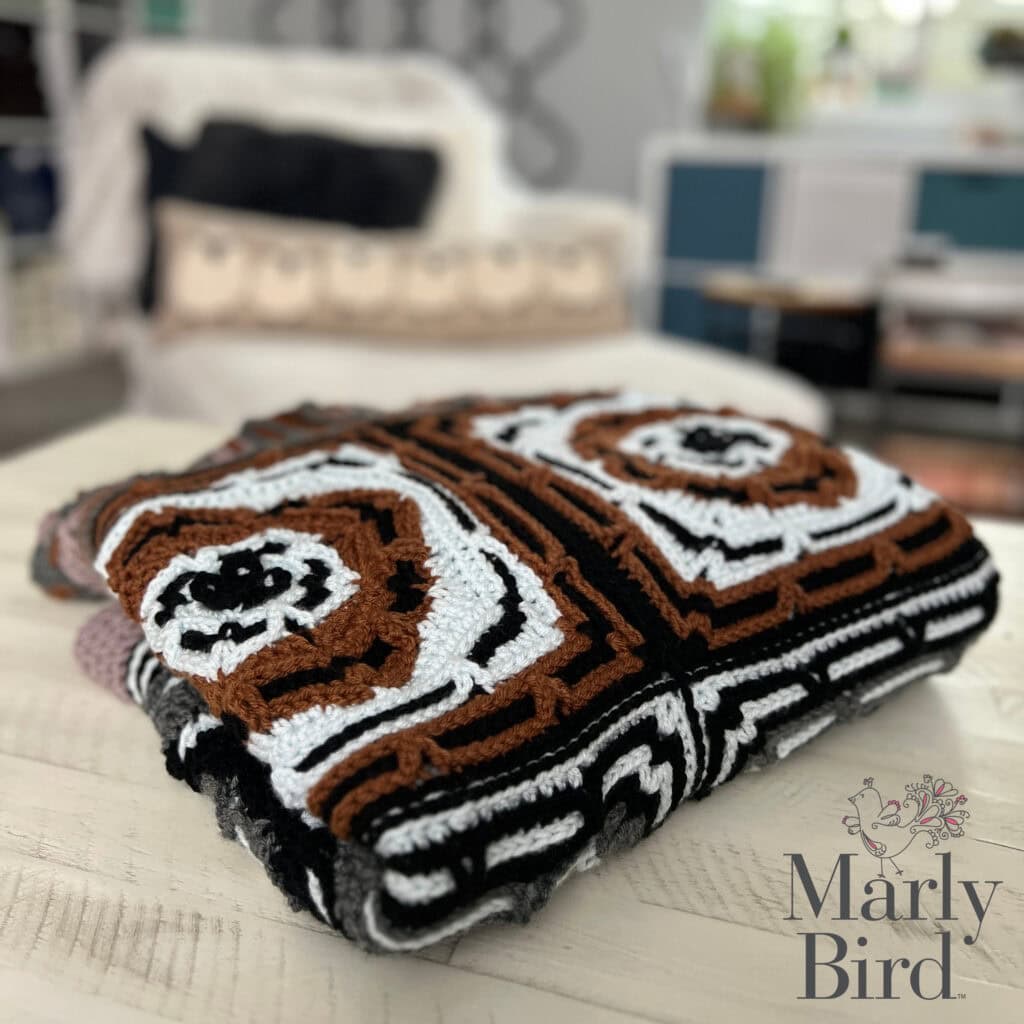
A Statement Crochet Blanket That Makes an Incredible Gift 🎁
Mosaic crochet blankets make unforgettable gifts because they feel artful and intentional.
This blanket is a wonderful choice for:
- Housewarming gifts
- Wedding or anniversary presents
- Graduation gifts
- Holiday or Christmas crochet gifts
- Statement throws for modern homes
It’s the kind of blanket people notice — and ask about.
MOSAIC TILE BLANKET PATTERN DETAILS
Designed by Marly Bird
SKILL LEVEL
Intermediate
MEASUREMENTS
Finished Measurements
Blanket is 54” [137 cm] wide by 66” [167.5 cm] long, including the edging.
One block is 12” [30.5 cm] wide by 12” [30.5 cm] long.
Gauge
Rounds 1-4 of Block = 3.25” [8.5 cm] wide by 3.25” [8.5 cm] long; use any size hook to obtain the gauge.
MATERIALS
Yarn
WeCrochet, Brava Worsted Mini Ball (100% acrylic, 54 yds / 49 m, 0.9 oz/ 25 g, CYCA# 4 worsted)
Color A: #28413 Black, 5 balls
Color B: #28419 Clarity, 4 balls
Color C: #28420 Cobblestone Heather, 3 balls
Color D: #28415 Brindle, 2 balls
Color E: #28448 Seraphim, 3 balls
Hook
Size I/9 [5.5 mm]
Notions
- Stitch Markers
- Tapestry Needle
- Scissors
- Tape Measure
- Leather tags (Optional)
- Leather rivets (Optional)
ABBREVIATIONS
BP – Back Post
CC1 – First Contrasting Color
CC2 – Second Contrasting Color
Ch – Chain(s)
Dc – Double Crochet
Hdc – Half Double Crochet
MC – Main Color
RS – Right Side
Sc – Single Crochet
Sl st – Slip Stitch
Sp(s) – Space(s)
St(s) – Stitch(es)
Tch – Turning Chain
Tr – Treble Crochet
WS – Wrong Side
SPECIAL STITCHES
⭐️ Back Post Single Crochet (bpsc): Insert hook from back to front to back around the post of the stitch indicated, yarn over and pull up a loop, yarn over and pull through both loops on hook.
⭐️ Third Loop: Middle bar located on wrong side of st under the top two loops (created by the yarn over)
BLANKET LAYOUT
| A | A | A | A |
| A | B | B | A |
| B | C | C | B |
| A | B | B | A |
| A | A | A | A |
STITCH DIAGRAM
✨ Stitch Diagram for the Mosaic Tile Crochet Blanket is only available in the Ad-Free PDF.
NOTES
- Block uses 3 colors, but feel free to substitute more colors for A and B.
- To join your round, you can use a sl st to the indicated stitch or thread the free loop of your last stitch through the indicated stitch from the RS to the WS.
- Change color by folding in a new color after joining and ch the amount needed for the next round.
- Do not turn at the end of each round.
VIDEO TUTORIAL
- How to Read a Stitch Diagram >> Click Here for Video Help <<
- Mosaic Tile Crochet Block >> Click Here for Video Help <<
- Crochet Seam (@ 36 min mark)>> Click Here for Video Tutorial <<
- Weaving in Ends >> Click Here for Video Help <<
GROW
To Unlock Exclusive Subscriber Content click the Box below and join for free by simply adding your email and creating a password! If you are having troubles, clear your cache or reset your password or login to the Grow Publisher Portal.
>> Learn More About Grow Here <<
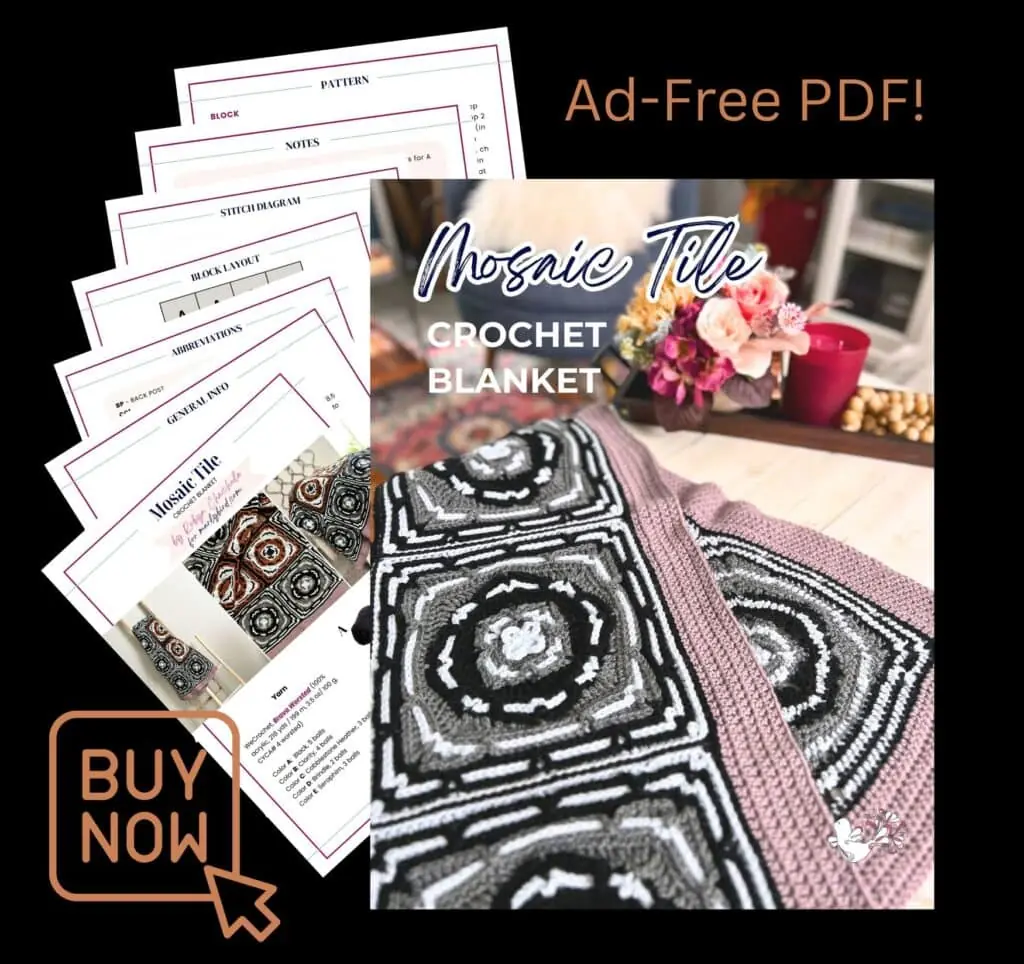
I’m thrilled to share this amazing pattern with you, many patterns on my blog are absolutely free! I kindly request that you don’t copy and paste or distribute this pattern. Prefer an ad-free experience? Buy a digital PDF pattern for a small fee from one of my online stores for a seamless crafting journey.
I appreciate your support and readership. You are the reason I can keep doing what I love and sharing it with others. So, thank you from the bottom of my yarn-loving heart! Disclosure: This post contains affiliate links, meaning I get a commission if you decide to make a purchase through my links at no cost to you.
MOSAIC TILE BLANKET PATTERN
BLOCK
Make 12 of Block A, 6 of Block B, 2 of Block C
Color Changes are the following for each block:
| BLOCK A | BLOCK B | BLOCK C | |
| MC | B | A | D |
| CC1 | C | B | E |
| CC2 | A | D | C |
With MC, ch 4, sl st to first ch to form a ring.
Round 1 (RS): Ch 6 (counts as dc + ch-3 sp), [sl st in ring, ch 3, dc in ring, ch 3] 3 times, sl st in ring, ch 3, join to 3rd ch of beginning ch, change to color CC1 . (8 ch-3 sps + 4 dc)
Round 2: Ch 1, bpsc around beginning ch (that counts as dc in Round 1). [ch 3, bpsc around next dc] 3 times, ch 3, join to first sc, do not change color. (4 ch-3 sps + 4 sc)
Round 3: Ch 1, *5 hdc in next ch-3 sp, ch 1, skip next sc; repeat from * around, join to first hdc, change color to MC. (20 hdc + 4 ch-1 sps)
Round 4: Ch 1, *hdc in third loop of next 5 hdc, (hdc, ch 1, hdc) in next ch-1 sp; repeat from * around, join to first hdc, change color to CC1, fasten off color MC. (28 hdc + 4 ch-1 sps)
Round 5: Ch 1, hdc in third loop of next 2 hdc, *ch 3, sl st to top 2 loops of next hdc on Round 3 (in front of Round 4), ch 3, hdc in third loop of next 3 hdc, (hdc, ch 1, hdc) in next ch-1 sp**, hdc in third loop of next 3 hdc; repeat from * around ending at **, hdc in third loop of next hdc, join to first hdc, fasten off color CC1. (32 hdc + 8 ch-3 sps + 4 ch-1 sps)
Round 6: Join color CC2 with sl st to any ch-1 sp, *sc in third loop of next hdc, hdc in third loop of next hdc, dc in third loop of next hdc, 2 dc in third loop of next hdc, ch 1, 2 dc in third loop of next hdc, dc in third loop of next hdc, hdc in third loop of next hdc, sc in third loop of next hdc**, sl st in next ch-1 sp; repeat from * around ending at **, sl st to first sl st, do not change color. (24 dc + 8 hdc + 8 sc + 4 sl sts)
Round 7: Ch 1, hdc in same sl st as join, *hdc in next 5 sts, (hdc, ch 1, hdc) in next ch-1 sp, hdc in next 5 sts**, (hdc, ch 1, hdc) in next sl st; repeat from * around ending at **, hdc in first sl st as join, ch 1, join to first hdc, change color to MC, fasten off color CC2. (56 hdc + 8 ch-sps)
Round 8: Ch 1, hdc in ch-1 sp, *hdc in third loop of each hdc to ch-1 sp**, (hdc, ch 1, hdc) in next ch-1 sp; repeat from * around ending at **, hdc in first ch-1 sp, ch 1, join to first hdc, fasten off color MC. (72 hdc + 8 ch-sps)
Round 9: Join color CC2 with sl st to first ch-1 sp, *sc in third loop of next hdc, hdc in third loop of next 2 hdc, ch 3, sl st to top 2 loops of next hdc on Round 7 (in front of Round 8), ch 3, hdc in third loop of next hdc, dc in third loop of next 4 hdc, (dc, ch 1, dc) in next ch-1 sp, dc in third loop of next 4 hdc, hdc in third loop of next hdc, ch 3, sl st to top 2 loops of next hdc on Round 7 (in front of Round 8), ch 3, hdc in third loop of next 2 hdc, sc in third loop of next hdc**, sl st in next ch-1 sp; repeat from * around ending at **, sl st to first sl st, change color to CC1, fasten off CC2. (40 dc + 24 hdc + 8 sc + 4 ch-1 sps)
Round 10: Ch 3, tr in first sl st, *dc in next 3 sts, skip next 2 ch-3 sps, hdc in third loop of next 3 sts, sc in third loop of next 2 sts, sl st in third loop of next st, sl st in next ch-1 sp, sl st in third loop of next st, sc in third loop of next 2 sts, hdc in third loop of next 3 sts, skip next 2 ch-3 sps, dc in next 3 sts**, (tr, ch 1, tr) in next sl st; repeat from * around ending at **, tr in first sl st, ch 1, join to first tr, do not change color. (8 tr + 24 dc + 24 hdc + 16 sc + 12 sl sts)
Round 11: Ch 1, hdc in first tr, *hdc in each st to ch-sp, (hdc, ch 1, hdc) in next ch-1 sp; repeat from * around, join to first hdc, change color to MC. (92 hdc + 4 ch-1 sps)
Round 12: Ch 1, *hdc in third loop of each hdc to ch-1 sp, (hdc, ch 1, hdc); repeat from * around, hdc in third loop of last hdc, join to first hdc, change color to CC1, fasten off color MC. (100 hdc + 4 ch-1 sps)
Round 13: Ch 2, dc in third loop of next 2 hdc, hdc in third loop of next 2 hdc, *ch 3, sl st to top 2 loops of next hdc on Round 11 (in front of Round 12), ch 2, sl st in third loop of next 11 hdc, ch 2, sl st to top 2 loops of next hdc on Round 11 (in front of Round 12), ch 3, hdc in third loop of next 2 hdc, dc in third loop of next 3 hdc, tr in third loop of next hdc, (tr, ch 1, tr) in next ch-1 sp, tr in third loop of next hdc**, dc in third loop of next 3 hdc, hdc in third loop of next 2 hdc; repeat from * around ending at **, dc in third loop of last hdc, join to first dc, change to color CC2, fasten off color CC1. (16 tr +24 dc + 16 hdc + 44 sl sts + 4 ch-1 sps)
Round 14: Ch 1, *hdc in third loop of each st to sl sts, 2 hdc in third loop of next hdc on Round 12 (behind sl st on Round 13), hdc in third loop of next 9 hdc on Round 12, 2 hdc in third loop of next hdc on Round 12, hdc in third loop of each sts to ch-1 sps, (dc, ch 1, dc) in next ch-1 sps; repeat from * around, hdc in third loop of last 3 sts, join to first hdc, change color to MC. (108 hdc + 8 dc + 4 ch-1 sps)
Round 15: Ch 1, *hdc in third loop of each hdc to ch-1 sp, (dc, ch 1, dc); repeat from * around, hdc in third loop of last 4 sts, join to first hdc, change color to CC2. (116 hdc + 8 dc+ 4 ch-1 sps)
Round 16: Ch 1, hdc in third loop of same hdc as join, *[ch 3, sl st to top 2 loops of next hdc on Round 14 (in front of Round 15), ch 3, hdc in third loop of next 8 hdc] twice, ch 3, sl st to top 2 loops of next hdc on Round 14 (in front of Round 15), ch 3, hdc in third loop of next 6 sts, (dc, ch 1, dc) in next ch-1 sps**, hdc in third loop of next 6 sts; repeat from * around ending at **, hdc in third loop of last 5 sts, join to first hdc, change color MC, fasten off color CC2. (112 hdc + 8 dc+ 4 ch-1 sps + 12 ch-3 sps)
Round 17: Ch 1, *2 hdc in third loop of next hdc, [hdc in third loop of next 7 hdc, 2 hdc in third loop of next hdc] twice, hdc in third loop of next 7 hdc, (dc, ch 1, dc) in next ch-1 sp, hdc in third loop of next 6 hdc; repeat from * around, join to first hdc, fasten off color MC. (132 hdc + 8 dc+ 4 ch-1 sps)
Weave in all ends.
FINISHING
Pin blocks to finished size, spray with water or steam to block.
SEAMING
Using the blanket layout as a guide, arrange blocks as shown. Seam blocks together by working a sl st through the back loop of each motif. Hold one motif on top of the other. Join color A to the back loop of the first st on each motif working through both adjoining motifs at the same time. Holding your working yarn to the back, insert your hook from the front to the back and sl st in each st through the back loop. Do not fasten off until you have joined all pairs together in column. Repeat on the blocks. When working the perpendicular seam (in the rows), repeat directions until at the previous seam, sl st over the seam and continue joining blocks. See video tutorial for more tips.
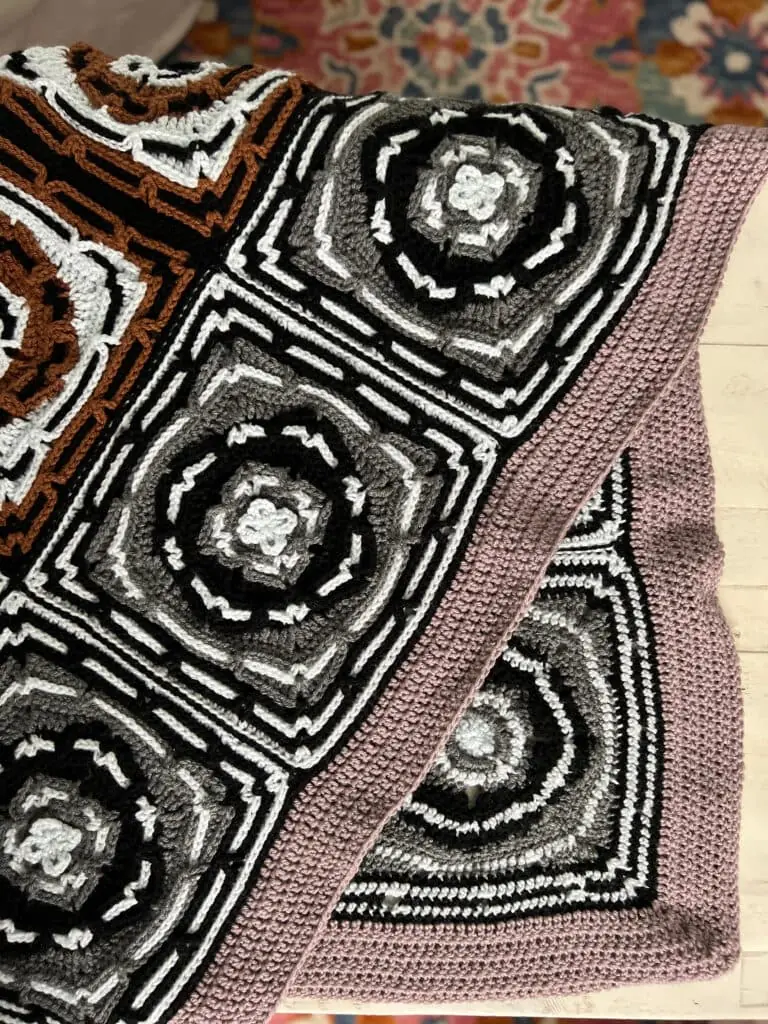
EDGING
Join color A to any hdc in the third loop of the center of one block along the edge of the blanket with a sl st.
Round 1: Ch 1, *hdc in the third loop of each st to the ch-sp before the seam**,hdc in the center of the seam; repeat from * across ending at ** in the corner ch-1 sp, (dc, ch 1, dc) in the corner ch-1 sp. Repeat around all sides of the blanket, join to the first hdc, change color to E, do not turn, do not fasten off color A.
Round 2: Ch 2 (does not count as a st), *dc in the third loop of each hdc to ch-1 sp, (dc, ch 1, dc) in next ch-1 sp: repeat from * around, dc in the third loop of each hdc to beginning, join to first st.
Round 3: Ch 2, *dc in each dc to ch-1 sp, (tr, ch 1, tr) in ch-1 sp; repeat from * around, dc in each dc to beginning, join to first st.
Repeat Round 3 until edging is 3” total. Fasten off and weave in ends,
Love This Pattern on Ravelry 💙
If you’re on Ravelry, don’t forget to:
- Favorite the pattern
- Add it to your queue
- Share photos of your finished blanket

Seeing your mosaic tile blankets come to life in different colorways is always a joy 🥰
FAQs About Mosaic Crochet Blankets ❓
Is mosaic crochet difficult to learn?
Not at all. Mosaic crochet uses simple stitches and one color at a time, making it very approachable with practice.
Is mosaic crochet the same as tapestry crochet?
No. Mosaic crochet relies on stitch placement rather than carrying yarn across rows.
Does mosaic crochet use more yarn?
Yes, textured and overlay stitches can use slightly more yarn, but the bold results are worth it.
Can I change the colors in this blanket?
Absolutely. Color customization is one of the best parts of mosaic crochet.
Is this a good first mosaic crochet project?
Yes! This blanket is an excellent introduction to mosaic crochet stitches and structure.
Final Thoughts 💙
If you’ve been curious about mosaic crochet, this Mosaic Tile Crochet Blanket is a fantastic place to start. It’s bold, graphic, and incredibly satisfying to make — and it builds skills you can carry into future colorwork projects.
Whether you choose earthy neutrals or go full bright and bold, this blanket is proof that crochet can be both creative and confident.
If you make one, be sure to tag @themarlybird and use #mmmdi and #marlybird so I can admire your beautiful work 🧶✨
❤️ Your BiCrafty Bestie,
Marly Bird

Categories: Crochet, Free Patterns, Marly Bird Premium Patterns, Our Free Patterns, Pattern