Crochet with Leather | Leather Crochet Bracelet
Traditionally we crochet with yarn and make beautiful things but we can crochet with so many other materials as well. Crocheting with leather is a great way to make a bracelet, a wrist strap, a shawl wrap, a keychain, or many other projects. Learn how to make a crochet leather bracelet with me.

Leather Bracelet Materials
- .5mm round Leather Cord (Leather Cord USA is a great supplier of quality leather)
- 5mm Magnetic clasp
- 2.25mm Crochet Hook (size B)
- Super Glue (I prefer ultra gel control super glue)
- Sharp Scissors

Tips for Making Your Bracelet
Sizing Your Bracelet
First you will need to know how long your finished bracelet will be. To figure this out you can use a fabric tape measure to go around your wrist or take your favorite bracelet and measure it.
NOTE: leather does tend to stretch a little bit with wear so be sure to size on the conservative side.
As we will talk about later, you will need to take into account the length of your clasp for the total length of the bracelet.
Working with Leather
You can create this crochet rope easily with yarn or with leather. We are using leather to make this bracelet. Leaving the leather on the spool allows you to adjust the length of your bracelet as you work. If you cut your leather first you might be cutting the leather too short.
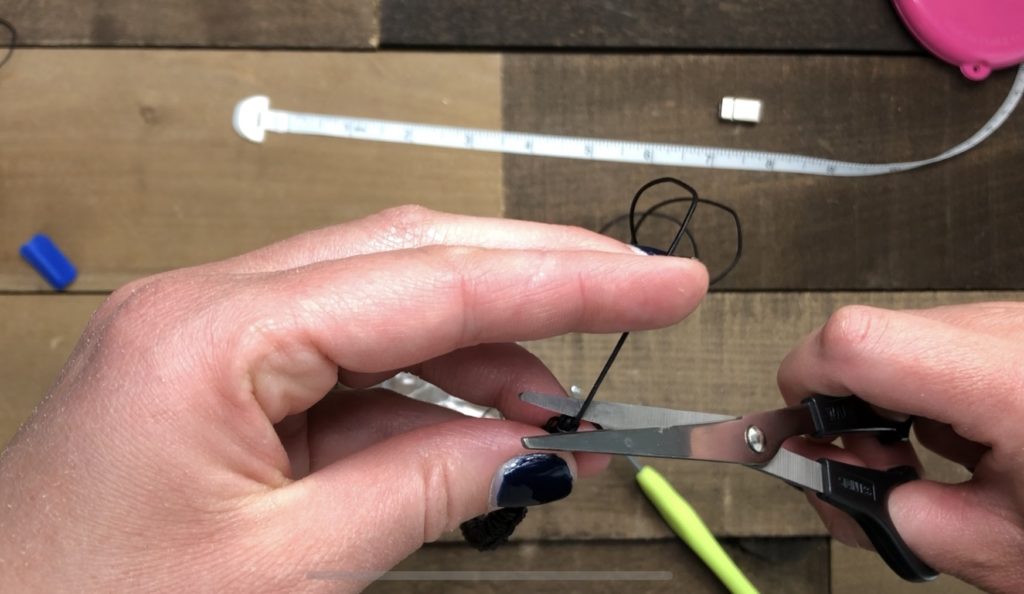
Cutting your leather is quite easy. You can use a jewelry wire cutter or a sharp pair of scissors.
Finishing Your Bracelet
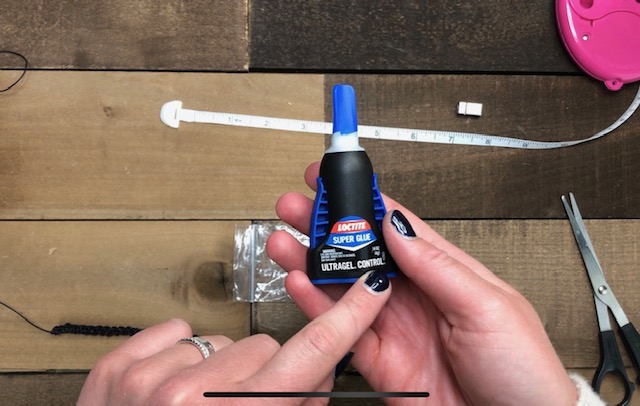
Finishing our bracelet will be done with a little super glue and a magnetic clasp. We will talk about this later but is important to note that super glue can leave the leather with a cloudy appearance if you get too much on your piece. Be sure to follow the directions below to keep your bracelet from being ruined by the super glue.
Using a magnetic clasp is a great way to finish off your bracelet. When you opening your magnetic clasp you will want to twist it open vs trying to pull it open. This will help keep your bracelet looking its best for a long time.
How to Make a Crochet Leather Bracelet
Step 1
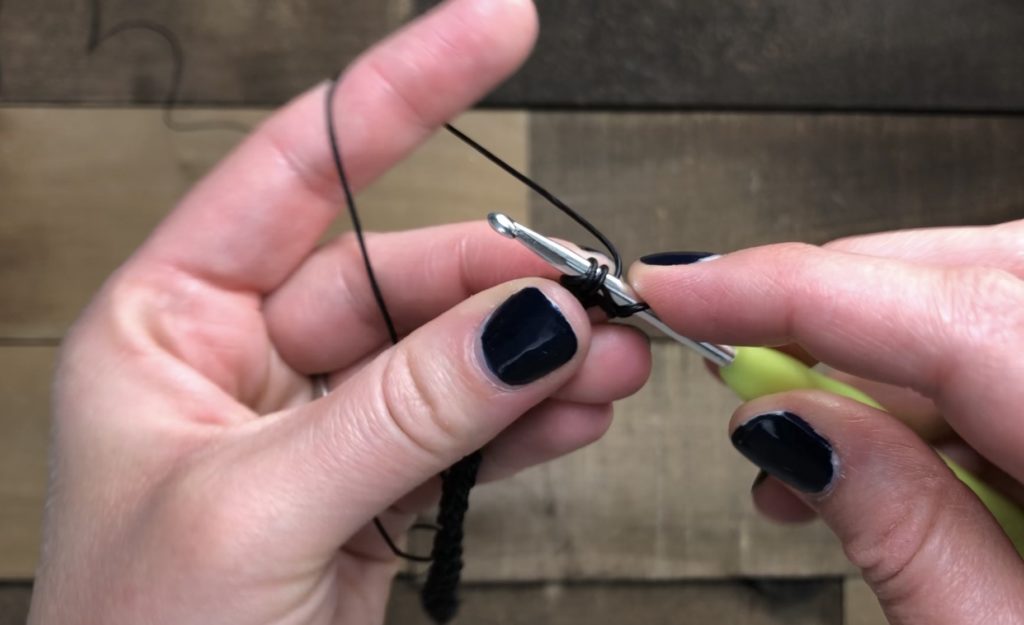
Start with a slip knot on your hook and chain two with the leather.
Step 2
For this project we will NOT be working into the V as you traditional do with crochet. It will be important to know where the V is on your project as we work.
After you make your first two chains you will work a single crochet into the BUMP at the bottom of your V. For this first stitch it will just be one bump.
Step 3
Once you have created this first stitch you will turn your work and work into TWO BUMPS at the bottom of your V. Repeat step 3 as many times as needed to get the desired length for your bracelet.
Step 4
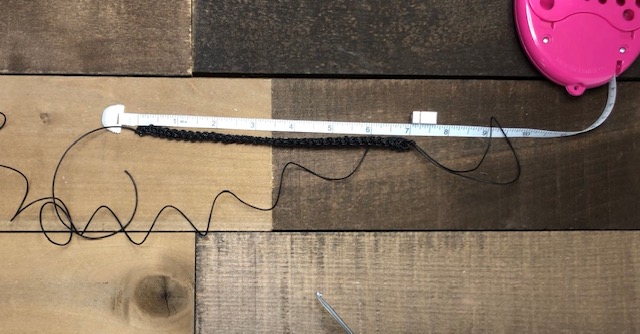
Measure your bracelet holding the clasp to it so that you are sure the length is correct when you attach your clasp. Once it is the correct length cut the leather and pull through to secure the end as you do with any other crochet project.
Step 5
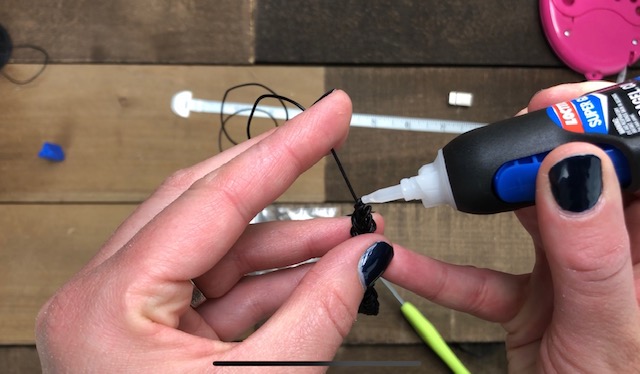
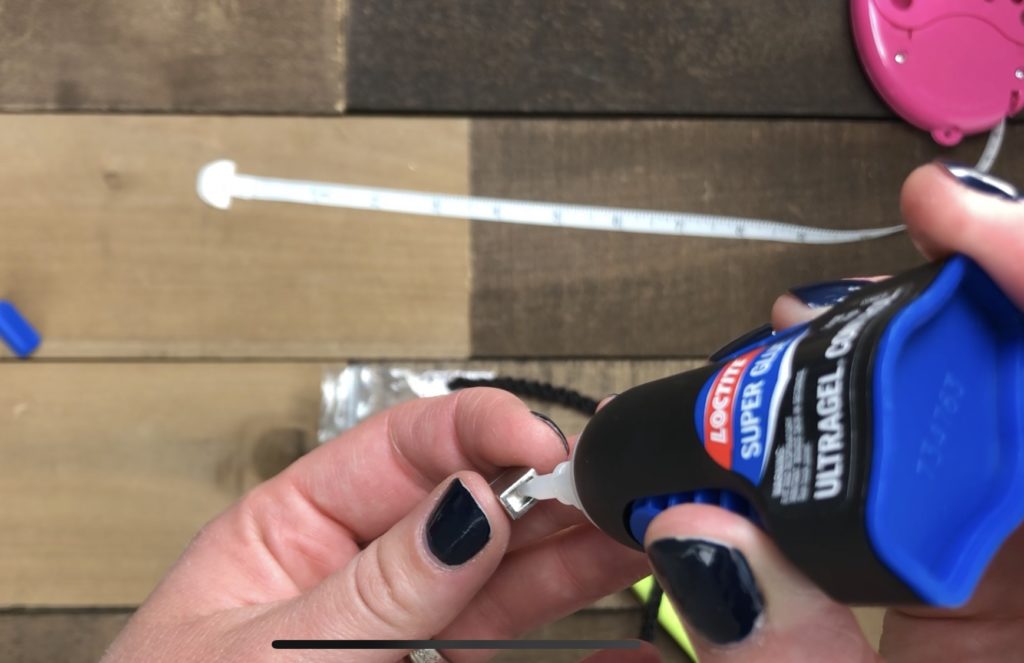
Add a small amount of super glue to the end of the leather to hold it in place. Only glue on your knot. The gel control glue helps to keep the glue where you put it so that it doesn't make your leather cloudy.
Pull your ends tight and cut the leather close to the end of the project, leaving a very small tail.
NOTE: It is always better to not add enough glue, you can add more but you can't really take it away. You want to control the glue so that it doesn't fog the leather. I prefer to use ultra control gel super glue to help with this process.
Step 6
Put a small amount of super glue into one end of your clasp. Using a toothpick spread the glue around so that it is on the bottom and all of the sides. This will help create a more secure hold. There should be a thin layer of glue inside the claps.
NOTE: Make sure that the layer of glue is thin. You don't want to have glue oozing out when you add your leather to the clasp.
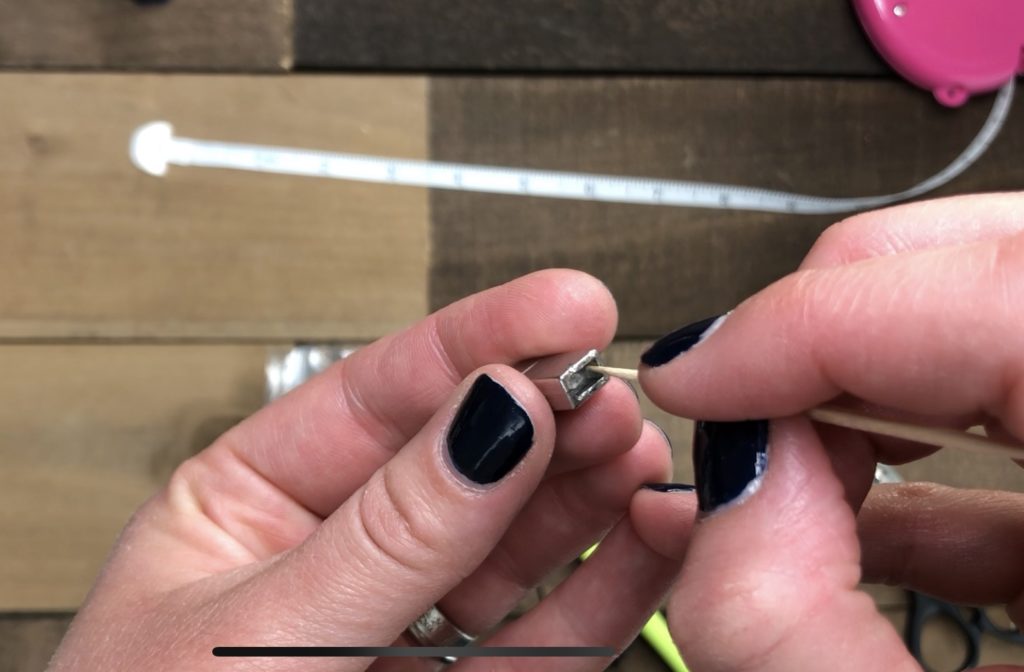
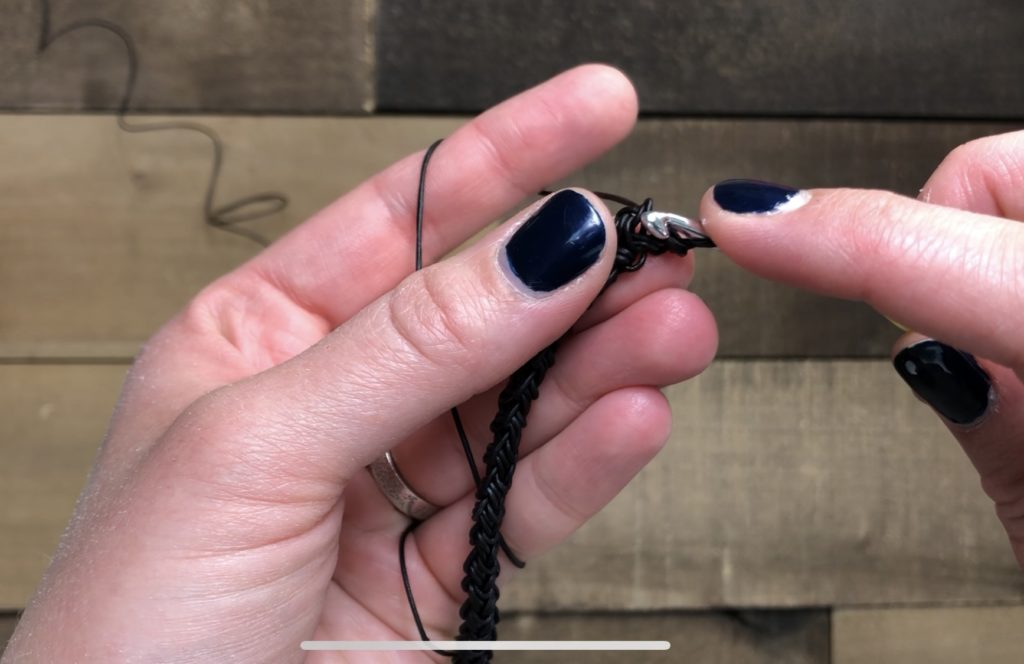
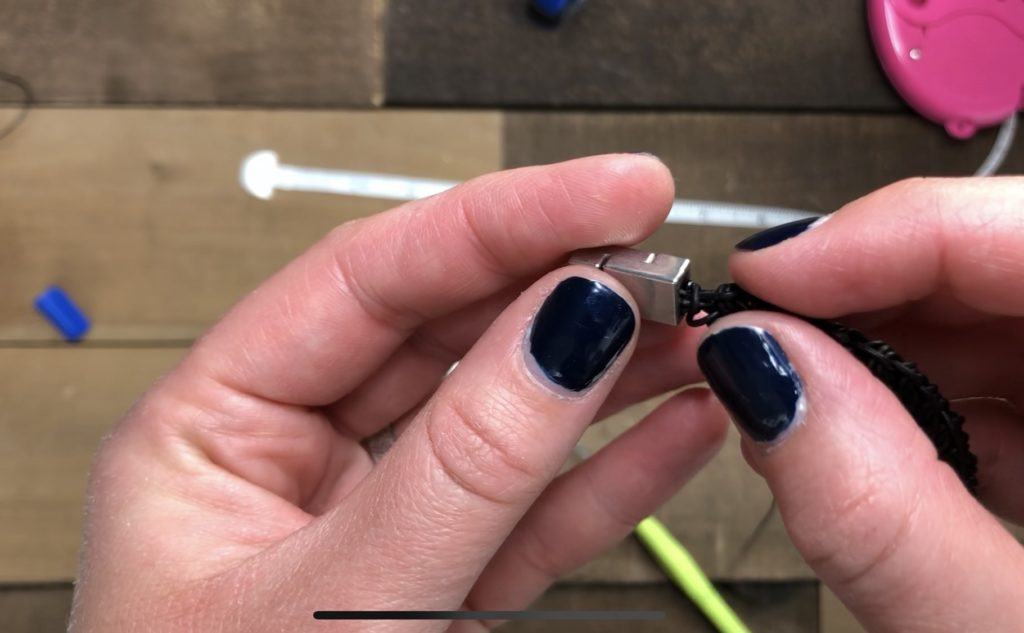
Insert one end of your leather crochet bracelet into the claps. Push in firmly to make sure that you get it all inside the clasp. You may need to bend or squeeze the end of the leather bracelet to get it inside the clasp.
Step 7:
Making sure that your bracelet is NOT TWISTED repeat step 6 for the other side of your bracelet.
Allow the bracelet to sit for about 24 hours to make sure that the glue is completely dry and will stay in place. Wear your bracelet and ENJOY!

Crochet Jewelry Patterns
Frequently Asked Questions
Can you really crochet with leather?
Yes! Leather lace (thin strips of genuine or faux leather) works beautifully with larger crochet hooks. The technique is similar to regular crochet but the leather's different texture and stiffness create a very distinctive finished fabric. Leather bracelets worked in simple crochet stitches have a gorgeous, substantial, artisan quality that's very different from yarn crochet. It's an accessible extension of crochet skills that opens up jewelry and accessory making in new materials.
What materials do I need to crochet with leather?
Leather lace or leather cord… available at craft stores, leather suppliers, or online. Lace weight leather strips (3-4mm width is common for bracelets) are the most manageable for beginners. A larger crochet hook… typically K (6.5mm) or L (8mm) accommodates leather lace well. A clasp or closure for the finished bracelet (a lobster clasp and jump ring work nicely). Scissors that are appropriate for cutting leather. Unlike yarn crochet, there are no ends to weave in… you simply trim the leather close and the material won't fray.
How is crocheting with leather different from crocheting with yarn?
Several key differences! Leather doesn't have the stretch and give of yarn… the finished fabric is stiffer and more structured. You can't rip back leather easily without it showing crease marks from the hook. Leather has no “give” so gauge is very literal… what you make stays the size it is. The hook needs to pierce or glide through the leather smoothly… some leather lace has holes punched or cut edges. And leather is less forgiving of tension variation. That said, simple patterns in leather (like a basic single crochet strip) are very achievable and create stunning results.
Is faux leather a good alternative to genuine leather for crochet?
Yes! Faux leather cord and lace are often more affordable, more readily available, and sometimes even easier to work with than genuine leather. For a first leather crochet project, faux leather lets you practice the technique without investing in more expensive genuine leather. Faux leather also comes in a wider range of colors and doesn't have the same sustainability concerns as genuine leather. The finished bracelet looks similar to the untrained eye. Check that the faux leather you're using is flexible enough to crochet with… stiffer faux leather can crack rather than bend smoothly.
What other projects can I make by crocheting with leather?
Beyond bracelets, leather crochet opens up: necklaces and chokers, bag handles (replacing fabric handles with crocheted leather handles is beautiful), handbag accents and trim, belts, and decorative cord projects. Leather can also be used as a structural element… working crochet around a leather base, or adding crocheted elements to a leather bag. The combination of soft crochet stitches with the structure of leather creates a distinctive aesthetic that's both handmade and very polished-looking.
Categories: Crochet, Dibble Dabble Inspiration, Pattern