Adding Sleeves to Your Spring KAL Vest
You asked for it and here it is! Now you can turn to your beautiful Spring KAL Vest, My First Knit Sweater Vest, into a complete knit sweater with the sleeve instructions. Grab your finished vest and some yarn and work this sleeve pattern where you left off.

*THIS POST CONTAINS AFFILIATE LINKS. BY CLICKING ONE OF THESE LINKS AND MAKING A PURCHASE A SMALL PORTION COMES BACK TO THE BLOG. THE PRICE YOU PAY WILL NOT CHANGE. THANK YOU FOR YOUR SUPPORT OF THE BLOG.*
Spring 2020 KAL with Yarnspirations
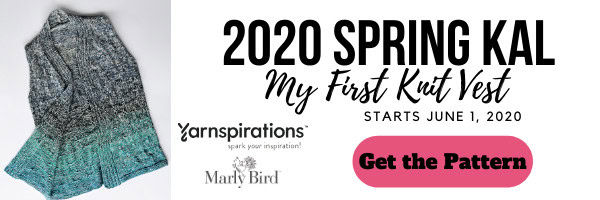
Each year I get to team up with Yarnspirations to have a great spring Knit-along. We all work on the same project together and have a TON of fun! This year we will be making the My First Knit Summer Vest! I am so excited about this project, the yarn that we are using and the techniques we will be able to learn along the way.
If you didn’t make the sweater vest yet, no problem! You can get the full pattern AND video tutorials in the original blog post about the Spring KAL.
Get started on your Spring KAL Sweater Vest HERE: https://marlybird.com/spring-knit-vest-2020-knit-along-with-yarnspirations/
Sweater Vest Gauge
20 sts and 26 rows = 4″ [10 cm] in stockinette st.
This is an average gauge for a worsted weight yarn. When the two yarns are held together the thickness of the yarn is a little lighter than worsted. It is recommended that you work up a gauge swatch to get the correct size needle for you to achieve 20 sts and 26 rows = 4″ [10 cm] in stockinette stitch.
To do a 6″ x 6″ [15.24 x 15.24 cm] gauge swatch, cast on 30 stitches and work the piece until it measures about 6 inches.
Sleeve Pattern
IMPORTANT NOTES:
- These instructions have not been tested but have been tech edited for correctness.
- You will need to play with the colors if you would like them to have a perfect flow, this might require you to purchase another ball of yarn.
- There are currently no photos of the finished sweater vest with sleeves. This pattern was written to be a sweater vest but I wrote out sleeve instructions because you asked for them. Please post your photos in Ravelry and in the Marly’s Minions Facebook group so that I can possibly use them in this post!

Sleeve (optional: make 2)
CO 42 (42-46-46-46-50-50) sts.
1st Row (RS): K2, p2, to last 2 sts, k2.
2nd Row (WS): P2, k2 to last 2 sts, p2.
Rep these 2 rows until cuff measures 2.25 (2.25-2.5-2.5-2.5-3-3)” [5.5 (5.5-6.5-6.5-6.5-7.5-7.5) cm].
Next Row (RS): Knit.
Following Row (WS): Purl.
Inc Row: K2, m1, knit to last 2 sts, m1, k2. 2 sts increased.
Working in stockinette stitch, rep this Inc Row every sixth row 12 (14-14-11-9-9-5) times, and then every fourth row 0 (0-0-4-8-8-14) times. 68 (72-76-78-82-86-90) sts.
Work even in stockinette stitch until sleeves measures 17 (17.25-17.5-17.75-18-18.25-18.5)” [43.25 (43.75-44.5-45-45.75-46.25-47) cm] ending with a WS row.
Shape Cap (RS): BO 4 (4-5-6-7-9-9) sts at beg of next 2 rows. 60 (64-66-66-68-68-72) sts rem.
Dec Row (RS): K1, k2tog, work in patt to last 3 sts, ssk, k1. 2 sts dec’d. Rep dec row EOR 15 (19-20-19-20-19-23) more times, then every fourth row 2 (0-0-1-1-2-0) times. 24 sts rem.
BO 3 sts at beg of next 4 rows. 12 sts rem. BO rem sts.
Finishing
Block pieces to measurements. Seam up the shoulders using a 3-needle bind-off. Seam bound off collar sts together. Sew selvedge edge of collar along back neck. If working up the sleeved version, seam up sleeves and set in place. If working the sleeveless vest work trim.
Knit Along Events
Categories: Dibble Dabble Inspiration, Knitting, Make-Alongs, Uncategorized


