Prism Path Knit Swoncho | Part 9 | Prism Make-Along 2025 Free Pattern
🧶 Prism Path Knit Swoncho | Part 9 Welcome back, colorwork rockstars! Part 9 of the Prism Path Knit Swoncho is now live and you are on a roll! 🎉 Today, we move finish the sleeves.
Affiliate Disclosure: This post contains affiliate links. If you click on one of these links and make a purchase, I may earn a small commission at no additional cost to you. This helps support the content and free patterns I provide here on MarlyBird.com. Thank you for your support—it means the world to me! 💖
It’s Time to Add the Sleeves!
You’ve made it to Part 9 of the Prism Path Knit Swoncho pattern — woohoo! 🎉 Your swoncho is really starting to come together, and now it’s time to give those arms some cozy coverage.
In this part of the pattern, we’ll be diving into sleeve knitting. You’ve already set aside your sleeve stitches back when we separated the body and the yoke, and now we’re picking them up and working in the round to create those signature relaxed-fit sleeves.
Don’t worry—just like the body, the sleeves are worked in stockinette stitch and finished with classic 1×1 ribbing to match the neckline and hem. The shaping is minimal so you can focus on maintaining your gauge and enjoying the rhythm of knitting in the round.
This is also a great time to try on your swoncho again! Make sure the sleeve length feels right to you before diving into the ribbing. You can customize the length to your liking—just keep in mind that adding length = using more yarn, so plan accordingly.
💡 Pro Tip: If your stitches feel tight around the small circumference, consider using DPNs, magic loop, or a shorter circular needle to make things more comfortable.
You’re in the home stretch now, and it’s looking fabulous. Let’s get those sleeves done and get even closer to finishing your Prism Path Swoncho!
💌 New Here? Here’s How the Free Make-Along Works
Just joining us? Welcome to the party! 🎉 Here’s a quick refresher on how the free version of the make-along works:
✨ New pattern parts are released every Monday and Thursday in May
✨ The latest pattern sections are added to the Prism Make-Along blog post
✨ You can view the patterns for free on the blog—no downloads required
✨ Want a direct link in your inbox? Sign up using the form on the blog post to receive pattern updates, supply info, and tips!
📬 Sign up here to stay in the loop and never miss a release!
Looking for Part 8? Click Here.
Scroll down to dive into Part 9 and let’s finish the sleeves✨
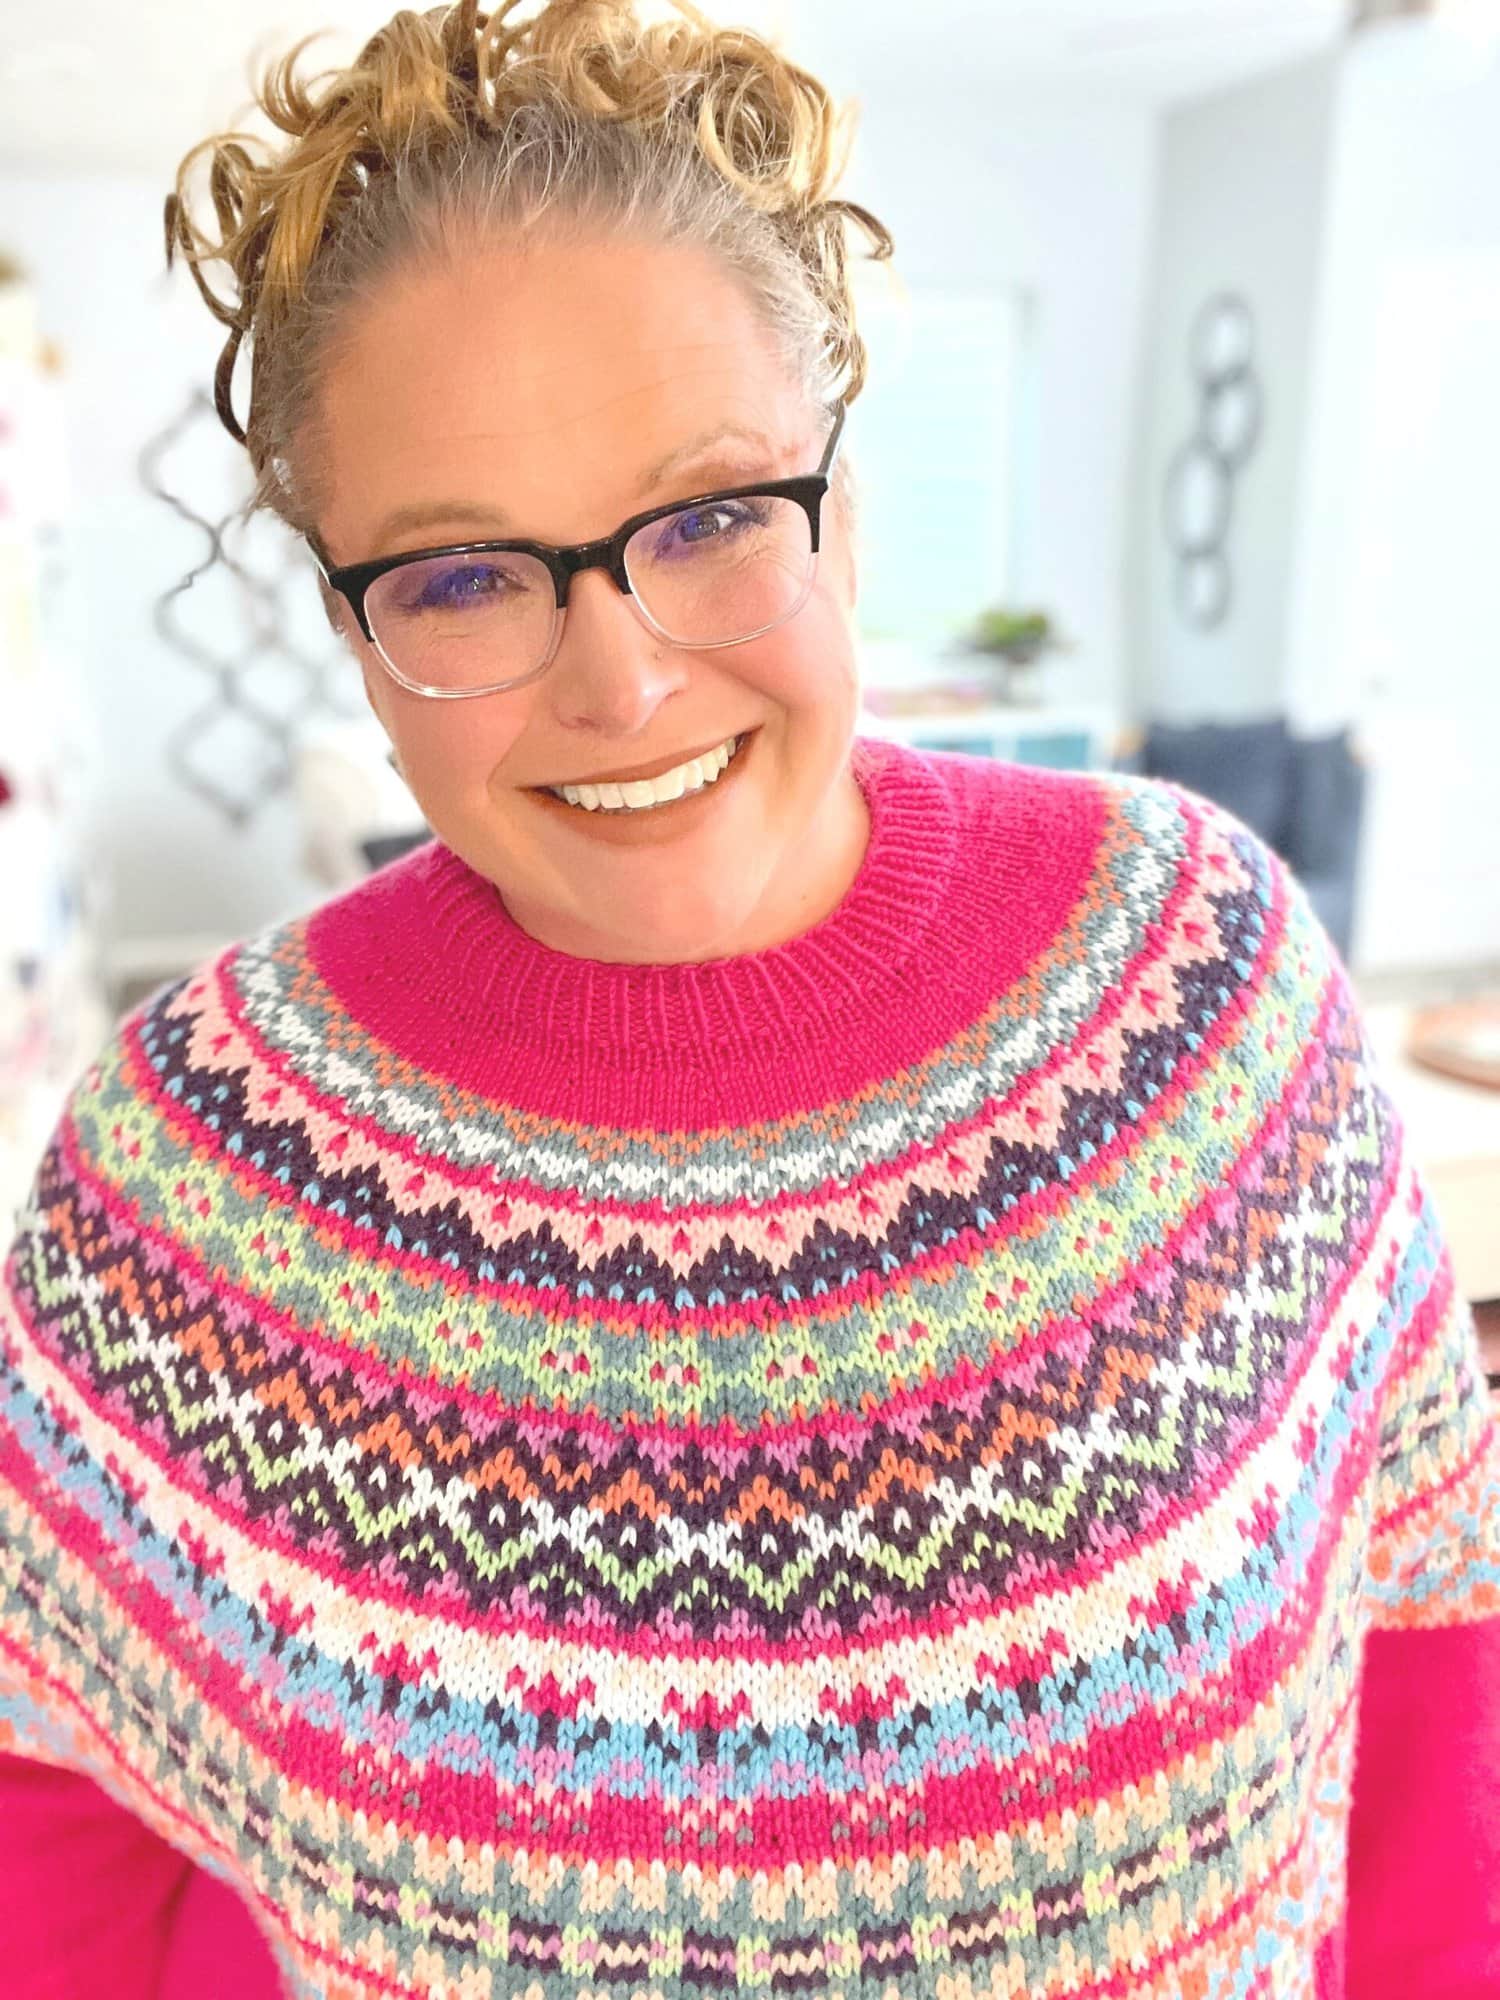
Prism Path Swoncho
Designed by: Marly Bird
SKILL LEVEL
Intermediate
MEASUREMENTS
To Fit Sizes
Extra-Small/Small/Medium 28-38” [71-96.5 cm] bust
Large/Extra-Large 40-46” [101.5-117 cm] bust
2/3 Extra-Large 48-54” [122-137 cm] bust
4/5 Extra-Large 56-62” [142-157.5 cm] bust
Sample made in size 2 / 3 Extra-Large
Finished Measurements
Bottom Circumference 52½ (59½, 72, 84½)” [133.5 (151, 183, 214.5) cm]
Length 27 (27½, 28, 29)” [68.5 (70, 71, 73.5) cm]
Gauge
18 sts and 24 rounds = 4” [10 cm] in Fair Isle knitting with larger needles.
18 sts and 24 rounds = 4” [10 cm] in Stockinette st with smaller needles.
MATERIALS
Yarn
KnitPicks Swish Worsted (100% Superwash Merino Wool, 110 yds / 100 m, 1.75 oz/ 50 g, CYCA# 4 worsted)
6 (8, 10, 12) balls: Crush (28657) (A)
- 1 ball: Conch (c26068) (B)
- 1 ball: Estuary Heather (c28655) (C)
- 1 ball: Arctic (c28656) (D)
- 1 ball: Frosting (c28658) (E)
- 1 (1, 1, 2) balls: Indigo Heather (c24097) (F)
- 1 ball: Mint Julep (n4128) (G)
- 1 ball: Electric Blue (c26645) (H)
- 1 ball: Lady Slipper (n4127) (I)
- 1 ball: Nutmeg Heather (28652) (J)
Note: If making the longer sleeve version, you may need an additional 2 balls of the main color for the longer sleeves.
Needles
A variety of needle lengths are used to accommodate the number of stitches. Getting interchangeable needle sets is a great option for this project.
- Chiaogoo Shortie Needle Set (US sizes 0-8, up to 14” [35.5 cm] circulars
- Chiaogoo Full Needle Set (US 2-15 [2.75 – 10 mm], with cables to extend up to 40”
- U.S. 8 [5 mm] circular knitting needles, 12” [30.5 cm], 16” [40.5 cm], 24” [61 cm], 32” [81 cm], [47” [119 cm] and 60” [152 cm] long needles;
- U.S. 9 [5.5 mm] circular knitting needles, 24” [61 cm], 32” [81 cm], [47” [119 cm] and 60” [152 cm] long needles, or size required for gauge.
Notions
Removable stitch markers, stitch holders or spare circular needles, tapestry needle.
ABBREVIATIONS
K – Knit
KFB – Knit Front and Back
P – Purl
Pm – Place marker
RS – Right side
slip marker – slip marker
WS – Wrong side
SPECIAL STITCHES
M1 (Make 1): With tip of left needle, pick up the horizontal strand between stitches from front to back. Knit this strand through the back leg, twisting it into a loop in the process – 1 stitch increased.
Kfb (Knit Front & Back): Knit through front and back of next stitch – 1 stitch increased.
Ssk (Slip, Slip, Knit): Slip 2 stitches, one at a time, as if to knit. Insert left hand needle into the front of these two stitches and knit them together from this position (1 stitch decreased)
SPECIAL TECHNIQUES
German Short Rows: Doubling the Stitch
When working German short rows, you’ll often hear the phrase “double the stitch.” This simply means we’re manipulating the working yarn in such a way that the stitch appears to have two strands wrapped over the needle instead of one. This visual cue helps mark your turning point and keeps your short rows looking clean and seamless.
Here’s how to work the turns step-by-step:
💡Turning on the Right Side:
- Knit to the stitch indicated in your pattern.
- Turn your work—now the wrong side is facing.
- With yarn in front, slip 1 stitch purlwise from the left needle to the right needle.
- Pull the yarn over the top of the right needle to the back. This creates the “double stitch” by distorting the slipped stitch.
- Bring the yarn to the front between the needles, ready to work the next purl stitch.
- Work across the row as directed in the pattern, keeping a firm tension for the next few stitches.
.
💡 Turning on the Wrong Side:
- Purl to the stitch indicated in your pattern.
- Turn your work—now the right side is facing.
- Bring the yarn to the front between the needles.
- With yarn in front, slip 1 stitch purlwise from the left needle to the right needle.
- Pull the yarn over the top of the right needle to the back. Again, this distorts the stitch and creates the doubled look.
- Work across the row as directed in the pattern, keeping a firm tension for the next few stitches.
Repeat these steps wherever the pattern indicates a German short row turn. When you come back to those doubled stitches later, you’ll work them as one stitch—treat both loops together as a single stitch to avoid holes.
NOTES
- Directions are for the smallest size; changes for larger sizes are in parentheses. When only one number is given then that number applies to all sizes.
- When working in Fair Isle technique, carry yarn not in use loosely across WS of work but never over more than 5 sts. When it must pass over more than 5 sts, weave it over and under color in use on next st or at center point of the sts it passes over. The colors are never twisted around one another.
- When a color is finished being used in a section, cut it and carry on. Do not carry colors up the inside of work.
- As more stitches are added to needles switch to longer needles to accommodate them.
VIDEO TUTORIALS
- How to do German Short Rows for Back Neck Shaping >> https://youtu.be/rrJUYF_s0T8 <<
- How to do 1×1 ribbing >> https://youtu.be/xx7XFsbEGkE <<
- Long-Tail Cast-On >> https://www.youtube.com/watch?v=vEGwt4cedLM <<
- Knit Stitch (continental style) >> https://www.youtube.com/watch?v=M3brKFKg5Yc <<
- Purl Stitch (continental style) >> https://www.youtube.com/watch?v=LuDt-8jqh4g <<
- How to Add Lifeline >> https://youtu.be/FiqYUE_aHAw <<
- How to Tink >> https://youtu.be/c7Gud7k4Y8k <<
- How to Bury Ends >> https://youtu.be/8_NBGUKjO-E <<
- Fair Isle vid >> https://youtu.be/OaJg_hh1VVw
- How to Add Stitches for Underarm >> https://youtu.be/cRRJ2plYr_U
- Tips for Chart 1 >> https://youtu.be/mBsub805wtA <<
- Tips for Chart 2 >> https://youtu.be/93YktrXiU_Q <<
- Tips for Chart 3 >> https://youtu.be/u555tRikhkc <<
- Tips for Chart 4 >> https://youtu.be/Q4wCzSO1u1Q <<
- How to Separate Yoke into Body and Sleeves >> https://youtu.be/ckTnZXaeX-I <<
- How to Knit the Sleeves >> https://youtu.be/w2gvyo6yof8 <<
PRISM PATH KNIT SWONCHO PATTERN – PART 9
SLEEVES
With RS facing, and using color A and smaller and shortest circular needle or double pointed needles, pick up and knit 10 (14, 18, 22) sts across underarm, then knit across 48 Sleeve sts – 58 (62, 66, 70) sts.
Join round and mark first st.
Work evenly in Stockinette st (knit every round) until Sleeve measures 2¼ (2¾, 3¼, 3¾)” [5.5 (7, 8.5, 9.5) cm].
Option #1 – Shorter Sleeve (3/4 length)
Cuff Ribbing
Next Round: * K1, p1; repeat from * around.
Repeat this round until ribbing measures 1¾” [4.5 cm].
Bind off all sts loosely in rib pattern.
Work other Sleeve the same.
Option #2 – Longer Sleeve with Thumbhole
Note: Choosing longer sleeves will require more balls of color A.
Continue working evenly in Stockinette st until Sleeve measures 4 (4 ½, 5, 5 ½)” [10 (11.5, 12.5, 14) cm]
Sleeve Shaping
Remove beginning-of-round marker, k5 (7, 9, 11), then replace marker, marking new beginning-of-round.
Next 4 Rounds:
Round 1 (decrease round): K1, k2tog, k to last 3 sts, ssk, k1 – 56 (60, 64, 68) sts.
Rounds 2-4: Knit.
Repeat Rounds 1-4 9 more times – 38 (42, 46, 50) sts.
Work evenly in Stockinette st until Sleeve measures 11 (11½, 12, 12)” [28 (29, 30.5, 32) cm].
Cuff Ribbing
Next Round: * K1, p1; repeat from * around.
Repeat this round until ribbing measures 1″ [2.5 cm].
Begin working back and forth in rows to create Thumbhole as follows:
Next 2 Rows:
Row (RS): * K1, p1; repeat from * to end, turn work.
Row 2 (WS): * K1, p1; repeat from * to end, turn work.
Repeat Rows 1 and 2 twice more.
Begin working in rounds again, rejoining Thumbhole, until Cuff measures 3” [7.5 cm].
Bind off all sts loosely in rib pattern.
Work other Sleeve the same.
🎉 You’re Crushing It
If no one’s told you lately: you’re doing awesome. Your Prism Path Swoncho is more than halfway there, and each round is building a wearable work of art. Keep going!
🗓️ The next section will be released on Monday, June 2 at 12:00 PM ET.
You’re well on your way to a stunning finish—stay consistent, enjoy the color changes, and don’t forget to tag your progress with #PrismMakeAlong and #MarlyBird so we can cheer you on!