
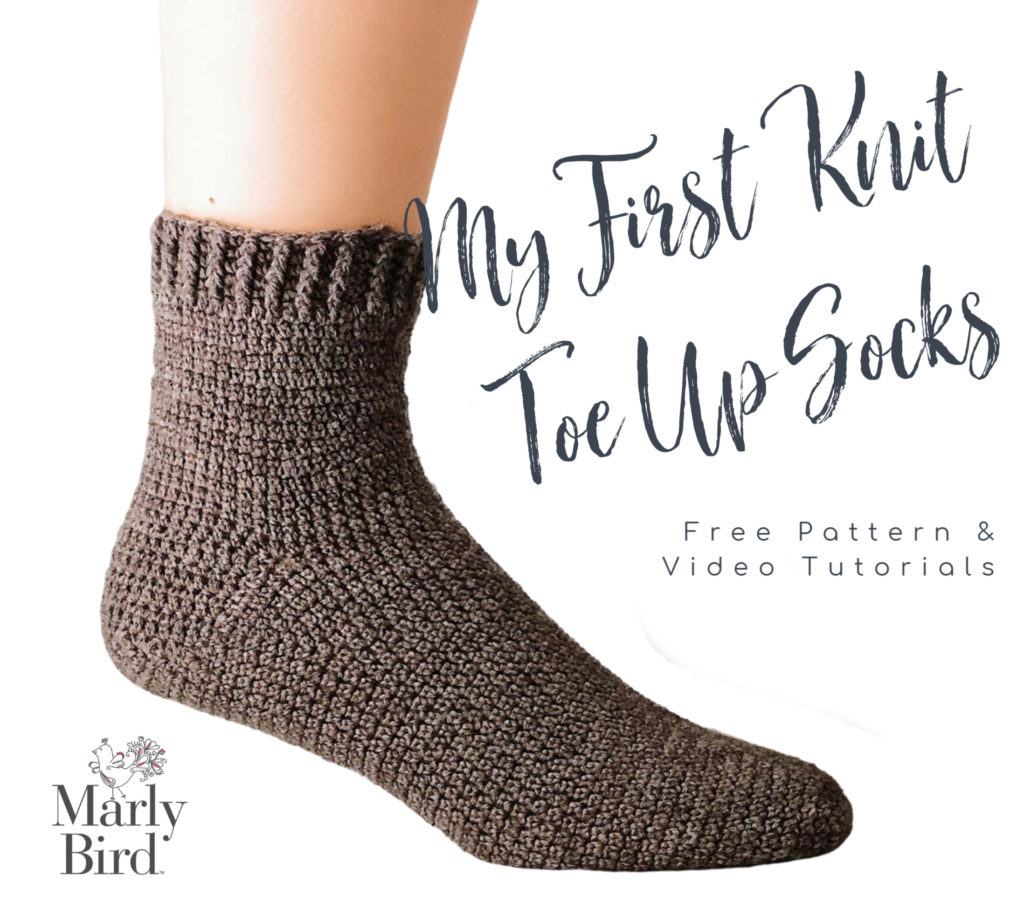
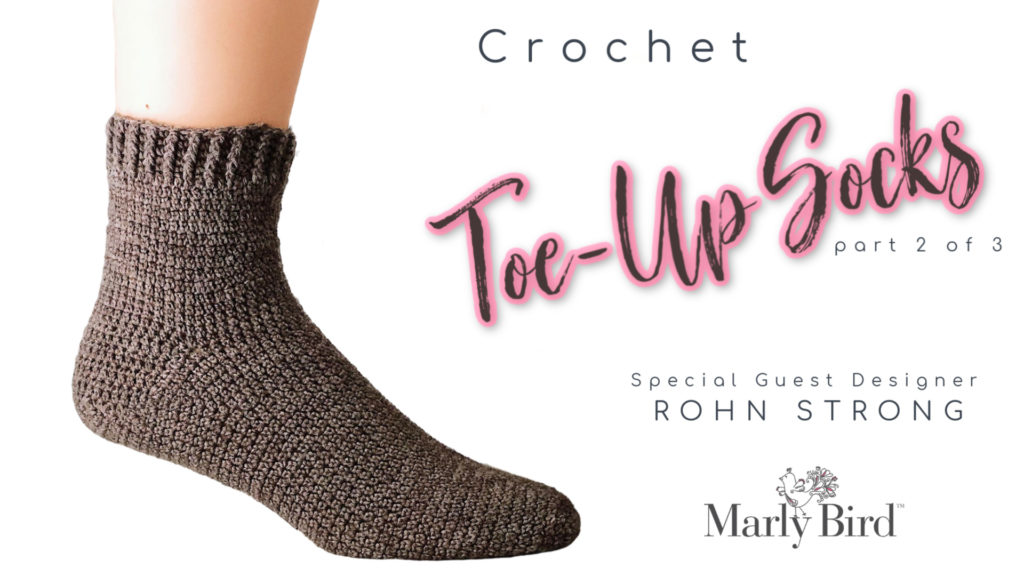
Let’s continue with the 2020 Sockalong 🙂 Here are the instructions for part 2 of 3 of the My First Toe Up Crochet Sock pattern by guest designer Rohn Strong.
The sock-along is for knitters and crocheters. That’s right, you can also make toe up knit socks! Looking for the My First Toe Up Knit Sock by Marly Bird? Get knit toe up sock pattern here!
Beginner Toe Up Crochet Socks
These socks are the perfect toe-up pattern for the adventurous Crocheter! An easy square toe, gusset increases, and wedge heel provide a super fit and feel!
PURCHASE THE AD FREE PDF
I usually don’t make the Ad Free PDF available for purchase until an event is over. But many of you have asked for it to be provided early so… here it is!!

Just a reminder, the pattern will always remain free here on my website and you do not need to purchase the Ad Free PDF to participate in the sock-along or to get the pattern. But I understand having it makes it easier to follow along.
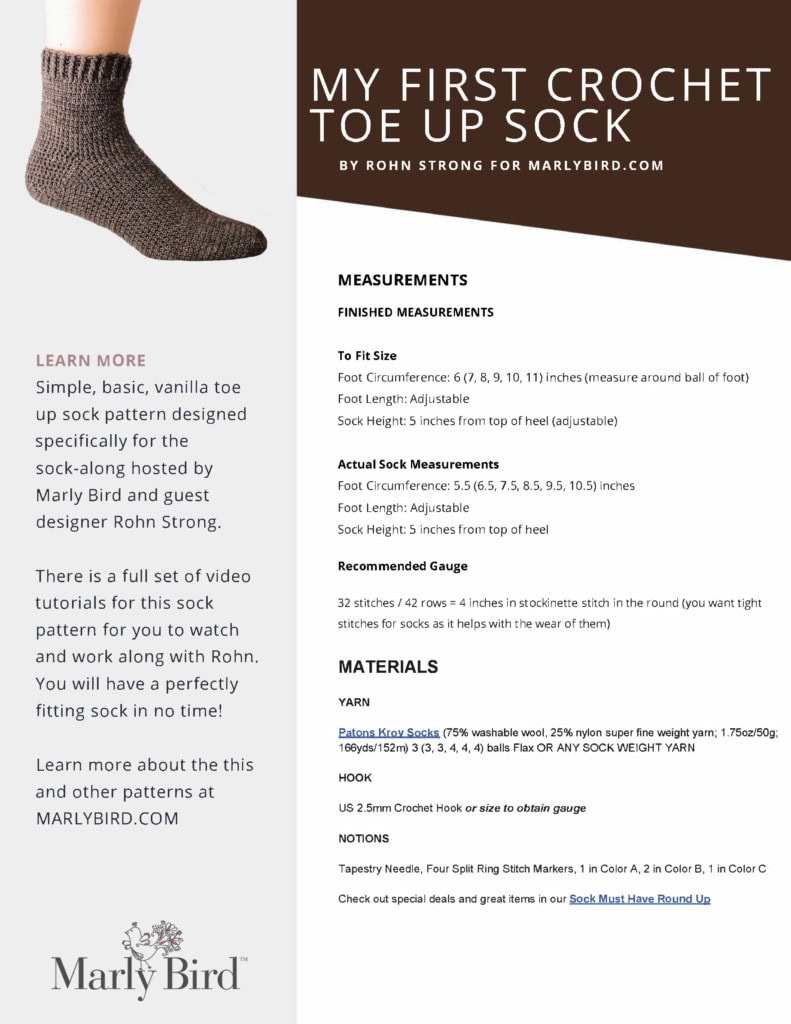
MEASUREMENTS
To Fit Size
Foot Circumference: 6 (7, 8, 9, 10, 11) inches
Foot Length: Adjustable
Sock Height: 5 inches from top of heel
Actual Sock Measurements
Foot Circumference: 5.5 (6.5, 7.5, 8.5, 9.5, 10.5) inches
Foot Length: Adjustable
Sock Height: 5 inches from top of heel
Sample Sock is show with a finished foot circumference of 7.5 inches, a finished foot length of 9 inches, and a finished sock height of 5 inches.
Recommended Gauge
24 stitches and 20 rows = 4 inches in Extended Single Crochet making a gauge swatch is a must! Follow the gauge swatch instructions below.
A Note on Sizing (Don’t skip this step!)
Crochet socks are notoriously difficult to size and often crocheters give up making socks because of this. Here’s the deal, it’s only difficult if you don’t understand the measurements above and your own personal measurements.
First things first, you should never choose a sock size based on your shoe size. This is primarily because shoes aren’t designed to stretch over our ankles, socks are. The measurement around the heel and ankle is the widest part of our foot and this, my friends, is where so many crochet socks go wrong. We have to juggle the overall fit of the sock while ensuring the sock can stretch over the ankle. We do this by crocheting a sock that is the proper size and using a stitch that provides the most stretch of any crochet stitch, extended single crochet.
Take a moment and measure your foot. You’ll measure what’s called the ‘foot pad’ or the area just below the toes. Now, if you have any bunions, you’ll want to avoid these as they’re often temporary and your sock will stretch to accommodate.
Next measure your foot length by stepping on the ground and measuring from the back of your heel to the tip of your longest toe. For me, that’s the second toe next to the big one.
This will give you your foot circumference and foot length. From these measurements, you can choose a size listed above. If you fall in between a size, choose the closest next size down. Don’t choose a larger size. We want to avoid the sock being too large.
Let’s use me as an example:
My measured foot circumference is 10.75 inches and my foot length is 11 inches. That means I’m going to need to choose the largest size, a finished measurement of 10.5 inches. Because I can adjust the foot length and the sock height, I’ll do that as I work.
MATERIALS
YARN
Patons Kroy Socks (75% washable wool, 25% nylon super fine weight yarn; 1.75oz/50g; 166yds/152m) 3 (3, 3, 4, 4, 4) balls Flax OR ANY SOCK WEIGHT YARN
HOOK
US 2.5mm Crochet Hook or size to obtain gauge
NOTIONS
Tapestry Needle, Four Split Ring Stitch Markers, 1 in Color A, 2 in Color B, 1 in Color C
Check out special deals and great items in our Sock Must Have Round Up
NOTES
Weave in loose ends as work progresses.
Sock is worked in spiral rounds unless otherwise stated.
Sock is worked as follows:
- Toe
- Foot
- Gusset
- Heel Wedge
- Heel
- Leg
- Cuff
SPECIAL ABBREVIATIONS
Esc- Extended Single Crochet: Insert hook into next stitch indicated, yarn over and pull up a loop, yarn over and draw through 1 loop on hook, yarn over and draw through last 2 loops on hook.
Esc2tog- Extended Single Crochet 2 Together: Insert hook into next indicated st and pull up a loop, yarn over and draw through 1 loop on hook, insert hook into next indicated st and pull up a loop, yarn over and draw through 1 loop on hook, yarn over and draw through last 3 loops on hook
Inc’d- Increased
Ch- Chain
Sc– Single Crochet
Sl St- Slip Stitch
St(s)- Stitch(es)
Dc– double crochet
Fpdc– Front Post Double Crochet
GAUGE SWATCH INSTRUCTIONS
Chain 30 sts, join to work in the round being careful not to twist your chain.
Round 1: Ch 1, esc in first chain and in each chain around to end, join with a slip stitch to first esc.
Round 2: Ch 1, esc in each stitch around, join with a slip stitch to first esc.
Repeat round 2 until the swatch measures approximately 4 inches.
Then measure the stitch and row gauge per inch. If you have MORE stitches per inch than 6 you need a bigger hook. If you have FEWER stitches per inch than 6 you need a smaller hook. You should use the hook YOU need to get the correct gauge.
PATTERN CONTINUES HERE
???? If you need part 1 of the 3 part instructions click here.
???? Watch video for part 2: https://youtu.be/KC0rlXyFLyE
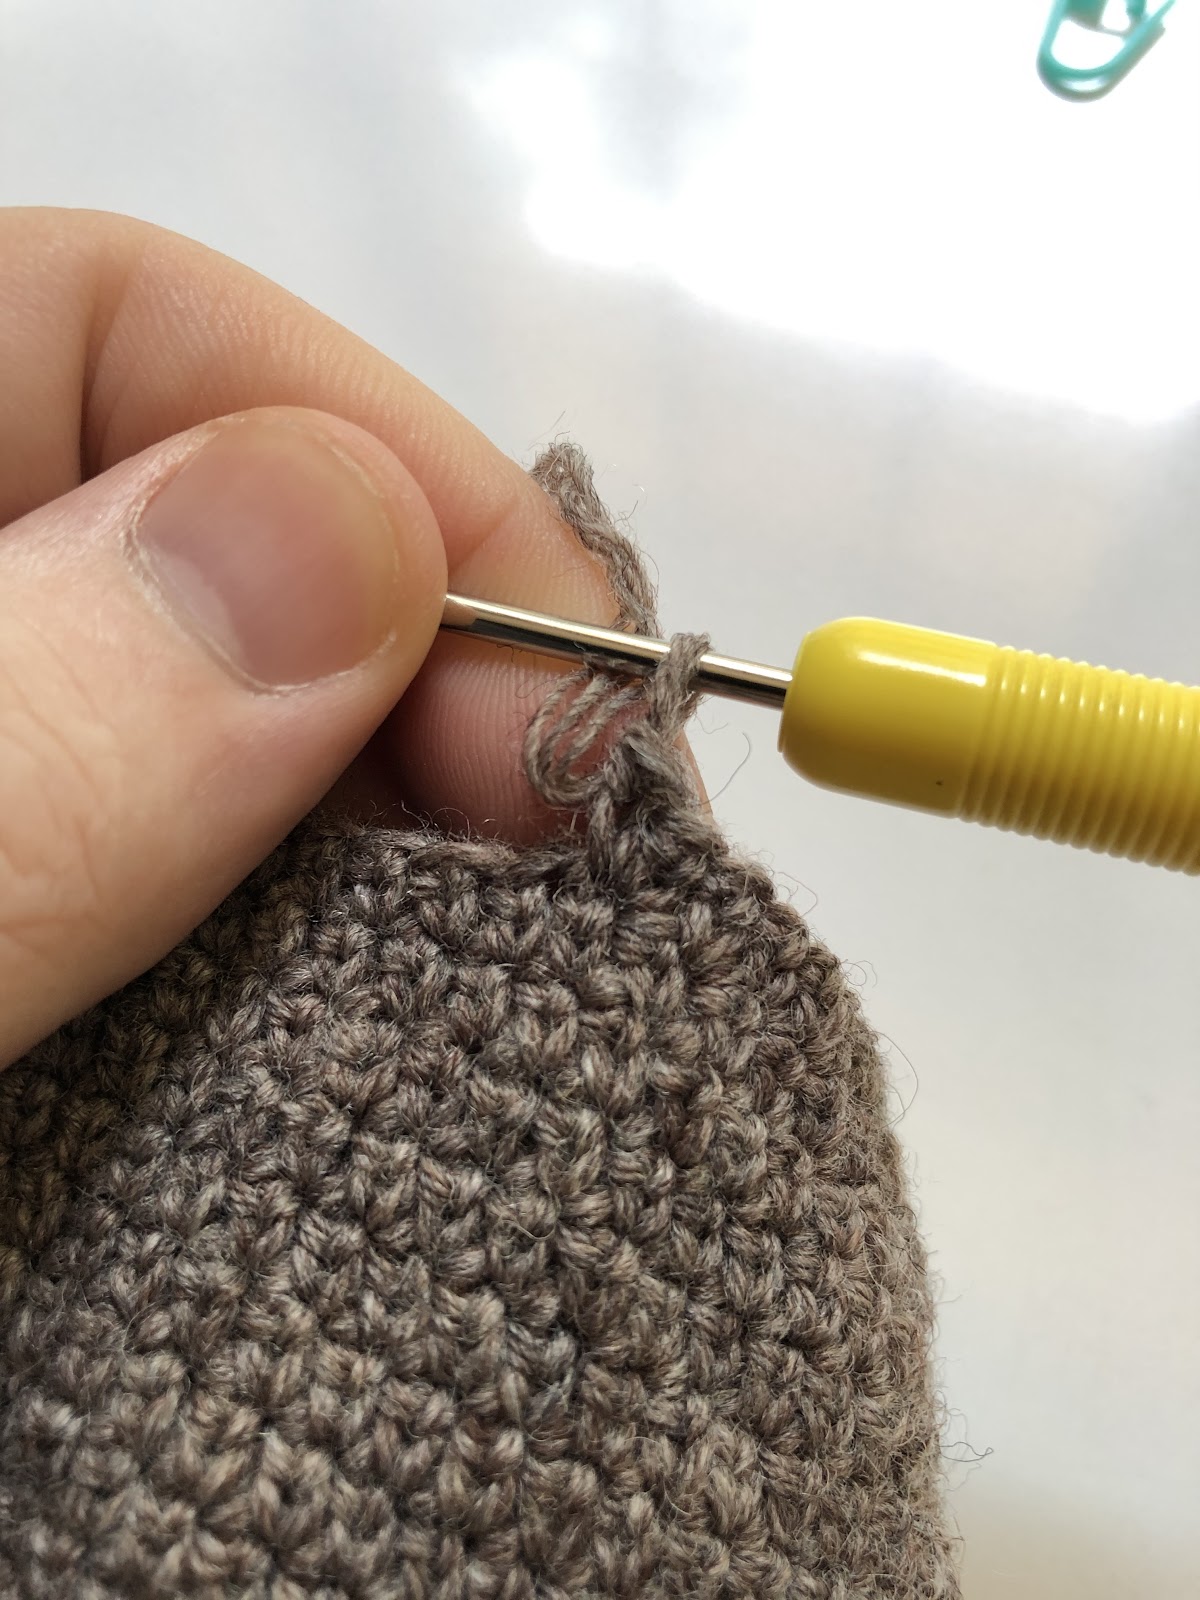
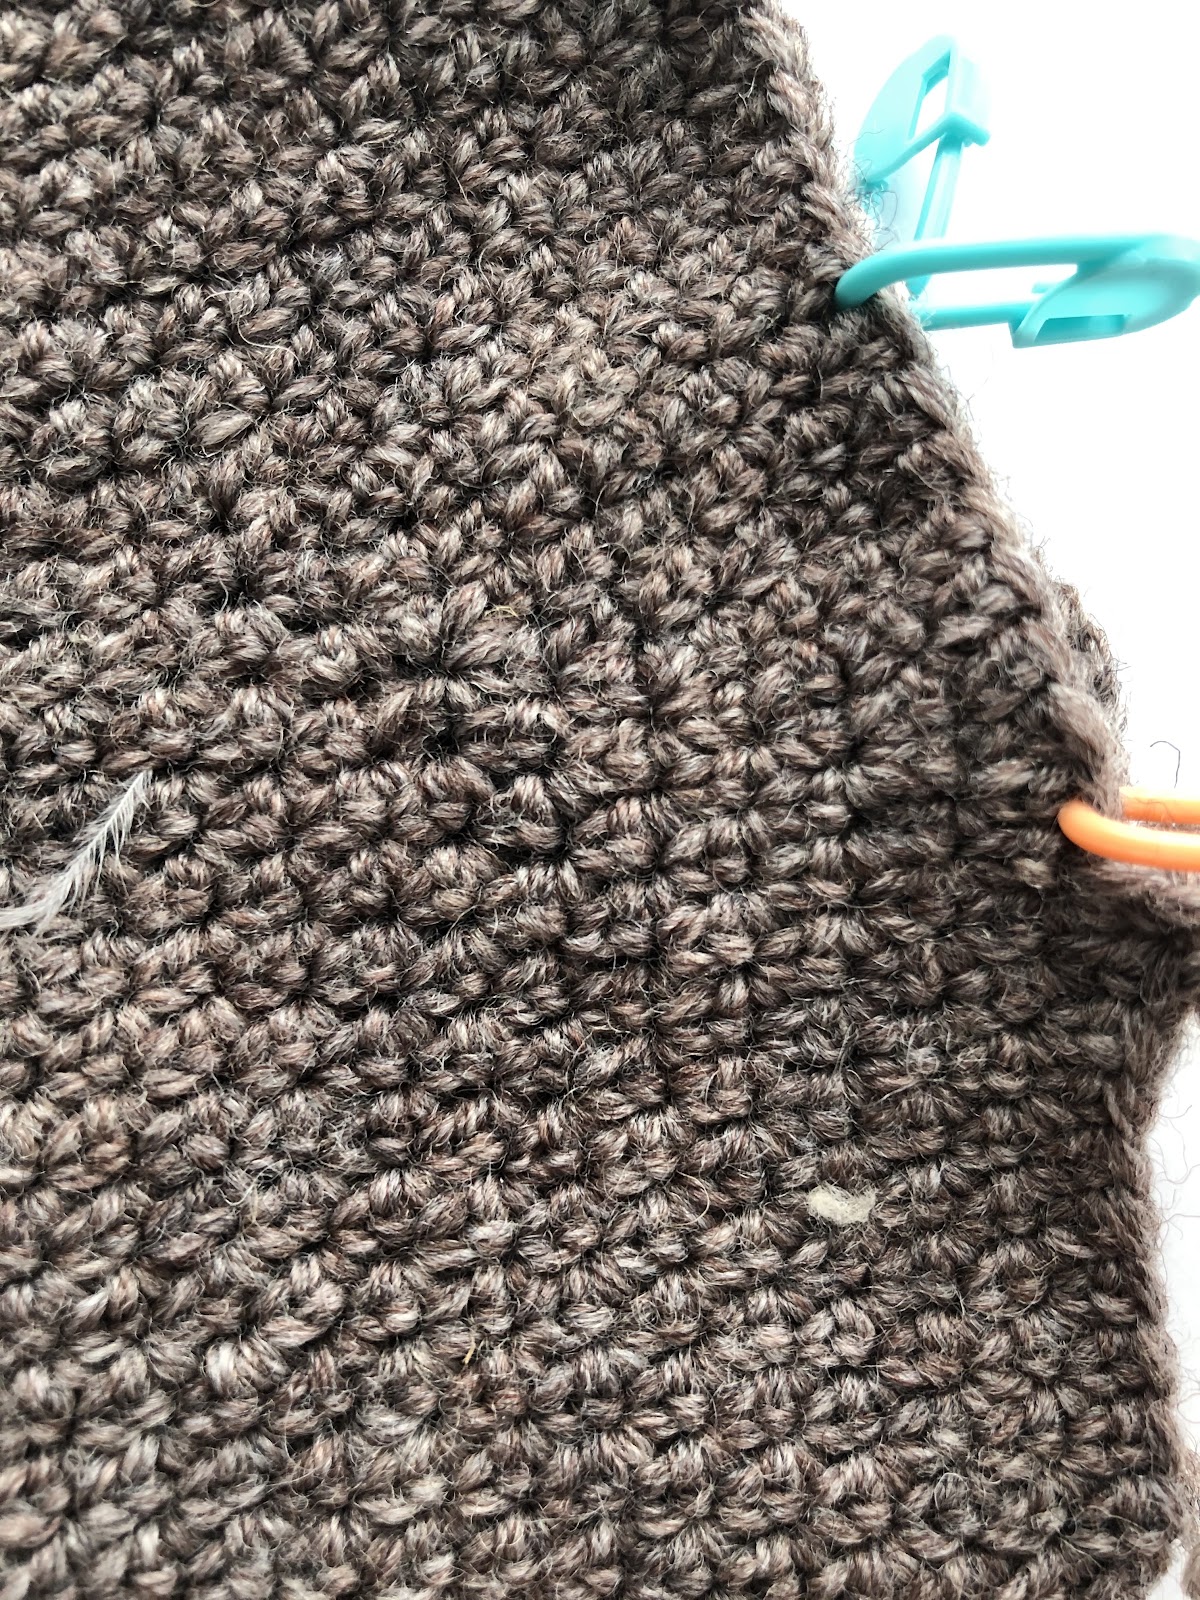
Gusset
The gusset is worked in spiral rounds. We will increase stitches each round at two distinct points to form the gusset (this is another name for an extra bit of fabric). The gusset should not be skipped as this will give the sock its customized fit and feel.
For this section you’ll need four markers preferably 3 colors. One of color A, Two of color B, and One of Color C.
Color A – Represents the beginning of the round. (orange in photos)
Color B – Represents the top of the foot stitches. (blue in photos)
Color C – Represents the 2nd gusset. (pink in photos)
Gusset Round 1: 2 esc in first esc (photo 1), place Color A marker in first st made and Color B marker in second st made (photo 2), esc in next 16 (18, 22, 24, 28, 30) esc, 2 esc in next st, place Color B marker in first st made and Color C marker in second st made (photo 3), esc in next 18 (20, 24, 26, 30, 32) esc. (2 esc inc’d – 38, 42, 50, 54, 62, 66 esc) (photo 4 shows finished round)


Gusset Round 2: 2 esc in first esc, move Color A marker to first st made, esc in next st, move Color B marker to this st, esc in next 16 (18, 22, 24, 28, 30) esc, esc in next marked st, move Color B marker to this st, 2 esc in next marked st, move Color C marker to second st made, esc in next 18 (20, 24, 26, 30, 32) esc. (2 esc inc’d – 40, 44, 52, 56, 64, 68 esc)
Gusset Rounds 3-6 (6, 8, 8, 10, 10): 2 esc in first esc, move Color A marker to first st made, esc in each esc to next marked st, esc in next marked st, move Color B marker to this st, esc in next 16 (18, 22, 24, 28, 30) esc, esc in next marked st, move Color B marker to this st, esc in each esc to next marked st, 2 esc in next marked st, move Color C marker to second st made, esc in next 18 (20, 24, 26, 30, 32) esc. (8,8,12,12,16,16 esc inc’d – 48, 52, 64, 68, 80, 84 esc)

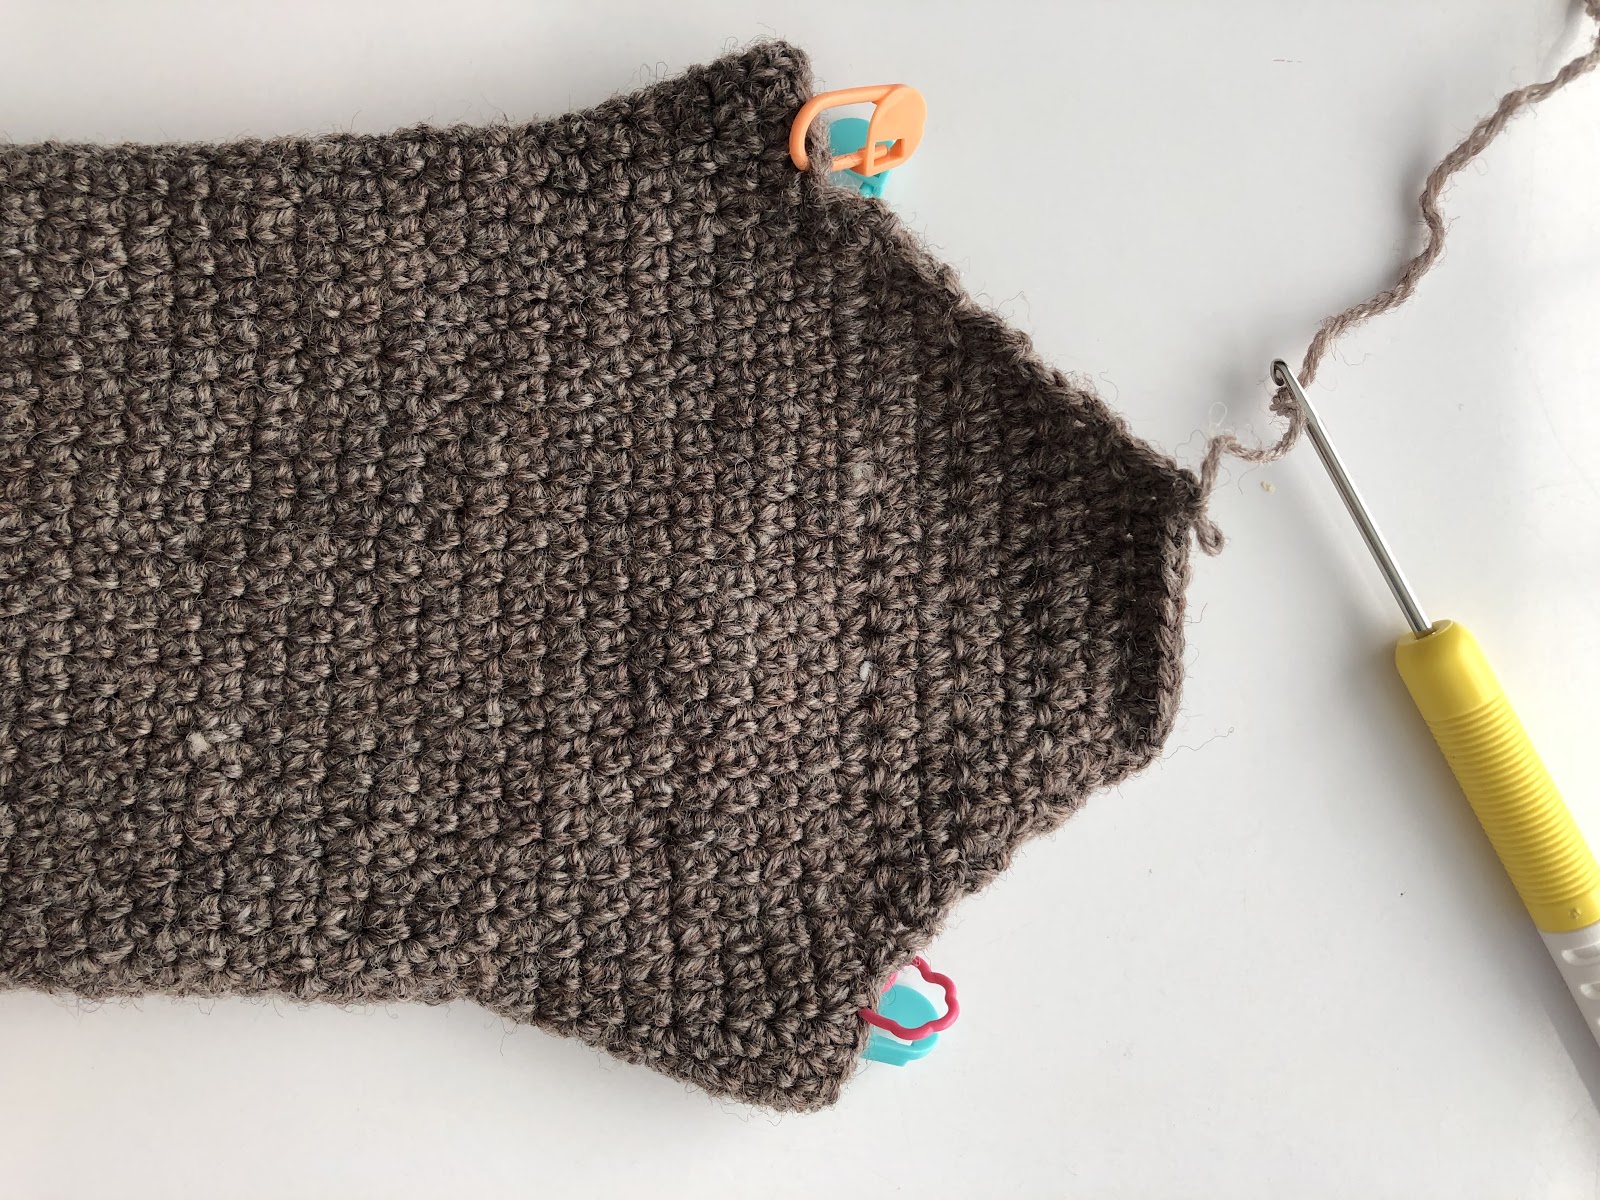
Heel Wedge
This sock does not feature a heel turn but instead, a heel wedge. This part is worked in rows.
Row 1 (WS): Ch 1, turn work, esc2tog in next 2 esc, esc in each esc across to last 2 esc before next marker, esc2tog in last 2 esc. (2 esc dec’d – 16, 18, 22, 24, 28, 30 esc)

Row 2 (RS): Ch 1, turn, esc2trog in next 2 sts, esc in each esc across to last 2 esc, esc2tog in last 2 sts. (2 esc dec’d – 14, 16, 20, 22, 26, 28 esc)
Rows 3- 6 (6, 8, 8, 10, 10): Repeat Row 2. (8, 8, 12, 12, 16, 16 esc dec’d – 6, 8, 8, 10, 10, 12 esc)
Heel
The heel of this sock is worked back and forth in rows. We’ll join each row to one of the gusset stitches. This will give us a comfortable fitting heel while also decreasing the stitches increased at the gusset.
Foundation Row 1: Ch 1, turn, sc in each of the next 6 (8, 8, 10, 10, 12) esc, sc in each of the 6 (6, 8, 8, 10, 10) row ends (working in ends of rows), sl st into st before marked st (this is a st we used for the heel).

Foundation Row 2: Ch 1, turn, sc in each st across row ends and bottom of heel wedge (across sc just made in previous row), working in 2nd set of row ends, work 1 sc in each of the 6 (6, 8, 10, 10) row ends, sl st in first marked st of gusset.

Row 1 (WS): Ch 1, turn, esc in each st across, sl st in next gusset st.
Rows 2-5 (5, 7, 7, 9, 9): Ch 1, turn, skip next sl st, esc in each st across to last st, esc2tog picking up one loop in last st and one loop in next st on gusset, sl st in next gusset st.

Last Row: Ch 1, turn, skip next sl st, esc in each st across to last st, esc2tog picking up one loop in last st and one loop in next st on gusset.
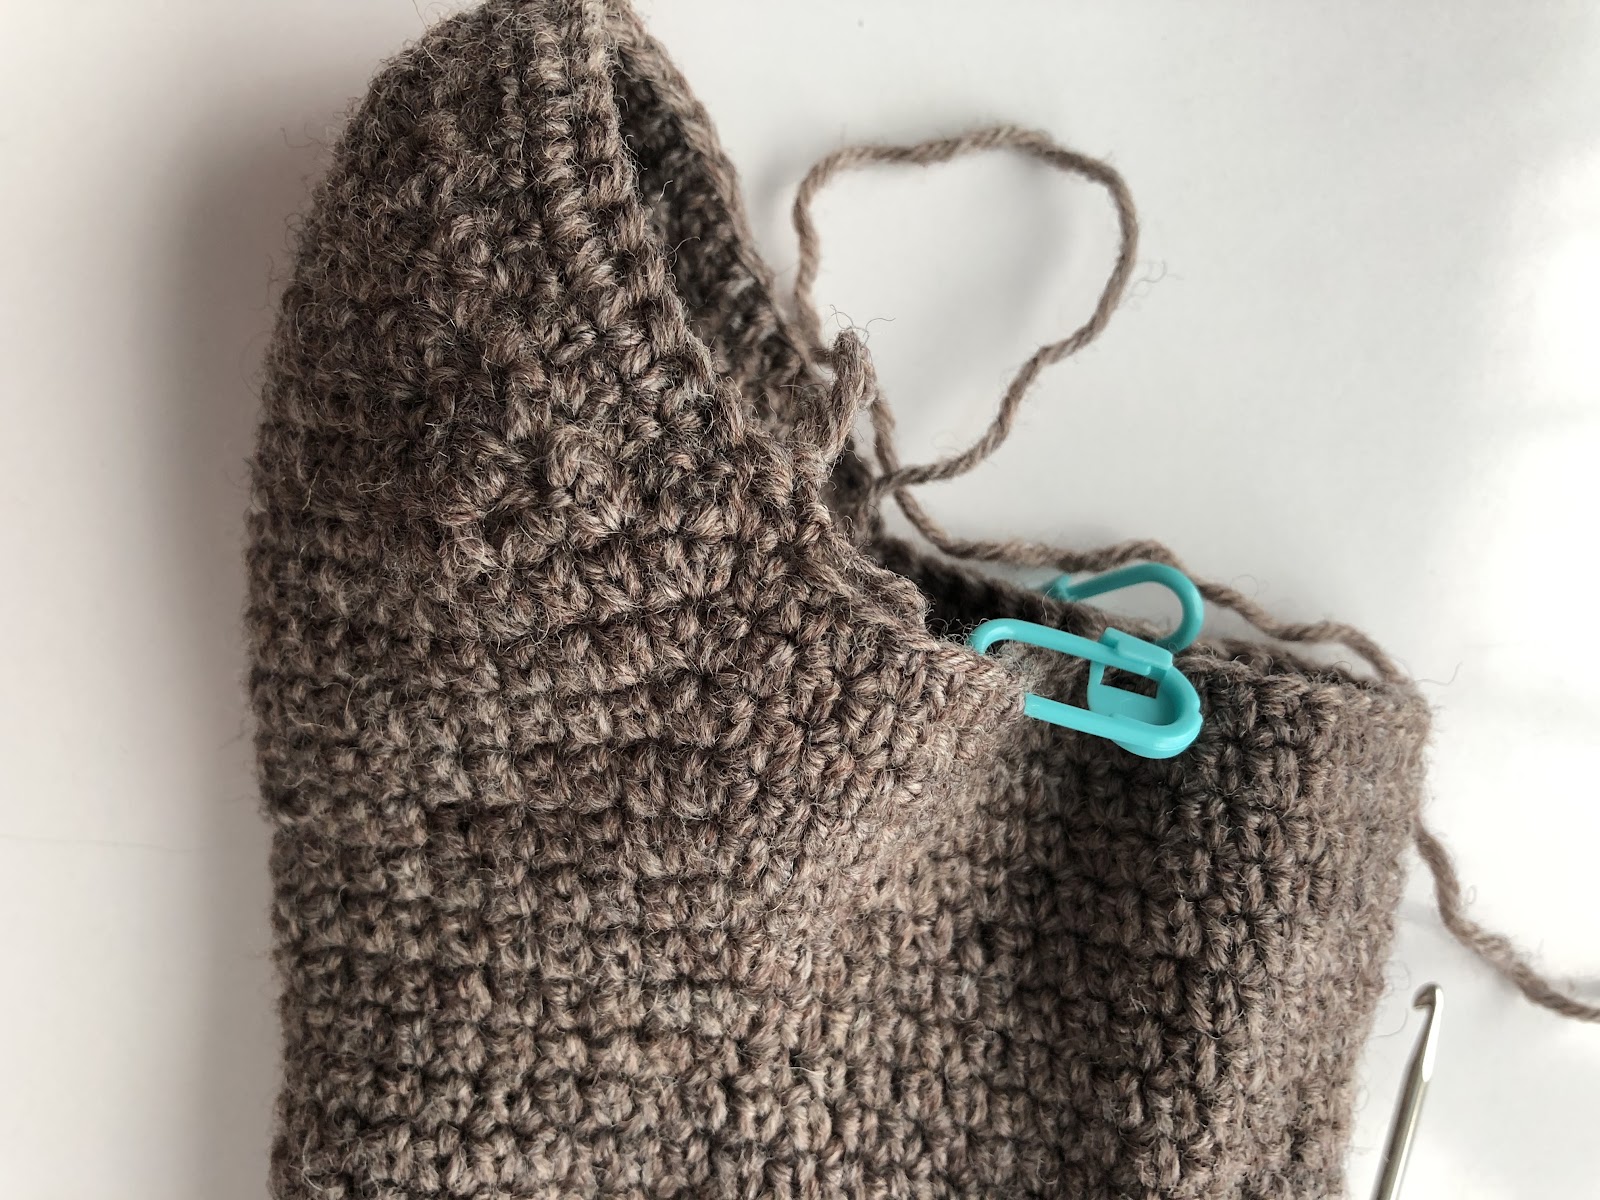
The heel of this sock is completed. We will now begin working in spiral rounds for the leg.
VIDEO TUTORIAL
It is HIGHLY RECOMMENDED that you watch the entire video first prior to following along with the video on your homework from part 1.