MMMDI || Marly Made Me Do It || Knit Cardigan with Pockets
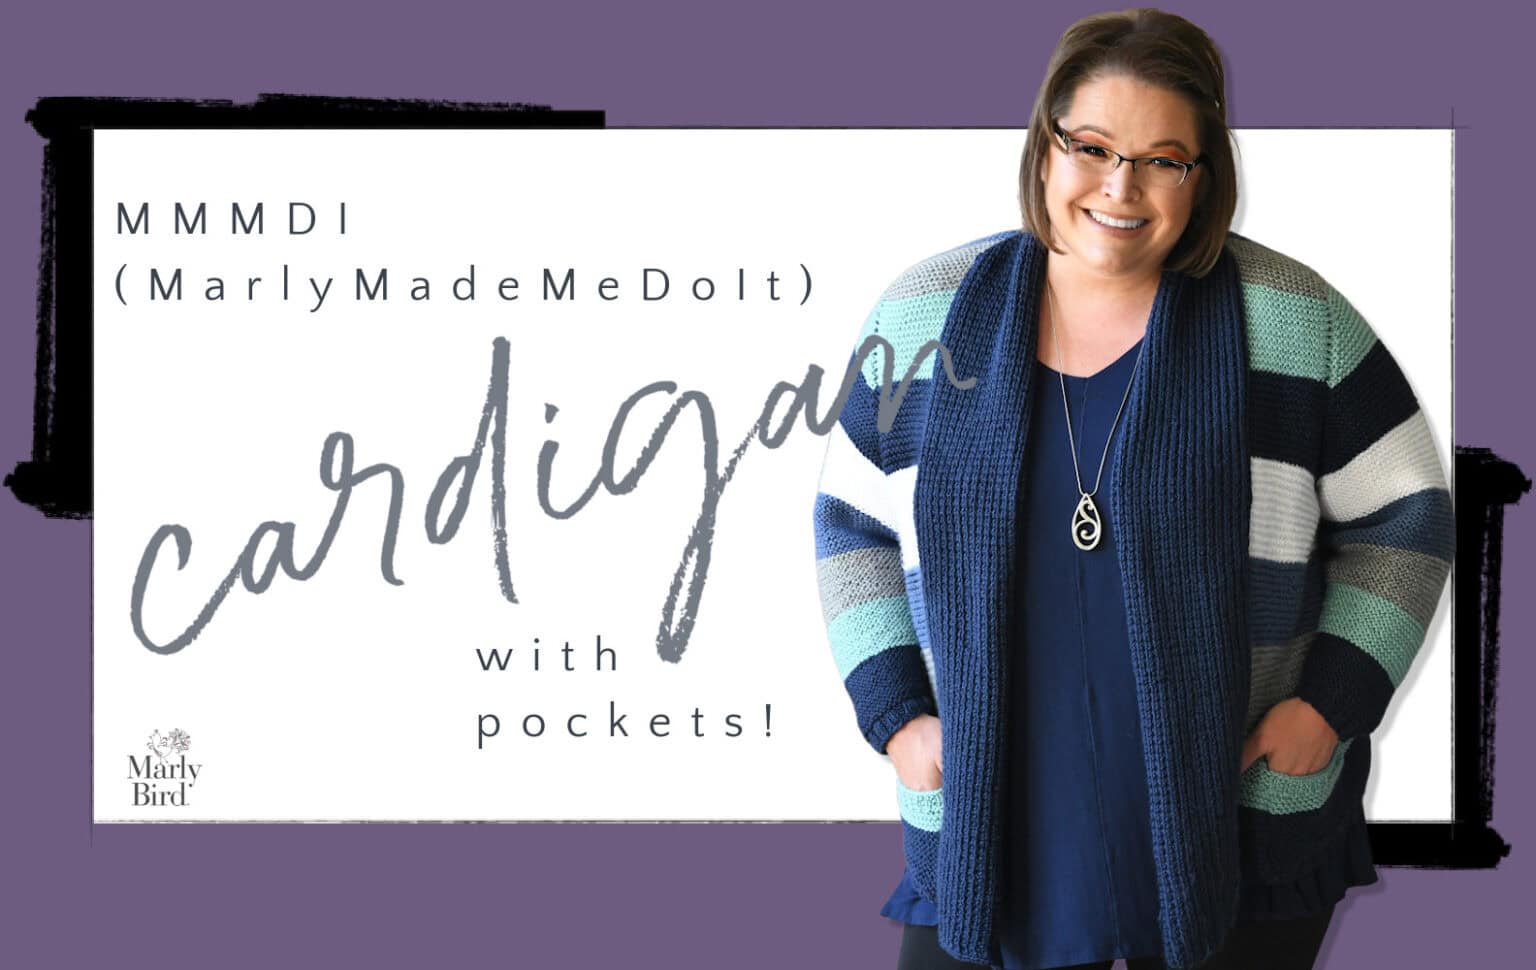
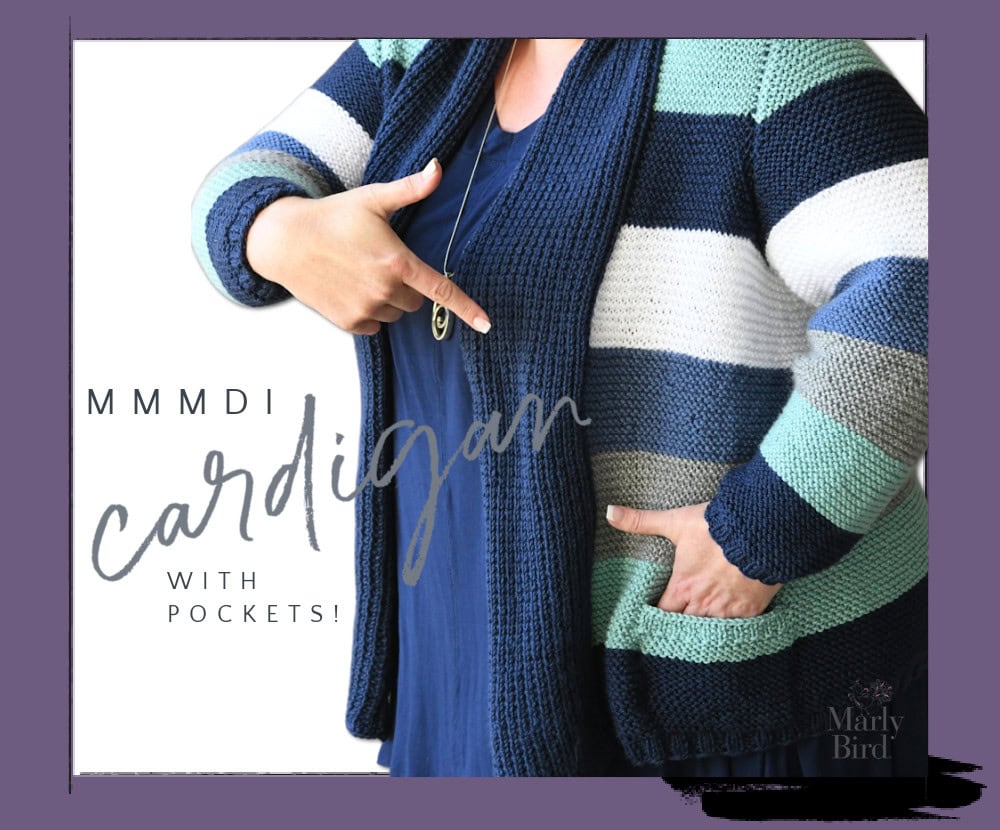
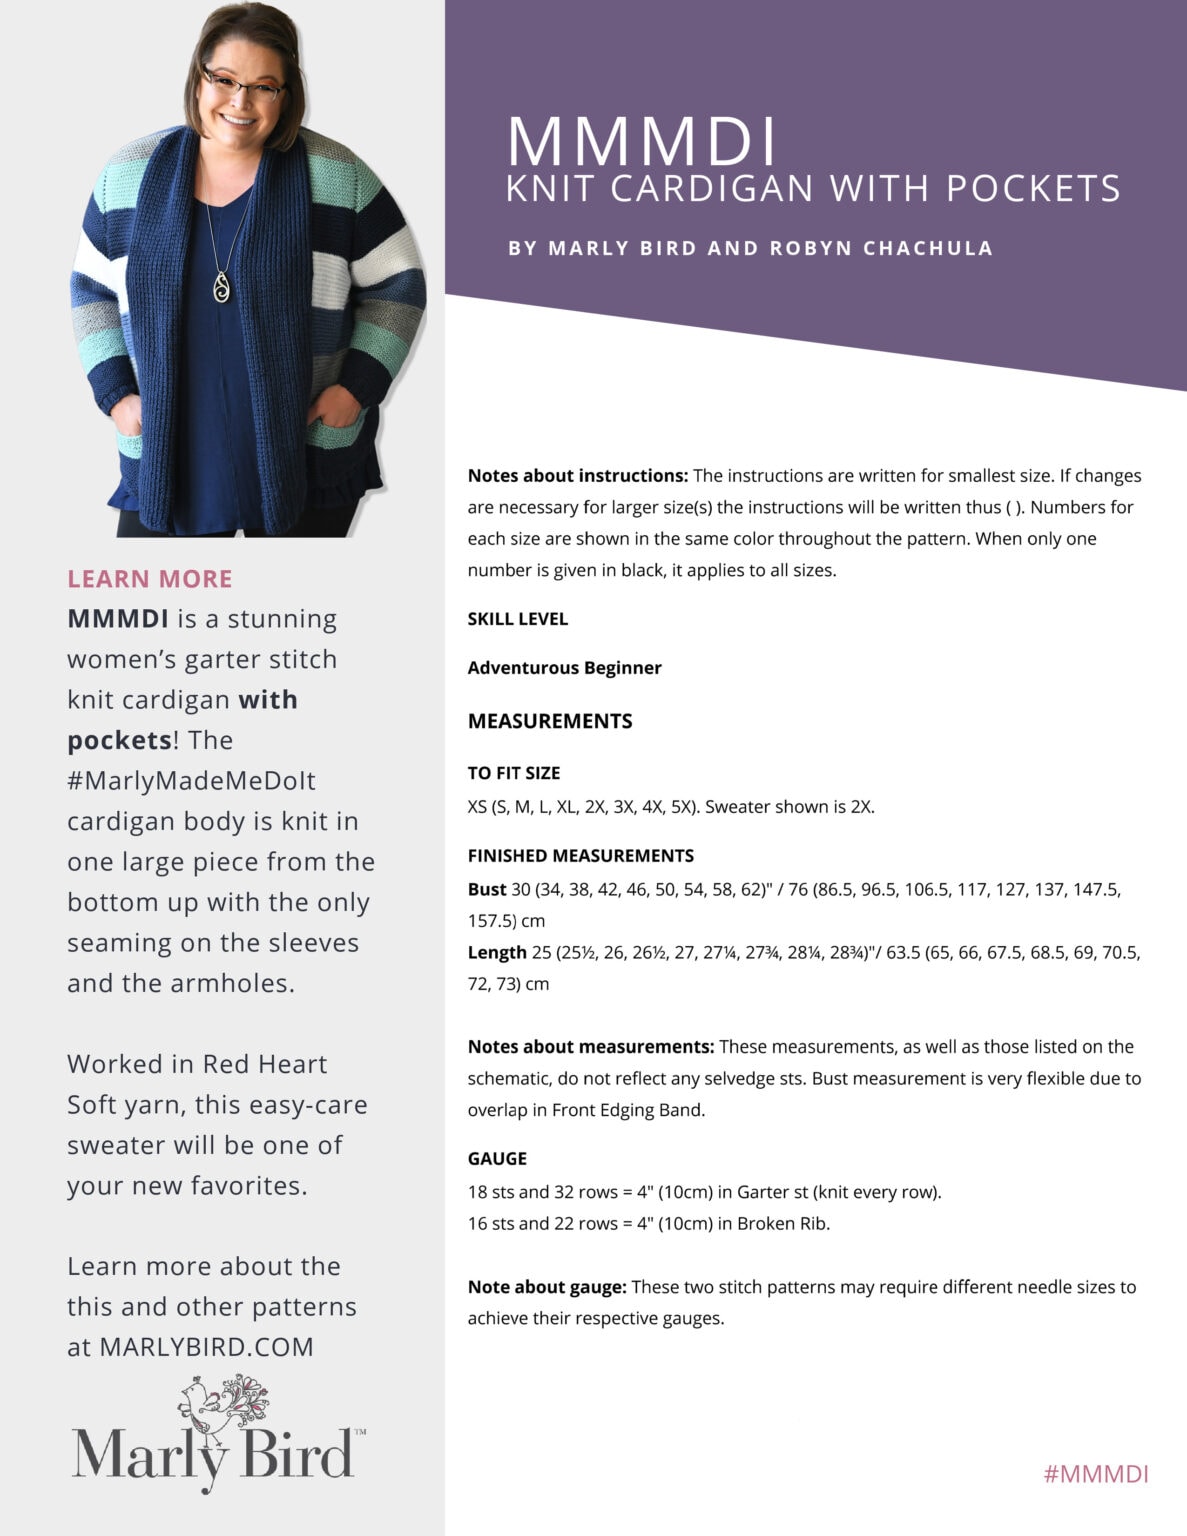
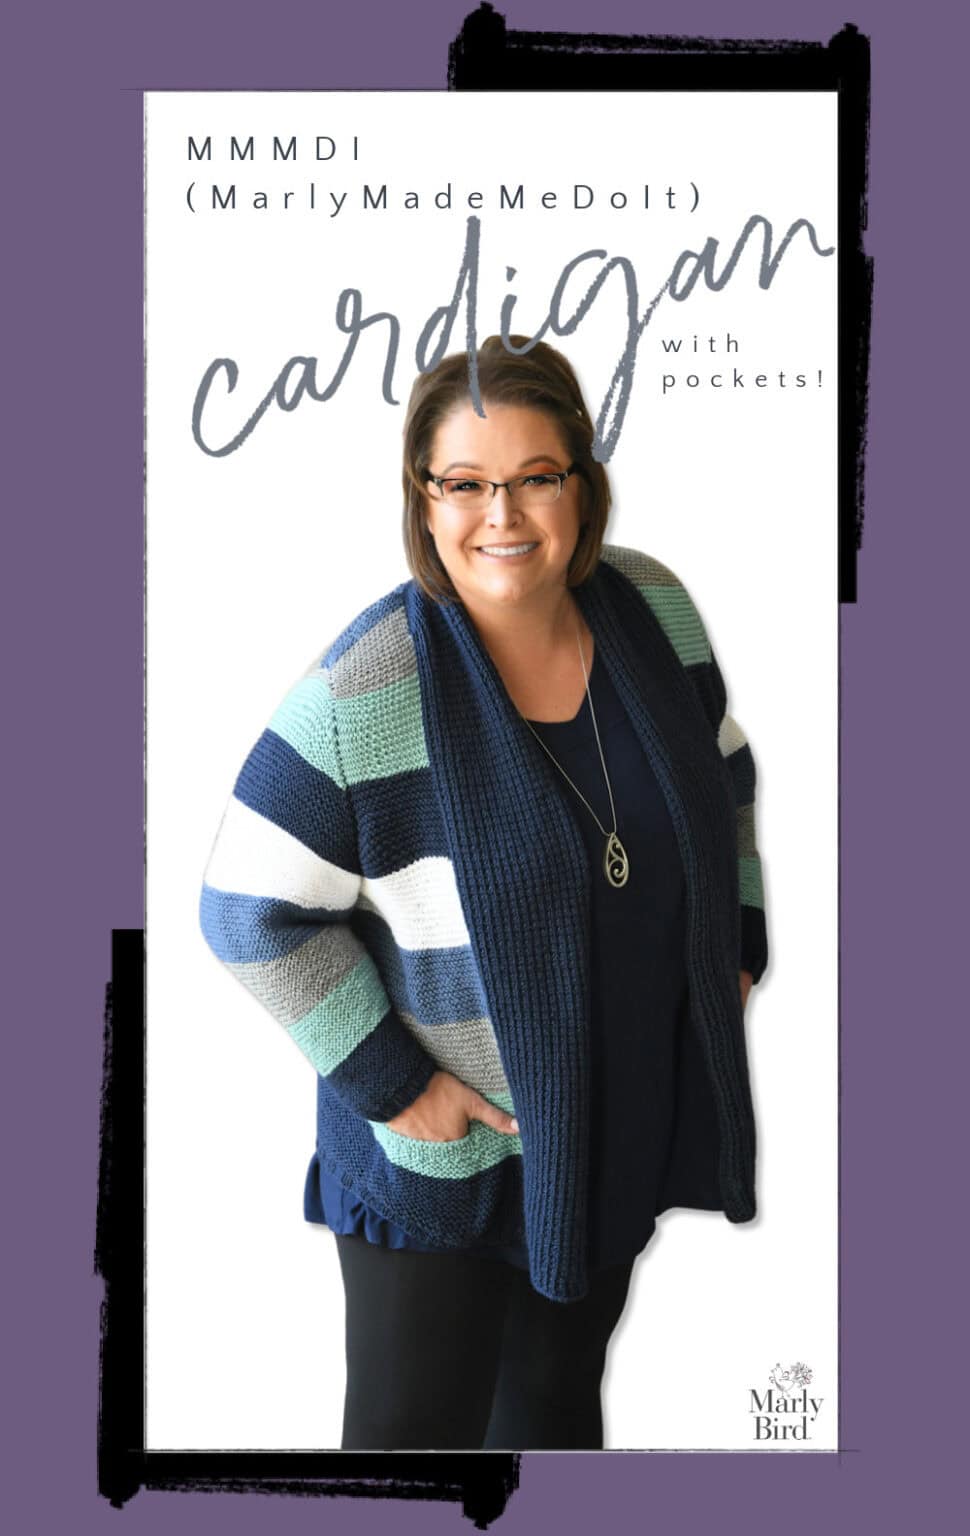
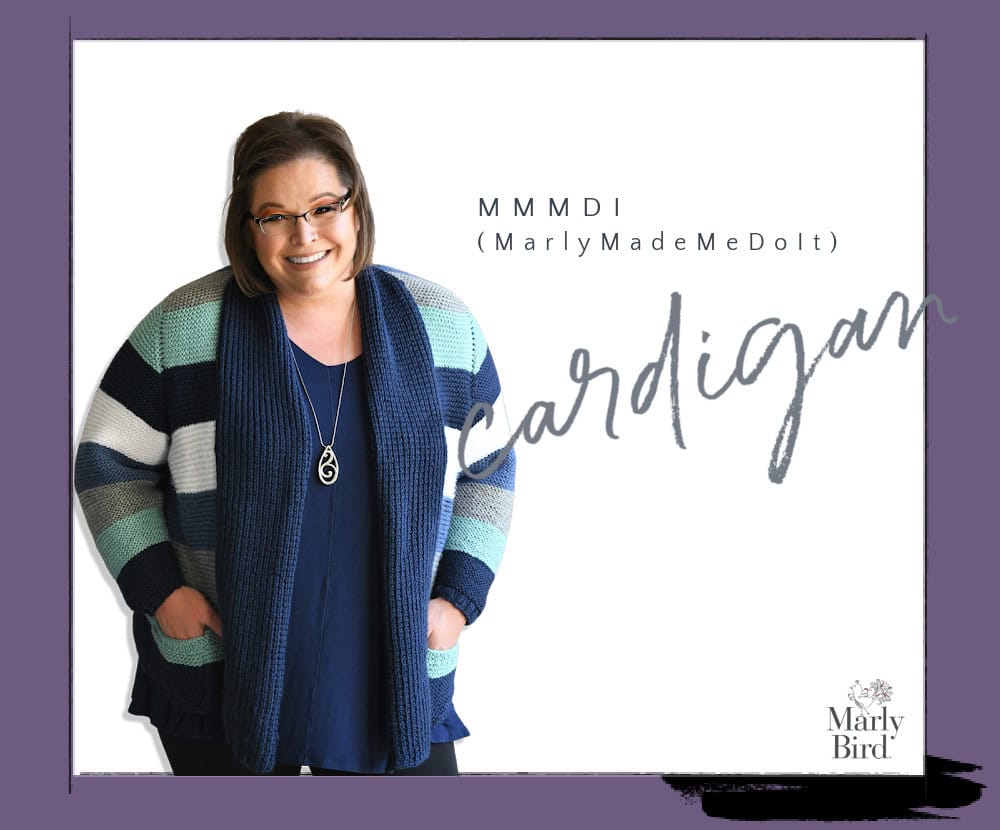
MMMDI is a stunning women’s garter stitch knit cardigan with pockets! The #MarlyMadeMeDoIt cardigan body is knit in one large piece from the bottom up with the only seaming on the sleeves and the armholes. Worked in Red Heart Soft yarn, this easy-care sweater will be one of your new favorites.
WHAT DOES MMMDI MEAN?
Marly’s Minions coined the phrase, “Marly Made Me Do It” as a reason they needed to buy yarn, or needles, or make a pattern. What started out as a joke has become a hashtag, and now a sweater pattern.
#MarlyMadeMeDoIt
The MMMDI (MarlyMadeMeDoIt) is a garter stitch knit cardigan with POCKETS ????. Because, if you are going to make a cardigan it must have pockets!
CAN A BEGINNER MAKE THIS MMMDI KNIT CARDIGAN WITH POCKETS PATTERN?
This sweater is designed to be a beginner friendly knit cardigan. Beginner knitters are always asking Marly what a good beginner pattern would be for them to make. Well, this is a good one ????
The instructions are written out in such a way to really explain each section (which is why it is really long). If an adventurous beginner were to pick up this pattern, he or she would be able to make this beautiful striped cardigan without any problem. At least, that was Marly’s goal.
TELL ME MORE ABOUT THE MMMDI KNIT CARDIGAN WITH POCKETS
The cardigan design is fashionable and totally on trend. Wear it to the office or cozied up on the couch as you binge watch a show while you knit. ????
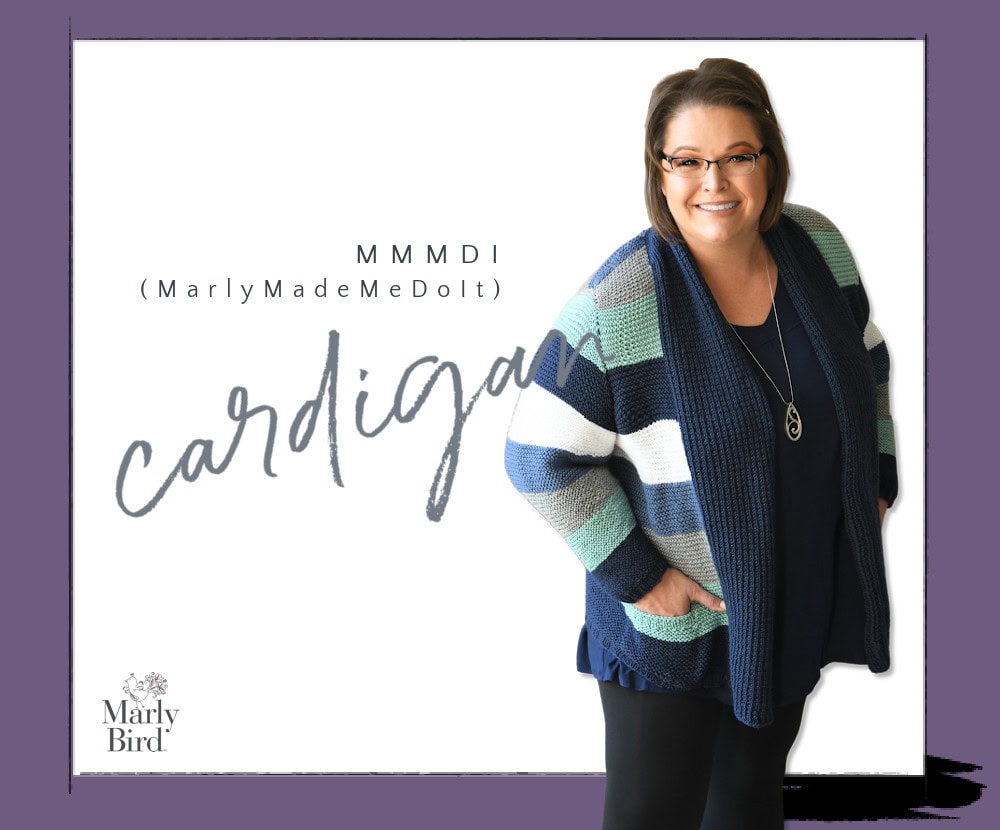
The neckline makes for a slimming silhouette and the bold stripes with the lightest color at the waistline are very flattering.
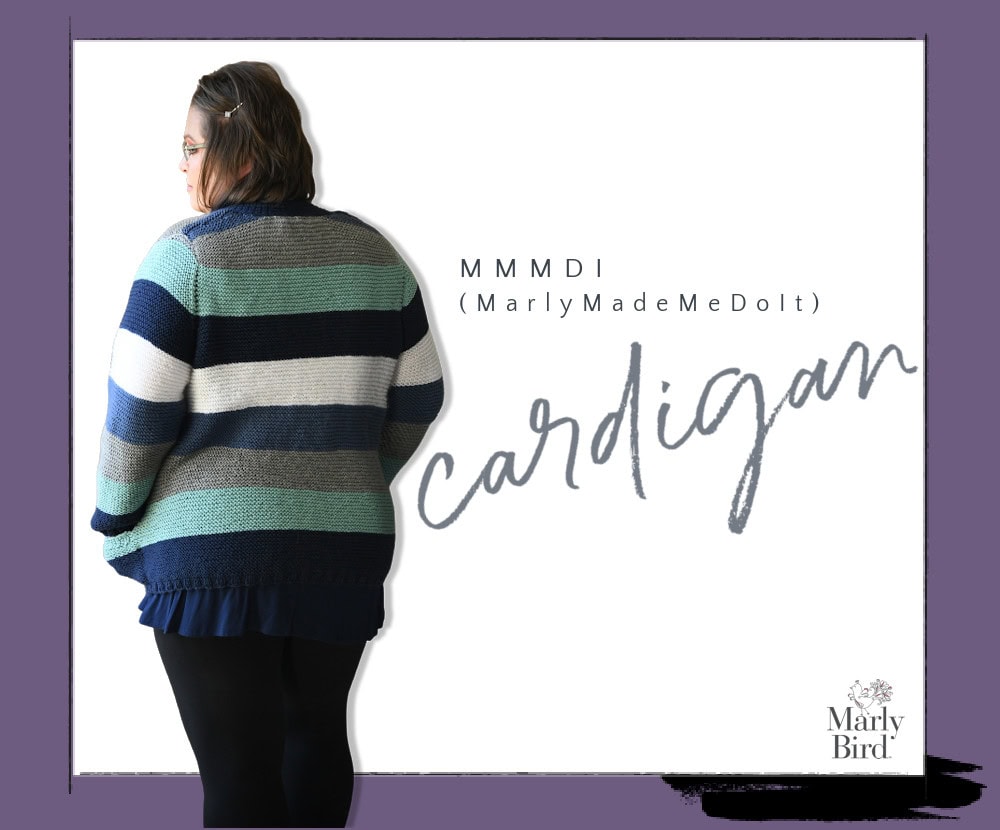
The knit stripes add a nice touch of excitement both for the knitter who is working miles of garter stitch, as well as the wearer who can couple this cardigan with so many color options. Plus, the way the sleeve stripes line up with the stripes on the body is very visually appealing.
Don’t you agree? ????????
Oh, I almost forgot to mention that the body of the piece is made as one so there is minimal seaming! It also makes the stripes completely lined up all around the cardigan ????
Then, of course there are the pockets! The pockets are designed to be a knit along with the cardigan so they are virtually seamless!!! (well, the seam is on the inside. ➸ Also, because Marly knows that some knitters like deeper pockets, there are instructions for shallow pockets (as shown in the sample) or deeper pockets.
Marly chose a basic worsted weight acrylic yarn for this cardigan but a lovely merino wool would make an equally stunning piece. The stitch gauge is average to this type of yarn and should be easy to achieve.
ARE THERE VIDEOS FOR THE MMMDI KNIT CARDIGAN WITH POCKETS?
Do you think you need more help? Not to worry, Marly is working on videos to show you the skills you need to complete this pattern. That way you will have no excuse for finishing it.
You will find them linked below when they are published. But you can also subscribe to the Marly Bird YouTube Channel and get notified as soon as they are published.
GET THE MMMDI KNIT CARDIGAN WITH POCKETS AD-FREE PDF PATTERN
As mentioned above, this pattern is really long in an effort to make pattern reading easy for a beginner. Because of that, Marly knows that many people will want a nice PDF pattern. So there is an Ad Free PDF is available in the Ravelry Store.
The MMMDI knit cardigan with pockets pattern will always be free on my website but if you want to have the pattern in a downloadable PDF without advertisements, click the link.
CLICK HERE GO TO RAVELRY AND CHECK IT OUT!
Queue it up and Like the Pattern on Ravelry
(coupon code does not work if you click the buy now button)

MMMDI KNIT CARDIGAN WITH POCKETS Here
Disclosure: This page may contain affiliate links which help me cover the cost of publishing my blog. Should you choose to make a purchase, at no additional cost to you, I may earn a small percentage of the sale.
SKILL LEVEL
Adventurous Beginner
Notes about instructions: The instructions are written for smallest size. If changes are necessary for larger size(s) the instructions will be written thus ( ). Numbers for each size are shown in the same color throughout the pattern. When only one number is given in black, it applies to all sizes.
MMMDI KNIT CARDIGAN WITH POCKETS MEASUREMENTS
TO FIT SIZE
XS (S, M, L, XL, 2X, 3X, 4X, 5X). Sweater shown is 2X.
FINISHED MEASUREMENTS
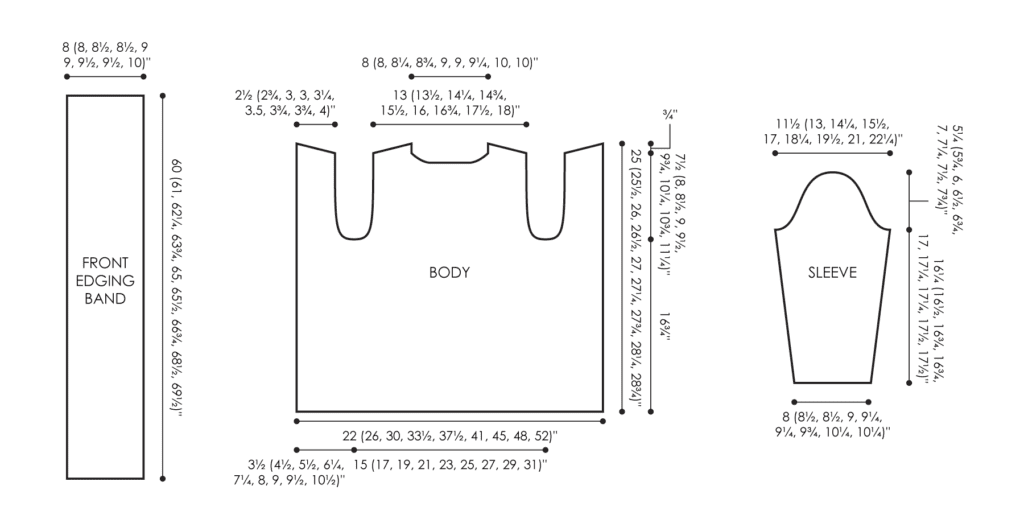
Bust 30 (34, 38, 42, 46, 50, 54, 58, 62)” / 76 (86.5, 96.5, 106.5, 117, 127, 137, 147.5, 157.5) cm
Length 25 (25½, 26, 26½, 27, 27¼, 27¾, 28¼, 28¾)”/ 63.5 (65, 66, 67.5, 68.5, 69, 70.5, 72, 73) cm
Notes about measurements: These measurements, as well as those listed on the schematic, do not reflect any selvedge sts. Bust measurement is very flexible due to overlap in Front Edging Band.
GAUGE
18 sts and 32 rows = 4″ (10cm) in Garter st (knit every row).
16 sts and 22 rows = 4″ (10cm) in Broken Rib.
Note about gauge: These two stitch patterns may require different needle sizes to achieve their respective gauges.
MMMDI KNIT CARDIGAN WITH POCKETS MATERIALS
YARN
RED HEART SOFT [100% acrylic; 141 g/5 oz, 234 meters/256] yards. Colors and amounts listed below.
- Navy — Color A — 3 (3, 3, 3, 4, 4, 4, 5, 5) balls
- Seafoam — Color B — 1 (1, 1, 1, 2, 2, 3, 3, 3) balls
- Light Grey — Color C — 1 (1, 1, 1, 1, 2, 2, 2, 2) balls
- Soft Blue — Color D — 1 (1, 1, 1, 1, 2, 2, 2, 2) balls
- White — Color E — 1 (1, 1, 1, 1, 1, 1, 2, 2) balls <updated amounts>
NEEDLES
- US 7 (4.5mm) at least 36″ (91 cm) long circular for bottom ribbed edges.
- US 8 (5mm) at least 36″ (91 cm) long circular or size required for Garter st gauge.
- US 9 (5.5mm) at least 24″ (61cm) long circular or straight needles or size required for Broken Rib gauge.
NOTIONS
Removable stitch markers, stitch holders, yarn needle, decorative clasp or closure (optional)
MMMDI KNIT CARDIGAN WITH POCKETS NOTES
- Sweater is worked in one piece from the cuff to the armhole. Then it is separated into right front/ back/ left front.
- Stripe colors are all started with RS facing.
- The front panel is made to be large so it can overlap on the front of the body. This panel can be made even more dramatic by casting on a larger number of stitches to make it wider.
- For knitters with larger busts who want the body to fit as intended and still have the fronts able to close with some extra fabric, making the panel wider is a great option.
MMMDI KNIT CARDIGAN WITH POCKETS STITCH PATTERNS
GARTER STITCH FLAT
Stitch multiple: any number of stitches.
Knit every row.
BROKEN RIBBING
Stitch multiple: odd number of stitches.
Row 1 (RS): Knit
Row 2: P2, * k1, p1; rep from * to last st, p1.
Repeat these 2 rows for Broken Rib.
MMMDI KNIT CARDIGAN WITH POCKETS PATTERN
POCKETS
(Make 2 the same)
With A, Cast on 21 sts, and work 22 (22, 24, 24, 24, 24, 24, 24, 26) rows in Garter st (knit every row).
Change to B, and work 10 (10, 8, 8, 8, 8, 8, 8, 6) more rows.
Place all sts on a holder.
Note for pockets: For a longer pocket, work 12 additional rows in Garter st here.
Place all sts on a holder.
BODY
With smaller needles and A, cast on 102 (122, 138, 154, 170, 190, 206, 222, 238) sts.
Row 1 (WS): P2, * k2, p2; rep from * to end.
Row 2: K2, * p2, k2; rep from * to end.
Rep Rows 1 and 2 once more, then Row 1 only once more – 5 total rows worked in ribbing.
Place 0 (3, 2, 1, 0, 3, 2, 3, 2) markers on the needle, approximately evenly spaced across the row.
BODY GARTER STITCH COLOR SEQUENCE
* Work 22 (22, 24, 24, 24, 24, 24, 24, 26) rows in each color A, B, C, D, E, being sure to change colors with RS facing, rep from * for remainder of piece.
Change to larger needles and work as follows, beginning the color sequence on the next row:
Next row (dec row, first Garter st row, RS): * Knit to marker, k2tog; rep from * for each marker, knit to end – 102 (119, 136, 153, 170, 187, 204, 219, 236) sts.
Work 31 more rows in Garter st following the Color Sequence – 16 ridges will appear on the RS. You may use removable stitch markers placed every 10 rows to keep track of the row count for each color band as well as for the entire piece.
Note for pockets: For a longer pocket, work 12 additional rows in Garter st here.
Next row (join pockets, RS): K1 (4, 7, 10, 13, 16, 20, 23, 27), place next 21 sts on a holder, knit across 21 sts of one Pocket piece, knit to last 22 (25, 28, 31, 34, 37, 41, 44, 48) sts, place next 21 sts on a holder, knit to end.
Work 95 more rows in Garter st across all sts keeping with the Color Sequence – 128 total rows worked.
SEPARATE BACK AND FRONTS AT ARMHOLES
Place a st marker 17 (21, 25, 29, 33, 37, 41, 44, 48) sts away from each edge for Front pieces, leaving 68 (77, 86, 95, 104, 113, 122, 131, 140) sts at center for Back.

RIGHT FRONT
Work across 17 (21, 25, 29, 33, 37, 41, 44, 48) Right Front sts (to the first marker) only as follows:
SHAPE ARMHOLE
Next 4 Rows:
Row 1 (RS): Knit.
Row 2: Bind off 2 (3, 3, 4, 4, 4, 5, 6, 6) sts, knit to end – 15 (18, 22, 25, 29, 33, 36, 38, 42) sts.
Row 3: Knit.
Row 4: Bind off 2 (2, 3, 3, 3, 4, 4, 5, 5) sts, knit to end – 13 (16, 19, 22, 26, 29, 32, 33, 37) sts.
All sizes except XS:
Next 2 Rows:
Row 1 (RS): Knit.
Row 2: Bind off x (2, 2, 2, 2, 3, 4, 4, 4) sts, knit to end – x (14, 17, 20, 24, 26, 28, 29, 33) sts.
Last 5 sizes only:
Next 2 Rows:
Rows 1 (RS): Knit.
Row 2: Bind off x (x, x, x, 2, 2, 2, 3, 3) sts, knit to end – x (x, x, x, 22, 24, 26, 26, 30) sts.
Size 5X only:
Next 2 Rows:
Row 1 (RS): Knit.
Row 2: Bind off 2 sts, knit to end – 28 sts.
All sizes except S and XS:
Next 2 rows:
Row 1 (dec row, RS): Knit to last 3 sts, k2tog, k1 – x (x, 16, 19, 21, 23, 25, 25, 27) sts.
Row 2: Knit.
Rep the last 2 rows x (x, 1, 3, 4, 5, 6, 6, 7) more times – x (x, 15, 16, 17, 18, 19, 19, 20) sts.
Total st count for all sizes: 13 (14, 15, 16, 17, 18, 19, 19, 20) sts.
All sizes:
Work 57 (59, 59, 59, 59, 59, 61, 65, 65) more rows evenly in Garter st – 61 (65, 69, 73, 77, 79, 83, 87, 91) total rows worked for Right Front beginning at armhole shaping.
SHAPE SHOULDER
Next 4 rows:
Row 1 (WS): Bind off 4 (4, 5, 5, 5, 6, 6, 6, 6) sts, knit to end – 9 (10, 10, 11, 12, 12, 13, 13, 14) sts.
Row 2: Knit.
Row 3: Bind off 4 (5, 5, 5, 6, 6, 6, 6, 7) sts, knit to end – 5 (5, 5, 6, 6, 6, 7, 7, 7) sts.
Row 4: Knit.
Bind off all remaining sts.
BACK
With RS facing, join new yarn and work across 68 (77, 86, 95, 104, 113, 122, 131, 140) Back sts (to next marker) only as follows:
SHAPE ARMHOLES
Next 4 Rows:
Row 1 (RS): Bind off 2 (3, 3, 4, 4, 4, 5, 6, 6) sts, knit to end – 66 (74, 83, 91, 100, 109, 117, 125, 134) sts.
Row 2: Bind off 2 (3, 3, 4, 4, 4, 5, 6, 6) sts, knit to end – 64 (71, 80, 87, 96, 105, 112, 119, 128) sts.
Row 3: Bind off 2 (2, 3, 3, 3, 4, 4, 5, 5) sts, knit to end – 62 (69, 77, 84, 93, 101, 108, 114, 123) sts.
Row 4: Bind off 2 (2, 3, 3, 3, 4, 4, 5, 5) sts, knit to end – 60 (67, 74, 81, 90, 97, 104, 109, 118) sts.
All sizes except XS:
Next 2 Rows:
Row 1 (RS): Bind off x (2, 2, 2, 2, 3, 4, 4, 4) sts, knit to end – x (65, 72, 79, 88, 94, 100, 105, 114) sts.
Row 2: Bind off x (2, 2, 2, 2, 3, 4, 4, 4) sts, knit to end – x (63, 70, 77, 86, 91, 96, 101, 110) sts.
Last 5 sizes only:
Next 2 Rows:
Rows 1 (RS): Bind off x (x, x, x, 2, 2, 2, 3, 3) sts, knit to end – x (x, x, x, 84, 89, 94, 98, 107) sts.
Row 2: Bind off x (x, x, x, 2, 2, 2, 3, 3) sts, knit to end – x (x, x, x, 82, 87, 92, 95, 104) sts.
Size 5X only:
Next 2 Rows:
Row 1 (RS): Bind off 2 sts, knit to end – 102 sts.
Row 2: Bind off 2 sts, knit to end – 100 sts.
All sizes except S and XS:
Next 2 rows:
Row 1 (dec row, RS): K1, k2tog, knit to last 3 sts, k2tog, k1 – x (x, 68, 75, 80, 85, 90, 93, 98) sts.
Row 2: Knit.
Rep the last 2 rows x (x, 1, 3, 4, 5, 6, 6, 7) more times – x (x, 66, 69, 72, 75, 78, 81, 84) sts.
Total st count for all sizes: 60 (63, 66, 69, 72, 75, 78, 81, 84) sts.
All sizes:
Work 50 (52, 52, 52, 52, 52, 58, 62, 62) more rows evenly in Garter st – 54 (58, 62, 66, 70, 72, 76, 80, 84) total rows worked for Back beginning at armhole shaping.
BIND OFF FOR NECK AND SEPARATE SHOULDERS
Next row (bind-off row, RS): K19 (20, 21, 22, 23, 24, 25, 25, 26), bind off center 22 (23, 24, 25, 26, 27, 28, 31, 32) sts, k19 (20, 21, 22, 23, 24, 25, 25, 26).
SHAPE LEFT BACK NECK AND SHOULDER
Work across 19 (20, 21, 22, 23, 24, 25, 25, 26) at left side of Back only as follows:
Next 10 rows:
Row 1 (WS): Knit.
Row 2: Bind off 2 sts, knit to end – 17 (18, 19, 20, 21, 22, 23, 23, 24) sts.
Row 3: Knit.
Row 4: Bind off 2 sts, knit to end – 15 (16, 17, 18, 19, 20, 21, 21, 22) sts.
Row 5: Knit.
Row 6: Bind off 2 sts, knit to end – 13 (14, 15, 16, 17, 18, 19, 19, 20) sts.
Row 7:
Row 7: Bind off 4 (4, 5, 5, 5, 6, 6, 6, 6) sts, knit to end – 9 (10, 10, 11, 12, 12, 13, 13, 14) sts.
Row 8: Knit.
Row 9: Bind off 4 (5, 5, 5, 6, 6, 6, 6, 7) sts, knit to end – 5 (5, 5, 6, 6, 6, 7, 7, 7) sts.
Row 10: Knit.
Bind off all remaining sts.
SHAPE RIGHT BACK NECK AND SHOULDER
With WS facing, join new yarn and work across 19 (20, 21, 22, 23, 24, 25, 25, 26) at right side of Back only as follows:
Next 9 rows:
Row 1 (WS): Bind off 2 sts, knit to end – 17 (18, 19, 20, 21, 22, 23, 23, 24) sts.
Row 2: Knit.
Row 3: Bind off 2 sts, knit to end – 15 (16, 17, 18, 19, 20, 21, 21, 22) sts.
Row 4: Knit.
Row 5: Bind off 2 sts, knit to end – 13 (14, 15, 16, 17, 18, 19, 19, 20) sts.
Row 6: Bind off 4 (4, 5, 5, 5, 6, 6, 6, 6) sts, knit to end – 9 (10, 10, 11, 12, 12, 13, 13, 14) sts.
Row 7: Knit.
Row 8: Bind off 4 (5, 5, 5, 6, 6, 6, 6, 7) sts, knit to end – 5 (5, 5, 6, 6, 6, 7, 7, 7) sts.
Row 9: Knit.
Bind off all remaining sts.
LEFT FRONT
With RS facing join new yarn and, work across remaining 17 (21, 25, 29, 33, 37, 41, 44, 48) Left Front sts as follows:
SHAPE ARMHOLE
Next 4 Rows:
Row 1 (RS): Bind off 2 (3, 3, 4, 4, 4, 5, 6, 6) sts, knit to end – 15 (18, 22, 25, 29, 33, 36, 38, 42) sts.
Row 2: Knit.
Row 3: Bind off 2 (2, 3, 3, 3, 4, 4, 5, 5) sts, knit to end – 13 (16, 19, 22, 26, 29, 32, 33, 37) sts.
Row 4: Knit.
All sizes except XS:
Next 2 Rows:
Row 1 (RS): Bind off x (2, 2, 2, 2, 3, 4, 4, 4) sts, knit to end – x (14, 17, 20, 24, 26, 28, 29, 33) sts.
Row 2: Knit.
Last 5 sizes only:
Next 2 Rows:
Rows 1 (RS): Bind off x (x, x, x, 2, 2, 2, 3, 3) sts, knit to end – x (x, x, x, 22, 24, 26, 26, 30) sts.
Row 2: Knit.
Size 5X only:
Next 2 Rows:
Row 1 (RS): Bind off 2 sts, knit to end – 28 sts.
Row 2: Knit.
All sizes except S and XS:
Next 2 rows:
Row 1 (dec row, RS): K1, k2tog, knit end – x (x, 16, 19, 21, 23, 25, 25, 27) sts.
Row 2: Knit.
Rep the last 2 rows x (x, 1, 3, 4, 5, 6, 6, 7) more times – x (x, 15, 16, 17, 18, 19, 19, 20) sts.
Total st count for all sizes: 13 (14, 15, 16, 17, 18, 19, 19, 20) sts.
All sizes:
Work 56 (58, 58, 58, 58, 58, 60, 64, 64) more rows evenly in Garter st – 60 (64, 68, 72, 76, 78, 82, 86, 90) total rows worked for Left Front beginning at armhole shaping.
SHAPE SHOULDER
Next 4 rows:
Row 1 (RS): Bind off 4 (4, 5, 5, 5, 6, 6, 6, 6) sts, knit to end – 9 (10, 10, 11, 12, 12, 13, 13, 14) sts.
Row 2: Knit.
Row 3: Bind off 4 (5, 5, 5, 6, 6, 6, 6, 7) sts, knit to end – 5 (5, 5, 6, 6, 6, 7, 7, 7) sts.
Row 4: Knit.
Bind off all remaining sts.
SLEEVES
(Make 2 the same)
With smaller needles and A, cast on 38 (42, 42, 42, 46, 46, 46, 50, 50) sts.
Row 1 (WS): P2, * k2, p2; rep from * to end.
Row 2: K2, * p2, k2; rep from * to end.
Rep Rows 1 and 2 once more, then Row 1 only once more – 5 total rows worked in ribbing.
Place 0 (2, 2, 0, 2, 2, 0, 2, 2) markers on the needle, approximately evenly spaced across the row.
SLEEVE GARTER STITCH COLOR SEQUENCE
* Work 18 (20, 24, 24, 26, 28, 28, 30, 32) rows in color A, then work 22 (22, 24, 24, 24, 24, 24, 24, 26) rows in each color B, C, D, E, A, being sure to change colors with RS facing, rep from * for remainder of piece.
Change to larger needles and work as follows, beginning the color sequence on the next row:
Next row (dec row, first Garter st row, RS): * Knit to marker, k2tog; rep from * for each marker, knit to end – 38 (40, 40, 42, 44, 44, 46, 48, 48) sts.
Work 3 more rows evenly in Garter st.
Next Row (inc row, RS): K1, kfb, knit to last 3 sts, kfb, k2 – 40 (42, 42, 44, 46, 46, 48, 50, 50) sts.
* Work 13 (11, 7, 7, 5, 5, 3, 3, 3) more rows evenly in Garter st, then rep the inc row above once more – 42 (44, 44, 46, 48, 48, 50, 52, 52) sts.
Rep from * 0 (6, 2, 12, 5, 16, 3, 8, 17) more times – 42 (56, 48, 70, 58, 80, 56, 68, 86) sts.
* Work 15 (13, 9, 9, 7, 7, 5, 5, 5) more rows evenly in Garter st, then rep the inc row above once more – 44 (58, 50, 72, 60, 82, 58, 70, 88) sts.
Rep from * 5 (1, 8, 0, 9, 1, 16, 13, 7) more times – 54 (60, 66, 72, 78, 84, 90, 96, 102) sts.
Work 9 more rows evenly in Garter st.
SHAPE SLEEVE CAP
Next 4 rows:
Row 1 (RS): Bind off 2, (2, 3, 3, 4, 4, 5, 6, 6) sts, knit to end – 52 (58, 63, 69, 74, 80, 85, 90, 96) sts.
Row 2: Bind off 2, (2, 3, 3, 4, 4, 5, 6, 6) sts, knit to end – 50 (56, 60, 66, 70, 76, 80, 84, 90) sts.
Row 3: Bind off 2 (2, 3, 3, 3, 4, 4, 5, 5) sts, knit to end – 48 (54, 57, 63, 67, 72, 76, 79, 85) sts.
Row 4: Bind off 2 (2, 3, 3, 3, 4, 4, 5, 5) sts, knit to end – 46 (52, 54, 60, 64, 68, 72, 74, 80) sts.
All sizes except XS:
Next 2 Rows:
Row 1 (RS): Bind off x (2, 2, 2, 2, 3, 4, 4, 4) sts, knit to end – x (50, 52, 58, 62, 65, 68, 70, 76) sts.
Row 2: Bind off x (2, 2, 2, 2, 3, 4, 4, 4) sts, knit to end – x (48, 50, 56, 60, 62, 64, 66, 72) sts.
Last 5 sizes only:
Next 2 Rows:
Row 1 (RS): Bind off x (x, x, 2, 2, 2, 2, 2, 3) sts, knit to end – x (x, x, 54, 58, 60, 62, 64, 69) sts.
Row 2: Bind off x (x, x, 2, 2, 2, 2, 2, 3) sts, knit to end – x (x, x, 52, 56, 58, 60, 62, 66) sts.
Size 5X only:
Row 1 (RS): Bind off 2 sts knit to end – 64 sts.
Row 2: Bind off 2 sts, knit to end – 62 sts.
Total st count for all sizes: 46 (48, 50, 52, 56, 58, 60, 62, 62) sts.
All sizes:
Next 2 Rows:
Row 1 (dec row, RS): K1, k2tog, knit to last 3 sts, k2tog, k1 – 44 (46, 48, 50, 54, 56, 58, 60, 60) sts.
Row 2: Knit.
Rep the last 2 rows 14 (15, 16, 17, 17, 18, 18, 19, 19) more times – 16 (16, 16, 16, 20, 20, 22, 22, 22) sts.
Next 4 Rows:
Row 1 (RS): Bind off 2 (2, 2, 2, 3, 3, 3, 3, 3) sts, knit to end – 14 (14, 14, 14, 17, 17, 19, 19, 19) sts.
Row 2: Bind off 2 (2, 2, 2, 3, 3, 3, 3, 3) sts, knit to end – 12 (12, 12, 12, 14, 14, 16, 16, 16) sts.
Row 3: Bind off 2 (2, 2, 2, 2, 2, 3, 3, 3) sts, knit to end – 10 (10, 10, 10, 12, 12, 13, 13, 13) sts.
Row 4: Bind off 2 (2, 2, 2, 2, 2, 3, 3, 3) sts, knit to end – 8 (8, 8, 8, 10, 10, 10, 10, 10) sts.
Bind off all remaining sts.
FRONT EDGE BAND
With A and needles sized to achieve the Broken Rib gauge, cast on 33 (33, 35, 35, 37, 37, 39, 39, 41) sts, and work in Broken Rib until piece measures 60 (61, 62¼, 63¾, 65, 65½, 66¾, 68½, 69½)” / 152.5 (155, 158, 162, 165, 166.5, 169.5, 174, 176.5) cm
Bind off all sts.
FINISHING
POCKET EDGINGS
(Work both the same)
With RS facing, place all pocket sts onto the smaller needles.
With WS facing, join new yarn leaving a long tail, and work 5 rows in Broken Rib.
Bind off all sts, leaving anorther long tail.
Use the yarn tails to sew the side edges of the Pocket edging onto front of Cardigan.
ASSEMBLY
Sew Pocket pieces to inside of Cardigan, being sure to use a matching color yarn to sew the different color sections.
Sew shoulder seams.
Sew Sleeve seams, then sew Sleeve caps into armholes.
FRONT EDGE BAND
Sew one long edge of the Front Edging Band to front edge of Cardigan beginning at bottom corners of Front and working inward, leaving the neck for last.
There will be about 2″ (5 cm) of extra fabric of the Front Edging Band at the neck. Pin center of remaining unsewn edge to center of Back neck, and sew remainder, easing in the extra fabric as you go.
Weave in all loose ends.
MORE PATTERNS BY MARLY BIRD
Be sure to check out more pattern by Marly Bird here on MarlyBird.com. Browse either the knitting patterns or the crochet patterns.

