Summit Chic Crochet Hat is a free crochet hat pattern with great texture and sleek lines. Made with almost one ball of yarn makes this an affordable accessory to make for everybody in your life.
Disclosure: This page may contain affiliate links which help me cover the cost of publishing my blog. Should you choose to make a purchase, at no additional cost to you, I may earn a small percentage of the sale.
Queue it up and Like the Pattern on Ravelry

This crochet hat with a brim was a result of me learning a new crochet stitch and wanting to use it immediately. I love the long bobble stitch. It gives a ton of texture to a common and popular pattern. Couple the long bobble with the 3rd loop stitch and get a LOT of visual appeal.
The style is a crochet beanie hat but could easily be made into a super easy slouchy hat by adding more stitches at the start of the hat, keeping with the stitch multiple of 6 working the body of the hat longer than written. Yes, that means you will need more yarn but if is the look you are going for it is possible.
This hat is designed with the beginner crocheter and the experienced crocheter in mind. You will be better off if you know how to crochet a hat. The construction is rather easy and the crown shaping is basic so the crocheter doesn’t have to over think while making the hat.
You will make the brim of the hat flat with single crochet ribbing then work along the side edge to create the body of the hat in the round.
The body of the hat is made up of the long double crochet bobble (you make these in the front post of the stitch) and double crochets worked in the 3rd loop or sometimes called the camel stitch and create a nice line of “v” around the hat. The combination of the long bobble and the double crochet in the 3rd loop make a hat with great texture and sleek sophistication.
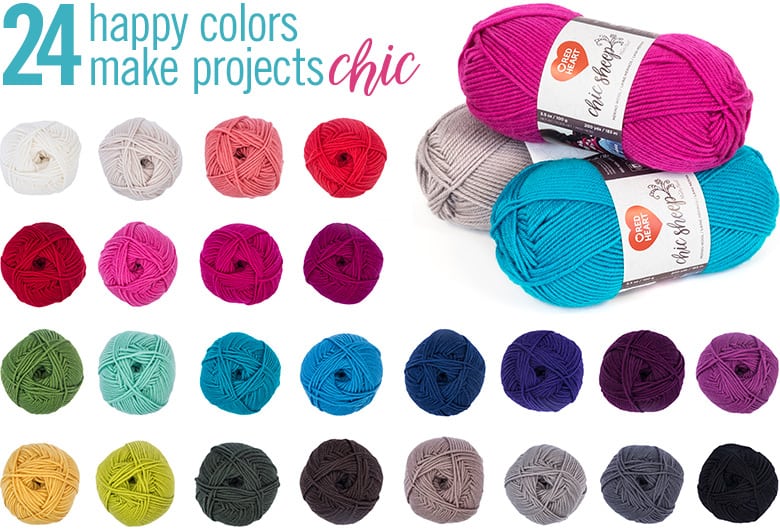
Remember, this is ALMOST a one ball hat project so the investment is not too much. With three balls of yarn you get 2 adult size hats. Plus, you will love all 24 colors of Chic Sheep by Marly Bird™ yarn!

Okay, grab your hook and yarn and get started on the summit chic crochet hat

MATERIALS
Yarn: Red Heart Chic Sheep by Marly Bird™ [Art. R170 100% Merino Wool available 3.5 oz (100 g),186 yd (170 m) balls], 2 balls (see note below)
Hook: G/7 (4.5mm)
MEASUREMENTS
Gauge: 16 hdc in the 3rd loop = 4” CHECK YOUR GAUGE. Use any size needles to obtain the gauge
Brim to top of hat = 8.5”, Circumference = 20” around brim, 21 around body
NOTIONS
Stitch Marker (make your own), Tapestry needle to bury the ends (learn how here)

NOTES
- You do not use much of the second ball of yarn, so 3 balls of yarn will make 2 hats.
- Brim is made in short rows worked back and forth flat.
- Body of hat is made in the round, working along the side edge of the brim.
SPECIAL STITCHES
3rd Loop of Hdc: This horizontal bar is located on the wrong side of the stitch directly under the top 2 loops. It is created by the yarn over when making the stitch previously. Crocheting in the 3rd loop shifts the top two loops forward creating a line of “v” that look like surface slip stitches.
Front Post Long Bobble: Yarn over hook, insert hook around the post of the indicated stitch from the front, yarn over and pull up a loop (3 loops on hook), yarn over and draw through 2 loops (2 loops on hook), yarn over hook, insert hook around the post of the same stitch under the partial stitch just made, yarn over and pull up a loop (4 loops on hook), yarn over and draw through 2 loops, (3 loops on hook), yarn over hook, insert hook around the post of the same stitch under the partial stitch just made, yarn over and pull up a loop (5 loops on hook), yarn over and draw through 2 loops, (4 loops on hook), yarn over hook, insert hook around the post of the same stitch under the partial stitch just made, yarn over and pull up a loop (6 loops on hook), yarn over and draw through 2 loops, (5 loops on hook), yarn over and pull through all loops on hook.
Front Post Stitch Refresher Video
Half Double Crochet 2 Together (hdc2tog): *Yarn over hook, insert hook into next stitch indicated, yarn over and pull up a loop (3 loops on hook); repeat from * once more in next stitch indicated, yarn over and draw through all 5 loops on hook.
SUMMIT CHIC CROCHET HAT
PATTERN
Brim
Chain 8.
Row 1: Sc in 2nd ch from hook and in each ch across, ch 1, turn — 7 sc.
Row 2: Sc in the back loop only of each sc across, ch 1, turn. Repeat row 2 86 more times.– (44 ridges)
Body
Note from Marly: The stitch multiple for the body of the crochet beanie hat is 6, so if you are an experienced crocheter or want to make a super slouchy crochet hat from the brim to the crown you can increase the number of stitches you work evenly around the crochet brim by 6 stitches. Remember that will increase the final number of stitches at the end of each round and will require more yarn. But it can be done 🙂
Turn to begin working on long edge of brim (around the row ends).
Set-up round: Evenly place 84 hdc along long side of brim, join with a slip stitch to first hdc (begin working in the round), ch 1, do not turn.
Round 1: Hdc in each st around, join with a slip stitch to first hdc, ch 1, do not turn.
Rounds 2, 3, 4: Hdc in the 3rd loop of each hdc around, join with a slip stitch to 3rd loop of first hdc, ch 1, do not turn..
Round 5: *Front post long bobble in first hdc, skip the hdc behind the long bobble just made, sc in each of the next 5 hdc; repeat from the * around, join with a slip stitch to first front post long bobble, ch 1, do not turn — 14 front post long bobbles.
Round 6: Hdc in each st around, join with a slip stitch to first hdc, ch 1, do not turn –84 hdc.
Rounds 7, 8, 9: Hdc in the 3rd loop of each hdc around, join with a slip stitch to 3rd loop of first hdc, ch 1, do not turn..
Round 10: *3 sc, front post long bobble in next hdc, skip the hdc behind the long bobble just made, 2 sc; repeat from * around, join with a slip stitch to first sc, ch 1, do not turn –14 front post long bobbles.
Rounds 11-20: Repeat rounds 1-10 once more.
Note from Marly: if you want to make the hat more slouchy at the top, and did not add more stitches after the crochet brim, you can still add more length before you start the crown shaping, remember that will require more yarn.

Crown
Round 1: Hdc in each st around, join with a slip stitch to first hdc, ch 1, do not turn.
Round 2: Hdc in the 3rd loop of each hdc around, join with a slip stitch to 3rd loop of first hdc, ch 1, do not turn.
Round 3: *Hdc2tog in the 3rd loop over the next 2 hdc; repeat from * around, join with a slip stitch to the 3rd loop of first st, ch 1, do not turn — 42 hdc.
Round 4: *Hdc2tog in the 3rd loop over the next 2 hdc; repeat from * around, join with a slip stitch to the 3rd loop of first hdc, ch 1, do not turn — 21 hdc.
Round 5: Hdc in first st, *Hdc2tog in the 3rd loop over the next 2 hdc; repeat from * around, join with a slip stitch to the 3rd loop of first hdc, ch 1, do not turn — 11 hdc.
Note from Marly: if your ant to make this crochet hat into a messy bun crochet hat, stop working in rounds at this point and weave in your ends.
Round 6: Hdc in first st, *Hdc2tog in the 3rd loop over the next 2 hdc; repeat from * around, join with a slip stitch to the 3rd loop of first hdc, ch 1, do not turn. — 6 hdc.
Finishing
Cut yarn leaving a 6” tail to sew the top of hat.
Fasten off.
Sew closed the top of hat.
Sew the brim closed.
Weave in tails.
Wash and block hat to final measurement.
Videos-Quick Projects on YouTube
Get more free CROCHET patterns!
Click here for more free crochet patterns by Marly Bird


