Crochet Chic Log Cabin Blanket — FREE Pattern
Originally published August 2018 · Updated August 2026 with full framework treatment, yarn alternatives, video tutorials, and FAQ.
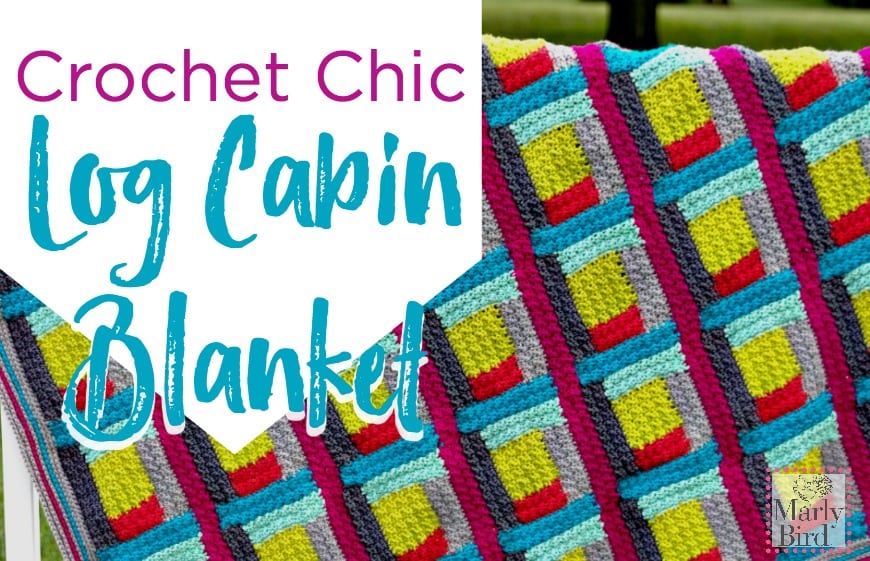
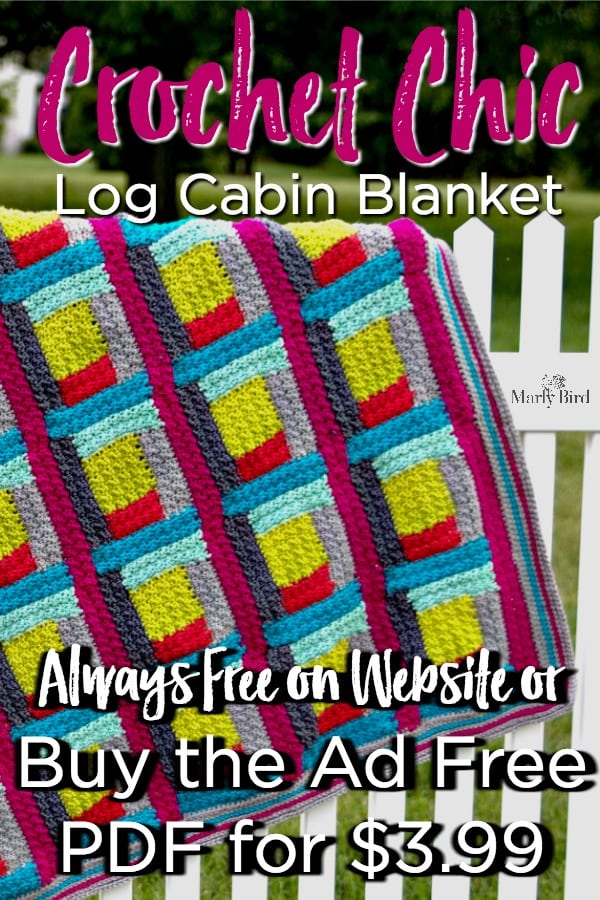
The Crochet Chic Log Cabin Blanket is a free intermediate crochet pattern by Marly Bird, inspired by classic log cabin quilts. Using 7 bold colors of worsted weight yarn and an I/5.5mm hook, you’ll build 49 log cabin–style squares and join them into a stunning 56″ × 56″ colorful throw blanket — adjustable to any size you want.
⚡ Quick Answer:
This is a free intermediate crochet blanket pattern using 7 colors of worsted weight yarn and an I/5.5mm hook. You build 49 log cabin–style squares — each has a center rectangle surrounded by 6 color-changing strips — sew them in a 7×7 grid, then add a camel stitch border. Finished size: 56″ × 56″. Fully adjustable!
Hey, bestie 💛 I have been obsessed with log cabin quilts for YEARS. There’s just something about the way those strips of fabric build around a center square that gives me all the feels… the geometric precision, the color contrast, the way the whole design comes together in the assembly. Genius. So I had to reinvent it in crochet — with my signature bold palette and a textured stitch that gives every rectangle its own depth. This blanket is the result, and I kind of can’t stop looking at it.
Why You’ll Love This Blanket 💖
🎨 Bold, scrappy color play you can actually use. Seven distinct colors. Strategic placement. And that magic moment when you lay all 49 squares out on the floor to check your layout… and suddenly the diagonal lines appear across the whole blanket even though each square is its own little world. That’s the log cabin secret, and it never gets old.
🤷 Surprisingly meditative once you get the rhythm. I know “intermediate” can sound intimidating, but here’s the truth: after your first square, the construction just clicks. It’s the same six rectangles, over and over, just rotating as you go. Perfect for binge-watching your favorite show with your hook in hand.
📐 Make it any size you want. The sample is a 7×7 grid of squares (49 total) for a generous 56″ × 56″ throw. But each block is a self-contained 8″ × 8″ unit. Scale up to a full bed blanket. Scale down to a baby blanket. Just add or subtract squares in any direction.
🏠 A true heirloom piece… made in crochet. This is the blanket that gets handed down. The colorwork looks incredibly complex but it’s really just knowing where to rotate your work and where to pick up your next rectangle. It looks like it took you years. It didn’t. 😄
This pattern is for you if you’re comfortable with single crochet, double crochet, and picking up stitches along a row edge. You’ll come away knowing how to build a log cabin–style construction, work clean color changes mid-row, and join blocks using the invisible mattress stitch. A proper skill-builder wrapped in a stunning project.
Quick Pattern Overview 🤴
🟩 Each individual square is built from the center out. Start with a small center rectangle in Color A, then rotate the work 90° and pick up Color B along one edge. Rotate again, add Color C… and keep going. Each new rectangle wraps around the previous one, getting a little longer each time. After 7 sections (1 center + 6 rectangles), you have one completed 8″ × 8″ square.
🧡 The texture comes from alternating single and double crochet stitches across every row — a seed stitch effect that gives every strip its own subtle depth. Not complicated once you get it; the alternating pattern just keeps going row after row. And that stitch definition? It’s what makes each color strip really pop.
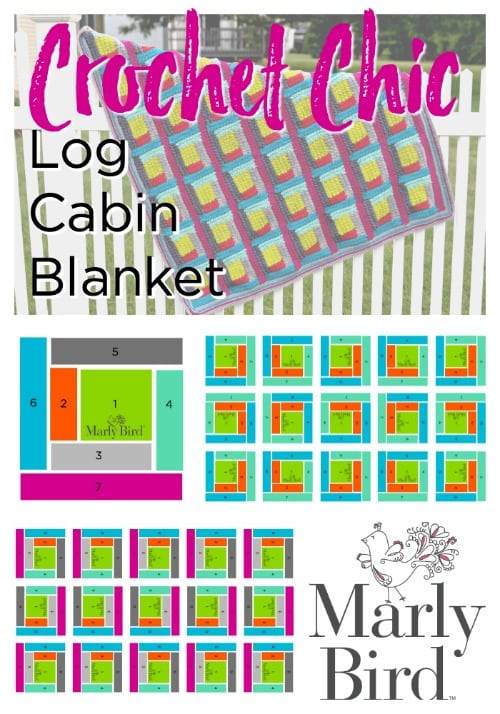
🖌 Make all 49 squares. Block each one to 8″ × 8″ (this is not optional — more on that below). Sew them together in a 7×7 grid using the layout chart of your choice — the pattern includes three colorway options plus a blank grid to plan your own. Then add the camel stitch border and you are DONE with a blanket that will genuinely blow people away.
About the Yarn — Red Heart Chic Sheep and the Best Substitutes 🧵
The original sample uses Red Heart® Chic Sheep by Marly Bird™ — 100% Merino wool in 7 bold colors. What makes it work so well for this blanket is the stitch definition: the alternating sc/dc seed stitch pattern really shows up in a smooth, structured worsted weight yarn. And because it’s merino, it blocks predictably — every square ended up a perfect 8″ × 8″. That matters a LOT when you’re assembling 49 of them!
My Favorite Substitutes for Chic Sheep
🥇 Malabrigo Rios — 100% superwash merino, worsted weight. My top pick for a luxe version of this blanket. The hand-dyed colorways are absolutely stunning, and it blocks like an absolute dream. Just make sure to buy enough of each color at once since dye lots can vary.
🥈 Cascade 220 Superwash — 100% superwash wool, worsted weight. Hundreds of solid colors to choose from, machine washable, widely available at your local yarn shop and online. A great budget-friendly option that still blocks beautifully.
🥉 Any smooth worsted weight (#4) with natural fiber — Lion Brand Wool-Ease, Patons Classic Wool Worsted, or Vanna’s Choice (solids) all work well with this stitch pattern. Aim for at least 50% natural fiber for the best blocking results.
Love the Pattern but Want an Ad-Free PDF? ⭐
Grab the ad-free PDF and stitch without a single interruption — no ads, no scrolling, just the pattern. Available on Ravelry, or browse Marly’s full pattern library!
Join our Newsletter
Get Free Crochet & Knitting
Pattern Links & Coupons!


Video Tutorials 🎥
These are all the techniques you’ll use in this pattern. Bookmark them as you work through each section!
- How to change colors on the last stitch of a row
- Crochet mattress stitch (for joining the blocks)
- How to block crochet (for perfect 8″ × 8″ squares)
- Camel stitch border tutorial
Weaving in ends — this pattern has A LOT of ends (color changes every section!). This video will save you hours:
Crochet Chic Log Cabin Blanket || Pattern Details
Skill Level
Intermediate
Finished Measurements
Approximately 56″ (142.24 cm) × 56″ (142.24 cm) after blocking and not including border
Gauge
1 block = 8″ × 8″ in pattern after blocking. Not sure how to measure gauge? Here’s my full crochet gauge swatch tutorial →
Materials
Yarn: Red Heart® Chic Sheep by Marly Bird™ — 100% Merino Yarn (or see substitutes above)
- Green Tea A — 3 balls
- Sunset B — 2 balls
- Sterling C — 4 balls
- Creme De Mint D — 3 balls
- Platinum E — 3 balls
- Poolside F — 3 balls
- Dragon Fruit G — 4 balls
Hook: Susan Bates® I/5.5mm crochet hook, or size required for gauge
Notions:
- Tapestry / yarn needle (for seaming and weaving in ends)
- Stitch markers
- Blocking mats
- Blocking pins
- Eucalan or wool wash
Abbreviations
beg — beginning · ch — chain · ch-sp — chain space · sc — single crochet · dc — double crochet · RS — right side · sl st — slip stitch · st(s) — stitch(es) · WS — wrong side
Special Stitches
Crochet Mattress Stitch: Watch the tutorial →
Pattern Notes
Change colors on the last stitch of each row when indicated. Watch: how to change colors on the last stitch →
Block each square to 8″ × 8″ before assembly — this is not optional for this project. Consistent blocking equals a consistent grid when you go to assemble. Watch: how to block crochet →
This pattern has a LOT of ends (two per color change per square, times 49 squares). Watch the weave-in-ends video in the Video Tutorials section above before you start — it will save you so much time.
Crochet Chic Log Cabin Blanket || Layout
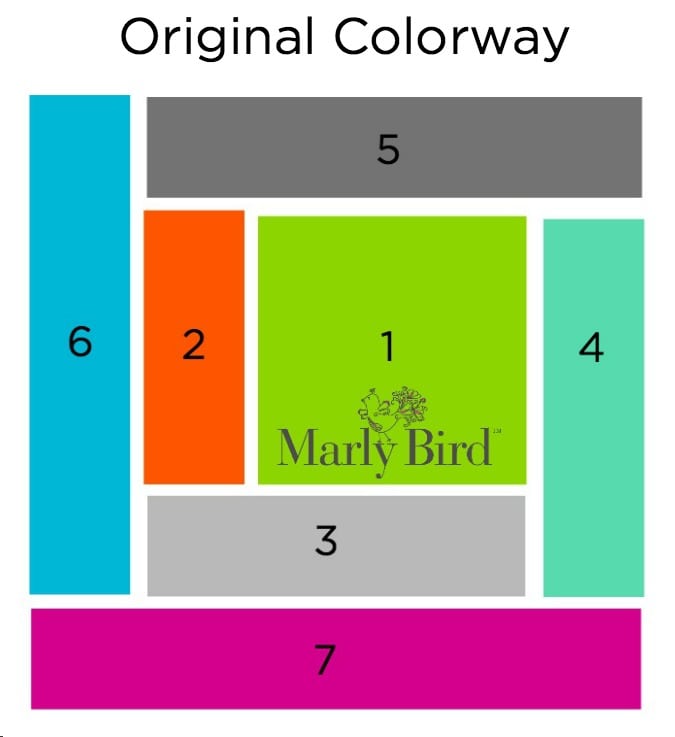
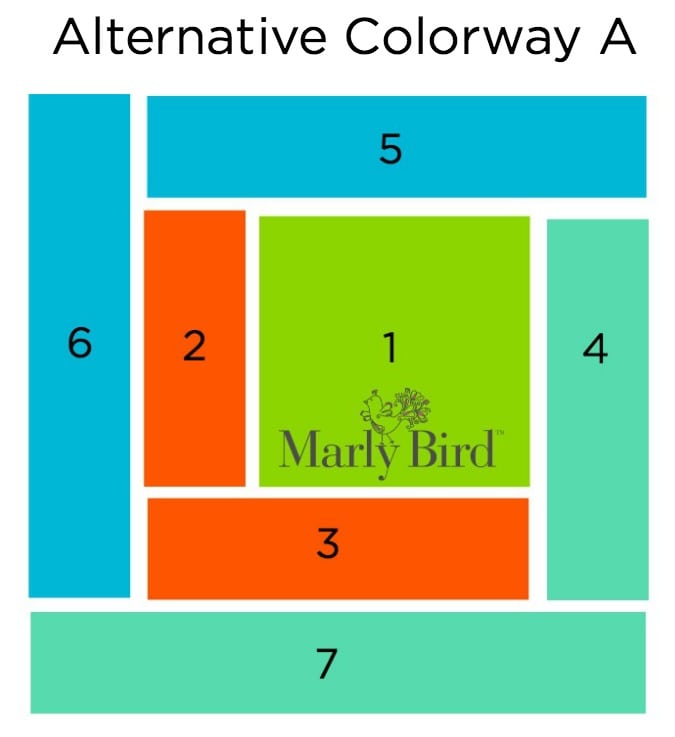
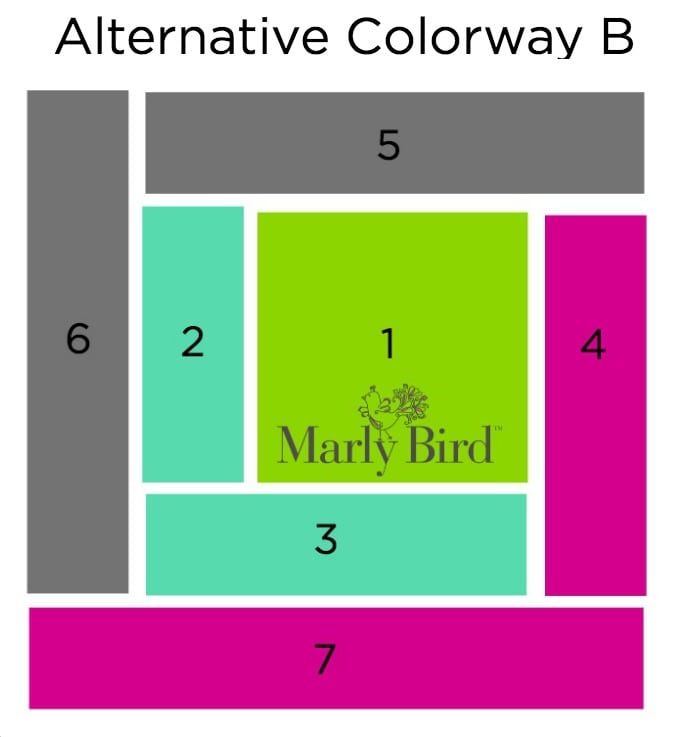
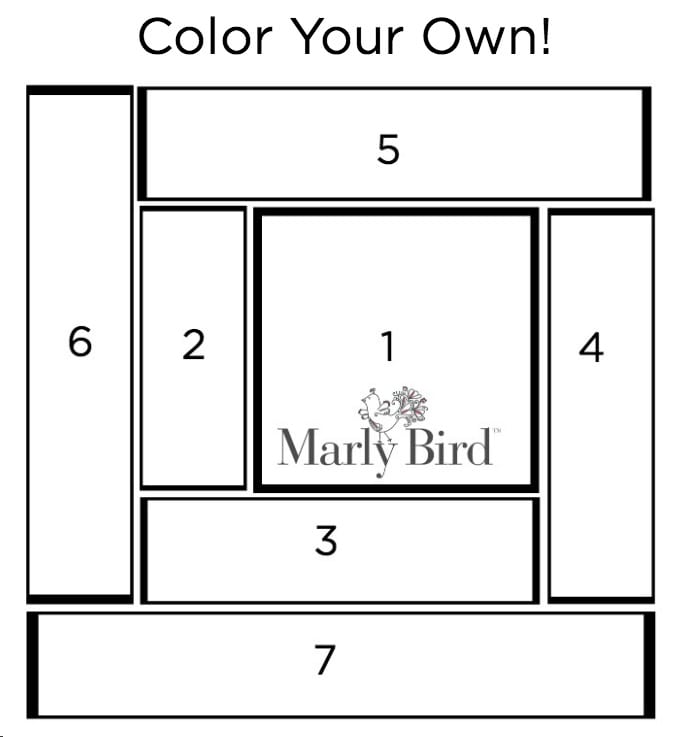
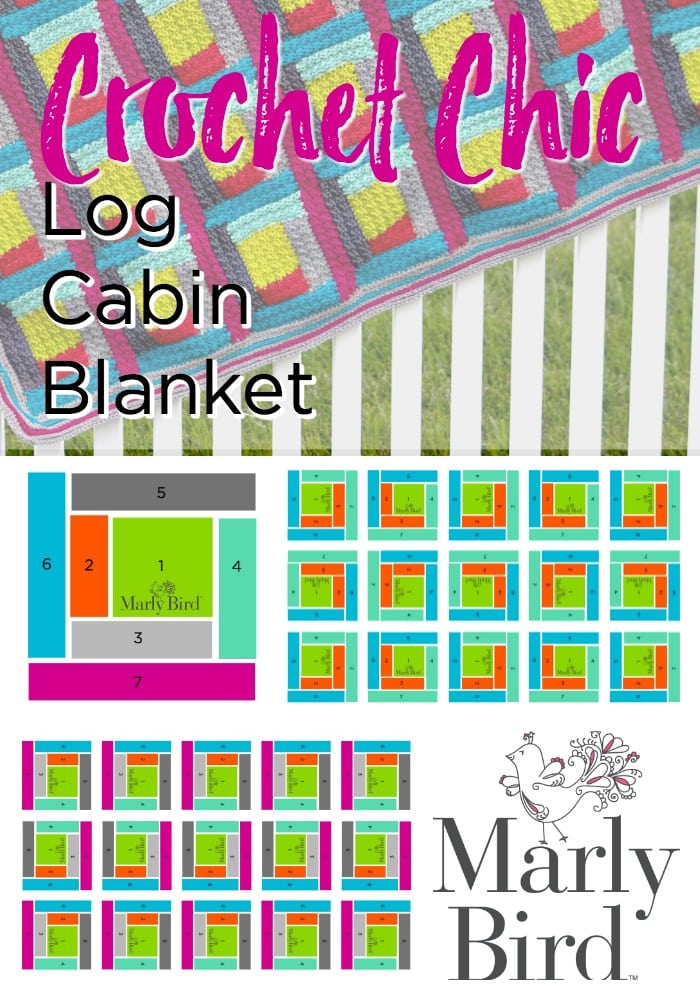
Here you’ll find the specific colors and layout for the sample blanket, plus two alternative colorways and a blank grid to plan your own. The layout chart is what creates those gorgeous diagonal lines — it’s all about which square sits where!
Individual Square Colorway Layout
Original Colorway
Alternative Colorway A
Alternative Colorway B
Color Your Own!
Crochet Chic Log Cabin Blanket || Pattern Instructions
1st — Center Square
With A, ch 12.
Row 1 (RS): Sc in 2nd ch from hook, *dc in next ch, sc in next ch; rep from * across, turn — 11 sts.
Row 2: Ch 2 (does not count as a st here and throughout), dc in first sc, *sc in next dc, dc in next sc; rep from * across, turn.
Row 3 (RS): Ch 1, sc in first dc, *dc in next sc, sc in next dc; rep from * across, turn.
Rows 4–9: Rep rows 2–3 (3 times) changing to B on the last stitch of last row.
2nd — First Rectangle
Row 1 (RS): Rotate block 90° to the right, ch 1, with RS still facing working across side edge of Center Square, work 11 sc evenly spaced across, turn.
Row 2 (WS): Ch 2, dc in first sc, *sc in next sc, dc in next sc; rep from * across, turn.
Row 3 (RS): Ch 1, sc in first dc, *dc in next sc, sc in next dc; rep from * across, turn.
Rows 4–5: Rep Rows 2–3 once, changing to C on the last stitch of last row.
3rd — Second Rectangle
Row 1 (RS): Rotate block 90° to the right, ch 1, with RS still facing working across side edge of Block, work 16 sc evenly spaced across, turn.
Row 2 (WS): Ch 2, dc in first sc, *sc in next sc, dc in next sc; rep from * across to last sc, sc in last sc, turn.
Row 3 (RS): Ch 2, dc in first sc, *sc in next dc, dc in next sc; rep from * across to last st, sc in last dc, turn.
Rows 4–5: Rep Rows 2–3 once, changing to D on the last stitch of last row.
4th — Third Rectangle
Row 1 (RS): Rotate block 90° to the right, ch 1, with RS still facing working across side edge of Block, work 21 sc evenly spaced across, turn.
Row 2 (WS): Ch 2, dc in first sc, *sc in next sc, dc in next sc; rep from * across to last sc, sc in last sc, turn.
Row 3 (RS): Ch 2, dc in first sc, *sc in next dc, dc in next sc; rep from * across to last st, sc in last dc, turn.
Rows 4–5: Rep Rows 2–3 once, changing to E on the last stitch of last row.
5th — Fourth Rectangle
Row 1 (RS): Rotate block 90° to the right, ch 1, with RS still facing working across side edge of Block, work 18 sc evenly spaced across, turn.
Row 2 (WS): Ch 2, dc in first sc, *sc in next sc, dc in next sc; rep from * across, turn.
Row 3 (RS): Ch 1, sc in first dc, *dc in next sc, sc in next dc; rep from * across, turn.
Rows 4–5: Rep Rows 2–3 once, changing to F on the last stitch of last row.
6th — Fifth Rectangle
Row 1 (RS): Rotate block 90° to the right, ch 1, with RS still facing working across side edge of Block, work 21 sc evenly spaced across, turn.
Row 2 (WS): Ch 2, dc in first sc, *sc in next sc, dc in next sc; rep from * across, turn.
Row 3 (RS): Ch 1, sc in first dc, *dc in next sc, sc in next dc; rep from * across, turn.
Rows 4–5: Rep Rows 2–3 once, changing to G on the last stitch of last row.
7th — Sixth Rectangle
Row 1 (RS): Rotate block 90° to the right, ch 1, with RS still facing working across side edge of Block, work 26 sc evenly spaced across, turn.
Row 2 (WS): Ch 2, dc in first sc, *sc in next sc, dc in next sc; rep from * across to last sc, sc in last sc, turn.
Row 3 (RS): Ch 2, dc in first sc, *sc in next dc, dc in next sc; rep from * across to last st, sc in last dc, turn.
Rows 4–5: Rep Rows 2–3 once, changing to A on the last stitch of last row.
Repeat 1st–7th sections to make 49 total squares.
Assembly
Weave in all ends (watch the video above — seriously, it’s a game-changer for this project). Wash and block all squares to 8″ × 8″.
Following the overall blanket layout of your choice, use the mattress stitch to sew blocks together in a 7×7 grid. Block the strips after joining.
Border
Color sequence for border: E, E, F, E, G, E, E
Round 1 (RS): With right side facing, ch 1, hdc evenly spaced around, working 3 hdc in each corner st or space; join with slip st in first hdc — four 3-hdc groups.
Round 2: Ch 2, camel st in each st around, working 3 camel sts in center st of each 3-hdc group; join with slip st in first camel st — four 3-camel st groups.
Rounds 3–7: Ch 2, camel st in each st around, working 3 camel sts in center st of each 3-camel st group; join with slip st in first camel st. Fasten off.
Finishing
Weave in any remaining ends.
Written pattern copyright Marly Bird Designs, a division of Yarnsports LLC © 2018, updated 2026. Please do not reprint or repost this pattern, but please do link to this page to share it with others.

More Free Crochet Blanket Patterns You’ll Love 🧵
Wildflower Hexagon Motif Crochet Blanket — Another motif-based blanket with gorgeous results! This one uses a floral hexagon for a completely different look. Perfect next project after this one.
51 Free Crochet Corner-to-Corner Patterns — If you loved building this blanket square by square, you’ll love the C2C technique too. This roundup has 51 free patterns to explore.
Free Crochet Blooming Granny Square Baby Afghan — Another free motif blanket from Marly Bird — perfect for a modern baby shower gift. Uses the same “make squares, join them” construction you just learned!

Frequently Asked Questions
What skill level is the Crochet Chic Log Cabin Blanket?
This blanket is rated Intermediate. You’ll use single crochet, double crochet, and need to feel comfortable picking up stitches along row edges and changing colors. If you’ve completed a granny square project before, you’re ready for this one!
The yarn in the original pattern is hard to find — what do I use instead?
Red Heart Chic Sheep (Marly’s own yarn collab) may be limited in availability these days. Great substitutes: Malabrigo Rios (100% superwash merino, gorgeous hand-dyed colors), Cascade 220 Superwash (worsted weight wool, hundreds of colors, machine washable), or any smooth worsted weight #4 with at least some natural fiber content. Full details in the yarn section above!
Can I make this blanket a different size?
Absolutely! The sample is a 7×7 grid (49 squares) for a 56″ × 56″ throw. Each finished block is 8″ × 8″ after blocking, so you can add or subtract squares in any direction to get your ideal size — great for a baby blanket, lap throw, or even a full bed size.
Do I really have to block every square?
Honestly, yes. I know it sounds like a lot (49 squares!), but it’s the only way to get a flat, even grid in the assembly. Crochet squares tend to pull in at the corners, and blocking fixes that. The good news: you can block multiple squares at once on a large mat. Watch the blocking tutorial in the Video Tutorials section — it makes the whole process much faster than you’d think!
How do I join the finished blocks?
Use the mattress stitch to sew the blocks together in a 7×7 grid, following your chosen layout chart. Sew into rows first, then join the rows together. Then add the camel stitch border in color sequence E, E, F, E, G, E, E — that border is what really ties the whole design together beautifully!
Final Thoughts 💛
This blanket holds such a special place in my crafty heart. It was one of the first times I took a classic quilting concept and completely reinvented it in crochet… and honestly? I think it works even BETTER in yarn. The log cabin construction is so meditative once you get in the groove — each block builds on the last in the most satisfying, rhythmic way.
And that moment when you lay all 49 finished squares out on the floor to check your layout before seaming? Pure magic. The diagonal lines appear like they were always meant to be there. You built that. With your hands. Out of string. I love this craft so much.
If you make this blanket, please please please share it with me! Tag me @marlybird on Instagram or Facebook and use #MMMDI (Marly Made Me Do It), #MarlyBird, and #ChicLogCabinBlanket so I can see your beautiful work. 💛
❤️ Your BiCrafty Bestie,
Marly Bird