Cables are not JUST for Knitters: (BiCrafty Bootcamp: Beginner Crochet Lessons for Knitters: Lesson 10)
Whether you’re a master cabler in knitting, or just a wannabe cabler, no one can deny the beauty of a cable. The dimension and texture a cable adds to any project, whether it be a hat, sweater, or scarf like we’ll be making this week, the cable screams sophistication!
And you may think that cables are exclusive to knit projects, but you’d be wrong! Over there years there have been many different crochet techniques to achieve the same effect as the knitted cable, and we will chat about that this week!
Refreshing Our Memories
Just another reminder that you can access the main BiCrafty Bootcamp Crochet page any time to see links to all of the lessons and videos. We’ve also shared the MATERIALS LIST for part two of bootcamp, so you should go order your yarn now if you haven’t done so already!
This Week’s Materials
Today we’re jumping in to our next project and for this we are using Swish Worsted and an H (5 mm) or I (5.5 mm) hook or size to obtain gauge.
Crochet Cables
Similar to knitting, the basic foundation of a crochet cable is the same concept. Skipping stitches and coming back to them later. But unlike knitting, you’re not having live stitches you need to account for, since – as we’ve chatted about before – you bind off every crochet stitch, essentially, at the time it is made. The key to basic crochet cables is really, a simple post stitch. Front post double crochet (FPDC) and Back post double crochet (BPDC) are the building blocks of a cable stitch.
Here are some helpful tutorials I’ve done in the past to help you master these stitches!
How to use cable crochet stitches to create fabric
Typically, it is done by skipping a certain amount of stitches, creating post stitches, and then working either in front or behind your post stitches back into the stitches you skipped! Don’t worry, I’ll show you exactly what to do in this week’s Bootcamp video!
Things to keep in mind when working crochet cables
- Generally creates thick fabric
- Uses a LOT of yarn
- Can appear to have holes behind the cable (due to skipped stitches)
- A bigger hook than what a yarn calls for can help with a cable fabric getting too tight
- Keep thes stitch tidy, don’t allow the loops to stretch too much when creating the post stitches
BiCrafty Bootcamp Lesson 10 Crochet Video
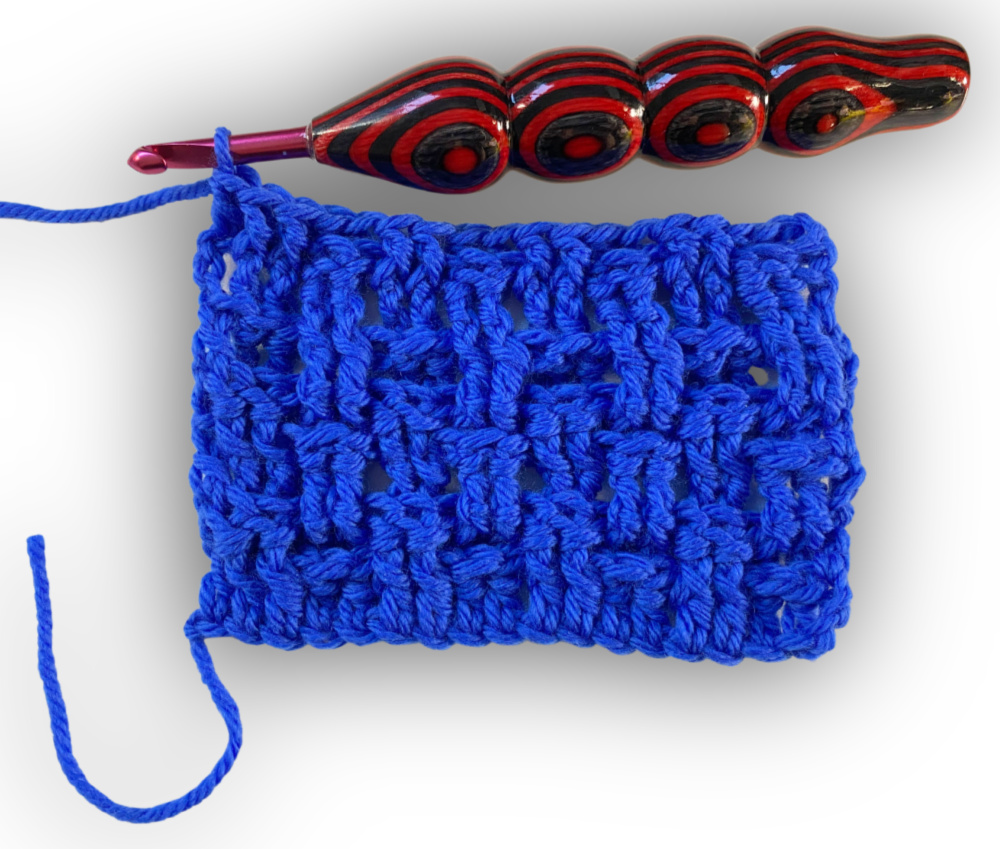
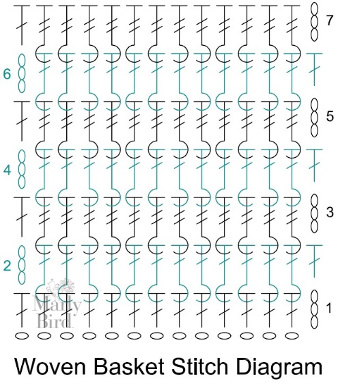
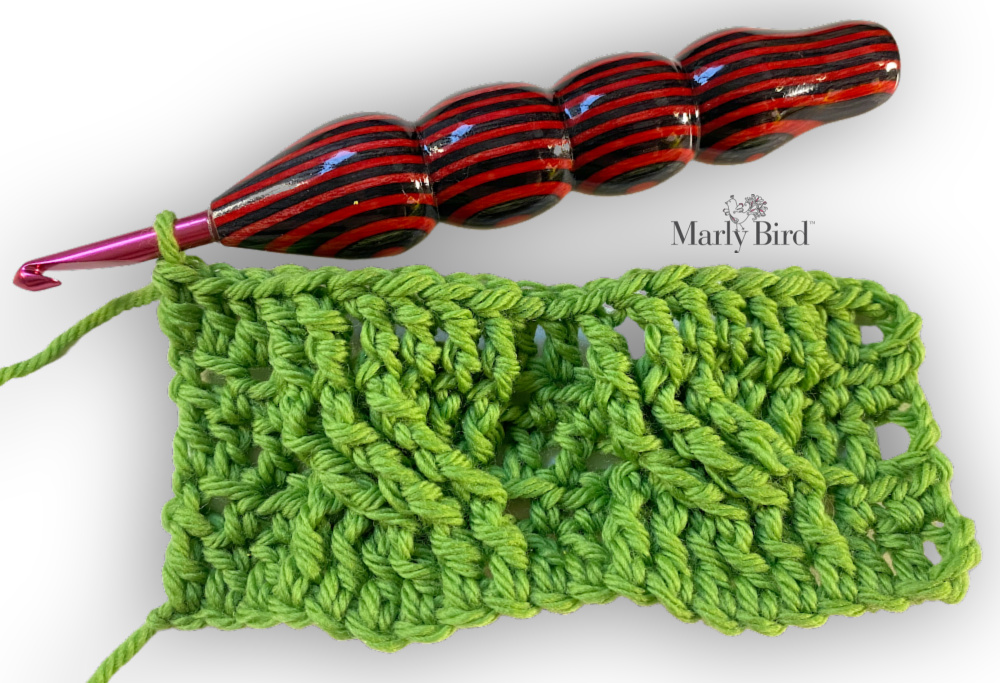
Woven Basket Crochet Cables Stitch Pattern
Ch multiple of 4
Row 1: Dc in 4th ch from hk, dc in each ch to end, turn.
Row 2: Ch 3 (counts as dc throughout), *bpdc around next 2 sts, fpdc around next 2 sts; repeat from * across, dc in top of tch, turn.
Row 3: Ch 3, *fptr around next 2 sts, bptr around next 2 sts; repeat from * across, dc in top of tch, turn.
Repeat Rows 2-3 to desired length.
Traditional Crochet Cables
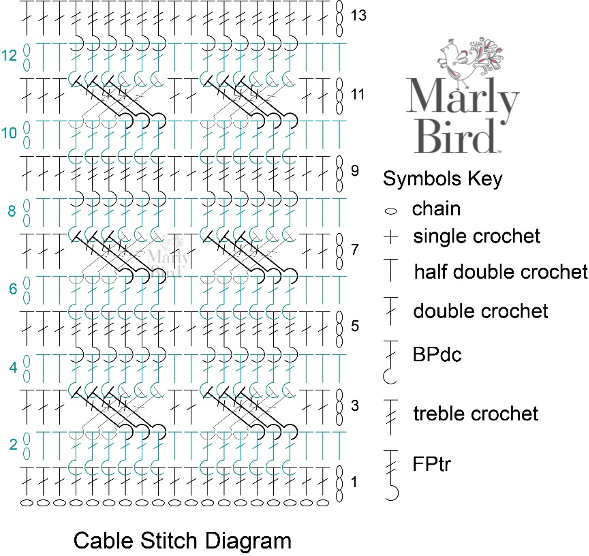
Ch 22
Row 1: Dc in 4th ch from hk, dc in each ch to end, turn — 20 dc
Row 2: Ch 2 (counts as hdc throughout), hdc in next 2 sts, *BPdc around next 6 sts, hdc in next 2 sts; repeat from * across to tch, hdc in top of tch, turn.
Row 3: Ch 3 (counts as dc throughout), dc in next 2 hdc, *skip 3 dc, FPtr around next 3 dc, FPtr around previous 3 skipped dc (work in front of sts just made), dc in next 2 hdc; repeat from * across to tch, dc in top of tch, turn.
Rows 4: Repeat Row 2
Row 5: Ch 3, dc in next 2 hdc, *FPtr around next 6 dc, dc in next 2 hdc; repeat from * across to tch, dc in top of tch, turn.
Repeat Rows 2-5 to desired length.
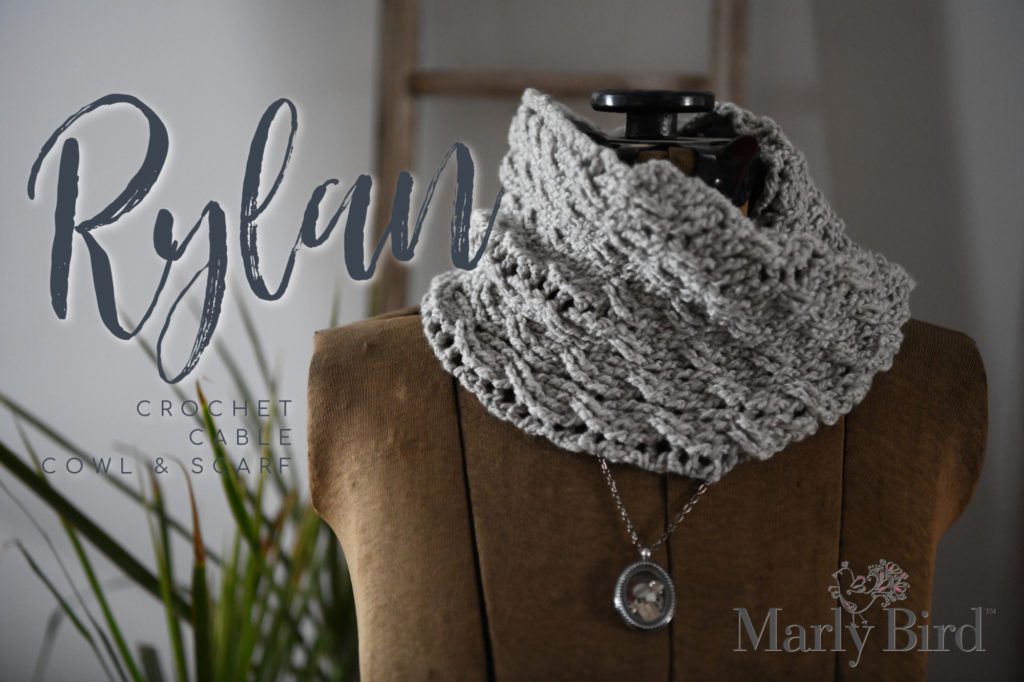
Homework is the Rylan Crochet Cable Cowl & Scarf Pattern.
Follow along with the instructions and make this stunning neck accessory!
Categories: BiCrafty Bootcamp Learn to Crochet, Crochet, Our Free Patterns, Pattern, Uncategorized

