Blooming Granny Square
Let’s make the Blooming Granny Square Square! You are nearing the finish line, way to go! This square combines All The Colors! It is the focal point to the entire blanket. This is the ninth and final block in the Crochet Stitch Sampler Baby Blanket CAL Sponsored by Red Heart Yarns and hosted by Marly Bird.
You can click here for the first square, here for the second square, here for the third square, here for the fourth square, here for the fifth square, here for the sixth square, here for the seventh square, here for the eighth square.
Where is the Full Pattern?
During the Crochet-along (CAL) you will be able to get the written and chart instructions as well as the HD Video tutorial for the next step in the Crochet Stitch Sampler Blanket every Tuesday and Thursday. The full pattern will not be posted until the end of the CAL.
GET FULL CAL DETAILS HERE
Get a little help from your friends!
Follow along and complete each step with my help as well as the wonderful group of other Marly Bird CAL members in the Facebook Group. In the group you can post pictures, ask questions and get general crochet support.
I’m ready! Let’s get this party started!
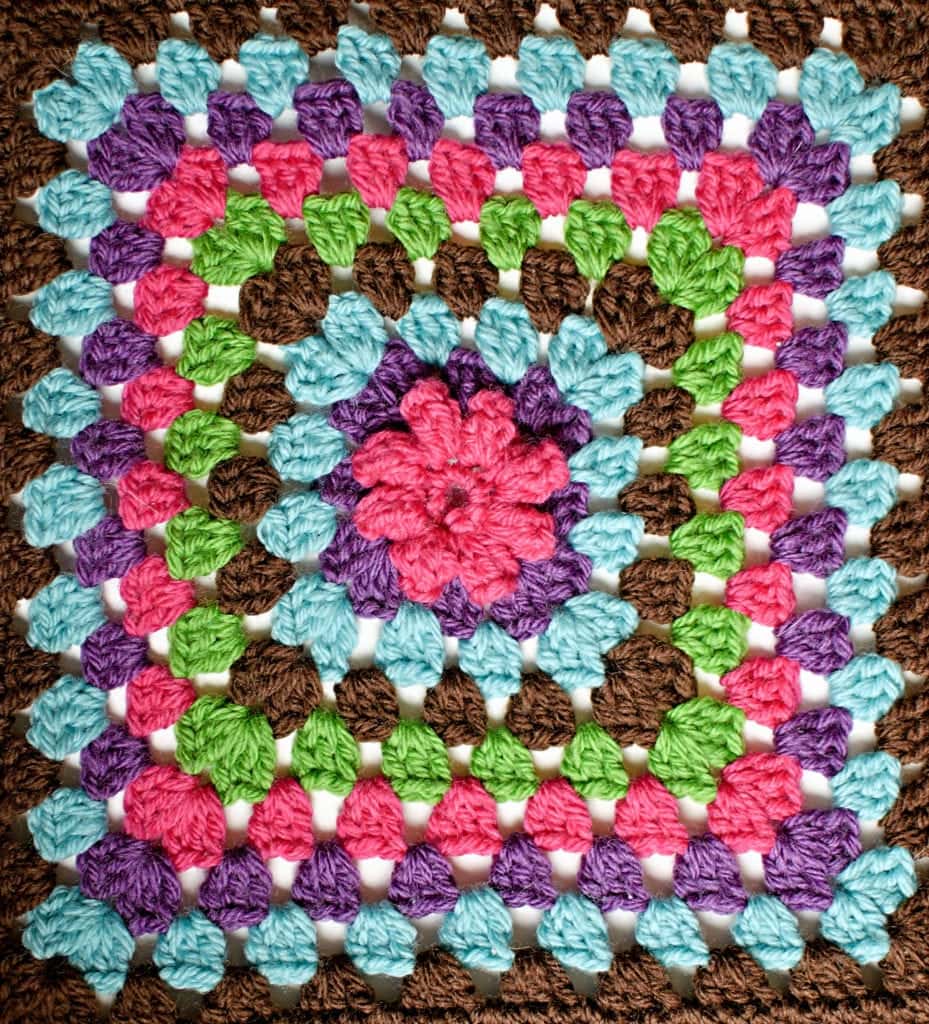
I chose the Blooming Granny Square for this blanket because it looks AWESOME and will be a GREAT center focal point to the blanket! The Granny Stitch is a quintessential crochet stitch and I wanted to have something like that in the blanket…with a twist! This square is called the Blooming Granny Square because it has a flower at the center. Cool, huh?
I did use EVERY color in this square, including the main color (in the sample that is brown). Once again, noticing that baby toys and such tend to be really bright colors I thought adding this really visually appealing stitch was just PERFECT for this baby blanket. This pattern teaches you about working in the round (all the other blocks have been back and forth squares) I talk about that in the video 🙂
Click on the stitch below If you need a quick refresher on how to do it.
CROCHET STITCH SAMPLER BABY BLANKET
Add this pattern to your Ravelry Queue and Favorites
Materials
Yarn: Red Heart, “With Love” (100% Acrylic; 315 yds/170g): 1 skein of 4 different complementary colors and 2 skeins of main color.
Designer NOTE: Original was made with a discontinued yarn–STITCH NATION by Debbie Stoller™ “Washable Ewe™”: [for sample size blanket] 2 balls each 3903 Strawberry, 3540 Currant, 3501 Robin Egg, 3652 Clover; 3 balls each 3365 Earth.
Hooks: you will need a variety of different sized hooks for this blanket. Use the hook size that will get you the desired square size. Some squares will require a smaller hook and others a larger hook depending on the stitch pattern. For the sample I used G/7 and H/8.
Notions: Stitch markers, tapestry needle
Gauge
Each Full Size Square: 11” x 11″ [27.94 X 27.94 cm]
Each stitch count given for the full square will result in approximately the same size square as long as you adjust hook size when necessary. YOU decide how large you want your squares to be. Once you choose the size for your blanket just make sure that each square will measure that.
Designer NOTE: To make sure each square I made was the same size, I washed and blocked each square as I made it. Doing so made it so I knew right away if my stitches were too tight or too loose.
Abbreviations
This is the full list of abbreviations used for all the patterns. I will be sure to add this to each pattern so you don’t have to go searching for it as your working on the square.
beg – begin(ning)
bpdc – back post double crochet
ch – chain
dc – double crochet
fpdc – front post double crochet
hdc – half double crochet
rep – repeat
rnd – round
RS – right side
sc – single crochet
sk – skip
sl st – slip stitch
sp – space
st – stitch
tch – turning chain
tr – treble crochet
WS – wrong side
yo – yarn over
Special Stitches
Popcorn: 5 dc in indicated st or sp, remove hook being careful not to unravel last loop, insert hook in 1st of 5 dc just made, pick up dropped loop and draw it through, ch 1.
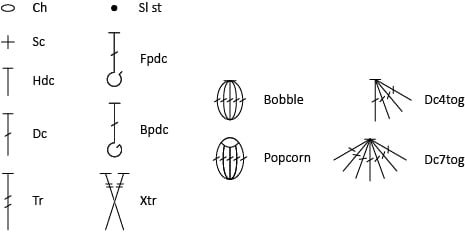
Symbol Key for Crochet Charts
This is the symbol key for all the charts used for all the patterns. I will be sure to add this to each pattern so you don’t have to go searching for it as your working on the square.
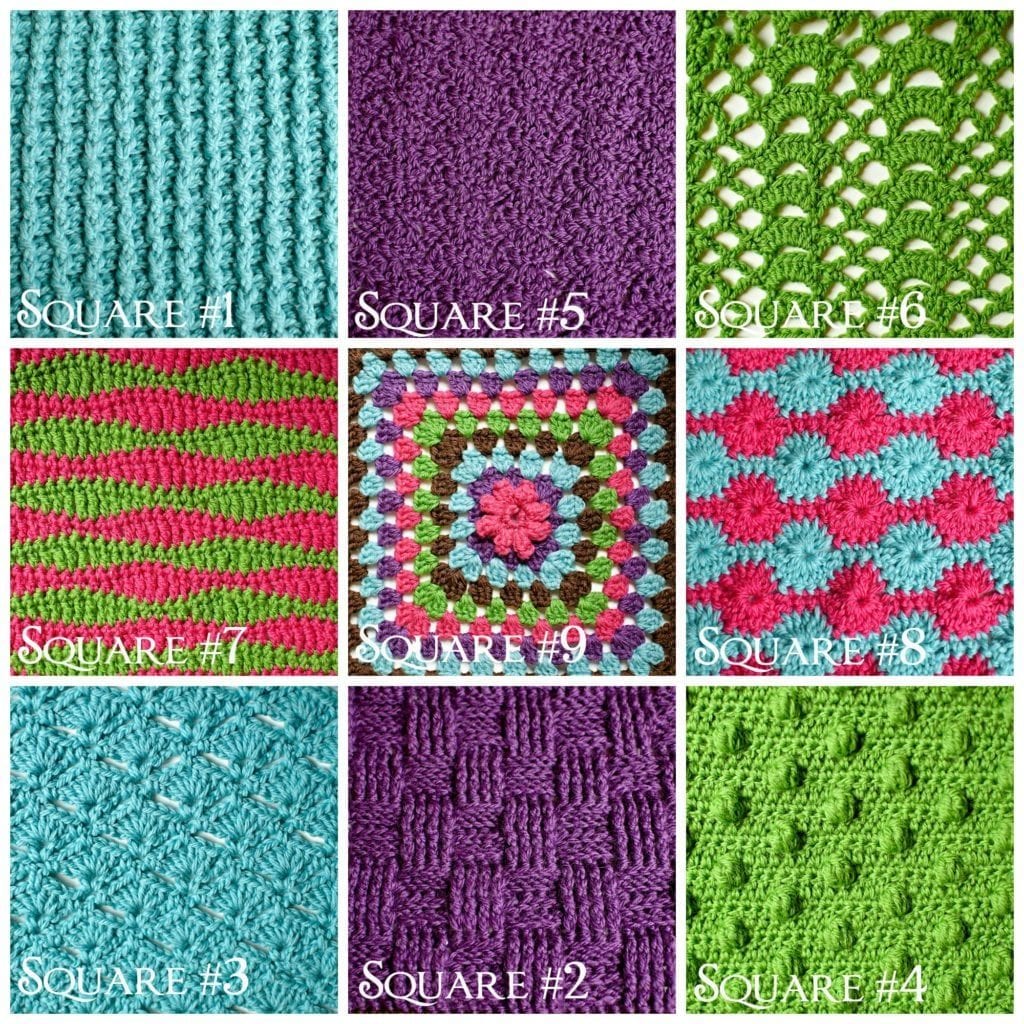
Layout
Here is the layout of the sample blanket incase you want to follow along with the same placement and color sequence. It should help you in choosing when to use a particular color for your blanket as well. But please remember, you can mix and match any way you wish; you _do not_ have to use my same layout!
Pattern
Blooming Granny Square (EVERY COLOR in sample):
Using all the colors.
For all the patterns up to this point, if you want to use this pattern stitch for another pattern you needed to know how many chains are used for the foundation. For the Blooming Granny Square–you make this in the round so you simple adjust the number of rounds you work to adjust the size.
In class block: There is no in class block for this pattern.
Full size block: Using A, ch 4, and sl st in 1st ch to form a ring.
Rnd 1: Ch 1, 8 sc in ring, sl st in beg sc to connect.
Rnd 2 (popcorn rnd): Ch 3 (counts as 1 dc), 4 dc in 1st sc, remove hook being careful not to unravel last loop, insert hook in 3rd of of beg ch 3, pick up dropped loop and draw it through, ch 1 (1 popcorn made), ch 1, * popcorn in next sc, ch 1; rep from * 6 more times, (8 popcorns made), sl st in top of beg popcorn to connect, fasten off A.
Rnd 3: Join B in any 1-ch sp, ch 3 (counts as 1 dc) 2 dc in same sp (half corner made), * ch 1, 3 dc in next 1-ch sp, ch 1, [3 dc, ch 1, 3 dc] next ch-1 sp (corner made), rep from * twice more, ch 1, 3 dc in next 1-ch sp, ch 1, 3 dc in same sp as beg half corner, ch 1, sl st in 3rd of beg ch 3 to connect (beg corner completed), fasten off B.
Rnd 4: Join C in any corner sp, ch 3 (counts as 1 dc), 2 dc in same sp (half corner made), * [ch 1, 3 dc in next 1-ch sp] to corner sp, ch 1, [3 dc, ch 1, 3 dc] in corner sp, rep from * twice more, [ch 1, 3 dc in next 1-ch sp] to corner sp, ch 1, 3 dc in same sp as beg half corner, ch 1, sl st in 3rd of beg ch 3 to connect (beg corner completed), fasten off C.
Rep rnd 4 only, changing colors at beg of each rnd until square is to the size you desire. This square should match up to be the same size as all the other squares.
Designer NOTE: Are you have a little trouble? Check out the HD Video and let me help.
Chart
Blooming Granny Square Chart
For this chart you will notice there are only 4 rounds shown. To continue the pattern you will repeat round 4 placing 3 dc in each ch-1 space along the sides and placing (3 dc, ch 1, 3 dc) in the ch-1 at the corners 🙂
HD Video Tutorial
Please SMASH THAT LIKE BUTTON on the video when you watch it 😉
Homework
Learn this stitch pattern either with the full size block. Once you feel like you have it, make your square for the blanket and get ready for the next part. NOTE: in an effort to let everybody get caught up and ready there will NOT be a video released on Thursday this week. We will renew the schedule on Tuesday next week with WET blocking vs STEAM blocking! WaHOO!
Don’t forget, if you have questions or need help we are here to help you. Well, not here but over in the facebook group dedicated to the Marly Bird CAL sponsored by Red Heart Yarns. Come and join us!
Next part: Preparing for joining– Video on wet blocking vs steam blocking acrylic
Categories: Crochet, Make-Alongs, Pattern, Uncategorized, YouTube Video Tutorial

