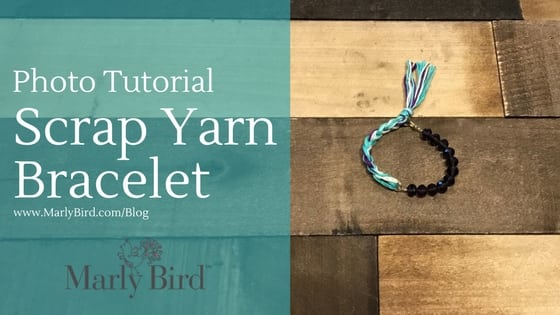
DIY Scrap Yarn Bracelet
With Mother's Day right around the corner I have been thinking about ways to use our yarn stash to make beautiful gifts. Although I had Mother's Day in mind for this one, really it could be for yourself or for any gifting occasion that you have. I have put Katelyn to the task of coming up with an easy jewelry project that we could make with our yarn. In this photo tutorial she will show you how to make a simple DIY scrap yarn bracelet. Dive deep into your stash and get started on your own bracelet!
*This post contains affiliate links. By clicking on one of these links and making a purchase a portion will go to the blog. The price you pay will not change and the small commission I receive helps me to keep brining you free content and giveaways on the blog. Thank you for your continued support.*
Beading and Yarn
Two of my hobbies are working with yarn (knitting and crocheting) and jewelry making. Although in this season of my life my free time is limited I still enjoy getting to work with my hands to make something beautiful. Each year I try to make something new for my mom for Mother's Day. This year I thought that I would make her some jewelry.
I started by looking at some things on Pinterest and what I had in my ever growing stash and put together an idea. If you are like me I hate throwing away perfectly good scraps of yarn in fear that I will find the perfect project to use it up or my kids could use it for a project (ironically my son just asked me for some yarn to play with to make a rope-case and point). Noticing that I had a small stash of light weight yarn I thought that I could do something with it. Since I liked how the project turned out I thought that I could share it with all of you so that you could make one for yourself. Hope you enjoy.
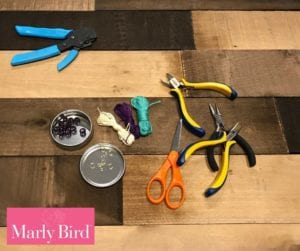
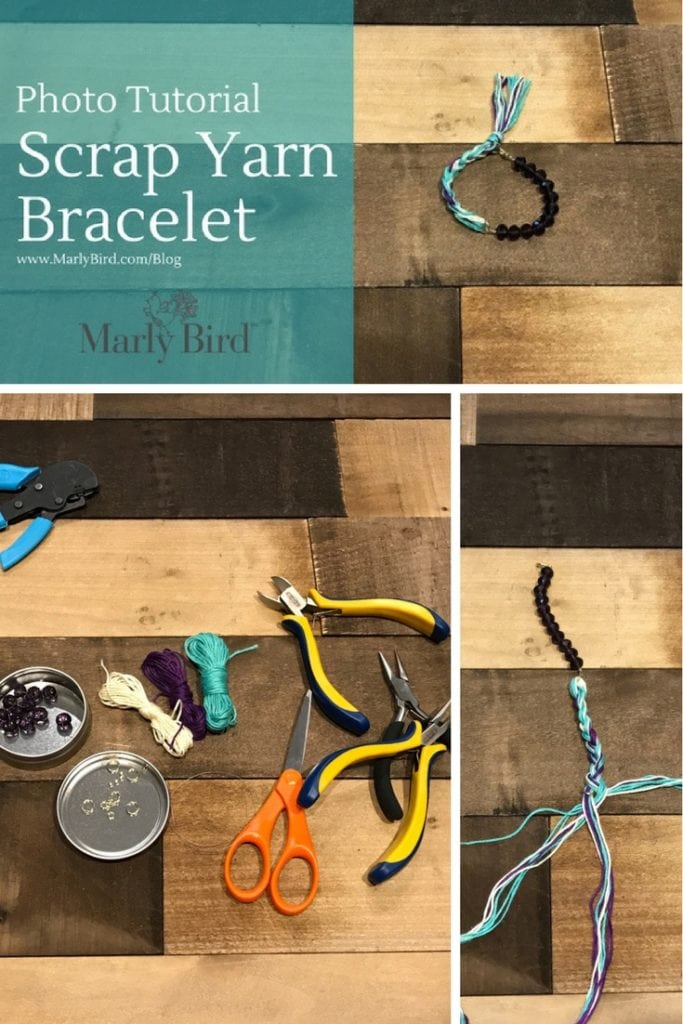
Scrap Yarn Bracelet Materials
- Scrap yarn (weight #1 or weight #2 works best)-For this project I used three colors-3 30″ strands of Purple, 3 30″ strands of White, 12 30″ strands of teal
- 2 10mm jump rings
- 2 crimp tubes (sized to match beading wire)
- 10″ of 49 strand beading wire
- 12 10mm crystal beads (or any size and beads of choice)
- Scissors
- Crimpers
- Wire Cutters
- Needle nose pliers (I prefer to use 2)
- Clasp of choice (I am using a lobster clasp)
DIY Jewelry Making Basics
Before we get started I want to talk a little bit about DIY jewelry making. If you are new to jewelry making please don't be hesitant, join us in the journey of making this simple bracelet. Although I will tell you to use a crimping pliers to work some of the joins, just using a plain pliers will suffice if you don't have all of the tools that you need.
When shopping for your materials there are a few things that you should consider. First the beading wire. There are two types of wire that you will find in the jewelry section of your local craft store. You will find hard wire, used for wire wrapping or making your own findings, and beading wire, which is more like string but made up of multiple strands of wire inside. To select the wire that you want to use think about the size hole the beads have that you will be using. The wire should fill the hole of the bead without being overly snug. On the front of the packaging you will find a number which is telling you how many strands are inside the wire. Higher numbers mean that the wire will be more flexible. I prefer to use a 49 strand wire but for this project you can use almost any size.
Next let's talk about crimp tubes. Crimp tubes come in different sizes and colors. If you take a look on the back of your wire packaging you will see the recommended crimp size. Be sure to get a crimp tube that is the right size or it will be too big (wires will slip out) or two small (you won't be able to get two wires through) for your project.
For the other supplies that you will need you will have some options. The beads you choose can be larger or small than I am suggesting. Find the right balance for what you want. If you want something beefier use larger beads or if you want something more delicate use smaller beads. At your local craft store you will have the option of using glass beads, wood beads, plastic beads, metal beads. Again, this is your choice for your bracelet. Whatever speaks to you is right.
Pliers can be an investment. I am not suggesting that you go out and get the most expensive pliers, I do recommend if this is something that you are going to do in the future that you don't get the cheapest ones. If you enjoy this project you could also try your hand at making your own stitch markers. (Marly has a great video tutorial on how to make knitting stitch markers and removable stitch markers)
Make Your Own Scrap Yarn Bracelet
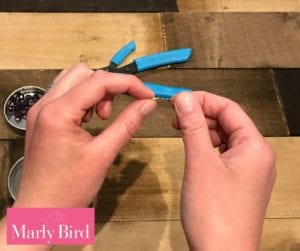
To get started we will work on the beaded section. First take your 10″ piece of beading wire and thread on one crimp tube and your clasp. You will then feed that end of the wire back through the crimp. This will secure the clasp in a loop. Now you will need to crimp the tube in place. To do this you can use your crimping pliers (refer to the directions on the package) or smash the crimp tube in your regular pliers. I recommend that you get crimping pliers as it will be a more secure finishing and less risky of your project coming apart.
Once you have your clasp secured to the end you can start to string your beads. I suggest that the first two beads should go over the ‘tail' that was left over when you crimped. After covering that tail with about 2 beads you can cut the rest of it. This just helps you from loosing the wire from the crimp if you didn't get it just right since you aren't cutting the end snug to the crimp. The beaded section should be half of the length of the bracelet you want to make.

After stringing all of your beads you will repeat the crimping process on the other end of the beading wire. This time rather than having a clasp you will use your jump ring. Use your chain nose pliers to make sure the jump ring is closed securely. Do not open the jump ring by pulling it open, you want to twist it front and back. If you pull it open you will never be able to get the perfect circle shape again.
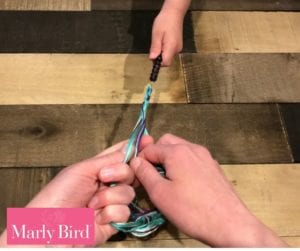
Now that your beaded section is finished you will move on to the yarn section. To start you will need to have all of your pieced cut. Feed one end of the yarn through the jump ring placing it in the middle of the yarn. Fold the yarn in half and divide them into three sections.
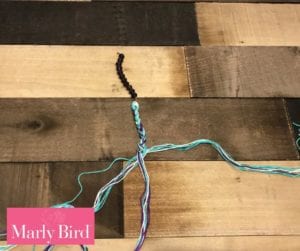
Using your three sections you will complete a simple braid. Once you have the other half of your bracelet braided you will add your second jump ring and tie and knot at the end of the braid. This jump ring will be used to connect to the clasp and finish your bracelet.
Want More Beads and Crochet or Beads and Knitting?
Then it is time you check out the MarlyBirdHouse.com!
Frequently Asked Questions
What is a scrap yarn bracelet?
A scrap yarn bracelet is exactly what it sounds like… a bracelet made from leftover yarn scraps that would otherwise just sit in your stash or be discarded. By braiding, wrapping, knotting, or crocheting tiny amounts of yarn around a base, you create wearable jewelry from what most people would consider craft waste. It's the ultimate zero-waste crafting accessory and a wonderful way to keep the memory of past yarn projects literally on your wrist… that bracelet includes bits from the sweater you made for your daughter, the baby blanket for your niece, and the socks you knit for yourself.
What yarn scraps work best for bracelets?
Any smooth yarn works! Wool, cotton, acrylic, silk blends… the texture and fiber content just affect the look and feel. Finer yarns (fingering, DK) create more delicate, stackable bracelets. Bulkier yarn creates chunkier statement pieces. The fun is in mixing colors and textures from different projects… a single bracelet can feature 10 different yarns from 10 different projects and look intentionally beautiful rather than random. Avoid very thick bulky yarn that makes the bracelet awkward to wear comfortably on a wrist.
Do I need any special tools or materials to make a yarn bracelet?
Minimal! Scissors. A tapestry needle for weaving in ends. Potentially a closure mechanism… a button you crochet a loop around, a hook-and-eye, a lobster clasp sewn to the end, or just a slipknot tie closure. Some yarn bracelets simply tie on and can be left on. For a more polished look, a simple button loop closure is both functional and decorative. The basic braided version needs nothing but yarn, scissors, and your hands. Very beginner friendly… no crochet or knitting skills required for the simplest versions.
How do I make sure a yarn bracelet is durable enough to wear regularly?
A few durability factors! Choose smoother, harder-wearing fibers for the outer layer… wool and cotton hold up better than very soft cashmere or silk for a bracelet that might get wet and takes daily wear. Secure all ends very firmly. Finishing options that help: clear nail polish on knots and ends, a thin layer of fabric glue on finished braids before drying, or metallic thread woven through for extra strength. And be realistic about wear expectations… delicate yarn bracelets are for occasional wear, while cotton or mixed fiber bracelets can handle daily use.
Can yarn bracelets be given as gifts?
They make incredibly thoughtful, personal gifts! A bracelet made from scraps of yarn from meaningful projects… the yarn from a sweater you knitted for that person, or from a shared project you worked on together… has a story built into it. Tell the recipient what's in the bracelet when you give it. “This blue is from the blanket I made when you had your baby, this red is from the mittens we made together last winter…” It becomes a wearable memory collection rather than just a piece of jewelry. That narrative makes it genuinely irreplaceable.