BiCrafty Bootcamp: Triple Threat Tunisian Crochet for Beginners – Lesson One
When I hired Cryssi and Kathryn, both of them mentioned they couldn’t knit. Being who I am, I insisted they learn! And Cryssi and Kathryn decided it would be great for all the other crocheters to join them in learning, and so, BiCrafty Bootcamp: Beginner Knitting Lessons for Crocheters was born. We had NO IDEA the amazing turnout we would have and how adamant our knitters would be for their own version! So, shortly after our knitting series ended, BiCrafty Bootcamp: Beginner Crochet Lessons for Knitters kicked off! But what about Tunisian Crochet, you say?
It’s OK – there’s MORE!
Now that there are more than 1,500 of you who have become bicrafty as a result of these bootcamps, we want to bring you the next notch in your belt – Tunisian crochet! It is no secret that Tunisian crochet has become quite the hot topic in recent years, and Robyn and I have been working over the last year to formulate a Tunisian Bootcamp for beginners that would be concise and challenging but not overwhelming to you. We have finally honed in the details on that and are excited to kick things off Wednesday, September 28, 2022! We will share all of the details LIVE on the Marly Bird YouTube channel at 1pm EST. Be sure to subscribe so you get notifications when I go live!
*THIS POST CONTAINS AFFILIATE LINKS. BY CLICKING ONE OF THESE LINKS AND MAKING A PURCHASE A SMALL PORTION COMES BACK TO THE BLOG. THE PRICE YOU PAY WILL NOT CHANGE. THANK YOU FOR YOUR SUPPORT OF THE BLOG.*
Who is Robyn Chachula aka Tunisian Crochet Expert
By now, you’re no stranger to Robyn. We have been working hand-in-hand for the last few years to bring you the best make-along experiences. Most recently, you would have seen her working with me on Camp Colorwork, an immersive learning experience geared toward incorporating different colorwork techniques in your knitting and crochet projects. You can check that out to get an example of Robyn’s teaching!

And, if you’ve been around for any length of time, you know my commitment to ensuring that you’re receiving the best instruction. Robyn has been designing since 2003 and teaches 10+ different workshops on Tunisian Crochet. I knew she would be the right person to lead this Bootcamp and I am so excited for you to get to learn from an expert!
Here is one of her books that has crochet stitches and tunisian crochet stitches: https://amzn.to/3SnOuNQ
Other books of Robyn’s you can purchase that include Tunisian are: Vintage Modern Crochet and Unexpected Afghans.
What Is Tunisian Crochet?
Tunisian Crochet (also known as Afghan Crochet) was a term many believe was started by the French. The earliest images of Tunisian crochet appeared in crochet publications in the 1800s, but was made more popular in the 1930s when Queen Victoria practiced Tunisian crochet. It has never had more of a wide known popularity than in recent years, however.
Essentially, Tunisian is a cross between crochet and knitting. Similar to crochet In that you work mostly with chains, single, and double crochet stitches with a hook, but similar to knitting in that you’re not binding off each stitch as you would in crochet, but rather leaving your stitches live.
Tunisian crochet creates a very unique fabric that is ideal for blankets, throws, and wearables.
Tunisian Crochet for Beginners Video Lesson One
Full Materials List for All Projects in BiCrafty Bootcamp: Triple Threat Tunisian
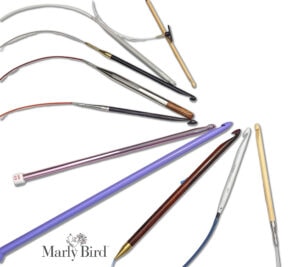
What Are Tunisian Crochet Hooks?
A Tunisian crochet hook has a crochet hook on one end, a long shaft (sometimes a cord), and a stopper of some sort on the other end to keep your stitches from falling off the hook. As with all fiber tools, there are a variety of hooks you can purchase for Tunisian, and I’ll talk about some of my favorites below. Most important, however is:
- Ensuring you have a hook long enough to hold all the stitches required for the width of your project.
- Ensuring that the yarn slides easily on the hook.
- The material is light weight enough to not add extra weight to your wrists. We personally love bamboo, but light wood or plastic can work as well.
Tunisian Cord/ Tunisian Cable Hooks
⭐️The key to Tunisian Hooks with cords is making sure the cable can swivel⭐️. When crocheting you will need to twist your hook quite a bit and if the cable can swivel it will save your hands a lot of extra stress. Here are two of our favorite sets:
➸ ChiaoGoo T-Spin Tunisian Interchangeable Set with Swivel Cords (swivel cords are purchased separately) ➸ ChiaoGoo SWIV 360 cord (this is an extra purchase but WORTH IT): http://shrsl.com/3q1kd
➸ Clover Interchangeable Takumi Tunisian Crochet Set
➸ Knitter’s Pride Dreamz (note, they do not have swivel cords)
➸ My Two Ladies Tunisian Hooks
????If you are only buying one hook to try, the recommended size is a K/10.5 or 6.5mm hook as it works with a worsted weight yarn really well. You want to use a hook size that is two to three sizes larger than the recommended size written on the ball band.
Common Tunisian Crochet Abbreviations
Ch Chain: Yo and pull through loop on hook.
Sl st Slip Stitch: Insert hook into st indicated, yo and pull up loop through stitch and loop on hook
“Work Loops off as normal” Yo, pull through 1 loop on hook, *yo, pull through 2 loops on hook; repeat from * to end.
Yo Yarn Over
St(s) Stitch(es)
Tunisian Crochet Foundation Stitches
Foundation Slip Stitch
First Stitch: Ch 1, insert hook into back ridge of chain, yarn over and pull up loop (2 loops on hook), yarn over and draw through 1 loop on hook (creates chain), draw through next loop on hook (creates slip stitch).
Next Stitch: Insert hook into chain just created (vertical bar furthest from hook), yarn over and pull up a loop (2 loops on hook), yarn over and draw through both loops on hook (first loop creates chain, second creates slip stitch)
How to do Tunisian Simple Stitch (TSS)
Insert hook, from right to left, into front vertical bar of next stitch, yarn over and pull up a loop.
Ch any number of sts.
Row 1 (RS) Fwd: Pull up loop in 2nd ch from hook and each ch across. Rtn: Yo, pull through 1 loop on hook, *yo, pull through 2 loops on hook; repeat from * to end.
Row 2 Fwd: (Loop on hook counts as 1st st.) Tss across row. Rtn: Yo, pull through 1 loop on hook, *yo, pull through 2 loops on hook; repeat from * to end.
Repeat row 2 to desired length.
Last row: *Tss in next st and pull through loop on hook; repeat from * to end, fasten off.
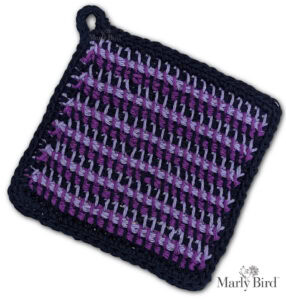
My First Tunisian Crochet Potholder Pattern
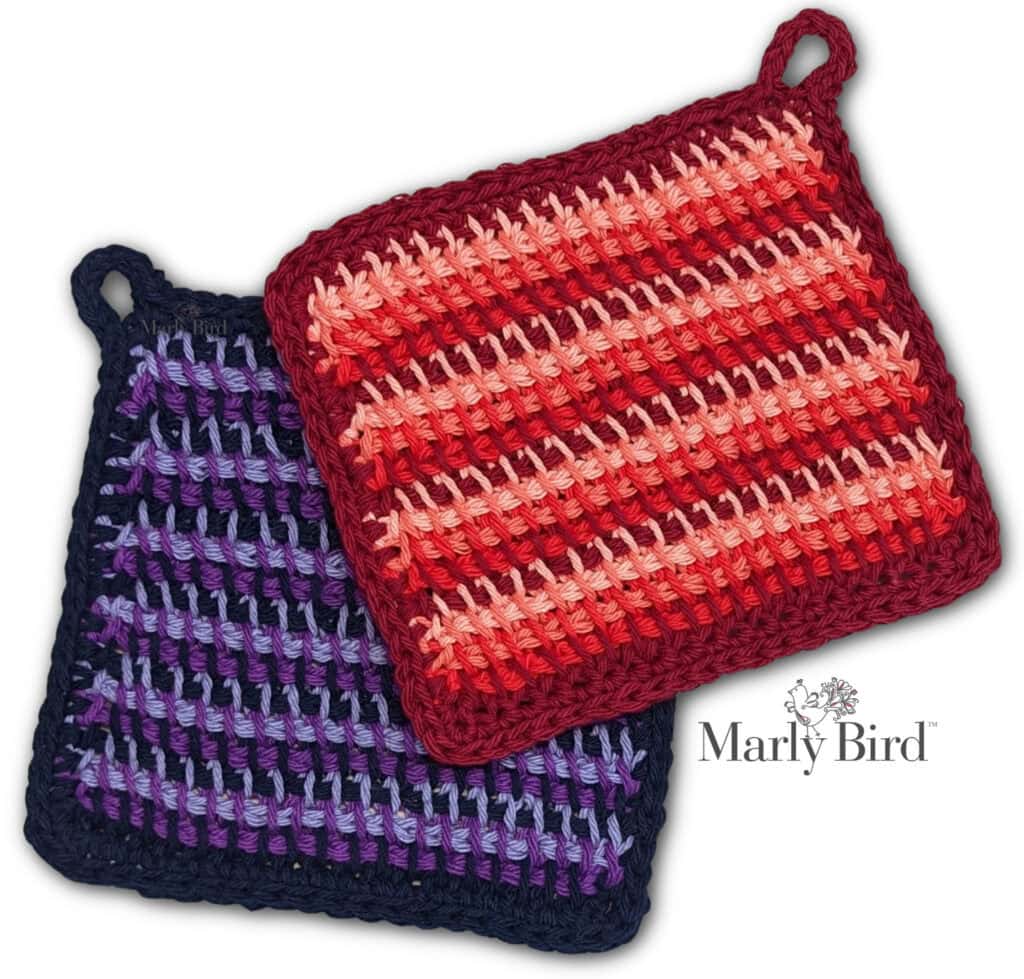
I like swatches that can be useful. These potholders let you practice your new Tunisian Skills and keep your hands safe while cooking. They can be used for washcloth, hot pads, or pot holders. If substituting an acrylic yarn, just remember that acrylic can melt. So, using them as a hot pad won’t be a great idea.
SKILL LEVEL
Easy
MEASUREMENTS
Finished Measurements
Potholder is 6” [15 cm] wide by 6” [15 cm] long.
Gauge
13 TSS by 13 rows = 4” [10 cm] by 4″ [10 cm]; use any size hook to obtain the gauge.
MATERIALS
Yarn
Lily Sugar’n Cream (100% cotton, 120 yds / 109 m, 2.5 oz/ 70.9 g, CYCA# 4 worsted)
Color A: #00015 Wine, 0.25 oz
Color B: #00095 Red, 0.25 oz
Color C: #01699 Tangerine, 0.25 oz
Color D: #00042 Tea Rose, 0.25 oz
⭐️ Note: You can substitute WeCrochet Dishie Yarn.
Hook
Size K/10.5 (6.5 mm) at least 6″ long Tunisian Crochet Hook
Notions
Tapestry needle
NOTES
- Change color in following order at beginning of RTN pass: A, B, C, D
MY FIRST TUNISIAN CROCHET POTHOLDER PATTERN
Chain or Foundation Slip Stitch 20.
Row 1: (RS) Fwd: Pull up loop in 2nd ch from hook and each ch across. Rtn: Change color, work loops off as normal to end.
Row 2 (RS): Fwd: TSS in each stitch across. Rtn: Change color, work loops off as normal to end.
Repeat row 2 16 times
Last row: *Tss in next st and pull through loop on hook; repeat from * to end, fasten off.
FINISHING
Edging
Join color A to any corner with sc.
Round 1 (RS): *Sc evenly across edge to corner, 3 sc in corner; repeat from * to last edge, sc evenly across last edge to first corner, sc in first corner, ch 7 (counts as potholder loop), do not turn.
Note: For a cleaner row edge, insert your hook in 1 strand of yarn that is vertical and 1 strand that is horizontal.
Round 2 (RS): Sl st in each sc around, sl st in each back bump of each ch, sl st to first sl st.
Fasten off, weave in ends.
