How to Seam a Crochet Sweater
Xanadu Crochet Pullover by Marly Bird is just one of the many wonderful free patterns over at RedHeart.com. This is also one of the few patterns that were actually designed by ME 🙂
As you know, this sweater was one I crocheted for the magazine, Crochet Today, and is now a pattern that Red Heart posted on their website because they loved it as much as I do 🙂
Designing and making sweaters are my favorite things to do, but I also like to help fellow knitters and crocheters make sweaters that they will love as well. One of the things I hear from crocheters and knitters alike is sweaters is intimidating. My goal with the Xanadu Crochet Pullover video is to help you tackle this sweater without any hesitation. Let me hold your hand and tell you how to make the sweater crocheting process easy.
Last week, I offered you a mission to make all the pieces of the sweater and then join me later when I show you how to seam a crochet sweater and how to sew on ribbing to the body of the sweater.
By this point in the sweater making process you have made all 5 parts of the sweater, Front, Back, 2 Sleeves and the Ribbing. It is time to begin seaming!
In the Marly Bird YouTube video for the Xanadu sweater I approached the tutorial differently in that I don’t actually crochet along with you.
In the Marly Bird YouTube video for the Seaming of the sweater I show you how to do it.
- I walk you through how to prepare the pieces before you seam them.
- I offer suggestions to help you keep the pieces lined up for a better seam.
- I show you the slip stitch join and the mattress stitch.
This video is part of my awesome new partnership with Red Heart and I am very excited to be able to show you how to crochet one of my own patterns!
Now, you are ready to seam your sweater together.
*Disclaimer: this post includes affiliate links**
Xanadu Crochet Pullover
Inspired by a sweater from the 1980s, this retro pullover has been redesigned in dreamy yarn! It’s sure to inspire you to get your crochet hook and try the Griddle stitch.
Pattern:
Here is the link for the FREE Xanadu Crochet Pullover
Supplies:
RED HEART® Boutique Treasure™: 6 (6, 7, 8, 9, 10, 11) balls 1901 Mosaic Susan Bates®
Susan Bates® Crochet Hook: 6mm [US J-10]
Susan Bates® Bent Tip Steel Yarn Needle
Stitch Markers
Mini Knit Clips for seaming
GAUGE: 12 sts = 4” (10 cm); 12 rows = 4” (10 cm) in Griddle stitch pattern. CHECK YOUR GAUGE. Use any size hook to obtain the gauge.
Abbreviations Used:
ch = chain;
dc = double crochet;
hdc = half double crochet;
sc = single crochet;
st(s) = stitch(es);
[ ] = work directions in brackets the number of times specified;
* = repeat whatever follows the * as indicated.
Special Stitches Used:
dc2tog = [Yarn over, insert hook in next stitch, yarn over and pull up loop, yarn over, draw through 2 loops] 2 times, yarn over, draw through all 3 loops on hook.
sc2tog = [Insert hook in next stitch, yarn over and pull up a loop] twice, yarn over and draw through all 3 loops on hook.
Pattern Stitch Griddle Stitch Pattern (multiple of 2 sts)
Row 1: Hdc in 3rd ch from hook (beginning ch do not count as a st), *dc in next ch, sc in next ch; repeat from * across to last ch, hdc in last ch, turn. Row 2: Ch 2 (does not count as a st), hdc in first st, *dc in next sc, sc in next dc; repeat from * across to last st, hdc in last st, turn. Repeat Row 2 for Griddle st pattern.
YouTube Video by Marly Bird:
YouTube Video Notes:
- Seam the shoulders first by matching up the corresponding front and back shoulders with Right Sides facing each other so the seam will be on the inside of the sweater. Remember that the shoulders are the hanger for your sweater so you want the shoulder seam to be strong so it can handle the weight of the garment. That is why I’ve chosen to use a slip stitch join.
- Use the same yarn you used on your project to do the seam. I used a different color just to demonstrate on camera.
- The slip stitch join will show through to the Right Side of your fabric but with the yarn I’ve chosen for this project that shouldn’t be a problem.
- If you want to use a different way to seam the shoulder together you can do that.
- Once the shoulders are joined, pin the sleeve into the armscye with the Right Side FACING YOU. This is different than how you seamed the shoulders but it is important when doing a crochet mattress stitch.
- I like to use the mini knit clips to keep the sleeve in place. I highly recommend them!
- Make sure you have a length of yarn long enough to seam the entire sleeve in place. Also, use the same yarn you used for the sweater to seam the sleeve.
- I HIGHLY recommend using a BENT TIP Steel Yarn Needle for this process. The one I use on camera is not bent tip but is steel (which is so much easier than the plastic ones!). If you don’t have one GET ONE NOW!
- Even though you are working on the Right Side of the sweater, if you have done the mattress stitch correctly the edges of the sleeve and armscye will join beautifully and invisibly. You can see that happen on camera as I am using a completely different colored yarn than the yarn I used for the sweater. Again, make sure you are using the same yarn you used for the sweater to seam it.
- Once the shoulder seam and sleeves are seamed in place you are ready to seam the side of the sweater and the underarm of the sleeve!
- Use the mattress stitch to seam the side seam and the sleeve.
- Seam these two sections separately. That way if you need to fudge any of the join you can do it in the armpit where it will never show 🙂
- Use the mattress stitch to seam the side seam and the sleeve.
You can do this!
What about the ribbing? Well, that is another video all together 🙂 Until next week!
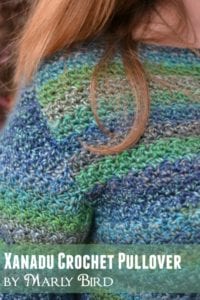
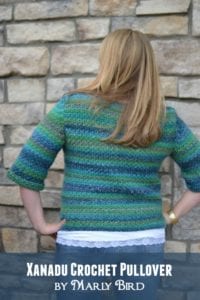
Here are some pictures of my best friend Jenni in her very own Xanadu Crochet Pullover. This is the actual sweater I used in the video.
Looking for more? I love making quick projects and even wrote a leaflet with Leisure Arts on how to do some fun things! If you too are looking for fun and quick projects go and check out the I Can’t Believe I’m Entrelac Knitting by Marly Bird.
![]() Look at more patterns crocheted by my Best Friend Jenni
Look at more patterns crocheted by my Best Friend Jenni


Hi Marly, I fell in love with the Sidewalk shawl and want to make it for my sisters Birthday. I’ve finished row seventeen but I am lost as to how to crochet row eighteen. I know you have said to repeat the repeat but I don’t know what that means You’ve also said to repeat the shaded areas but there are no shaded areas on the screen and none when I print out the pattern or the chart. I hope you will help me understand the directions so I can finish this beautiful shawl.
thank you,
Niki Ochsner
In the pattern, it reads
–Rows 18–45: Repeat Rows 11–17 four more times.
Rows 46–50: Repeat Rows 11–15.–
That means if you are reading the instructions you will do what is written in those rows and repeat anything that is between *.
On the chart, there are no * but there is a different color on the symbols that are the repeat. You will see that if you compare the written words of row 11 with the chart the different colored stitches are the same stitches that are between the *.
I hope that helps.
Marly, This is my first time crocheting a sweater for my Grand daughter. It’s done in double crochet. When I followed your directions for the seams, I have holes at the edge of the pieces made by the 3 chain made after the turn. Should the holes be so visible ? When I did the mattress stitch, do I pick up the mattress stitch at the 3 chain edge or move inside to the double crochet stitch ? Thanks for your reply to my e-mail address bfpfitz62@hotmail.com Barbara Fitzgerald