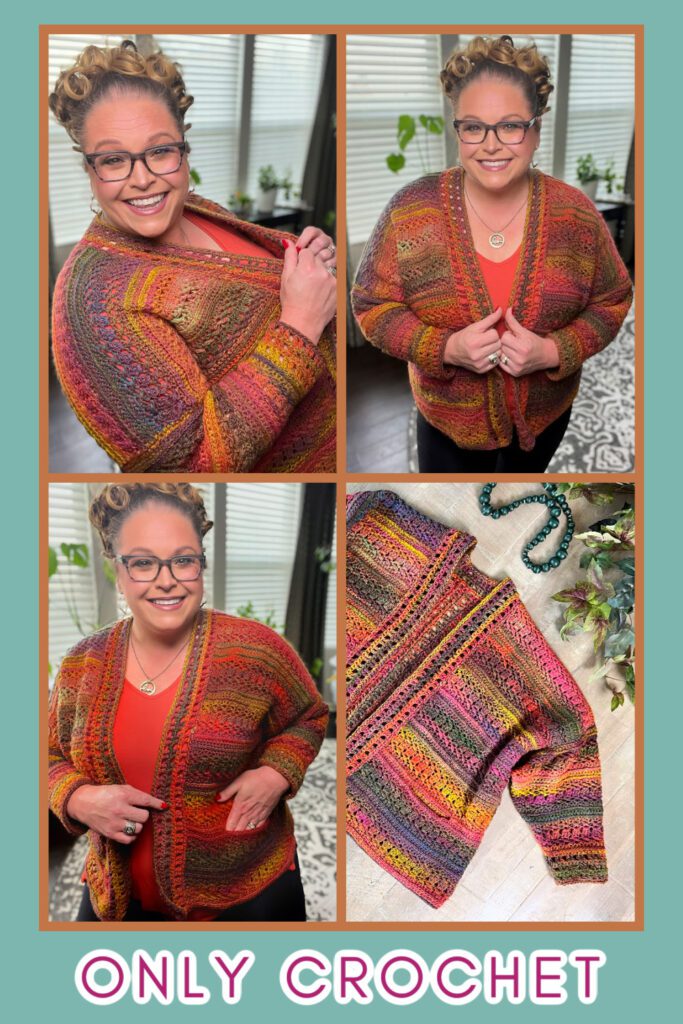
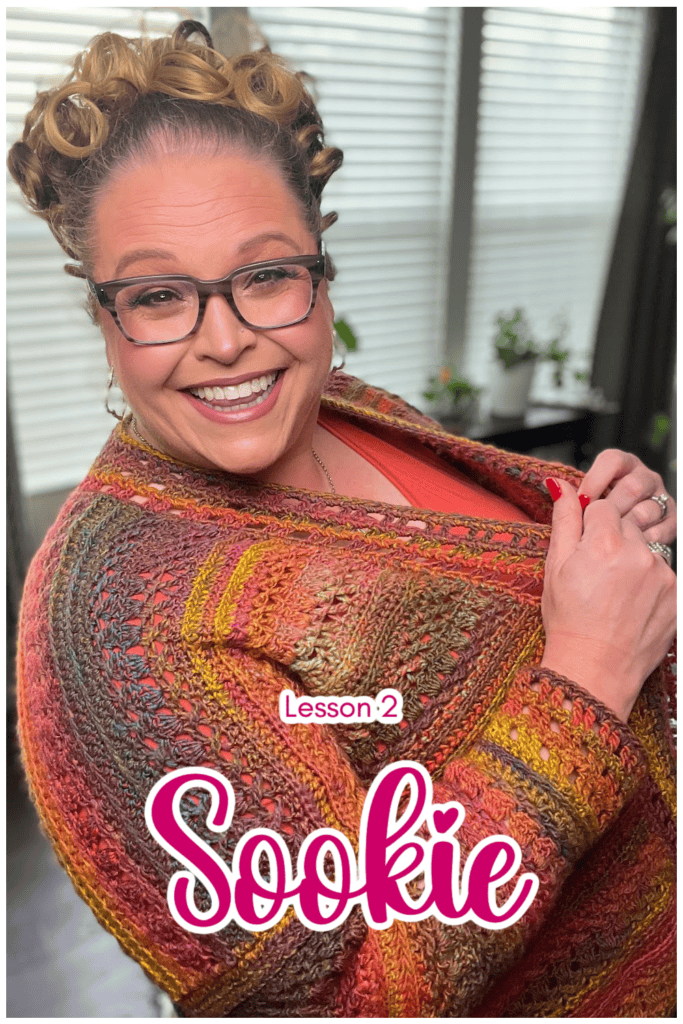
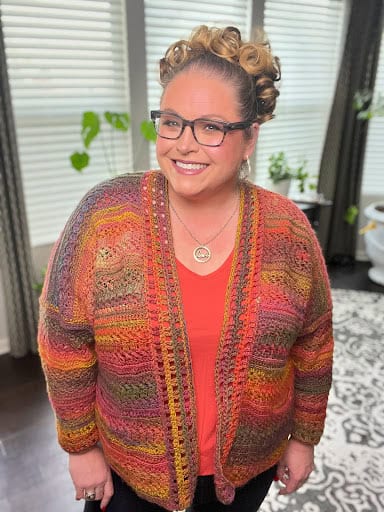
Sookie Crochet Cardigan Lesson 2: Customizing Length
Welcome to Lesson 2 of the Sookie Crochet Cardigan, part of the 6th Annual Marly Bird Turkey Trot Make-Along! 🦃✨ This exciting event brings crocheters from all over together to create stunning, wearable projects while connecting with a supportive crafting community. Whether you’re working along with the free version of the pattern or enjoying the extra perks of the VIP Silver Platter, we’re so glad to have you here!
In this lesson, we’ll focus on customizing the length of your cardigan. This step is all about making the Sookie Crochet Cardigan uniquely yours. Whether you prefer a shorter, cropped style, a classic length, or a longer silhouette for added coziness, this tutorial will show you how to adjust the panels to your exact preference.
If you haven’t joined the Turkey Trot yet, there’s still time to hop in:
Upgrade to VIP: Get ad-free PDFs, exclusive videos, and bonus patterns https://marlybirdturkeytrot.com/2024-sale438984
This event is free to join, just click here to get all the details, sign up and get that supply list!
This section is a continuation of Lesson 1.
Don’t forget to share your progress in the Marly Bird BiCrafty Community—we love seeing your work!
Affiliate Disclosure: This post contains affiliate links. If you click on one of these links and make a purchase, I may earn a small commission at no additional cost to you. This helps support the content and free patterns I provide here on MarlyBird.com. Thank you for your support—it means the world to me! 💖
Sookie Crochet Cardigan – Turkey Trot 2024
designed by Robyn Chachula for MarlyBird.com
SKILL LEVEL
Adventurous Beginner
MEASUREMENTS
To Fit Size
XS (S, M, L, XL, 2X, 3X, 4X, 5X) with 9-10” [23-25.5 cm] of positive ease. Sample shown has 9” of positive ease.
Finished Measurements
Sweater is 41 (44, 47, 51, 56, 59, 63, 66, 69)” [104, 112, 119.5, 129.5, 142, 150, 160, 167.5, 175 cm] bust circumference and 21 (21, 21, 22.75, 22.75, 22.75, 24.5, 24.5, 24.5)” [53.5, 53.5, 53.5, 58, 58, 58, 62, 62, 62 cm] in length (shoulder to edge).
Gauge
BLOCKED: 18 dc (6 Stitch Repeats) by 16 Rows in PANEL STITCH PATTERN = 5” [12.5 cm] by 7” [18 cm]; use any size hook to obtain the gauge. (see video for more information on gauge)
MATERIALS
Crochet Yarn
Red Heart, Roll With It Mélange (100% Acrylic, 389 yds / 356 m, 5.29 oz/ 150 g, CYCA# 4 worsted)
- Curtain Call, 3 (3, 3, 4, 4, 4, 4, 5, 5) balls
Alternate Yarn
Lion Brand, Ferris Wheel (100% Acrylic, 270 yds / 247 m, 3 oz/ 85 g, CYCA# 4 worsted)
- Morning Java, 4 (5, 5, 6, 7, 7, 7, 8, 8) balls
Crochet Hook
Size J/10 [6.0 mm] or size needed to obtain gauge.
Notions
Steamer or Steam Iron
ABBREVIATIONS
Ch – Chain(s)
Dc – Double Crochet
Dc2tog – Double Crochet Two Together
Fhdc – Foundation Half Double Crochet (see special stitches)
Hdc – Half Double Crochet
PM – Place Marker
RS – Right Side
Sc – Single Crochet
Sl st – Slip Stitch
Sp(s) – Space(s)
St(s) – Stitch(es)
Stacked Dc – Stacked Double Crochet
Tch – Turning Chain
WS – Wrong Side
SPECIAL STITCHES
⭐️Double Crochet 2 Together (Dc2tog): *Yarn over hook, insert hook into indicated st, yarn over and pull up a loop, yarn over and draw through 2 loops on hook; repeat from * in next st indicated, yarn over and draw through all 3 loops on hook. (1 decrease)
⭐️ Foundation Half Double Crochet (fhdc):
First fhdc: Ch 2 (does not count as a st), yarn over hook, insert hook into 2nd ch from hook, yarn over and pull up a loop, yarn over and draw through 1 loop on hook (forming a chain, place marker in chain just made), yarn over and draw through 3 loops on hook (forming the half double crochet)
Next fhdc: Yarn over hook, insert hook into base of previous stitch (in the “chain” space), yarn over and pull up a loop, yarn over and draw through 1 loop on hook (forming a chain), yarn over and draw through 3 loops on hook (forming the next half double crochet). Repeat directions for desired amount of sts.
⭐️ Foundation Single Crochet (fsc):
First fsc: Ch 2, insert hook into 2nd ch from hook, yarn over and pull up a loop, yarn over and draw through 1 loop on hook (forming a chain), yarn over and draw through 2 loops on hook (forming the single crochet)
Next fsc: Insert hook into base of previous stitch (in the “chain” space), yarn over and pull up a loop, yarn over and draw through 1 loop on hook (forming a chain), yarn over and draw through 2 loops on hook (forming the next single crochet). Repeat directions for desired amount of sts.
⭐️Half Double Crochet 2 Together (Hdc2tog): Yarn over hook, insert hook into indicated st, yarn over and pull up a loop, insert hook into next st indicated, yarn over and pull up a loop, yarn over and draw through all 4 loops on hook. (1 decrease)
⭐️ Single Crochet 2 Together (sc2tog): *Insert hook into indicated stitch, yarn over and pull up a loop; repeat from * in next stitch indicated, yarn over and draw through all 3 loops on hook. (1 decrease)
⭐️Third Loop: Also known as middle or back bar. Horizontal strand located under the top 2 loops.. When working in turned rows the third loop is on the front side of the fabric facing you.
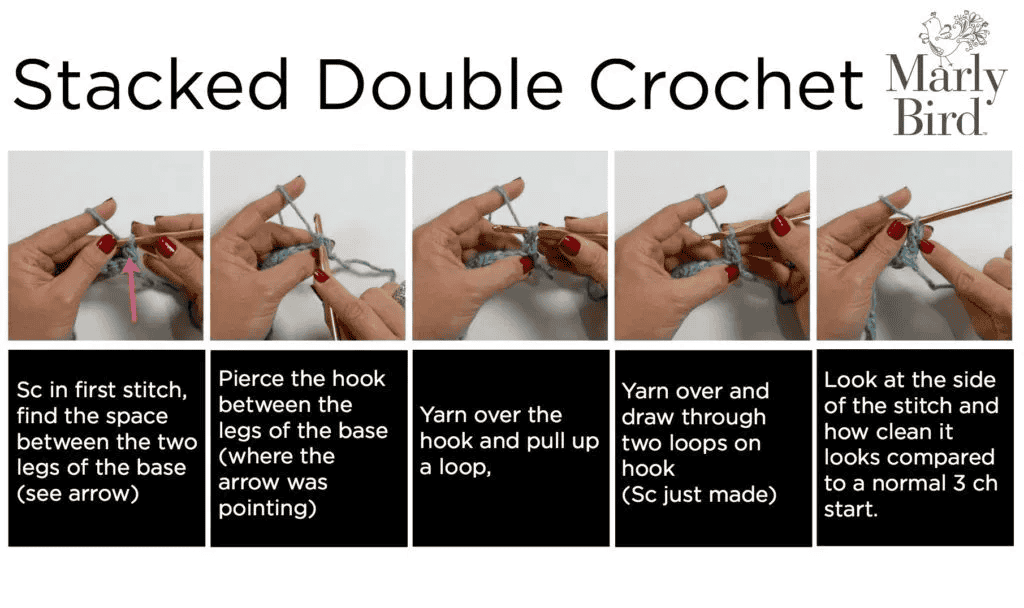
⭐️ Stacked Double Crochet (Stacked Dc): (Do not ch 1 prior to making the first sc) Sc in first stitch, insert hook in between two legs of the base, yarn over and pull up a loop, yarn over and draw through 2 loops on hook.
NOTES
- Directions are for size XS; changes for sizes S, M, L, XL, 2XL, 3XL, 4XL, 5XL are in parentheses. When only one number is given then that number applies to all sizes.
- Sweater is oversized. If you prefer a tighter fit, pick a size closer to your bust circumference. Sample is shown is the 3X size with 9” of ease.
- Gauge listed is blocked. The stitch pattern unblocked is much shorter compared to when it is blocked. Make sure you are choosing your hook size based on a blocked swatch.
- Sweater is worked in panels and seamed. The collar is crocheted onto the project at the end.
- If you do not want to start your panel with foundation hdc, you can chain and hdc instead. Make sure you have the same number of hdc as Row 1 calls for fhdc.
- We recommend Steam Blocking with both yarns listed. We do not recommend “pin and spray” blocking or wet blocking for the yarn used. If you substitute another yarn, spray or wet blocking might work. Blocking is required and not optional for this project.
VIDEO TUTORIALS
- Foundation Single Crochet >> Click Here for Video Help <<
- Seaming Crochet >> Click Here for Video Help <<
- How to Read Crochet Diagrams >> Click Here for Video Help <<
- Weave in Ends >> Click Here for Video Help <<
- Stacked Double Crochet >> Click Here for Video Help <<
SOOKIE CROCHET CARDIGAN VIDEO TUTORIAL
Goes Live at 8am Nov. 24, 2024
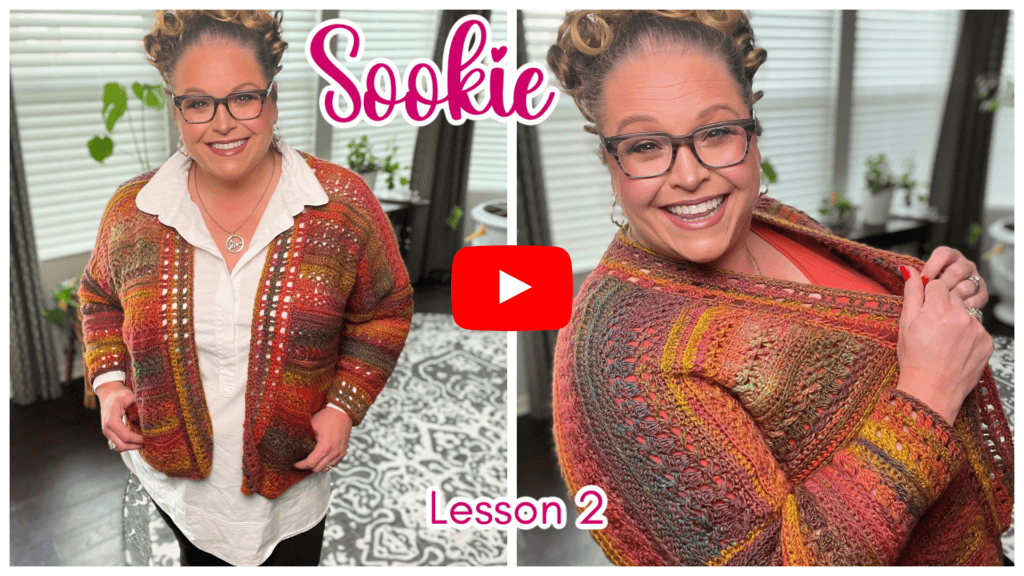
Click Here to view Lesson 2 of the Sookie Crochet Cardigan
SCHEMATIC
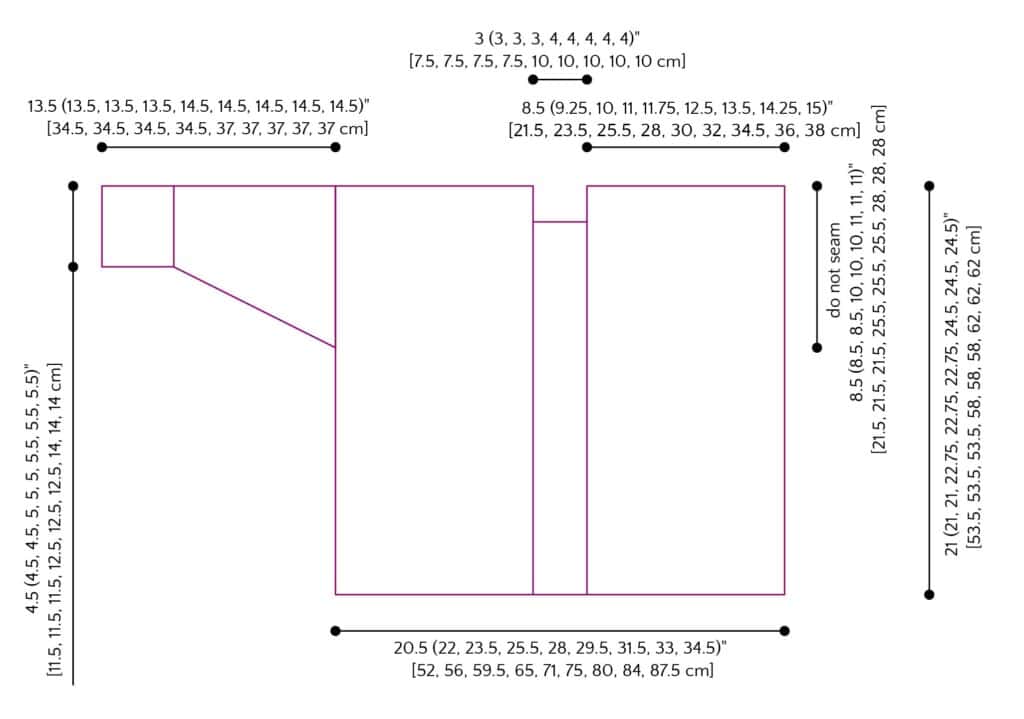
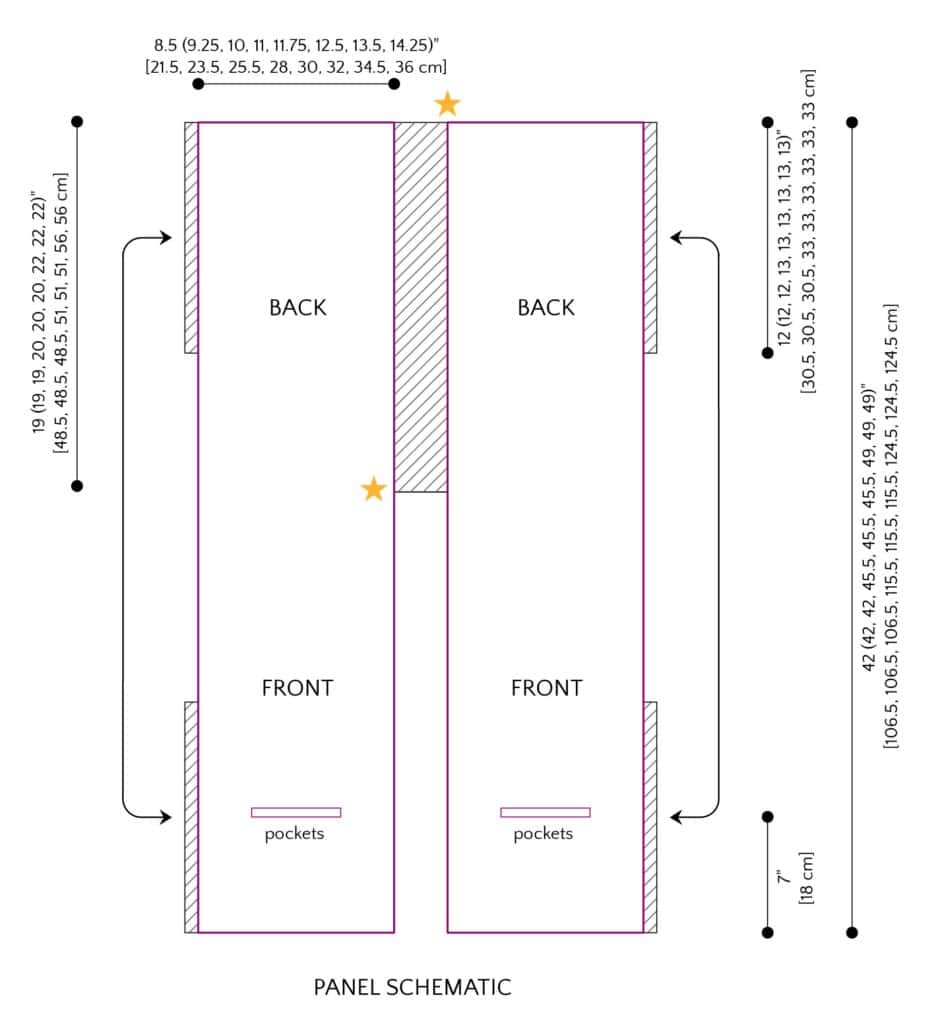
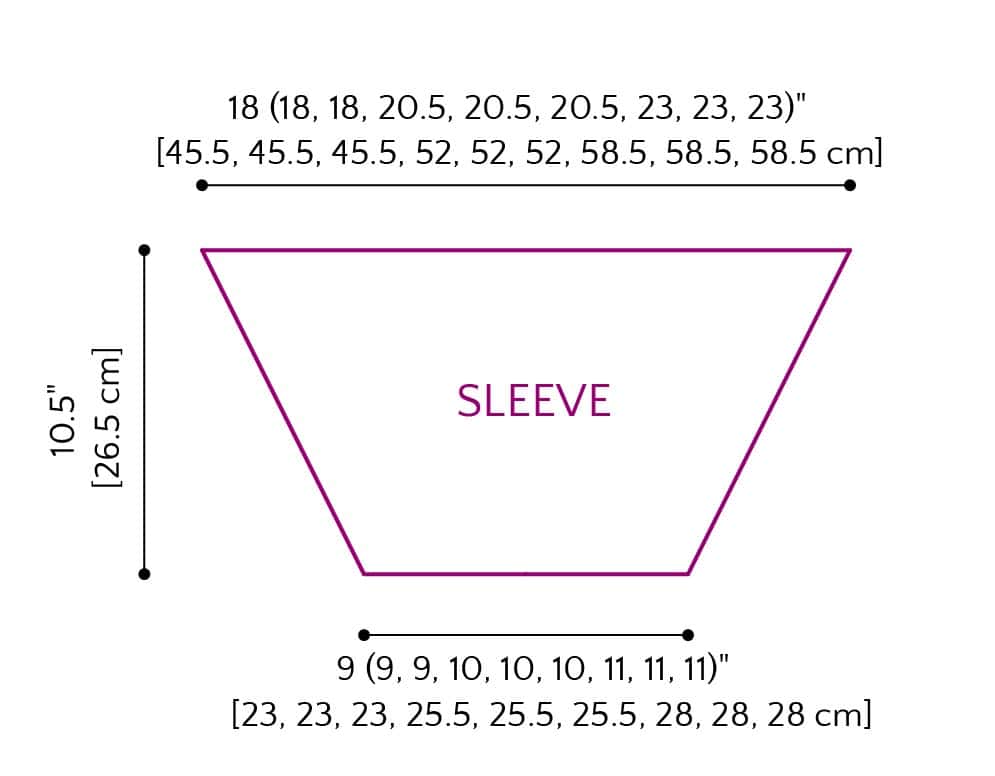
CROCHET STITCH DIAGRAM
✅ The crochet stitch diagram is exclusive to the VIP Upgrade and ad-free pdf.
GROW
To Unlock Exclusive Subscriber Content click the Box below and join for free by simply adding your email and creating a password! If you are having troubles, clear your cache or reset your password or login to the Grow Publisher Portal.
>> Learn More About Grow Here <<
I’m thrilled to share this amazing pattern with you, many patterns on my blog are absolutely free! I kindly request that you don’t copy and paste or distribute this pattern. Prefer an ad-free experience? Buy a digital PDF pattern for a small fee from one of my online stores for a seamless crafting journey.
I appreciate your support and readership. You are the reason I can keep doing what I love and sharing it with others. So, thank you from the bottom of my yarn-loving heart! Disclosure: This post contains affiliate links, meaning I get a commission if you decide to make a purchase through my links at no cost to you.

